This is a detailed guide on how to get all the achievements, including all the collectibles there are. for main story you need 8-10 hours to beat, if you decide to go for 100% completion and do everything that the game has to offer, you will need 22-25 hours in total. Enjoy!
NOTE: if you are grinding some collectibles or not sure how many tanks you destroyed, business robbed, cars stolen, stashes looted and much more. You can click K on your keyboard, and find the stats you are looking for.
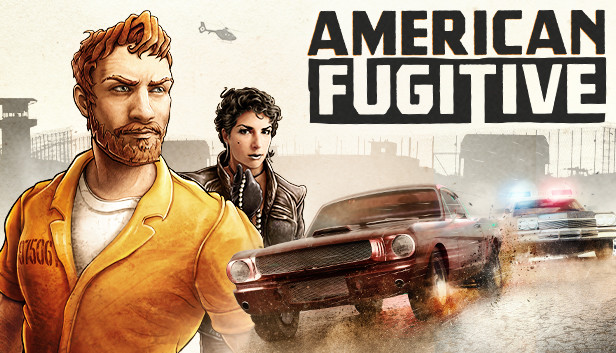
Campaign
 Breakout
Escape from the prison.
You will unlock this right after the prologue. You’ll appear in the first area with a mission marker and a convict outfit, immediately prompting you to find clothes better suited to the civilian life.
 The Gift Horse
Complete ‘The Gift Horse.’
The gift horse is the final mission for Dwayne. You’ll get sent to a motel and end up in a firefight. After the firefight you go back to confront Dwayne and a short cutscene later you’ll get this achievement.
 A Quiet Moment
Complete “A Quiet Moment.”
This is the final mission from Ana in area 1. It’ll be a short mission prompting you to get donuts. After that you’ll have a short cutscene which will pop this achievement once you regain control of your character.
 Foul Play
Complete “Foul Play.”
Completing the Undertaker’s missions will get you this achievement. The undertaker’s last mission requires you to rob a pharmacy for a list, then deliver it back to him. After that you’ll have this one in the bag.
 The Getaway
Reach Port Providence.
The fixer’s final mission will send you on a heist to rob a bank. After that heist is complete you’ll end up on a train to Port Providence. You’ll get this achievement after the mission is completed and you regain control in area 2.(Port Providence)
 White Lines
Complete ‘White Lines.’
The mayor’s final mission has you deliver a package of illicit drugs to a party then calling the sheriff to rat them out. After the mission completes you’ll get this achievement.
 Rebel Without Wheels
Complete ‘Rebel Without Wheels.’
You’ll receive a mission to retrieve a hot rod from an old enemy, a mission given to you by an older friend. After delivering the hot rod to the lockup you’ll get this achievement.

Dispose of a body in a river or lake.
Strangely enough, this achievement is mandatory. There’s a mission in the game where you have to set up a murder scene, and part of it is dragging a body into a pool of water, popping this instantly. If you can’t wait though, just knock someone out or shoot someone, grab their body and drag it towards the nearest body of water.
 Supplies And Demand
Complete “Supplies And Demand.”
The loan shark’s final mission requires you to rob a store without killing the owner. After finding the safe, you deliver the contents back to the loan shark, giving you this achievement.
 Not The Fugitive You’re Looking For
Reach Ridge Plains.
The final mission of area 2 will have you fight against a group of thugs, as well as tussle with the police. You get this mission from the dock worker Harry Wilde, and ends up with you on the run to Ride Plains, also known as area 3 in this guide. After regaining control in area 3, the mission is completed and you have this achievement.
 A Little Less Loyal
Complete “A Little Less Loyal.”
Final mission from Vito. You’re sent to eradicate the McCoys. Be prepared for a long gun battle as there are quite a few enemies here. After they’re all gone and you got the police off your tail, you get this achievement.
 Two Wrongs Make A Right
Complete “Two Wrongs Make A Right.”
Completing Rusty’s questline will give you this achievement. Rusty’s missions are all based around driving the vintage truck, and the final one will send you back towards Vito. The mission in question wants you to get a vintage truck from some thieves. Expect to be shot at quite a bit and use the boost liberally.
 Redemption
Complete the story.
In the final mission of area 3 you’ll be prompted to hunt down the person that framed you. After a car chase and some shooting, you’ll be given two prompts. To let the person explain themselves or just shoot them. One will keep you on the run, the other will eventually exonerate you. No matter which choice you pick, you’ll end up back in the game after some newspaper clippings and this achievement will pop. Congrats on beating the game!
Gone In 60 Seconds
 Gone In 60 Seconds
Steal 200 cars.
There are two ways to steal cars:
1, One is to find a parked car, then use a melee weapon to crack the door or window. This will trigger an alarm that beeps for a few seconds. If you can avoid any attention for those seconds, no cops will be called.
2, The second is carjacking someone in the street. Approach a vehicle with a person inside and steal it. or you can just pull out the driver, allowing you to knock them out. If no other vehicles show, and there are no passersby either, you will not have police called on you.
As you will have to steal quite a few cars, don’t fret if the cops come after you. You can keep running away and steal cars while the police will sometimes be thrown off your scent if you go into a car that they haven’t seen.
Until you have this achievement it’s recommended to not use the car dealership, as any car bought using this method will not count, you can track on your “Statistics” screen under “Cars stolen”.
Stick Up Artist
 Stick Up Artist
Hold up 50 businesses.
Holding up a store is simple. You enter the store, select to hold up, and get your weapon of choice. If you use a melee weapon and succeed, you can rob the store stealthily (use rope or handcuffs). If you use a gun, a police alarm will go off.
For this achievement all you need to do is succeed with the initial intimidation. So if you need to grind this just walk into the store, use an assault rifle and then let the person just go. After that, leave the store without actually robbing anything and that will count towards your progress.
You can see on the game map where every store is, so you can chain a few together in quick succession when entering a busy area. You are going to rob some stores as you play through the campaign and doing collectables, so consider leaving this achievement as one of the last as you’re going to naturally get some progress towards this. This achievement is tracked on your statistics screen under “Shops held up”.
Rampage
 Rampage
Cause 10 deaths in 30 seconds.
Killing 10 people in 30 seconds is much easier than it sounds. By far the easiest method is to go into any mansion or high income housing such as across the bridge to the north in area 1 and rob it using the assault style. Make sure to bring guns and ammo. Break in using a crowbar or break a window and just let the timer go out. Cops will cover every entrance and then finally pull you out to try to arrest you. Get back on your feet, move a bit back so all the cops move in a line towards you and start shooting. A big house has 8+ entrances, some even 11. As you kill the police present, move around the area to find a few more random civilians or more cops and take them out for the achievement.
Cut Out The Middle Man
 Cut Out The Middle Man
Run over 10 civilians in a hearse in 60 seconds.
The hearse can be bought from the car dealership, stolen out in the street, found by a cemetery or the funeral home. The hearse is somewhat slow so you want to build up some speed as you barrel through. Also keep in mind you specifically need civilians so you can’t cause havoc and use cops. The best places to do this is at a trailer park, around a bank, or any place on the map where you see multiple stores close together. Civilians will respawn if you drive away from the area, meaning a few meters longer than out of the camera sight. Use that to your advantage. Make sure you keep a high enough speed to go through obstacles as well.
I done this around basketball court in area 2, right next to the donut and supply shop(check “art dealer” map, left of painting 13)
Recommended Perk: Armored
Cleaning Up
 Cleaning Up
Knock 5 people out with a toilet brush in 60 seconds.
Most houses have a toilet brush in the bathroom. So rob a house, find the toilet brush and then go outside. Equip it and start smacking people around. Melee combat is easy as you can stunlock people. Without upgrades it takes 5 hits to knock someone out with a toilet brush. So go to a place where people gather like a bar area, or a trailer park and start smacking them down.
You Can’t Park There!
 You Can’t Park There!
Land a car on the roof of the bank in Twin Lakes.
The Twin Lakes bank is right next to the donut shop, almost in the middle of the map of the first area (It’s marked so you should see it easily).
 Going For Speed
Reach a top speed of 160 mph.
You can get this achievement rather easily using a kamara, buzzard GTX, Astro ZX or hot rod. Any fast car will do. You can use the outer edges of the areas to have maximum straights or even the train tracks. It is very likely to get this achievement randomly at some point while escaping police.
Burning Rubber
 Burning Rubber
Drive at over 100 mph in a flaming car.
The way you want to go about this is to get a fast car and then start a chase with the police. Any sports car will do. As the police chase you they’ll start hitting your car. As you get more damaged the car will eventually burst into flames. Make sure that you’re not getting spun out by side attacks. Try to hit walls and corners a bit as you drive and this should come easily. You can even damage the car a bit beforehand if you want in order to make this achievement even easier, but make sure you have the right speed before you finish it. There’s no speedometer, but you can listen to the RPM of the car to get a good indication.
Ticket To Ride
 Ticket To Ride
Ride a train around a loop of the track.
For this achievement you don’t actually go to the train station and buy a ticket. What you instead have to do is wait by the train tracks until a train comes along and run into the side of it. As you do that your character will latch on to the train and hold on. Go get your self something to eat/drink for a bit and you’ll get this automatically.
As a sidenote, latching on to the train is an efficient way to get rid of the police as they seemingly have no options to deal with you getting away with a train.
Forager
 Forager
Consume 10 pieces of wild food.
Wild food grows everywhere. Berries, carrots and mushrooms can be seen glistening in the wilds all over the place. You can pick them up and chow them down later or eat them on the spot, making this achievement one of the easiest ones. You can track how much wild food you’ve eaten on the statistics page in the menu screen, under “wild food consumed”
Pendulum
 Pendulum
Kill someone with something that you are towing.
Get yourself a tow truck and back up to a vehicle and tow it. You are now armed and dangerous. The easiest way to do this is by backing up across a person, making sure the vehicle you’re towing is the part that hits the target first. Anyone will do, civilian or police doesn’t matter.
Don’t Look Back
 Don’t Look Back
Tow a flaming car.
Get a tow truck, put it in a position where it’s ready to tow and exit. Open fire on the car you want to tow and the instant it starts burning, get inside the tow truck and press the button to tow it. Feel free to drive a bit forward to make sure it’s latched on. There you go.
Take Them For A Ride
 Take Them For A Ride
Tow a vehicle while it is occupied.
Another tow truck related achievement. All you have to do is tow a vehicle with someone in it. So head into traffic, slow down so the car behind you catches up and press the button to tow it. Easy as that.
Clean As A Whistle
 Clean As A Whistle
Drop a garbage bag at the dump.
Garbage bags can be found many places, most likely in front of a random house. Get a car, then grab a garbage bag and put it in the trunk of the car. After that you want to head to the city dump, located north-east in area 1. If you see the time trial furthest north and to the east, the dump is straight north of that, behind the mail office. Get the garbage bag out of the car and just drag it onto the trash pile and drop it for the achievement.
Scot Free
 Scot Free
Break into a house stealthily, steal $100 of goods, and make a clean getaway.
In order to be properly stealthy, you need to enter and leave a house without the police responding. The way to do this is simple. Find someone walking outside in their garden, or stalk a house until the owner leaves. Then knock them out and take their key. Enter the house and get what valuables you can.
Ignore clocks, vases and such as they weigh alot and give little income. Instead go for jewelry and other valuables. You can see the weight and value of any item you pick up. Some houses even have gold bars, which weigh 2kg and have 100$ in value, giving you the achievement all on its own. Stashes don’t count here. It has to be actual items that you pick up.
The Big Score
 The Big Score
Fence more than $1000 worth of goods in one go.
In order to get this achievement you have to ignore clocks, vases and any heavy object that don’t also carry a significant price. You want to aim for smaller items with higher value, like jewelry. Earrings, necklaces and such weigh 0.2 kg and have values up to 18-20$. If you’re lucky you can even find gold bars, which weigh around 2kg but are also worth 100$ all on its own. You should invest in the Packhorse perk a few times before attempting this, as otherwise you’ll be forced to remove weapons and other necessities to make room. There is no way to calculate the value of your inventory unfortunately, so you have to do this on your own. Selling 2 paintings at once to the art dealer will also work.
Recommended perks: Packhorse ,Burglar’s instinct
Perfect Line
 Perfect Line
Get Gold on a Time Trial without taking any vehicle damage.
The best time trial to do this on would be “Time Trial: Quarry Sprint” as it’s situated entirely in the Quarry. It’s also sunny and with no traffic, making it the easiest by far.
You can also try the time trial by the race track in Area 2. The downside is that you control a Buzzard GTX which can spin out more easily, and the track itself is longer. It has no traffic and is also sunny though so it’s ideal for the attempt.
I Believe I Can Fly
 I Believe I Can Fly
Complete every vehicle jump.
Vehicle jumps are ramps that more often than not have glowing warning lights on them. They are easily recognizable and always have some sort of path leading to them. They all have a requirement for length, but the issue will more likely be around how the game will sometimes not recognize that you landed properly, often denying you the success because the bumper hit the ground too hard. Contrary to that you also can sometimes get the jump even if you landed on two wheels and slowly fell over. There’s nothing to do here other than to simply try again. Keep as much of a straight line you can, try to get a good angle on the ramp and make sure to use a sports car like the kamara or even a police car. With that in mind, here are the maps for each area:
Area 1, Area 2, Area 3
Despite their buggy nature, jumps are one of the best sources of early game upgrade points. Complete them as soon as you’re able and you should be able to get the vital perks needed for the other collectables.
Note: Be especially wary of the double jumps down at the docks on the southeast side. The jump towards the ship and the jump back are considered separate and have to be completed both ways.
Several of these are doable since the moment you start the game and you are bound to get some even by accident while playing the game. That being said, given that nothing is missable there is no reason to stress any of them.
Going The Distance
 Going The Distance
Jump a distance of 70 meters.
As you complete “I Believe I Can Fly” achievement you’re going to run into several long distance jumps. It’s safe to say that most of these can be used for this achievement. Get yourself a fast car, like a kamara, buzzard GTX, hot rod or a police car and make sure to have a good angle with ample time to get your speed up. The first area alone has multiple jumps that can stretch well above 70 meters. If you fall just short just try again and get a better angle as the reason you failed can be attributed to getting caught last second at the jump, or were just plain unlucky. If all else fails, the hot rod on the jump a bit north of the outdoor supplies store in the first area is all but guaranteed to get this achievement.
Gearhead
 Gearhead
Drive every vehicle.
You are going to find a lot of cars during your time with the game. Missions will provide most unique vehicles such as the vintage truck or armored truck, while the car dealership can provide most of the common vehicles in the game. That being said there are two vehicles you’re not likely to find randomly:
The Police Van is the equivalent of a S.W.A.T van in this game and spawns in whenever you get 4 stars, and will more aggressively spawn at 5 stars. Sometimes you find these outside a police station, but all things considered it’s more reliable to kill police until 5 stars and wait for a police van to show up so you can steal it.
The Ambulance is just that. A regular ambulance that kinda looks like a van with lights on top. These are only found by the hospital on the third area. Luckily you’re going to be passing by there a few times on missions, so keep it in the back of your head as you play and you’ll get this quickly.
The rest of the vehicles spawn at random places, so check parking lots, the car dealership or just driving around randomly as you play. The game tracks unique vehicles, but do not tell you which unique vehicles you’ve driven so far. With that in mind it’s highly recommended to make personal notes about which cars you have and haven’t driven yet. Also recommended to wait until the end of Rusty’s missions before you gather the rest, as Rusty provides the last story mission exclusive vehicle, the vintage truck.
Off To A Flyer
 Off To A Flyer
Pick up each type of flyer.
There are 15 flyers to find in the game and they are random collectibles that will pop up as you’re robbing houses. They are always noted as “x flyer” where x is the business in question, and they all weigh nothing so you can pick up every flyer you see. There are no set spawns for this, meaning you’re going to just have to rob houses until it pops. Given the amount of robbing you have to do though, this will come naturally long before you’re done with the collectibles, given the condition that you rob everything you can whenever you’re inside a house. You can see how many unique flyers you have in the statistics screen under “Flyers found”
Speed Freak
 Speed Freak
Get Gold on every Time Trial.
There are 19 races total in the game. 6 in area 1, 6 in area 2, and 7 in area 3. These races have a preset vehicle, weather condition and time for you to play in. Make sure to understand how much rainy weather will effect your vehicle, and whenever you have boost available use it as often as possible. However do make sure not to overuse the boost as it will make the car catch on fire, losing you the race within the next 10 seconds. You can however overuse the boost towards the very end. As long as the car doesn’t explode when you’re across the finish line it will count.
Note:
-The median leeway you have for each race is approximately 5 seconds, give or take.
-Also worth mentioning is that any race involving the train should be reset if you find yourself in a situation where you have to wait for it to pass.
-Don’t hesitate to go between houses and neighbourhoods either when you’re able since it can shave off valuable seconds if you do it right.
You will unlock all of the following achievements by the time you get the “Speed Freak” achievement:
 3, 2, 1, Go!
Complete a Time Trial.
 Going for Gold
Get Gold on a Time Trial.
 Need For Speed
Complete 10 Time Trials.
 Club Racer
Get Gold on 10 Time Trials.
 Full Circuit
Complete every Time Trial.
 Medal of Duty
Get Gold on Every Challenge
Crime Doesn’t Pay
 Crime Doesn’t Pay
Earn $50,000 in lifetime earnings.
Most of what you do in the game earns you money. Getting stashes, selling paintings, completing time trials, missions and robbing houses. This all adds up as you play. Just complete other achievement before going for this one while keeping an eye out for any valuables and pawn off whenever you’re close to a pawn shop to make the counter steadily go up. You can see your progress in the statistics screen under “Money Earned”
One Track Mind & Rollin’, Rollin’, Rollin’
 One Track Mind
Destroy 100 Enemy Tanks
 Rollin’, Rollin’, Rollin’
Crush 250 Vehicles with a Tank
The following method is the easiest and fastest way i found in order to get this 2 achievements:
Grab the tank in the base at the top left of the map in Area 1. You instantly get a six-star wanted level needed to spawn enemy tanks.
When your tank’s health is low, either wait until another tank shows up and carjack it or go back and get another from the base.
You can drive over to car dealer ship(just across the bridge) and crush parked vehicles.
Note:
-You don’t get credits for shooting an empty tank so shooting the tank at the base doesn’t count.
-If you get too far from the chopper and cops they’re prone to lose sight of you and delay tanks from spawning.
-Always keep on moving, police officers will do their best to pull you out, just run them over for good measure.
-Once the tanks shows up, just stay of its range(a red circle will show where it will fire next), and destroy them from further away.
-When the health bar on the tank goes down to 2 green bars, it slows down by quite a lot and its harder to avoid incoming tank fire and cops trying to pull you out.
Art Dealer
 Art Dealer
Find and sell all 20 paintings.
Paintings are valuable items weighing 2 kg each and nets you $500 for each one you sell. This achievement coincides with “No Stone Left Unturned” as multiple houses and safes where a painting can be found will also have a stash in it. So make sure to use both maps to mark off the relevant stash number and painting as you go.
Also keep in mind that paintings are not tallied until you actually sell them at an art store. If you die or get arrested while carrying paintings, you will have to go get them again. Always sell off paintings as soon as you can in order to avoid marking off a painting only to forget it was never delivered due to death later.
Recommended Perk: Burglar’s Instinct
Area 1
The following is each painting for area 1 and how to get them:
1. General store – In the stockroom
2. Garbage dump – Outbuilding. In the office right side
3. Mon Repos – Bedroom – In a safe. Code: 3990
4. The motel. Southwest motel room, right inside the entrance.
5. Valetta – Inside the tool shed. Just kick it open and there it is.
6. 5 Cliffside trailer park – You steal it during a mission from Ana
7. Police station – Property storage – You’ll come here on a mission from Ana
Area 2
The following is each painting for area 2 and how to get them:
8. Rose Bush – Dining Room
9. Northside– Living room in a safe. Code: 8175
10. Bunker on the docks. Code: 2345
11. General store – In the bathroom
12. Allmine – Living room
13. The old station house – Tool shed to the right of the house.
14. 18 palm wells – In the bedroom
Area 3
The following is each painting for area 3 and how to get them:
15. Longfield farm – Kitchen safe. Code: 2056
16. General store – Rob the owner. Painting is in the kitchen
17. Eastcliff Lodge – In the bedroom
18. In a bunker by the tracks. Code: 1234
19. Top Cottage – bedroom in a safe. Code: 1981
20. The haven – Bathroom
No Stone Left Unturned
 No Stone Left Unturned
Find every hidden stash.
Stashes are the game’s main collectables. Every stash has a set cash amount inside, and will give you an upgrade point when you find one, making it an ideal way to save up for perks. This achievement works in conjunction with “Art Dealer” as several places have paintings stored in a safe along with stashes or are found in the same area. Use both maps together in order to be most efficient. It is once again stressed how important Metal Detector is for this perk as it helps immensely in charting out what you have already completed if you didn’t note it down. It also starts beeping just by driving past a house with a stash inside, making it an ideal tool to help you remember when to check the maps. Also note, every stash that requires a shovel will be noted in parentheses.
Recommended perks: Metal detector, Burglar’s instinct, Restrainer, Intimidation, Invader
Area 1
The following is each hidden stash for area 1 and how to get them:
1. St boadle’s church – Sanctum
2. Inside cemetery – Grave name: Bobbie Jean Tractor (Shovel)
3. Middle of the puddle (shovel)
4. Car dealership – underneath the pickup truck (Need to steal/move the car and a shovel)
5. Quarry – between two piles of rocks on the right side (shovel)
6. Quarry – in the outbuilding right next to the time trial marker
7. Dwayne’s compound – Between 4 sets of tires on the left side (shovel)
8. The Old Post Office – In the bunker on the west side of the house, outside. Code: 1213
9. Capital Gains – Underneath the clothesline behind the house
10. Cliffview – Living room. There’s a safe. Code: 0513
11. General store – In the office
12. By the flaming barrel, 3 steps south and a bit to the right (shovel)
13. Gas station in front of the art dealer – Stockroom
14. Between the container and the tent (shovel)
15. Canny Valley – Study. Code: 5439
16. Four winds – Living room. Code: 5555
17. Four winds – Visible behind the house by the wooden structure
18. Small Farm – Bunker south of the house, against the wall. Code: 1978
19. Trailer/Crusher – Underneath the jefferson car. (shovel)
20. Dun Struglin – Bunker by the fence next to the road. Code: 1976
21. Behind the pawn shop – Partly hidden by the grass where thedrainage pipe is
22. Supply store – Stockroom
23. Northern Entrance to Ana’s house. Dirt patch right by the wooden box and misc garbage (shovel)
24. School house – In the study
25. Mon Repos – Bedroom safe – Code: 3990
26. Garbage disposal – Dirt patch right by the place where the train tracks stop. (shovel)
27. To the left of the bridge sitting out in the open by some rocks
28. Pharmacy – Office
29. Valetta – Behind the tool shed in a dirt patch (shovel)
30. Out in the open, a bit south of the river
31. The barrow – Right beside the house in a dirt patch
32. Sitting hidden behind a tree, a bit to the right of where the drainage pipe is
33. 14 Cliffside trailer park – Living area. Inside a safe. Code: 8462
Area 2
The following is each hidden stash for area 2 and how to get them:
34. Beneath the billboard under a dirt patch (shovel)
35. Bunker out in the open. Code: 2345
36. Cemetery – Outbuilding – Code: 3434
37. Cemetery – Behind the outbuilding in a dirt patch (shovel)
38. The docks – Behind some containers in the open
39. Between the two rightmost silos, sitting underneath the classic van
40. Inside the camp – To the right of the northernmost mess hall there’s a tree. The stash is covered by that tree (shovel)
41. Inside the camp – In the middle of the lake. There’s a jump on the south side that will bring you here if you complete it (shovel)
42. Outdoor supplies – Office – the bottom room on the right side
43. Northside – Living room in a safe. Code: 8175
44. Stadium – Behind one of the bleachers (shovel)
45. Train station – Go into the «maze» of containers and you’ll find a dirt patch on the right side (shovel)
46. Docks – Outbuilding – Inside the left office
47. Train station, just inside the fence beside some containers
48. Clothes shop – bathroom
49. Behind the clothes shop in a bunker. Code: 1980
50. Dirt road to the left of police station, when it splits, take the path closest to police station and look on the left side for a dirt patch (shovel)
51. Moorely Residence – Safe in the bathroom. Code: 7575
52. The park. Bunker in top left corner. Code: 0728
53. General store – Right office
54. Cafë – Right outside of the shop in plain view
55. Donut store – the basketball court to the right of the store, behind the bleacher closest to the store
56. Right by the fishing pier on its right side. Dirt patch is behind 4 wooden logs (shovel)
57. Dirt patch a few steps north of the rightmost cactus, where the leaves of the tree end (shovel)
58. Redyard – Next to the tool shed in the backyard. (shovel)
59. Redyard – Bedroom. Code: 1204
60. Cornerstone – Tool shed behind the house
61. Behind an abandoned flatbed truck (shovel)
62. Sycarmore corner – Safe in hallway. Code: 9111
63. Trackside – In the bedroom
64. Stadium – Next to the flatbed truck, near the passenger sidesitting out in the open
65. Outside 20a Palm Wells (the fenced in trailers in the middle of the area)– Dirt patch right by the entrance (shovel)
66. 8 palm wells (wooden cabin on east side) – in the kitchen
Area 3
The following is each hidden stash for area 3 and how to get them:
67. Between the fence and the trees (shovel)
68. Bunker by train tracks. Code: 1234
69. Riley House – Bedroom in the safe. Code: 5061
70. Riley house – Right side of the abandoned car, hidden behind trees
71. Bunker at the end of a farm, by the fence. Code: 5495
72. Dirt patch under the tree in the corn field
73. Between two trees by the wooden stables
74. Next to the bodyshop in the open
75. Shrubbery in the middle of the field, on the south side in a dirt patch (shovel)
76. Longfield Farm – Kitchen safe. Code: 2056
77. Underneath the sign for the gas station in a bunker. Code: 0000
78. Donut store – rob the owner and find the stash in the kitchen
79. Police station – By the entrance there’s a small memorial with an american flag. The dirt patch is right next to the bush to the left of the flag
80. Right behind/underneath the billboard (shovel)
81. Eastcliff lodge – In the bedroom
82. The bushes next to the fence, a few steps down from the jump
83. Right by the train tracks, a few steps above the cactus and tothe left of the train statue
84. A Few steps north of a group of cacti. Just go behind the bar and follow the wall north
85. Supply store – stockroom
86. To the right of the tree, behind and left of the outbuilding (shovel)
87. Right in front of the motel sign (shovel)
88. Backside of the motel by the trash
89. Motel room right above #88
90. Top cottage – Bathroom
91. Top Cottage – Bedroom in a safe. Code: 1981
92. Joe’s chapel – Next to the chapel, it’s under thesouthernmost flower pot on the right side
93. Next to a pile of rocks on the left side in a dirt patch. (shovel)
94. In the building area, there’s two outbuildings here and you want to enter the northernmost one. It’s in the right office
95. Mountainview – Kitchen
96. Junkyard – You have to use the crane to move the car closest to the outbuilding entrance. The stash is in a dirt pile underneath
97. Backyard by the tool shed
98. Backyard, inside the tool shed Code: 0002
99. The haven – Outbuilding. Safe code : 9876
100. The haven – Outside by the recycling container in the open