This is a simple, IN-DEPTH guide: with photo’s detailing every little step on how to get Reshade working with Back4Blood.
IF YOU HAVE A LAPTOP THIS MIGHT NOT WORK! (Lag and other issues have been known for a while with Reshade and Laptops)
Don’t skip any steps and double-check your filepaths and it will work.
If it didn’t work, it’s because you chose the wrong Back4Blood.exe.
FOLLOW THE FILE PATH THROUGH THE “Gobi” FOLDER!
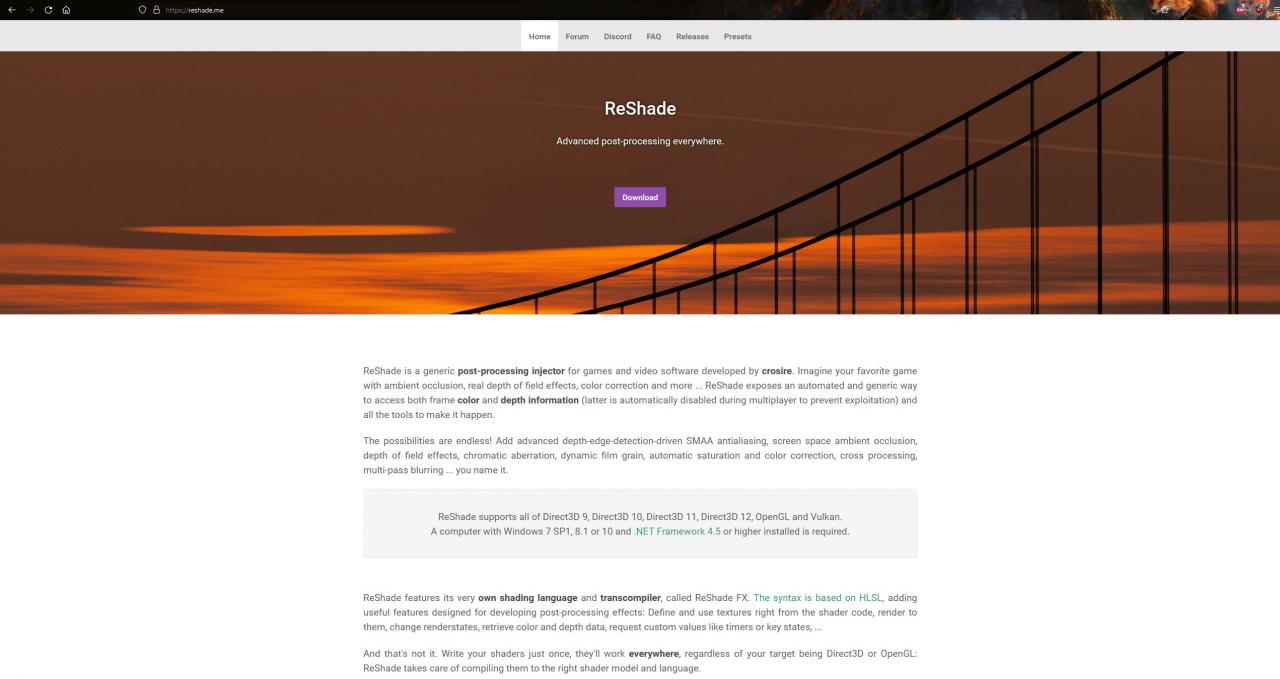
Download ReShade
Run ReShade.exe

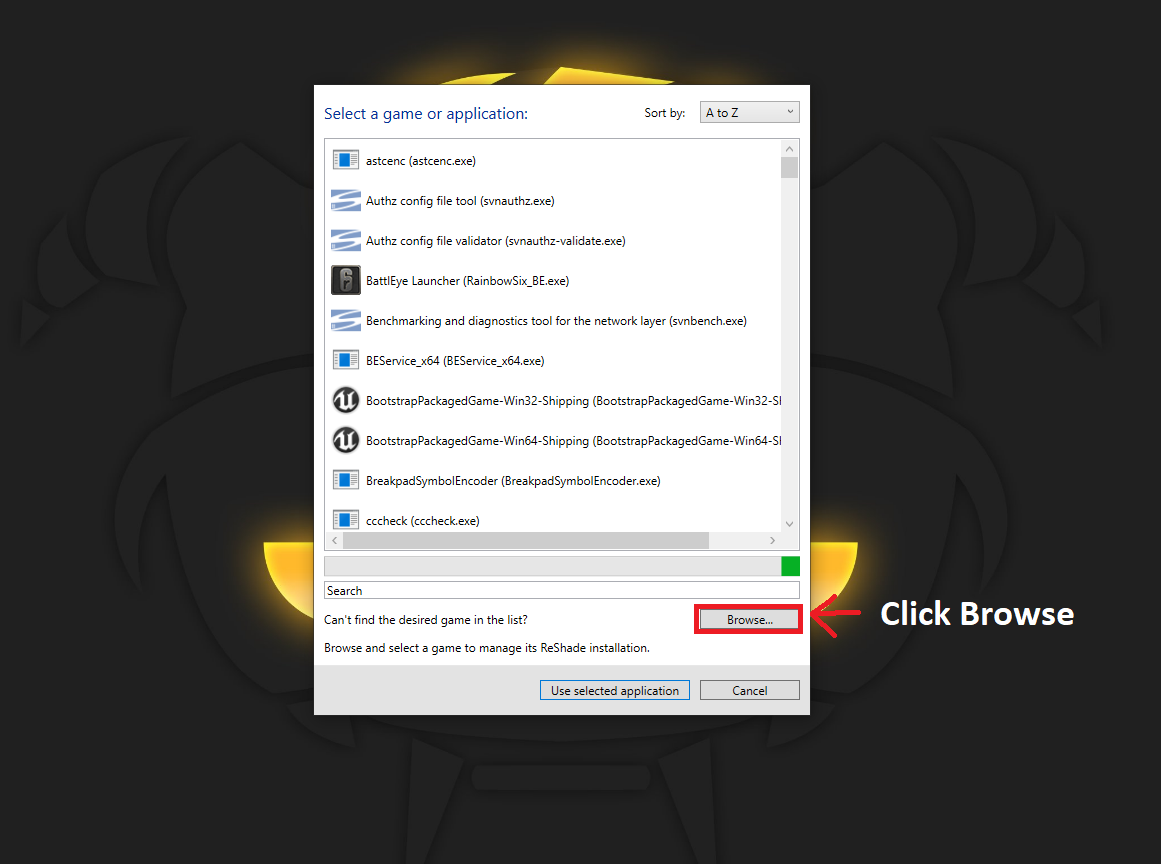
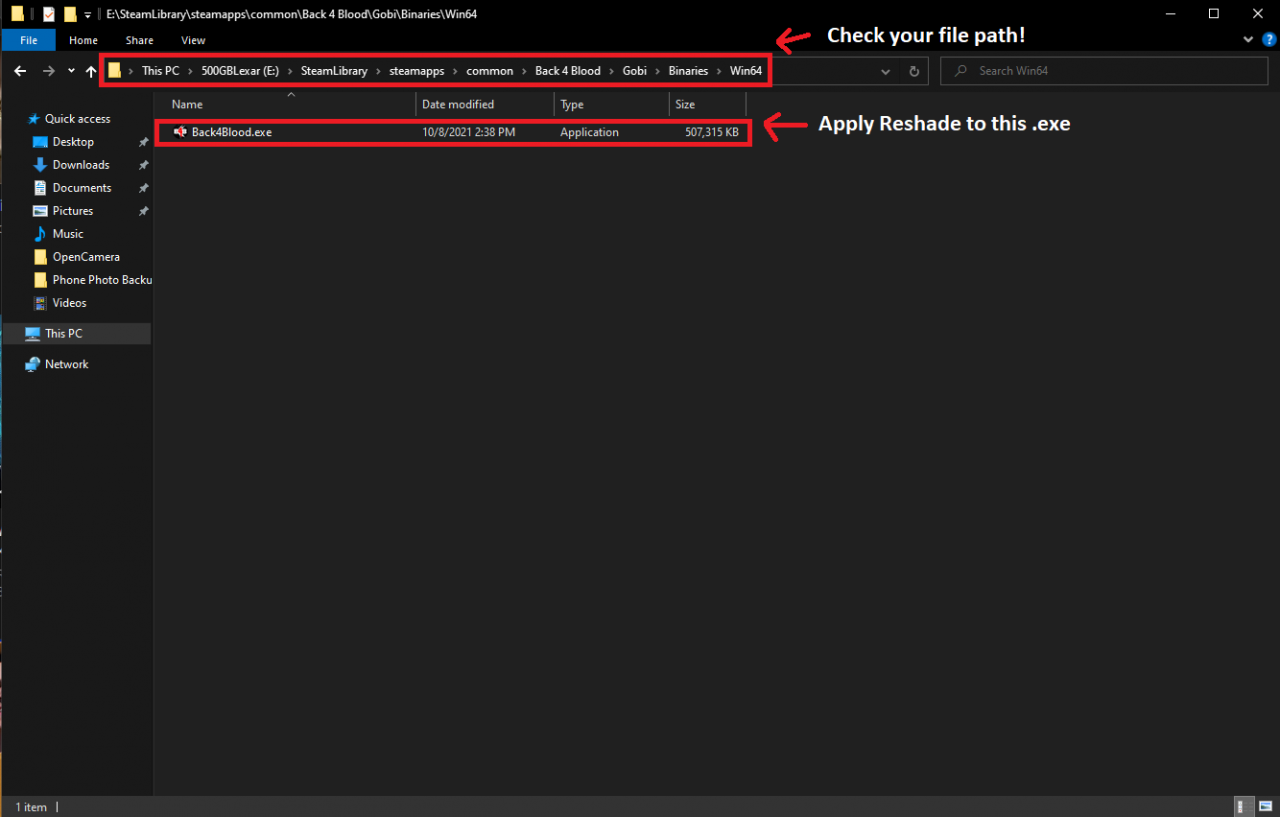
Applying ReShade

Selecting PROPER game Filepath
Steam location for Back4Blood
Go to your Back4Blood game files folder and go into the “Gobi” folder within it.
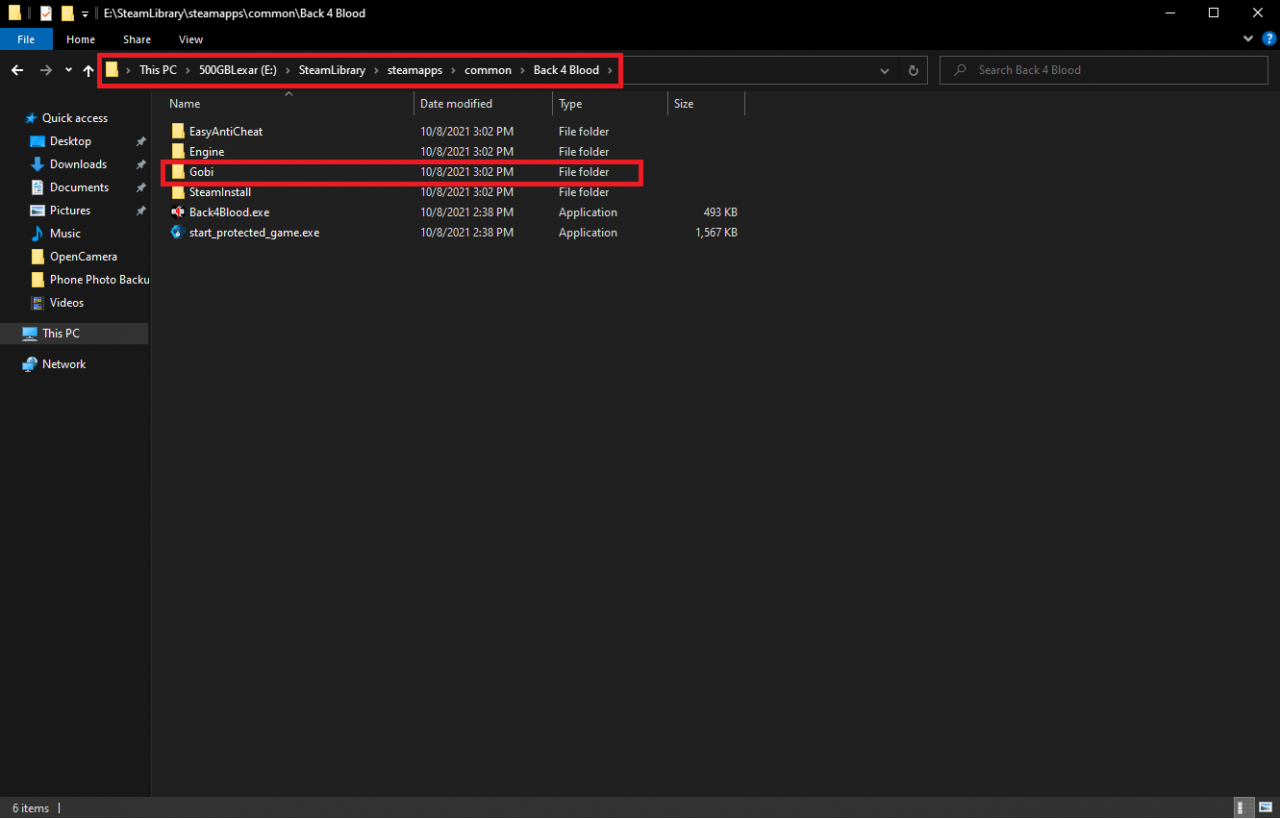
Back4Blood > Gobi > Binaries > Win64
Once there we will be greeted with the TRUE Back4Blood.exe that we need to hook into. So select the only file in here, being Back4Blood.exe and double click it.
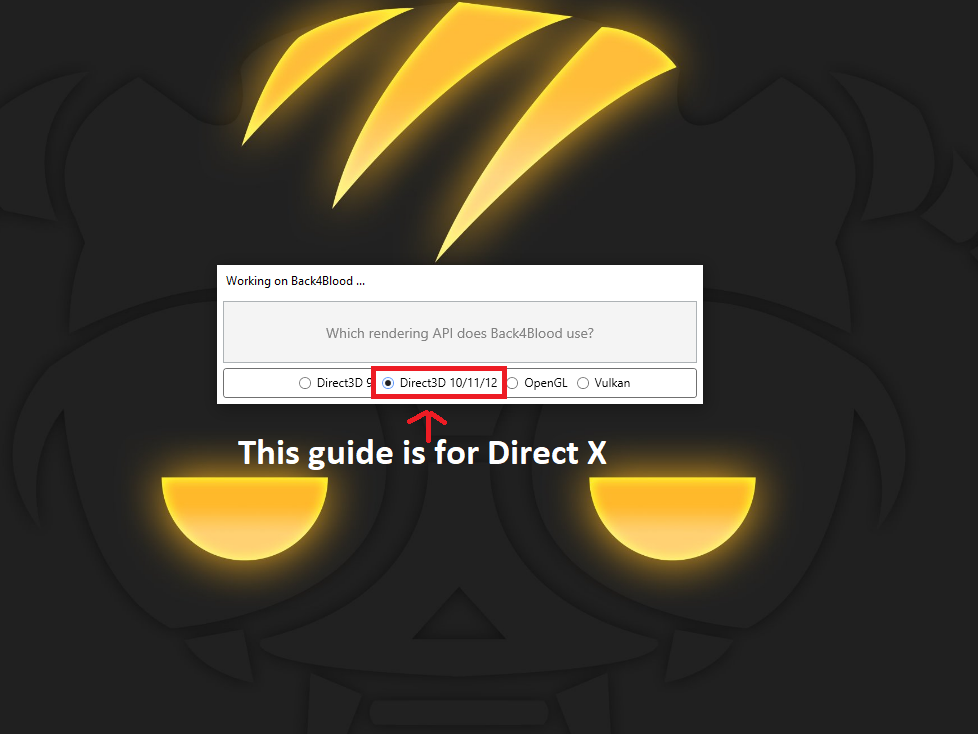
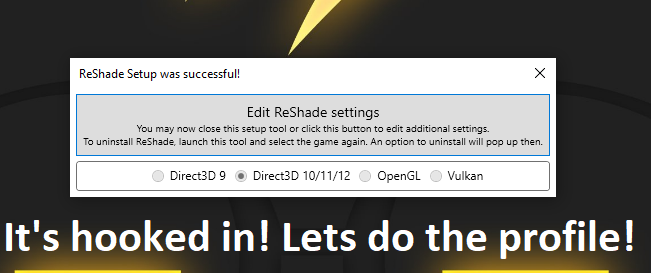
Selecting the PROPER graphics driver
This guide is not for Vulkan so choose at your own risk, as It probably won’t work as other games I have tried with that option.
Download the required Shaders
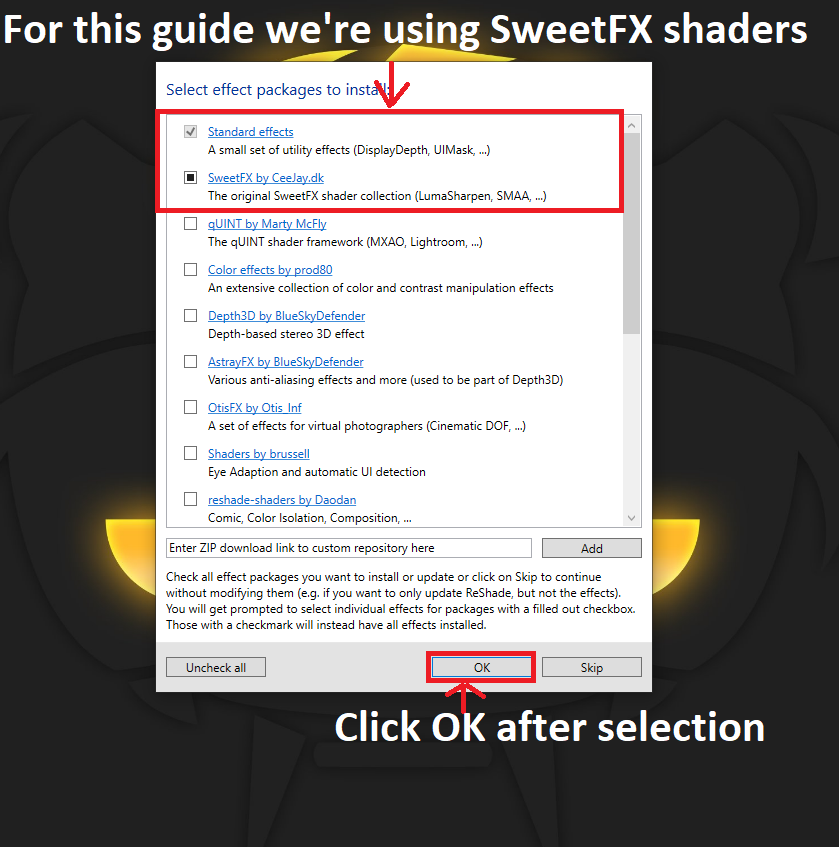
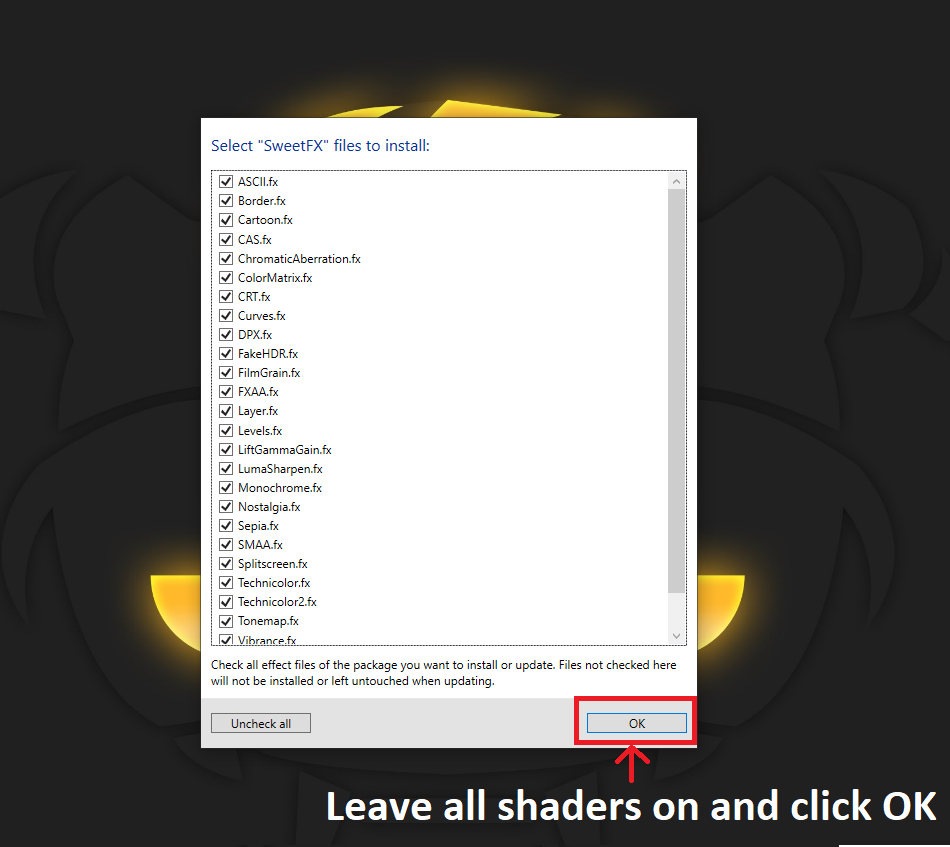
Leave all shaders on and click OK
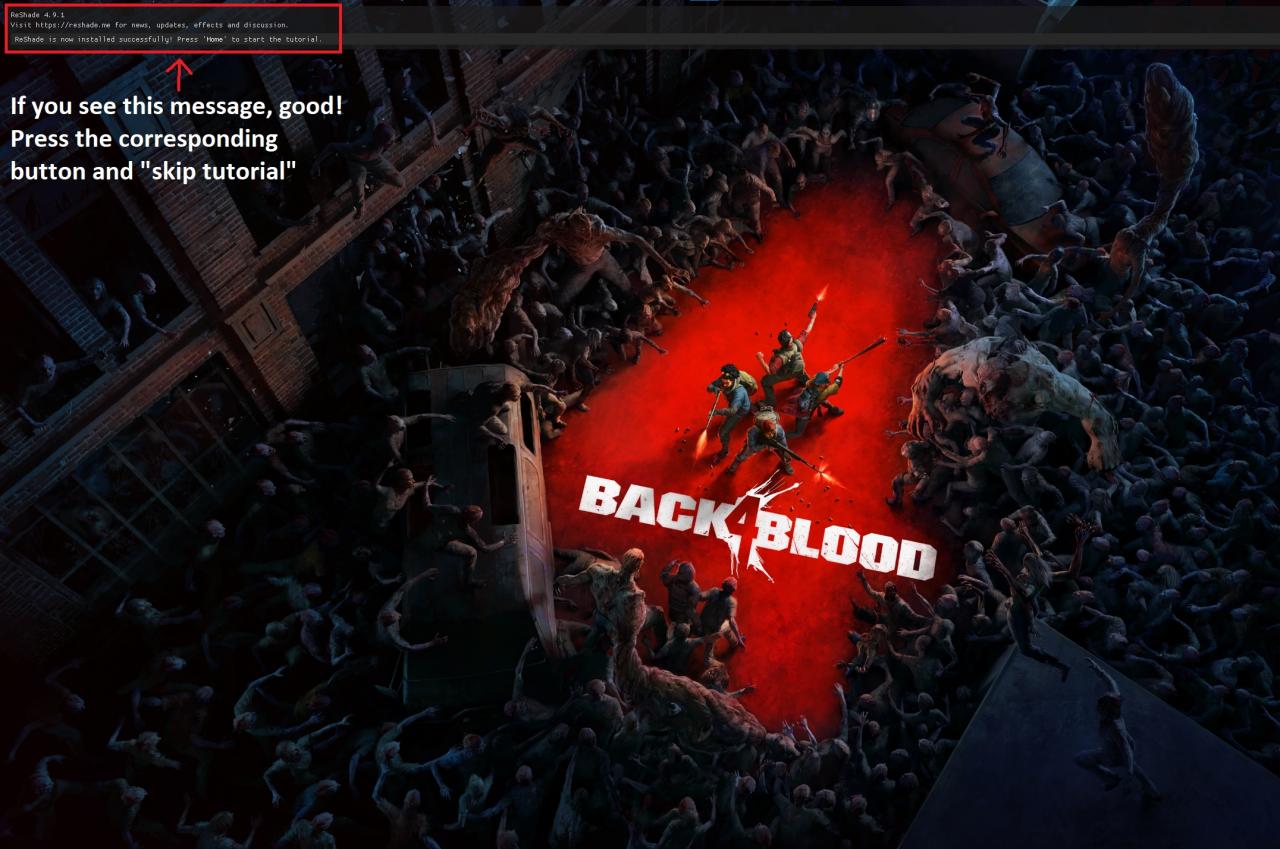
It’s hooked in! Success! We’re almost done!
Now its time to fire up the game and mod the profile to our liking in the next step!
Fire up Back4Blood through Steam (or however you start it)

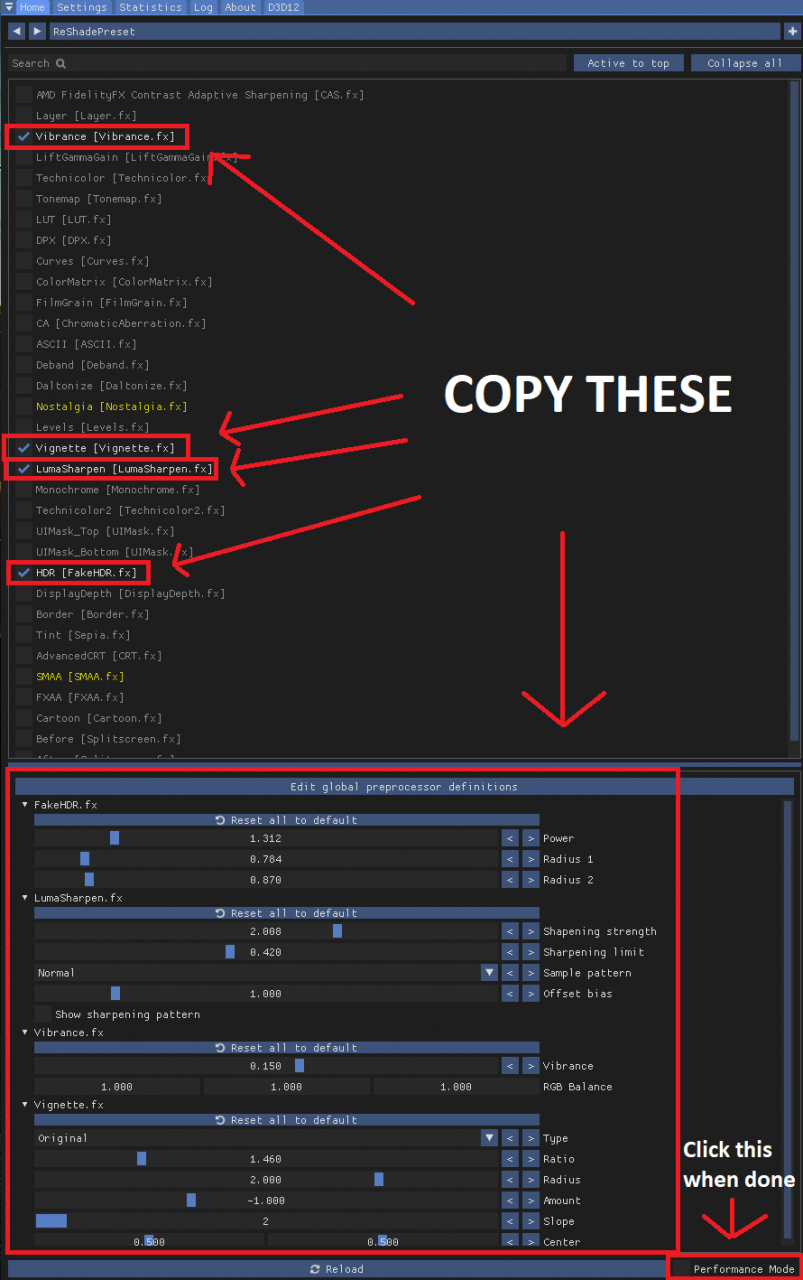
Turning on the Shaders and tuning them.
Vibrance (Extra vibrance to the coloring)
Vignette (To blend the edges of the screen SLIGHTLY)
LumaSharpen (Crisp up the edge of objects that antialiasing “smooths” out by making blurry)
FakeHDR (Deeper coloring/Better Shadows)
Copy the specific tuning options from the bottom of the image to obtain the same profile that I use to get the end result comparison. Once you click the checkbox for each of these shaders you will will get the tuning options at the bottom of the window.
When you’re done, hit the “Performance Mode” button on the bottom right of the ReShade window to stabilize fps.
AFTERTHOUGHTS:
***In OLDER VERSIONS*** of ReShade there is a “Clarity” option. This is a fantastic option to clean up the edges of objects in conjunction with Lumasharpen: but it is not required.
Reshade 4.2.1 has this “Clarity” option if you want to try it out.
Google “Reshade Repository” and you will easily find all versions of reshade to try out and can play with the Clarity option among others
Done! Here’s a comparison! Enjoy!
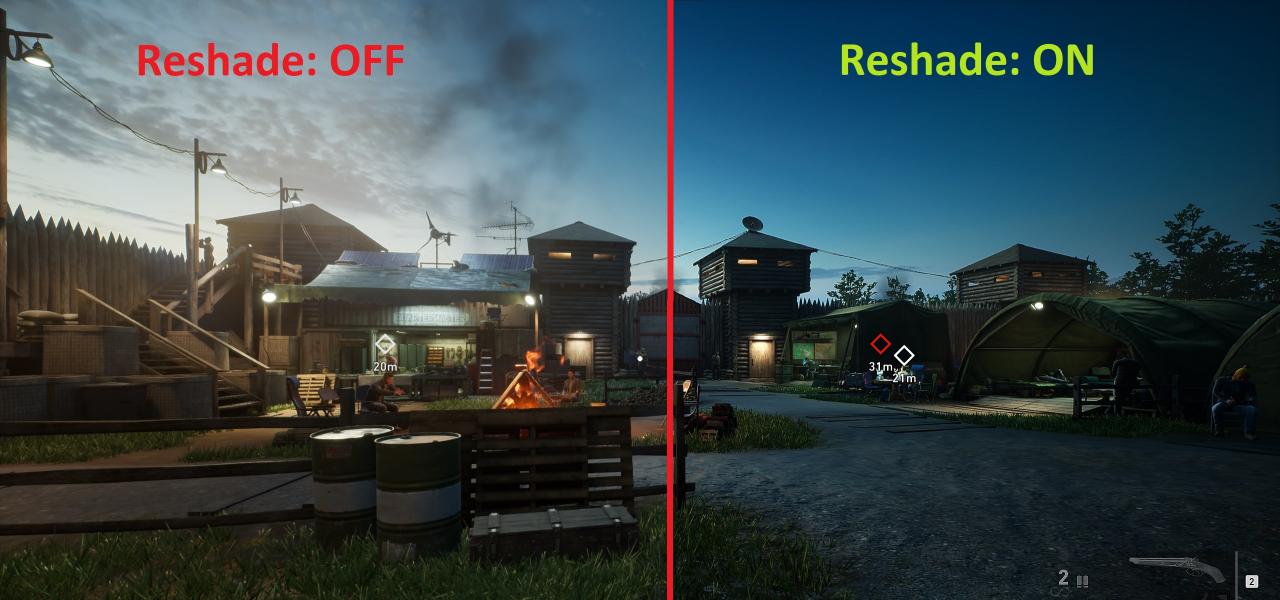
Enjoy your fancy new-looking game! Play with other options and have some fun when you’re bored!
Thanks to NagsterTheGangster for his great guide, all credit to his effort. you can also read the original guide from Steam Community. enjoy the game.
Related Posts:
- Back 4 Blood: How to Fix “anti-cheat violation” Bug
- Back 4 Blood: How to Enable Exclusive Fullscreen
- Back 4 Blood: How to Fight the Abomination
- Back 4 Blood: All Secret Golden Skull Locations (Secret Achievements Guide)
- Back 4 Blood: Hag Guide (All You Should Know)