
What is the most optimal way to setup housing, farms, and wells for the best bonuses?
Introduction
Keep in mind that due to the nature of RNG you might find yourself unable to perfectly use one or more of the layouts. Adjusting your strategy to cope with these random elements will be the key to what you can do on the islands, and within the confines of a biome’s rules.
It should be noted that this isn’t every conceivable layout, and there are many permutations of each one. Adapt and overcome whatever RNG throws at you using these layouts as the foundation for maximizing bonuses.
Each biome will have its own section, and I will be filling them out as I tackle them. I’ve spent most of my playtime learning the systems, and playing with layouts in the first two biomes. I hope to continue moving forward and discovering all new worlds with all new challenges so that I can continue to update this guide.
Changelog:
- v1.0 (5/23/21):
- Initial Release
Bonuses and Penalties
Each field and housing tile will gain a bonus or penalty depending on what kind, and how many, tiles they are adjacent to. Due to the bonuses scaling with upgrades I have chosen to currently limit the guide to the basic tier of Field and Accommodation. This will provide a baseline for how effective the layout will be.
Note that this is not an exhaustive list of bonuses/penalties for the tiles, but rather those that are relevant to adjacency bonuses.
FieldAdjacencyBonusPenaltyAt least 1 Accommodation+10% Prod SpeedAt least 1 Field+2 Crop StorageAt least 1 Well+10% Prod Speed
AccommodationAdjacencyBonusPenalty1 Accommodation+1 Peep2 Accommodations+2 Peeps1 Field+1 Food & Drink Storage2 Fields+2 Food & Drink Storage
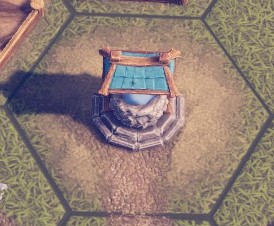
WellAdjacencyBonusPenalty1 Accommodation-10% Production2 Accommodations-20% ProductionAt least 1 Animal Field-40% Production
Grass Island
This is the first biome you are likely to encounter, and is by far the most flexible when it comes to layouts. You could really spend a significant amount of time in this biome experimenting with different layouts.
Limiting Factors:
- Overall Space
- Location of the highland
- Coastline
- Unmovable tiles (e.g. Transmogrifier, Shelter, inland water tiles, etc…)
With the opportunities limited in a small number of ways it really depends on what you’re hoping to accomplish as to which layout you’ll use.
Maximum Peeps:
Maximize the number of peeps, but still take advantage of adjacency bonuses.
Active Bonuses
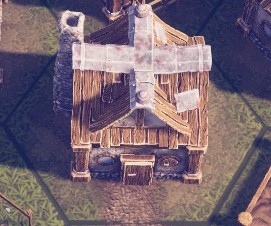
- Each Accommodation has:
- +2 Peeps for each accommodation
- +1 Food and Drink storage for the Hut with 1 adjacent Field
- +2 Food and Drink storage for the Hut with 2 adjacent Fields
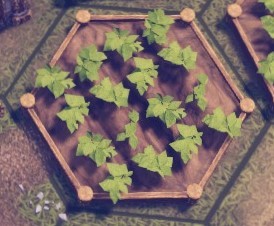
- Each Field has:
- +2 Crop storage
- +20% Production speed
A breakdown of all the bonuses is found below:
Field with 1 adjacent HouseField with 2 adjacent HousesAdjacencyBonusAdjacencyBonus1 Accommodation+10% Prod Speed2 Accommodations+10% Prod Speed1 Field+2 Crop Storage2 Fields+2 Crop Storage1 Well+10% Prod Speed1 Well+10% Prod SpeedHouse with 1 adjacent FieldHouse with 2 adjacent FieldsAdjacencyBonusAdjacencyBonus2 Accommodation+2 Peeps2 Accommodation+2 Peeps1 Field+1 Food Storage2 Fields+2 Food Storage1 Field+1 Drink Storage2 Fields+2 Drink Storage
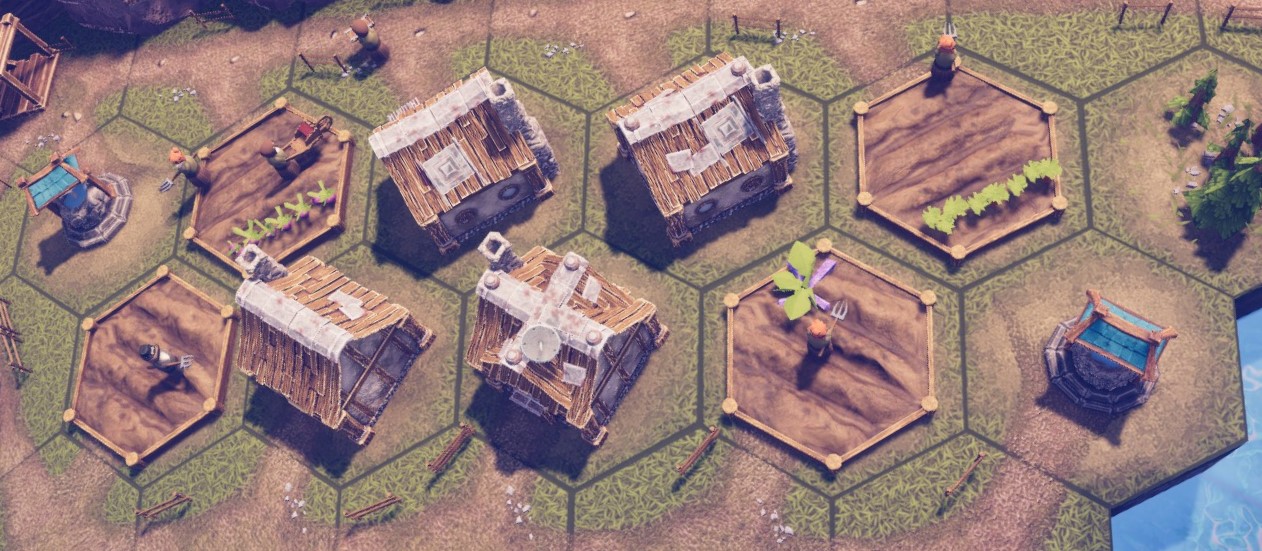
Sufficient Peeps:
You wanted Maximum Peeps, but you couldn’t get two rows of 5 hexagons with road access. You could however get a row of 5, and a row of 4. This isn’t as good, but it’s a decent compromise.
Active Bonuses
- Each Accommodation has:
- +1 Peep for each accommodation
- +1 Food and Drink storage for the Hut with 1 adjacent Field
- +2 Food and Drink storage for the Hut with 2 adjacent Fields
- Each Field has:
- +2 Crop storage
- +20% Production speed
A breakdown of all the bonuses is found below:
Field with 1 adjacent HutField with 2 adjacent HutsAdjacencyBonusAdjacencyBonus1 Accommodation+10% Prod Speed2 Accommodations+10% Prod Speed1 Field+2 Crop Storage2 Fields+2 Crop Storage1 Well+10% Prod Speed1 Well+10% Prod SpeedHouse with 1 adjacent FieldHouse with 2 adjacent FieldsAdjacencyBonusAdjacencyBonus2 Accommodation+2 Peeps2 Accommodation+2 Peeps1 Field+1 Food Storage2 Fields+2 Food Storage1 Field+1 Drink Storage2 Fields+2 Drink Storage
Desert Island
Each layout can have numerous permutations based on how the tiles get generated. The desert biome has a habit of forcing awkward setups, but it can be done.
Note that layouts from other biomes are possible if the tile generation allows it. In this section I’ll only cover the unique scenarios I’ve had to overcome in this biome so far.
Limiting Factors:
- Can only place Fields and Wells on the Grass tiles
- Location of the highland
- Coastline
With the opportunities limited to small splotches it really depends on what you’re hoping to accomplish as to which layout you’ll use.
The Sunflower:
The odd 7+ hexagon layout is pretty common in this biome from what I’ve experienced. After a lot of trial and error I’ve had the most success creating a sort of flower like layout with a Well in the center, then Fields, then Accommodations.
Active Bonuses
Note that this is all highly subject to the number of Fields and Accomodations you are able to place with how the tiles rolled on your island. Aim for the basic shape with a Well in the middle, then Fields in a semi-circle around it, and Accommodations on the outside.
- Each Accommodation has:
- +2 Peeps for each accommodation
- +1 Food and Drink storage for the Hut with 1 adjacent Field
- +2 Food and Drink storage for the Hut with 2 adjacent Fields
- Each Field has:
- +2 Crop storage
- +20% Production speed
A breakdown of all the bonuses is found below:
Field with 1 adjacent HutField with 2 adjacent HutsAdjacencyBonusAdjacencyBonus1 Accommodation+10% Prod Speed2 Accommodations+10% Prod Speed1 Field+2 Crop Storage2 Fields+2 Crop Storage1 Well+10% Prod Speed1 Well+10% Prod SpeedHut with 1 adjacent FieldHut with 2 adjacent FieldsAdjacencyBonusAdjacencyBonus2 Accommodation+2 Peeps2 Accommodation+2 Peeps1 Field+1 Food Storage2 Fields+2 Food Storage1 Field+1 Drink Storage2 Fields+2 Drink Storage
The Triangle:
When you just can’t get a good layout to maximize the bonuses due to how the tiles were generated you can always rely on the triangle to get some bonuses.
Active Bonuses
- Each Accommodation has:
- +1 Peep for the two end Huts
- +2 Peeps for middle Hut
- +1 Food and Drink storage for the two end Huts
- +2 Food and Drink storage for the middle Hut
- Each Field has:
- +2 Crop storage
- +20% Production speed
A breakdown of all the bonuses is found below:
Field with 2 adjacent HutsAdjacencyBonus2 Accommodations+10% Prod Speed1 Field+2 Crop Storage1 Well+10% Prod SpeedHut with 1 adjacent FieldHut with 2 adjacent FieldsAdjacencyBonusAdjacencyBonus2 Accommodation+2 Peeps2 Accommodation+2 Peeps1 Field+1 Food Storage2 Fields+2 Food Storage1 Field+1 Drink Storage2 Fields+2 Drink Storage