How to mod Gates of Hell’s files through Notepad++
2. Notepad++
1. Go to game directory
2. Open map.pak
3. Extract the 0.mi file you want to mod to anywhere such as your desktop
4. Edit the 0.mi file you want to mod via Notepad++
EXAMPLE
I modded the 0.mi file of the very first Russian mission.
For this, I edited the 0.mi file found in
map.pak > map > single > 01-rus > 1941_11_typhoon > 0.mi
2. Use 7-zip / WinRar to open map.pak
3. Drag your modded 0.mi file to replace the original existing 0.mi file
Impregnability full = No damage taken
Impregnability harmless = Unsure
Impregnability disabled = Disables Invincibility
1. Press ctrl+f in Notepad++ with any 0.mi open
2. Use the replace feature
3. Find what “player 1”
4. Replace with “player 0”
5. Press Replace All
With this, all allied units will now go under your direct control
Player 0 = Player control
Player 1 = Allied control
Player 2 and so on = Enemy control, neutral AI, etc
 For this, I will give an example
Within the 0.mi file, there are lines of code like this
————————————————————————————————————————————
{Entity “122mm_m30” 0xc017
{Position 2173.04 1967.25}
{xform zl 173.87 y 4.82 zw 28.44}
{TexMod
{“/texture/common/_vehicle/m30” “winter”}
}
{Placer
{State “driver1” {Disable}}
{State “driver2” {Disable}}
{State “driver3” {Disable}}
{State “driver4” {Disable}}
{State “seat1” {Disable}}
{State “seat2” {Disable}}
{State “seat3” {Disable}}
{State “seat4” {Disable}}
}
{Impregnability full}
{Extender “cannon”
{animation
{switch close}
}
}
{AreaDisable “close”}
{player 0}
{MID 74}
}
{Human “single/rus/1941_win/rifleman_1” 0xc019
{Position 2579.39 1332.81}
{xform zl -166.26 y 5.99 zw 31.6}
{Volume “ram”
{able {visible 0}{bullet 0}{throwing 0}{obstacle 0}{contact 0}{contact_ground 0}{blast 0}{select 0}{touch 0}{blockcamera 0}}
{disabled}
}
{Impregnability full}
{player 0}
{MID 73}
{NameId 17 167}
{LastItem “mosin”}
}
{Human “single/rus/1941_win/rifleman_2” 0xc01c
{Position 2595.73 1350.72}
{xform zl 170.72 y 5.99 zw 31.6}
{Volume “ram”
{able {visible 0}{bullet 0}{throwing 0}{obstacle 0}{contact 0}{contact_ground 0}{blast 0}{select 0}{touch 0}{blockcamera 0}}
{disabled}
}
{Impregnability full}
{player 0}
{MID 78}
{NameId 7 27}
{LastItem “mosin”}
}
{Human “single/rus/1941_win/rifleman_3” 0xc01f
{Position 2520.42 1578.65}
{xform zl 156.76 y 4.19 zw 68.4}
{Volume “ram”
{able {visible 0}{bullet 0}{throwing 0}{obstacle 0}{contact 0}{contact_ground 0}{blast 0}{select 0}{touch 0}{blockcamera 0}}
{disabled}
}
{Impregnability full}
{player 0}
{MID 79}
{NameId 115 250}
{LastItem “mosin”}
}
————————————————————————————————————————————
From this, we can see a 122mm Russian artillery labelled as an “Entity” and various Russian soldiers labelled as “Human” afterwards.
This is simply one of the artillery pieces of the first mission that gets bombed by German planes and some of the men accompanying this artillery piece.
To spawn more of this specific artillery infantry, just copy and paste a “Human” into the 0.mi file.
Let’s say I would like to spawn more of the Human rifleman_3
I will now copy paste this group of code to spawn more of him.
ORIGINAL CODE
————————————————————————————————————————————
{Human “single/rus/1941_win/rifleman_3” 0xc01f
{Position 2520.42 1578.65}
{xform zl 156.76 y 4.19 zw 68.4}
{Volume “ram”
{able {visible 0}{bullet 0}{throwing 0}{obstacle 0}{contact 0}{contact_ground 0}{blast 0}{select 0}{touch 0}{blockcamera 0}}
{disabled}
}
{Impregnability full}
{player 0}
{MID 79}
{NameId 115 250}
{LastItem “mosin”}
}
————————————————————————————————————————————
MODDED CODE
————————————————————————————————————————————
{Human “single/rus/1941_win/rifleman_3” 0xc01f
{Position 2520.42 1578.65}
{xform zl 156.76 y 4.19 zw 68.4}
{Volume “ram”
{able {visible 0}{bullet 0}{throwing 0}{obstacle 0}{contact 0}{contact_ground 0}{blast 0}{select 0}{touch 0}{blockcamera 0}}
{disabled}
}
{Impregnability full}
{player 0}
{MID 79}
{NameId 115 250}
{LastItem “mosin”}
}
————————————————————————————————————————————
 I will give another example,
Say you want to spawn more 25mm AA guns.
Simply copy paste this line multiple times and you will have multiple AA guns spawn in one location.
——————————————————————————————————————-
{Entity “25mm_72k” 0xb00d
{Position 3512.15 -1075.43 153.96}
{xform zl -177.71 y 8.05 zw 28.67}
{TexMod
{“/texture/common/_vehicle/72k” “winter”}
}
{Placer
{State “driver1” {Disable}}
{State “driver2” {Disable}}
{State “driver3” {Disable}}
{State “seat1” {Disable}}
{State “seat2” {Disable}}
{State “seat3” {Disable}}
}
{Extender “cannon”
{animation
{switch close}
}
}
{player 0}
{MID 52}
}
——————————————————————————————————————-
For this, we will edit 0.mi so that we no longer need to bring wood to build the dummy artillery pieces
Simply find this line under
{“dummyguns/erect_1”
{“dummyguns/erect_2”
{“dummyguns/erect_3”
{“dummyguns/erect_4”
And change the value of wood to whatever you’d like
ORIGINAL CODE
—————————————————————————————————–
{count
{op “>=”}
{value 2}
—————————————————————————————————–
MODDED CODE
—————————————————————————————————–
{count
{op “>=”}
{value 0}
—————————————————————————————————–
-> This means you will not see your extra spawns until you move the infantry or use Direct Control to wiggle the vehicle away from all the others
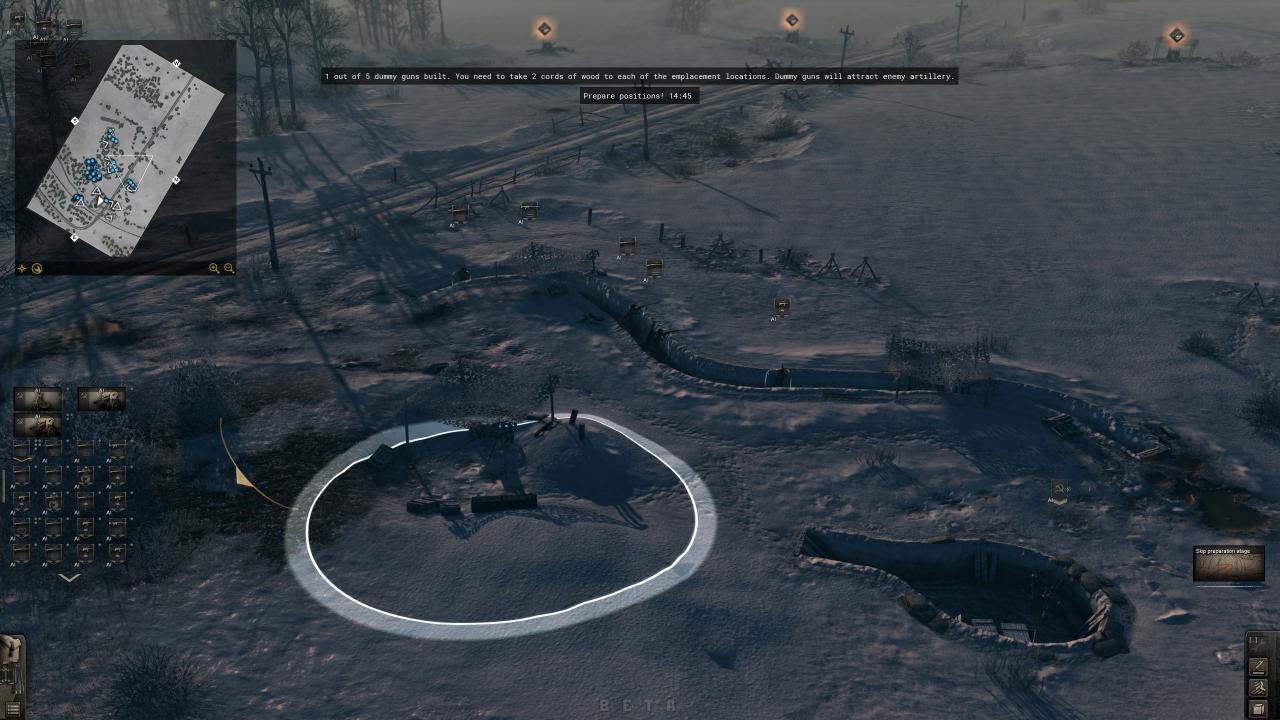 Multiple ammo crates spawned in the exact same place (explains why the white circle is so dark & thick), Friendly AI now under player control
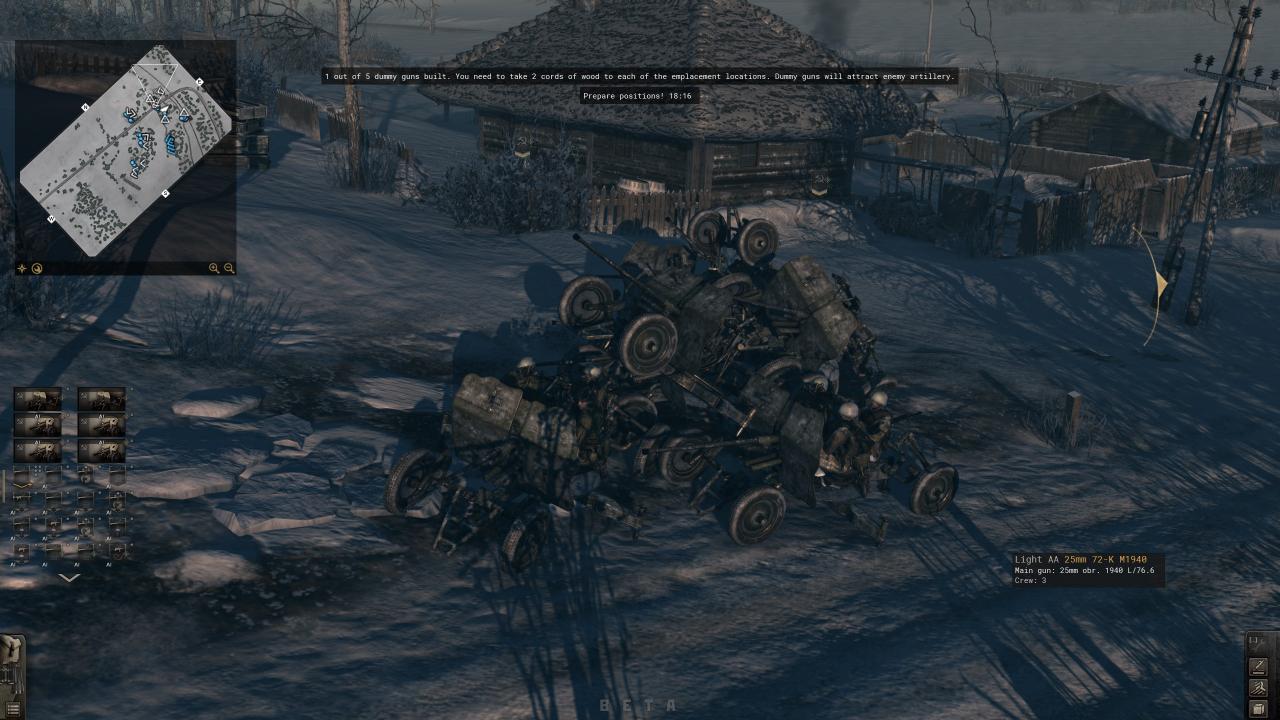
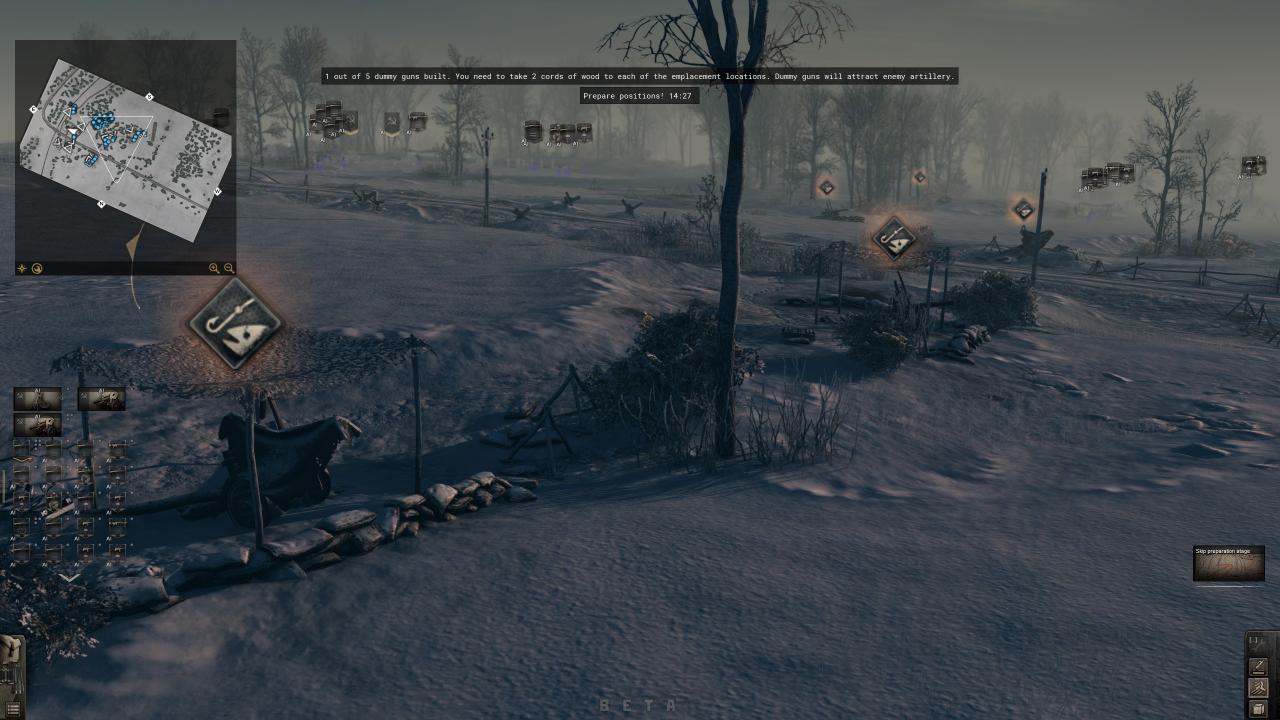 Dummy guns built without bringing wood (causes a small bug in the mission text / objective), Friendly AI now under player control
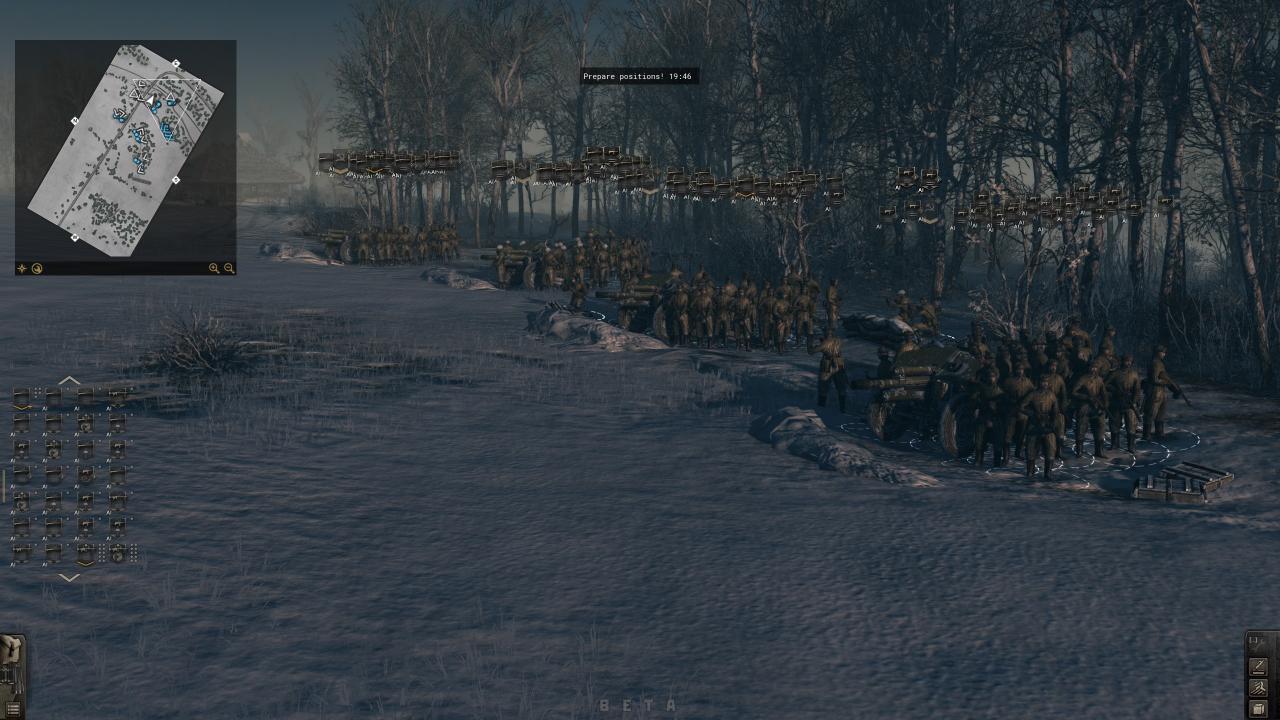
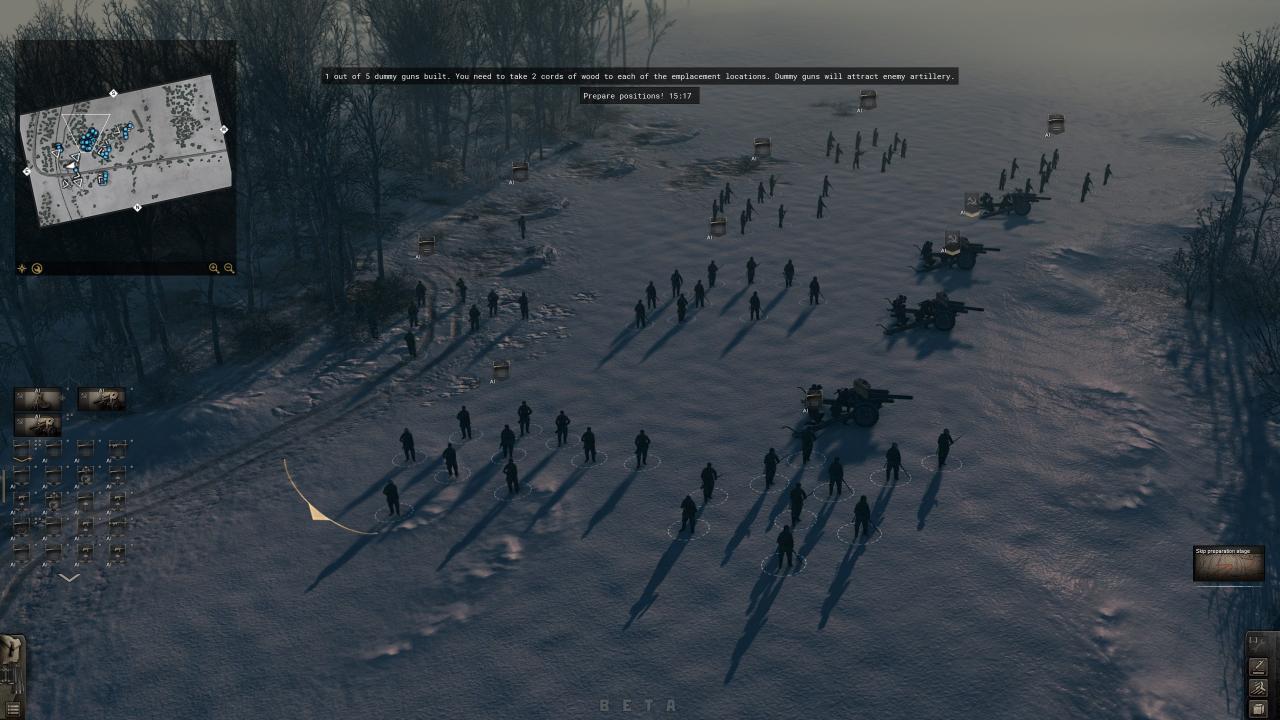 More infantry spawned, Friendly AI now under player control
I tried this so called mod all it did was crash my game! Moving even one thing out of place makes the game crash i think they put in self diagnostic program when something is out of place it crashes! We need to find an actual working mod this was a nice try but even the smallest change ruined the game and i followed the directions exactly so i’m not sure how he got his to work there is probably a missing step or something Thanks anyway!