
Covers game-play, Achievements, etc.
Introduction
Menu Screen
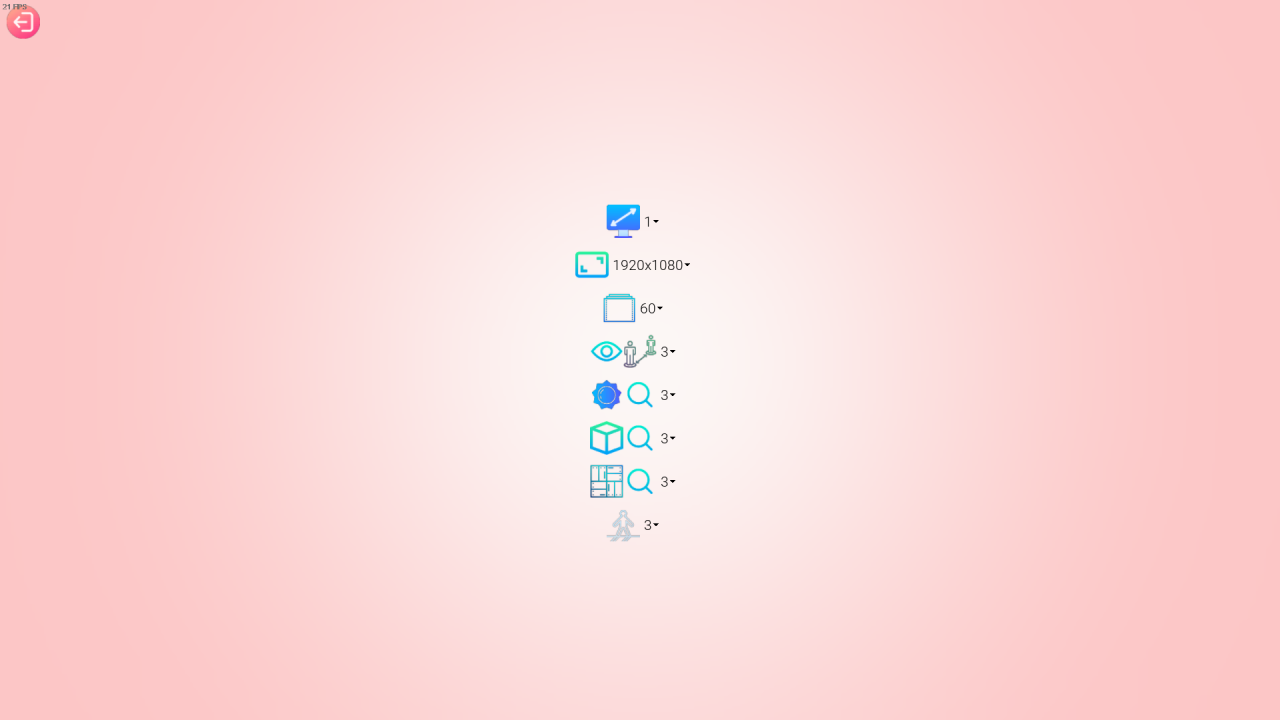
First I will talk about the settings menu.
I honestly do not know what all of these do, so I’ll explain the ones I know.
-The second setting (the box with two triangles) changes screen resolution. Change as you need.
-The third setting (the thing that looks like a film strip) changes the fps cap. Cap it at 60 fps, or 30 if your PC somehow needs you to do that to run.
-The 4th setting changes render distance and the bottom setting changes shadows? Maybe reflections? Either way, set all the setting under FPS to a max of 3.
Once settings are changed, click the button in the top-left of the screen to exit to main menu.
Servers
The number next to the VAC shield showcases the ping of the host (in ms). The higher the host’s ping, the more input lag you’ll experience. Try to avoid servers with 100+ ping
If there is a lock next to the player count, it is password protected. Click the violet box next to the lock and input the password.
Once password is entered (or you find an unprotected server), click the door with the arrow to enter the game
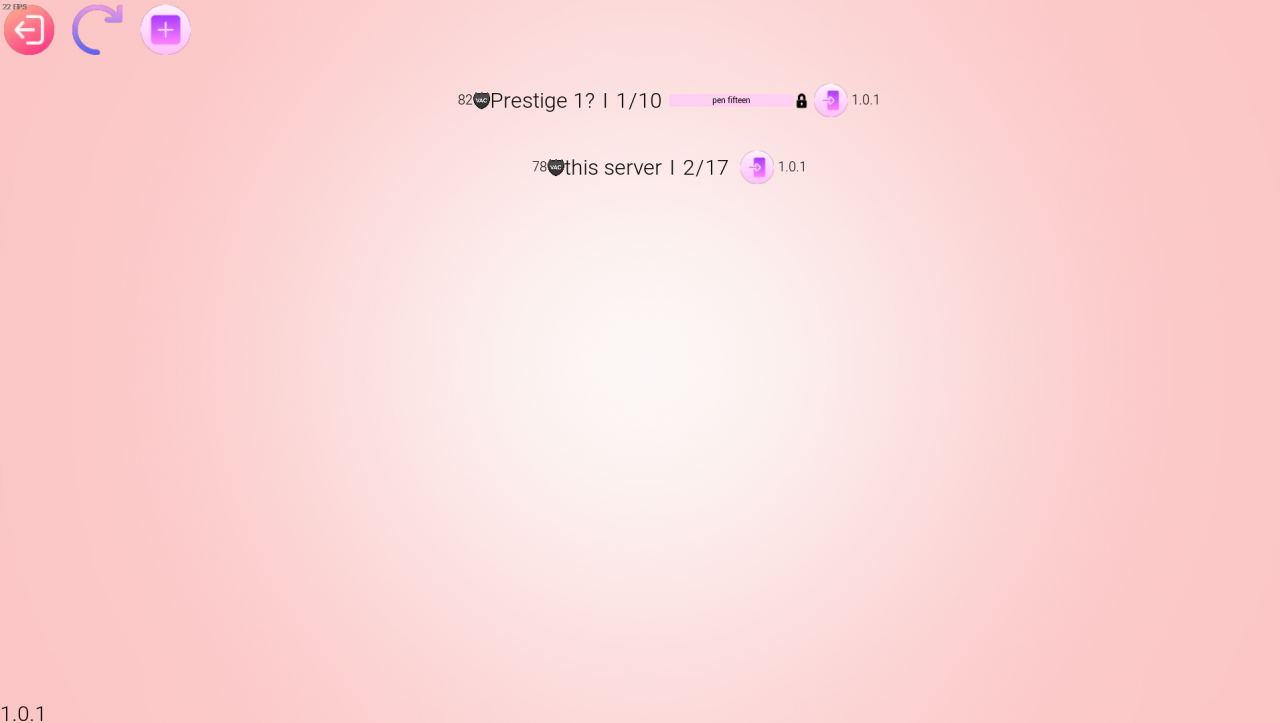
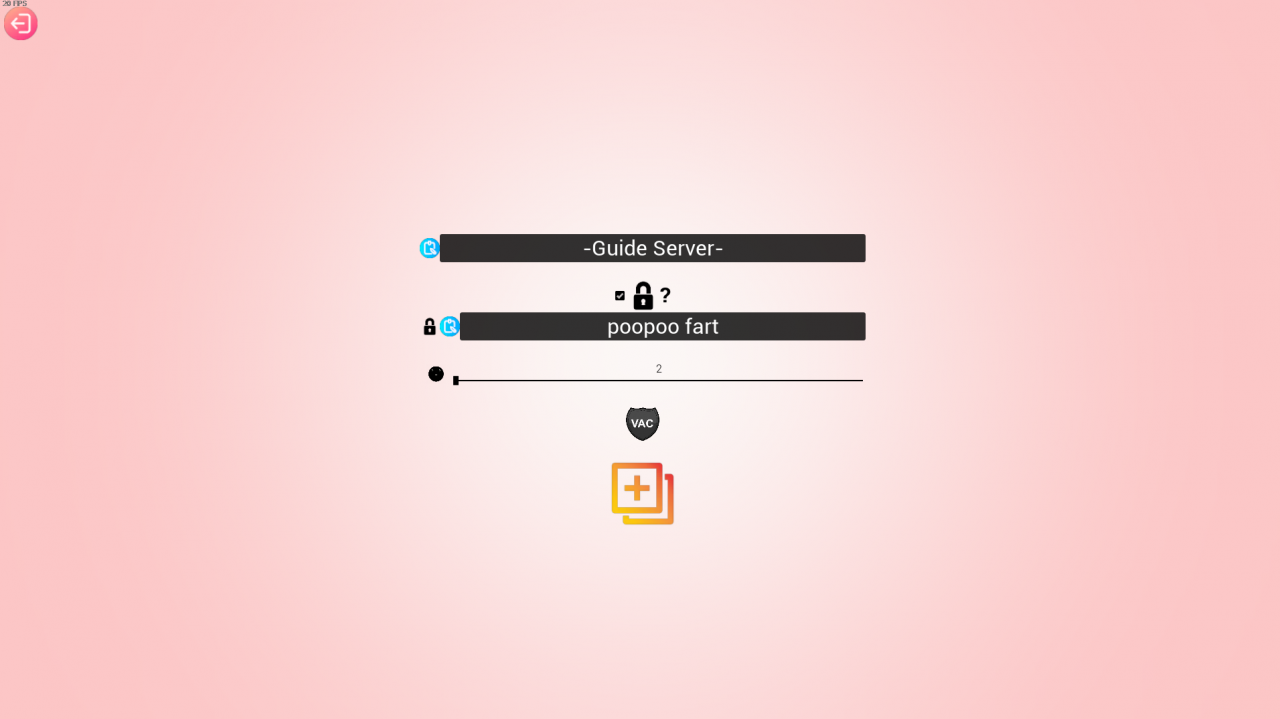
If you would like to host your own server, here’s how to do that. Click on the plus button on the top-left menu, then proceed to the sub-section below.
-First, you need a name for your server. This is done with the text-box on the top (with the blue clip-board next to it).
-The slider above the VAC shield changes the max amount of players that can join. It’s two for this example. It maxes out at 100, but try to keep it between 10 and 30 to minimize lag.
-If you would like to protect your server with a password ()whether you are grinding or you wanna play with pals), click the check-box next to the lock. This will bring up a second text-box where you will type your server password.
Once all of that is done, click the big orange button to enter the game and create your server! Please keep in mind:
1. Your ping affects everyone else. Try not to have too many tabs open, and stick with the in-game chat system.
2. Once you leave your server, everyone else will be kicked.
3. As of the update this guide was created on, you do not get your own server admin-console, meaning you cannot kick/ban any bad actors in your server. Not that there are that many.
Gameplay
By default, you can just drag your mouse to turn your camera. Anyways here are the controls list for keyboard and controller.
-WASD to move around
-Space to jump, can be done infinitely
-Enter to access the chat, hit enter again (whether you typed something or not) to close chat and be able to move around/play again
-Left-click or right-click to show the mouse cursor. From this point on, you must click and drag to rotate the camera
-Left-click while the cursor is revealed to make a button selection
-Use the scroll-wheel to (slowly) zoom in and out
-Move the left joystick to move the character
-Move the right joystick to rotate the camera
-Use X to jump
-Click the right joystick to show the mouse cursor. At this point, moving the right joystick will move the cursor. (I think you would need to click and move this joystick to rotate the camera, but I do not have a controller to test this with)
-Use A while the cursor is revealed to make a button selection
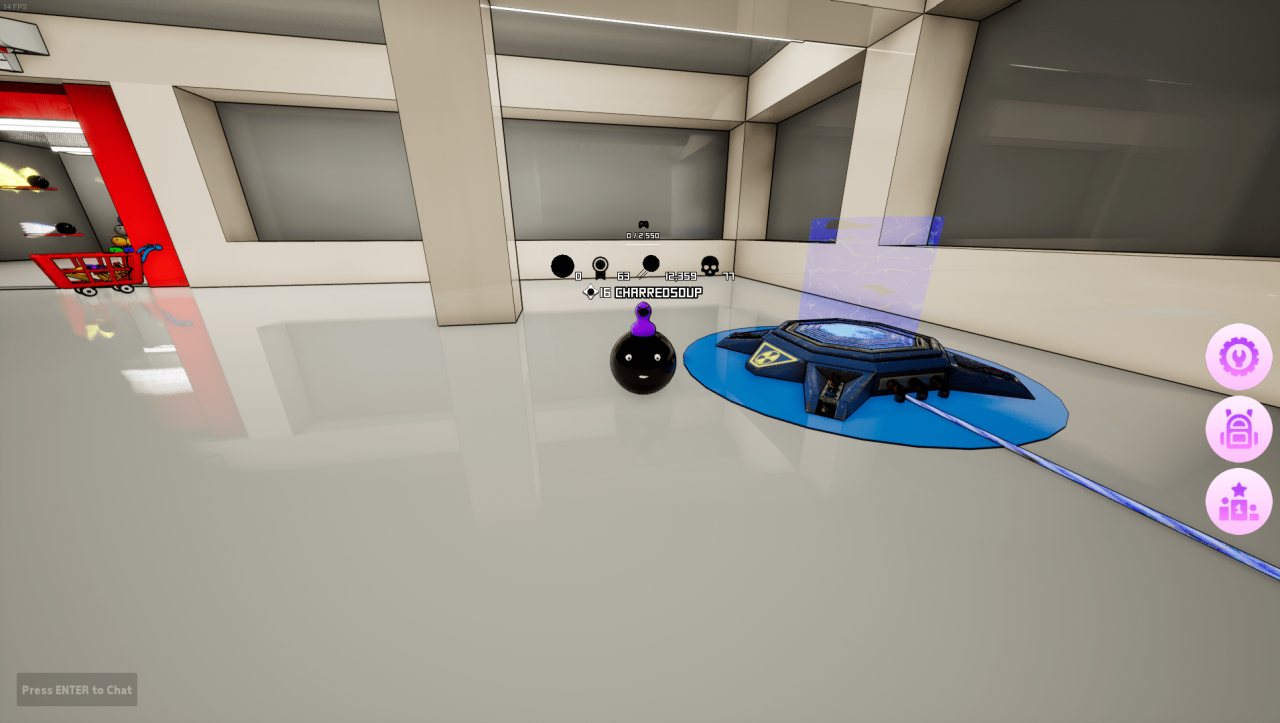
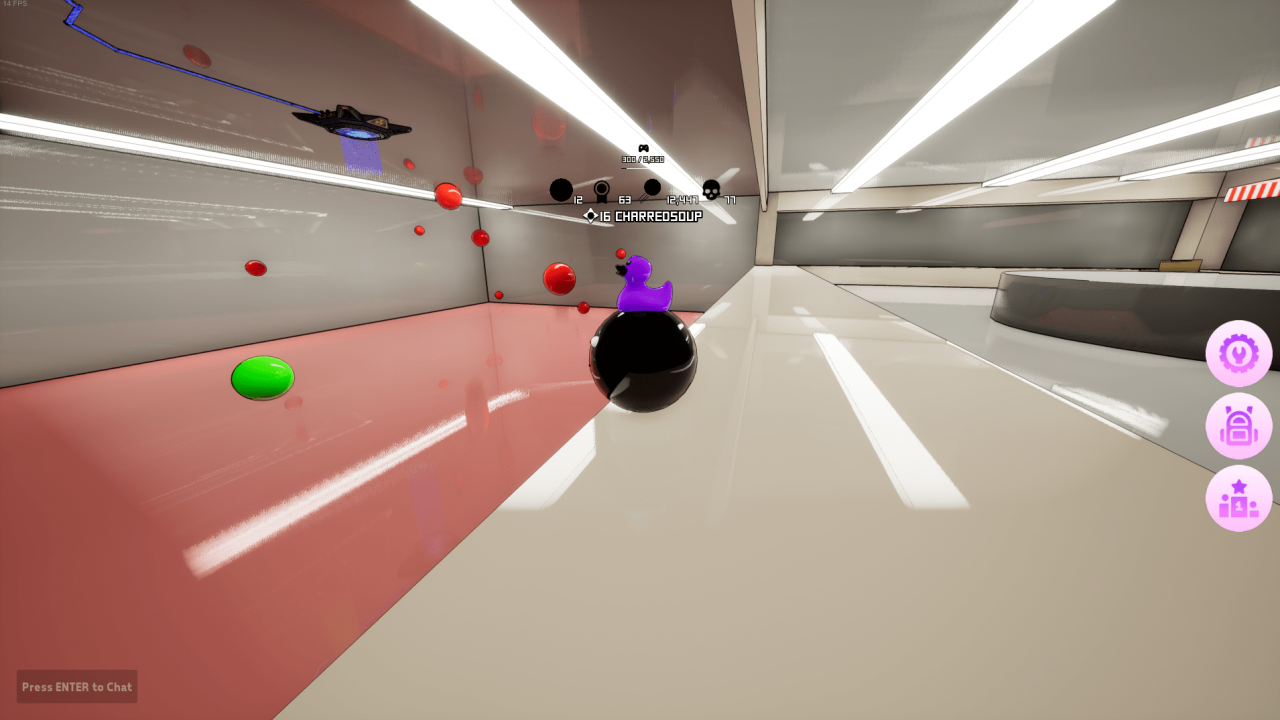
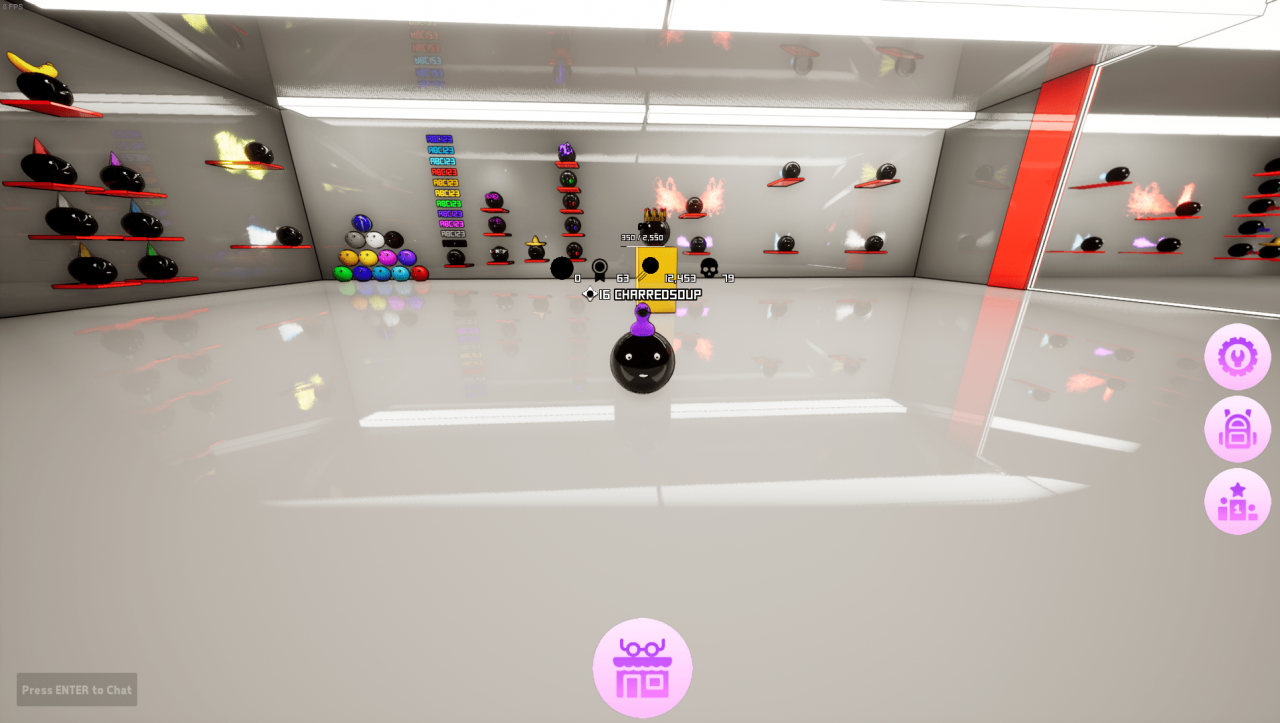
This is what I call the arena where the main stuff happens. Simply walk into the portal to the left of the spawn location to enter the cage.
You must keep jumping and collect green orbs to increase your score. Landing on the floor or touching a red orb will kill you and put you back in spawn. If you need a break from jumping to avoid certain death, whether to afk or to use the chat feature, you can jump to and land on the edge in front of the mirror.
In-Game Menus
The third button is the settings menu, which requires you to click the big button with pictures of sliders to access the actual game settings. The button below that allows you to exit the server and enter the main menu. In the top-left of this menu, you have a red button that brings you back to the game and a button with a controller & question mark that shows a visual of the controls for keyboard and controller users.

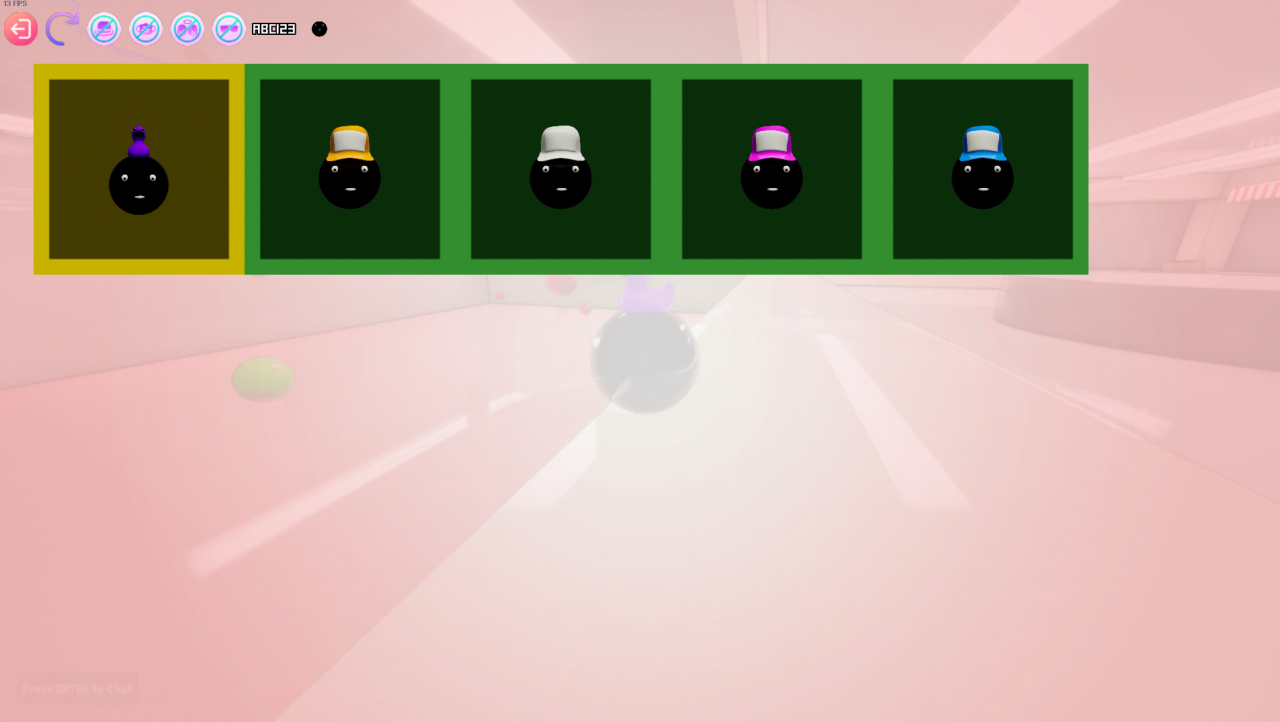
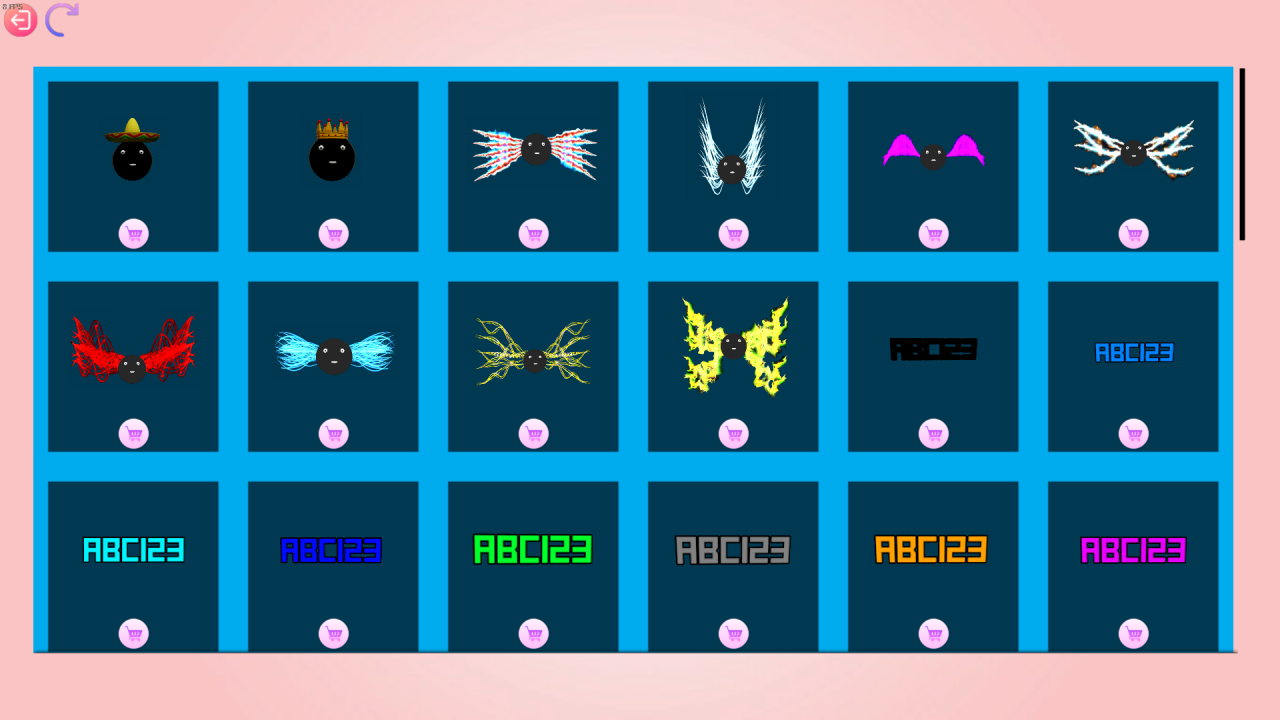
The button with an icon of a backpack opens up your inventory, which allows you to put on cosmetics. Simply left-click to equip. The purple arrow refreshes the page, in case you get a new item. The buttons with the blue crosses unequips hats, masks, wings, and glasses respectfully. The ‘ABC123’ button allows you to change your name color and the ball icon next to it allows you to change your character’s color.
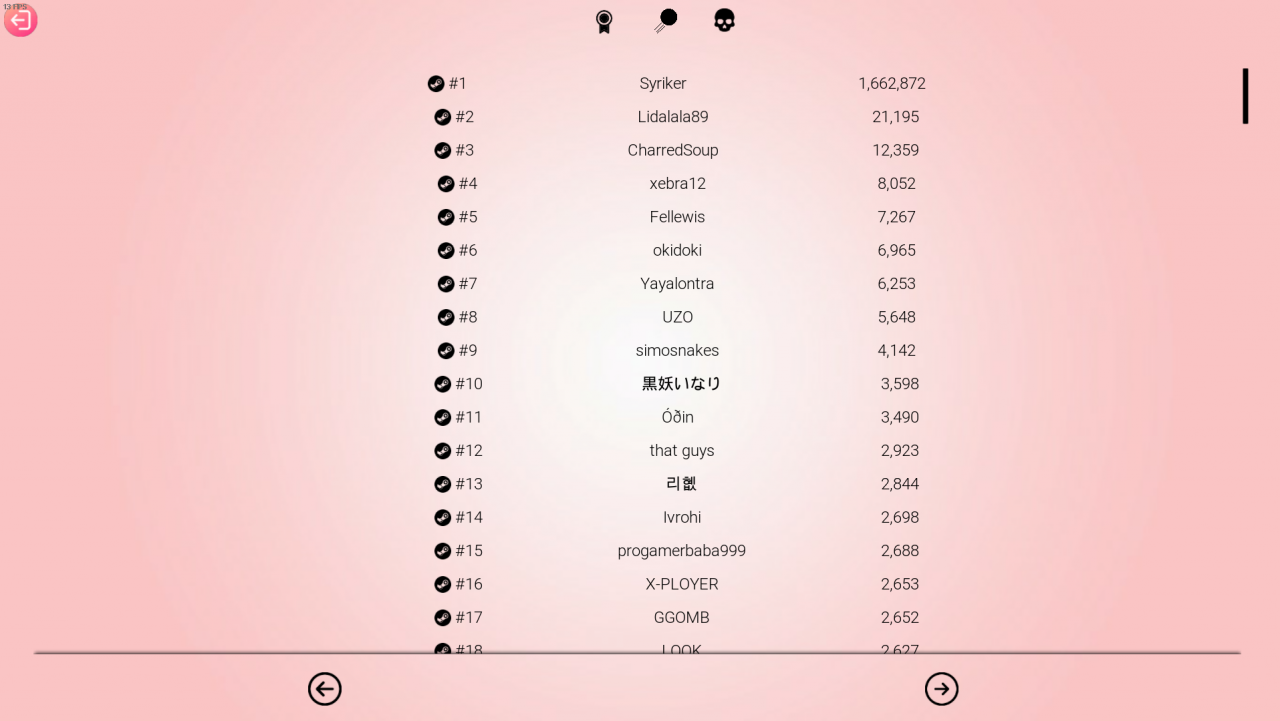
The final menu is the leader-boards. Clicking the icons at the top (badge, ball, and skull), will show you the players with the most score, jumps, and deaths respectfully. Menu shown is jumps.
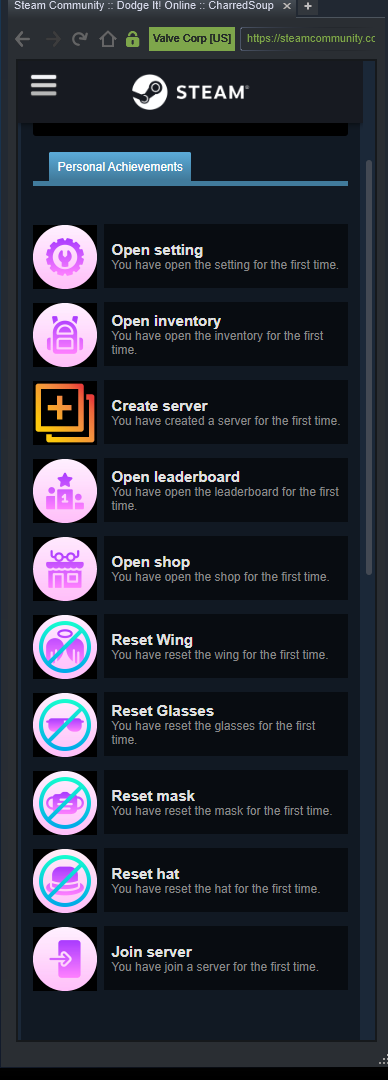
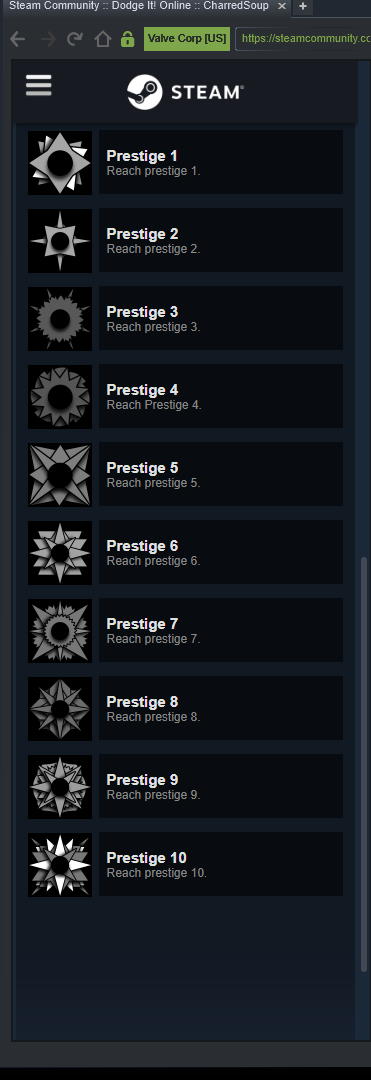
Achievements
The other ten achievements are for reaching prestige levels. Prestige levels are reached every 51 levels. Have fun with these.
Cosmetics
For premium cosmetics like wings or a crown, you can go to the shop behind spawn. Once you enter the shop, a new menu button will appear at the bottom-center of the screen. Reveal your cursor and click the new menu button to open up the shop. Clicking the shopping cart button below any item will open a steam prompt to checkout and confirm your purchase.
For free items, there IS steam trading, but these are the two main methods:
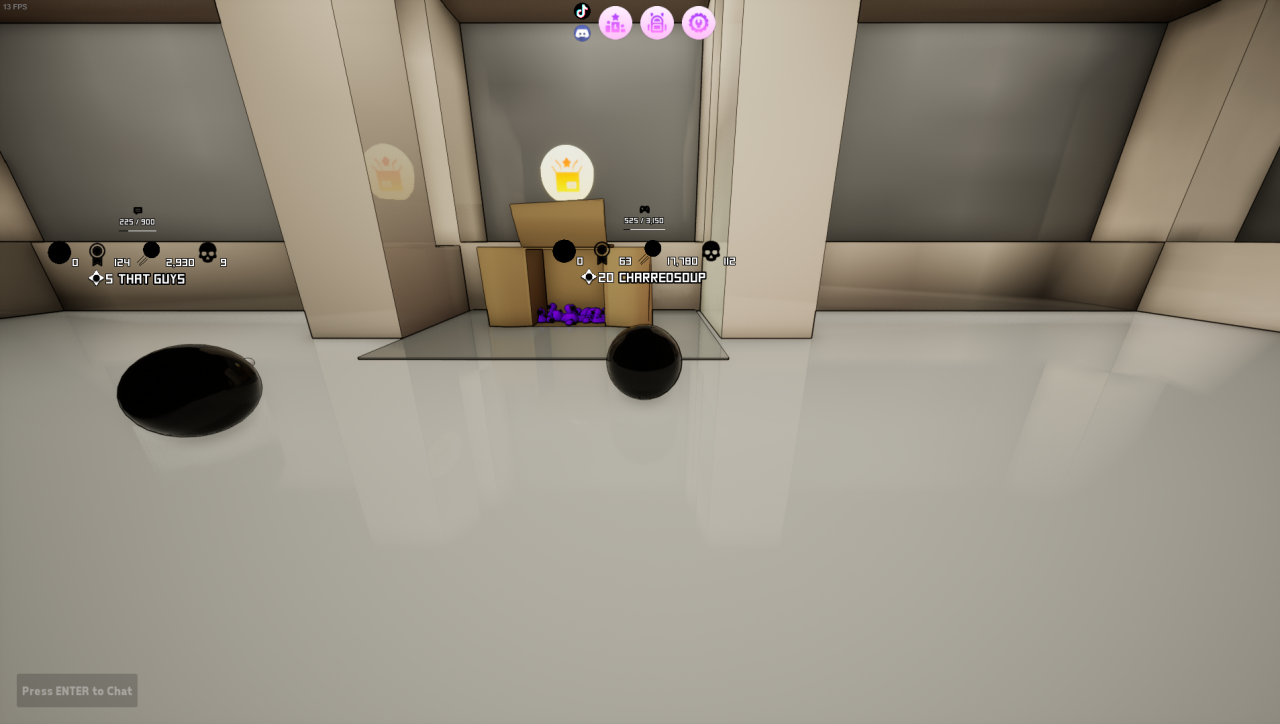
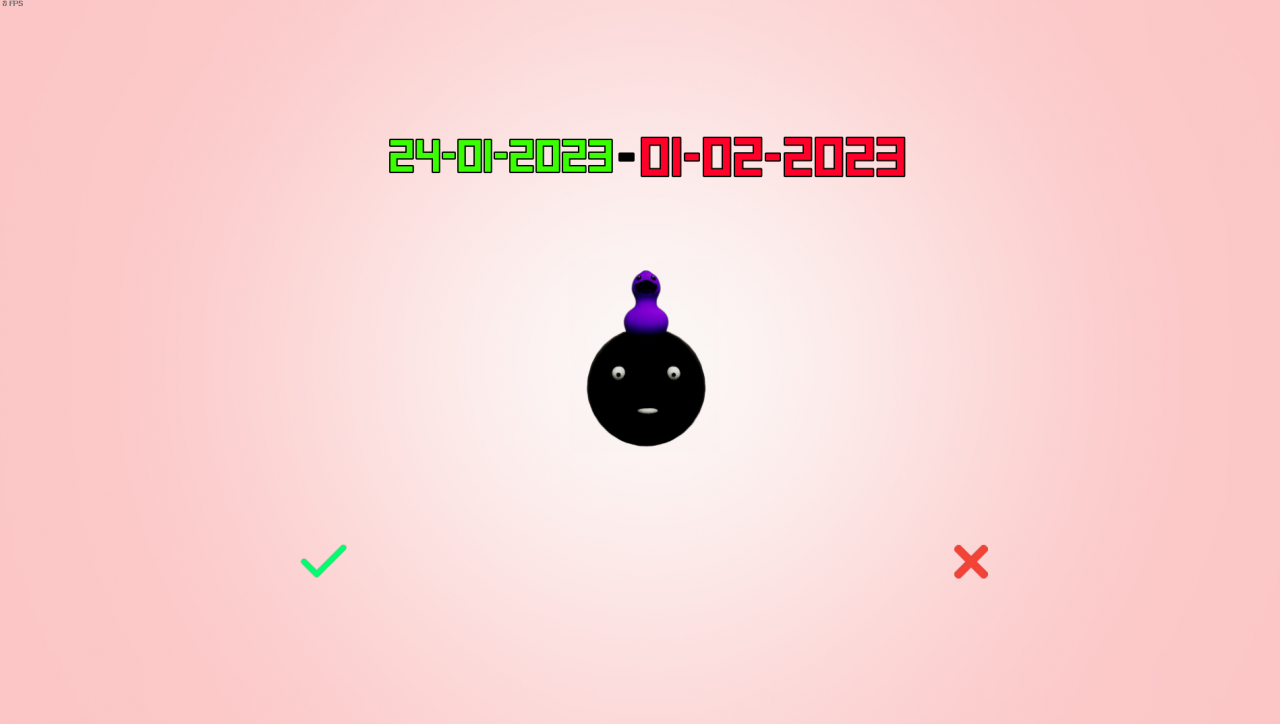
1. Every month, this cardboard box to the right of spawn will have a new free item that can ONLY be collected that month and will never return. Just walk up to it, and click the check-mark on the menu that shows up. These items can only be collected once to prevent one person from flooding the marketplace with ducks.
2. For every 30 minutes of playtime, you will get a randomly-colored trucker hat (tradeable, marketable. But why would you, they’re so stylish!) You can only get two free trucker hats per day, and you must die in the ball cage to get your hat. Meaning you can get an hours worth of trucker lice per day, and all you gotta do is die twice.