A guide how to best implement custom textures into your game. From small changes like added writing to complete texture replacements.
Basics
I am not a native speaker, so please don’t mind occasional grammar or spelling errors.
Many puzzle or decoration ideas will require you to add custom textures to your room.
There are two methods that are useful for different projects:
1. The Overlay Method [Small/easy and quick changes]
2. The Replacement Method [Larger changes and changes that require high resolution]
Before we start, a few important infos to handle some common bugs and problems:
– The game will accept different sizes of textures. But having a 1024×1024 pixel ones is enough detail for all but the very largest items.
– For smaller items use 512×512 to save data. For solid colours even a single pixel will do.
– Minimizing the file size of your textures this way is important to prevent lags and glitches for your
players.
– The game uses .png files. If you have any trouble with some texture not showing up, make your .png a .jpg. This solved the problem for many people.
– You can easily accidentally overwrite your new textures. So be careful and keep copies of all custom textures in a separate project folder for backup.
– The game will delete any texture in your room folder that is not used at the time you save your room!
-Not all items have the same attributes regarding texture, colours and so on. Some papers just have one side, others two. Some items can handle transparent texture replaces, others can not. So experiment a bit!
Overlay Method
It preserves the original object texture and overlays it with a transparent layer, that is saved in your room folder. This layer can be used to quickly add small details to existing textures or transform your scribbled on hints into proper typed letters. It is less useful for large objects or objects with a heavily structured surface.
How to do it:
– Click the item you want to overlay.
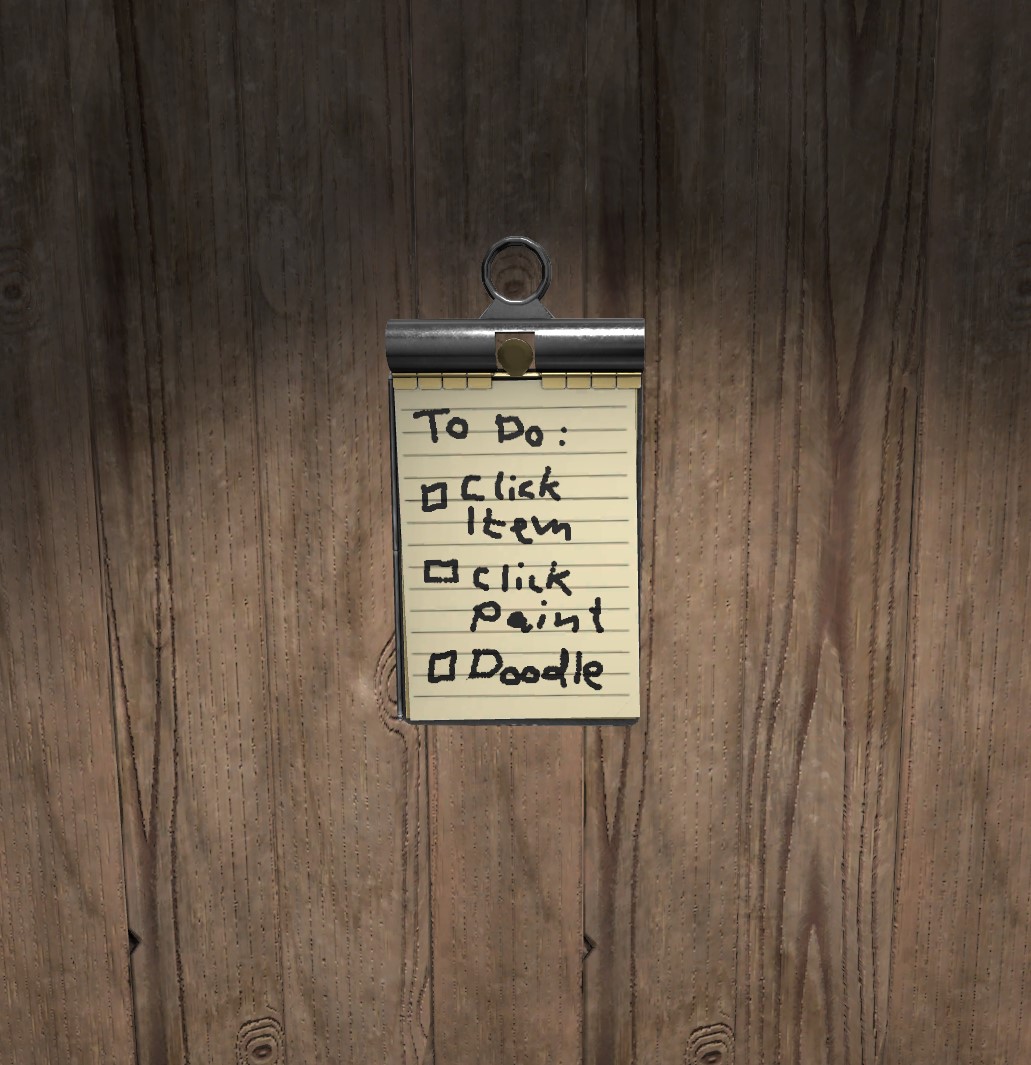
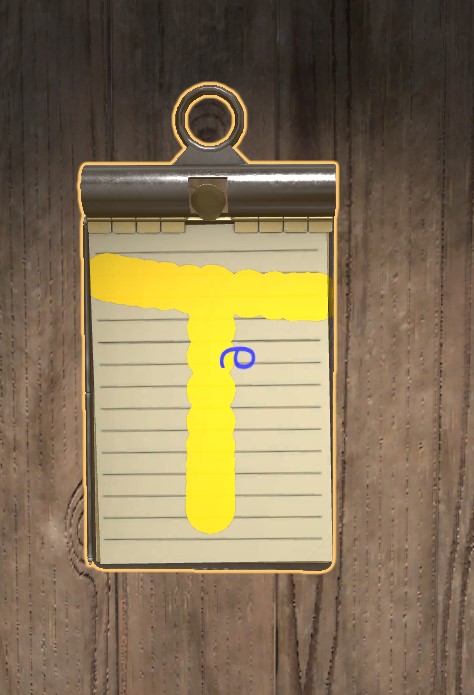
– Click “Paint” and use the in-built paint function to draw a rough sketch of what you want. You will use this sketchs as a guide later on. So pay attention to correct placement most of all!
– Save the doodle, then save&exit the editor. This is important because the improved overlay textures we are going to make will not show until you restart the editor. Also this way you prevent the game overwriting your improved overlay with the old doodle again.
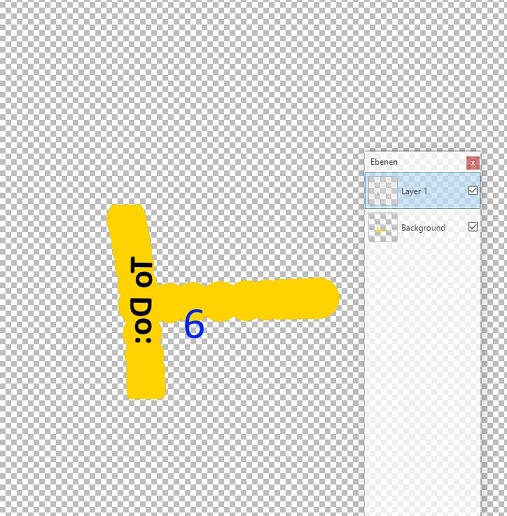
– Open your room folder and locate the .png file with the long and complex random letter name that shows your overlay. Open it in an editor that can handle TRANSPARENCY. (See respective section for advice on programs to use)
– Sometimes there are multiple files, which can be confusing. This happens because items have more than one surface and you will write on ALL the surfaces at once, that are behind your paintbrush. With most items that is easily sorted, but I took the clipboard as an extreme example.
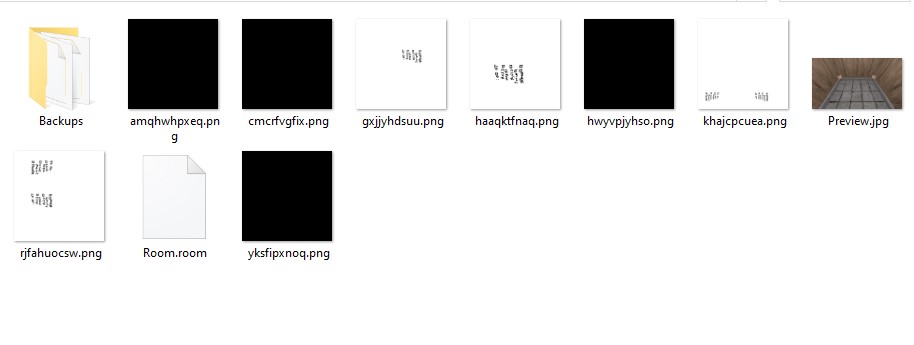
In such a case just add a number or whatever on each, but always a different one for each. save them all and restart your room in the editor. That way you will see which is linked to the surface you are looking for.
Here I did this with a yellow T and added blue numbers to each of the Ts in each of the 4 files that the game created of this overlay. Again: Most simple items will just give you one file.
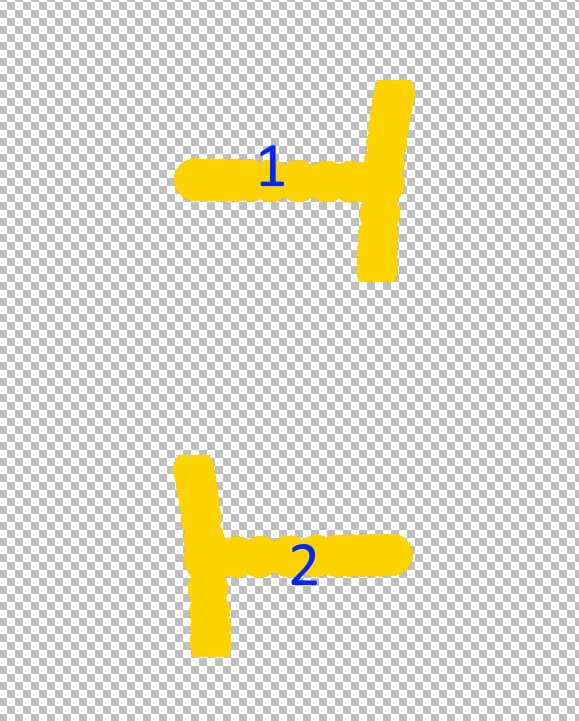
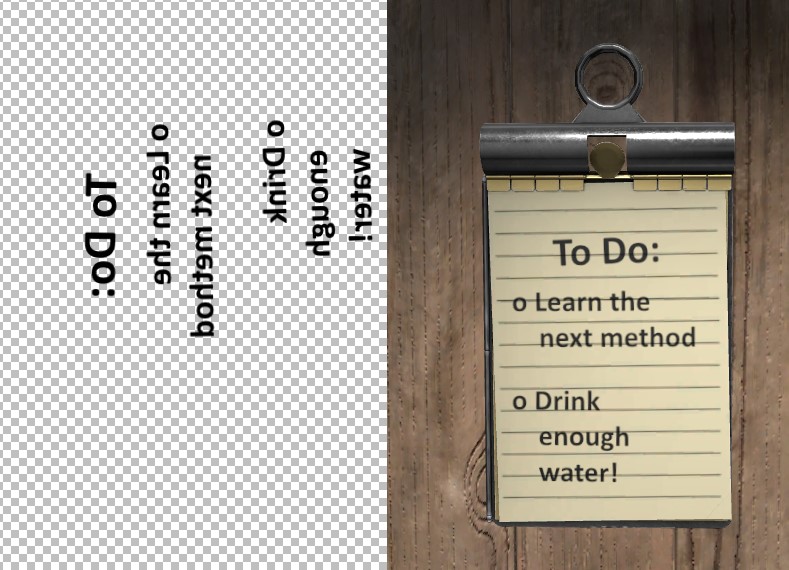
When booting things up again in the editor, the new textures will be there. In this example you will see why it is important to not use lines or dots for marking, but actual letters or numbers:
Some files additionally MIRROR the text on the surface you are trying to write on. You wil not notice that if you don’t do a propper doodle or propper test numbers, you might end up creating a mirror checklist that requires additional work to fix. Or which you notice too late.
In our case we need to mirror and turn our new text in the graphics program. Work with a layer, so you can always shuffle your new text around over the old doodle without losing the guidance from it where your writing should begin and end.
Put all your new text on there, save the file under its original name and as a .png file.
Reenter the Editor. Done!
Replacement Method
As an example we will change the texture of a painting to show something different.
Either start by downloading the in-game textures from the Pine Studio Discord (they are pinned in the room-editor channel) or by taking a screenshot of the original texture preview. I will do the latter for this example, because I want to replace the whole visible surface instead of just details. So no need to search for the original textures. If you want to retexture books e.g. you will need the original texture to save yourself lots of unnecessary extra work.
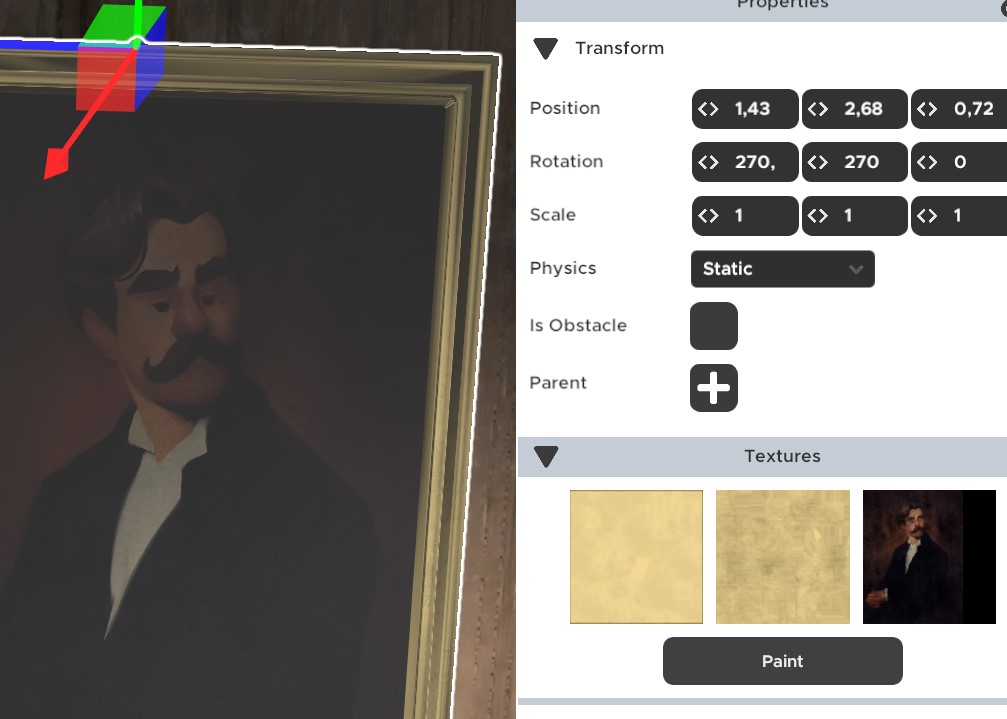
Click the painting item and select “textures”. Screenshot the texture thumbnail of the texture you want to change. Open a new file in a graphics program (1024×1024) and size up the previw thumbnail to fill the whole program canvas.
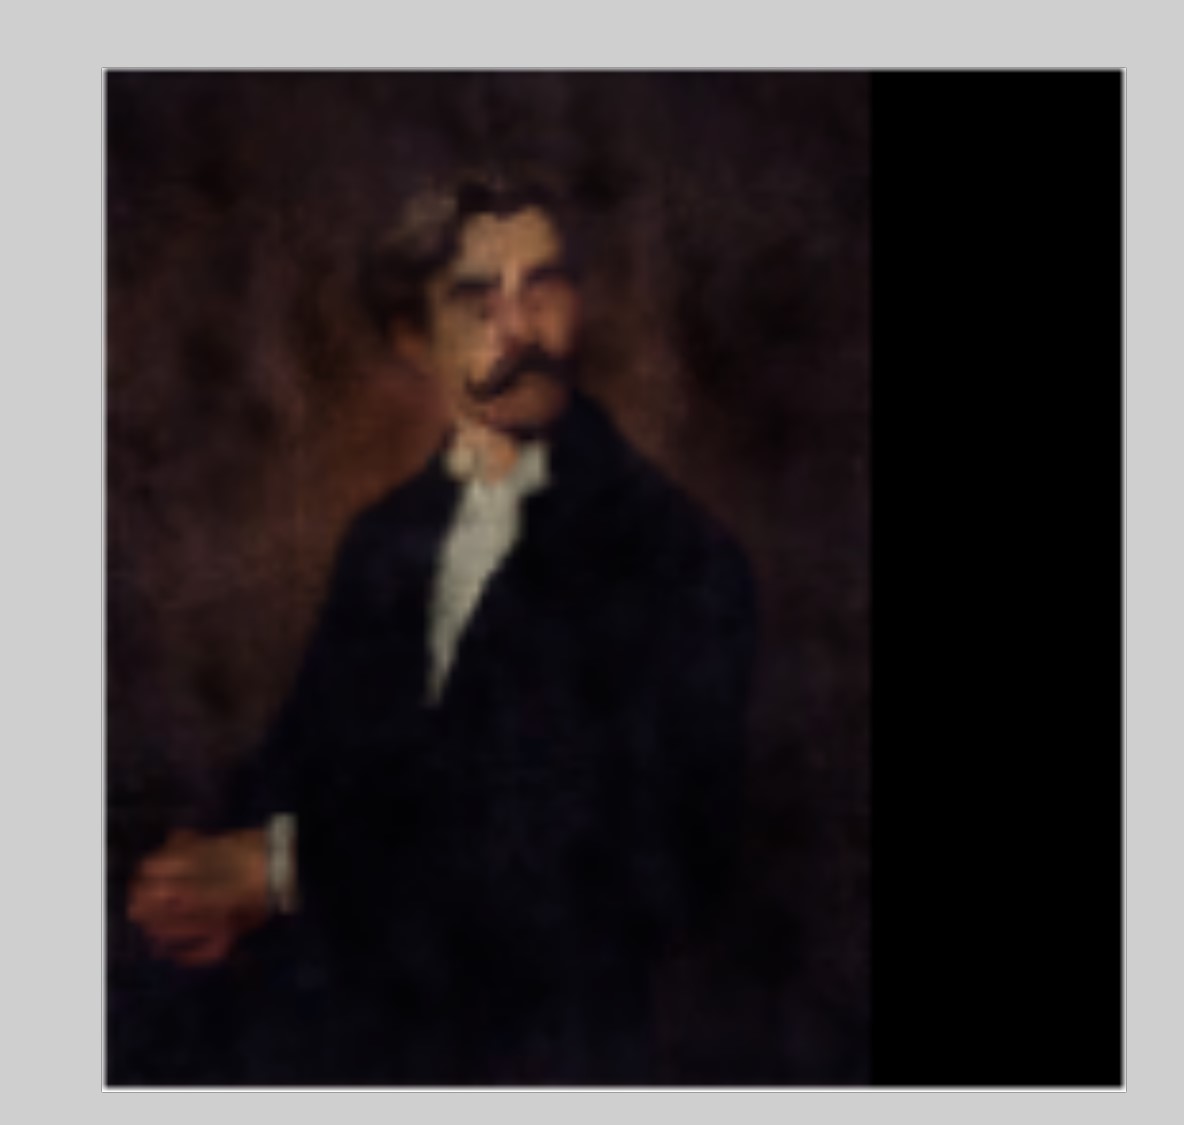
This gives you the information as to where you will need to put your new image. See the black line on the side? That will not be displayed. If you enlarge your picture to fill the whole texture, this part will be cut off!
Now we add the image we want to replace the man with.
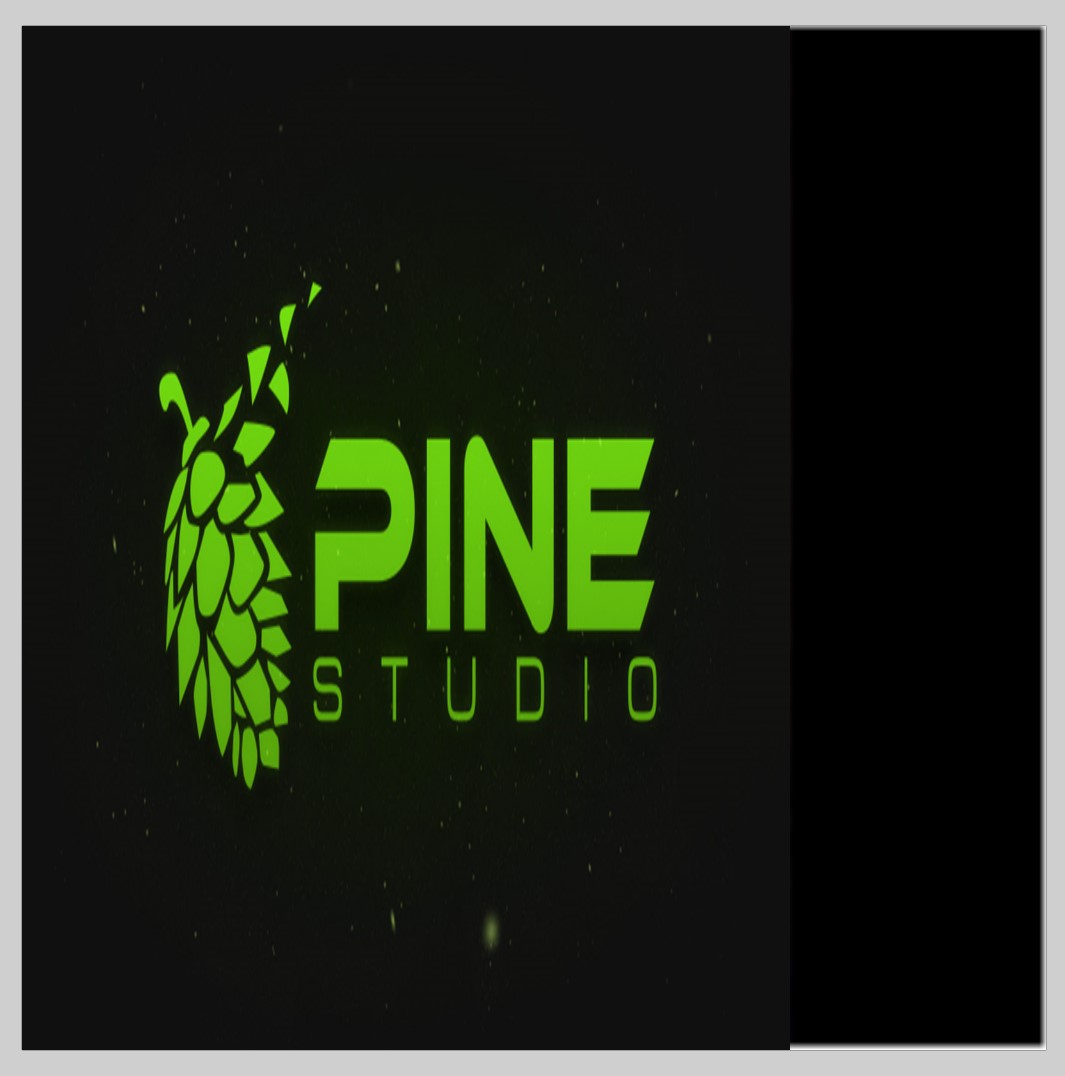
The new image has a different side ratio than the man. But that is not a problem. In the Editor we will later pull the painting wider to have the correct side ratio there. Here we just stretch it to fit into the assigned space. Save the file as a .png or .jpg in your room folder.
In the Editor you then select the texture you want to replace and choose your new texture from the folder.
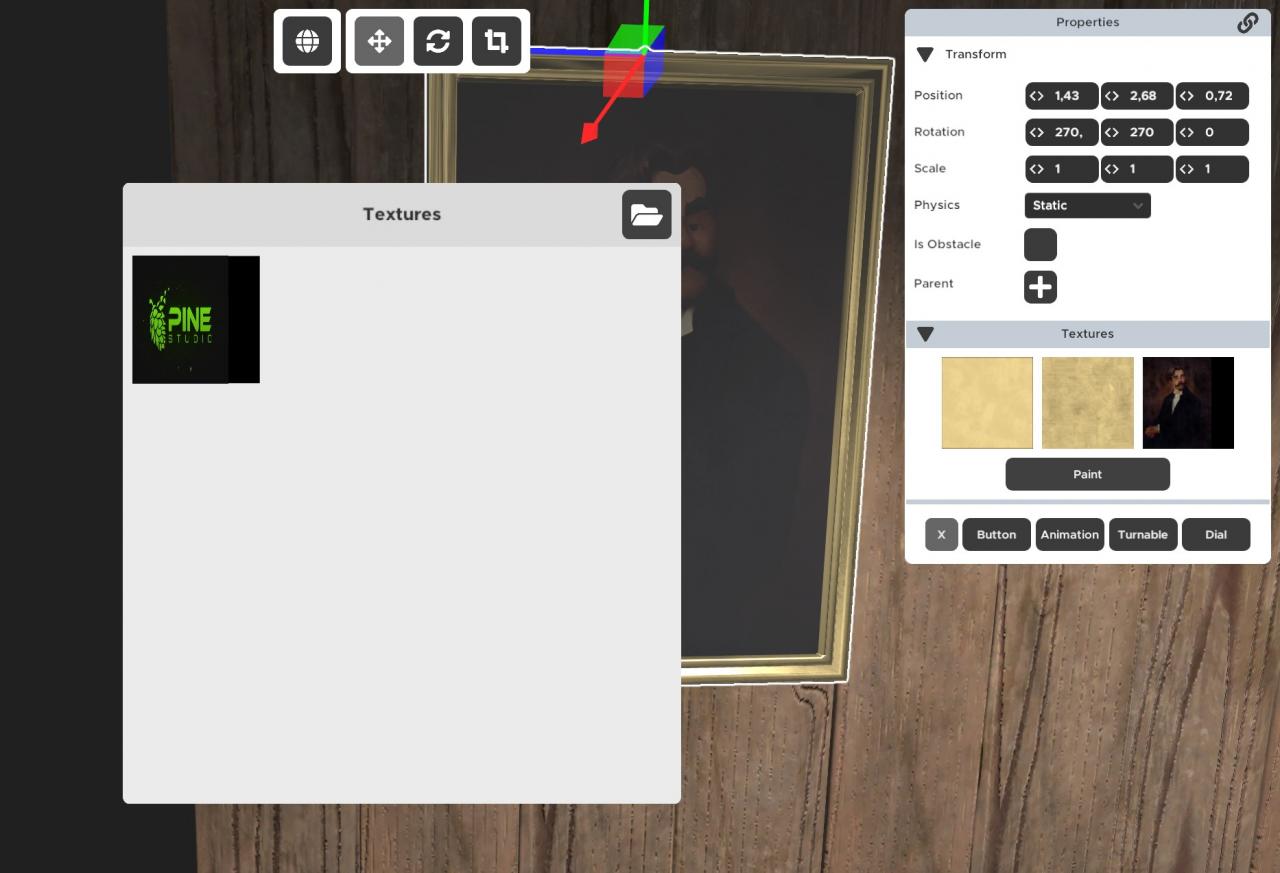
The change will take place immediately.
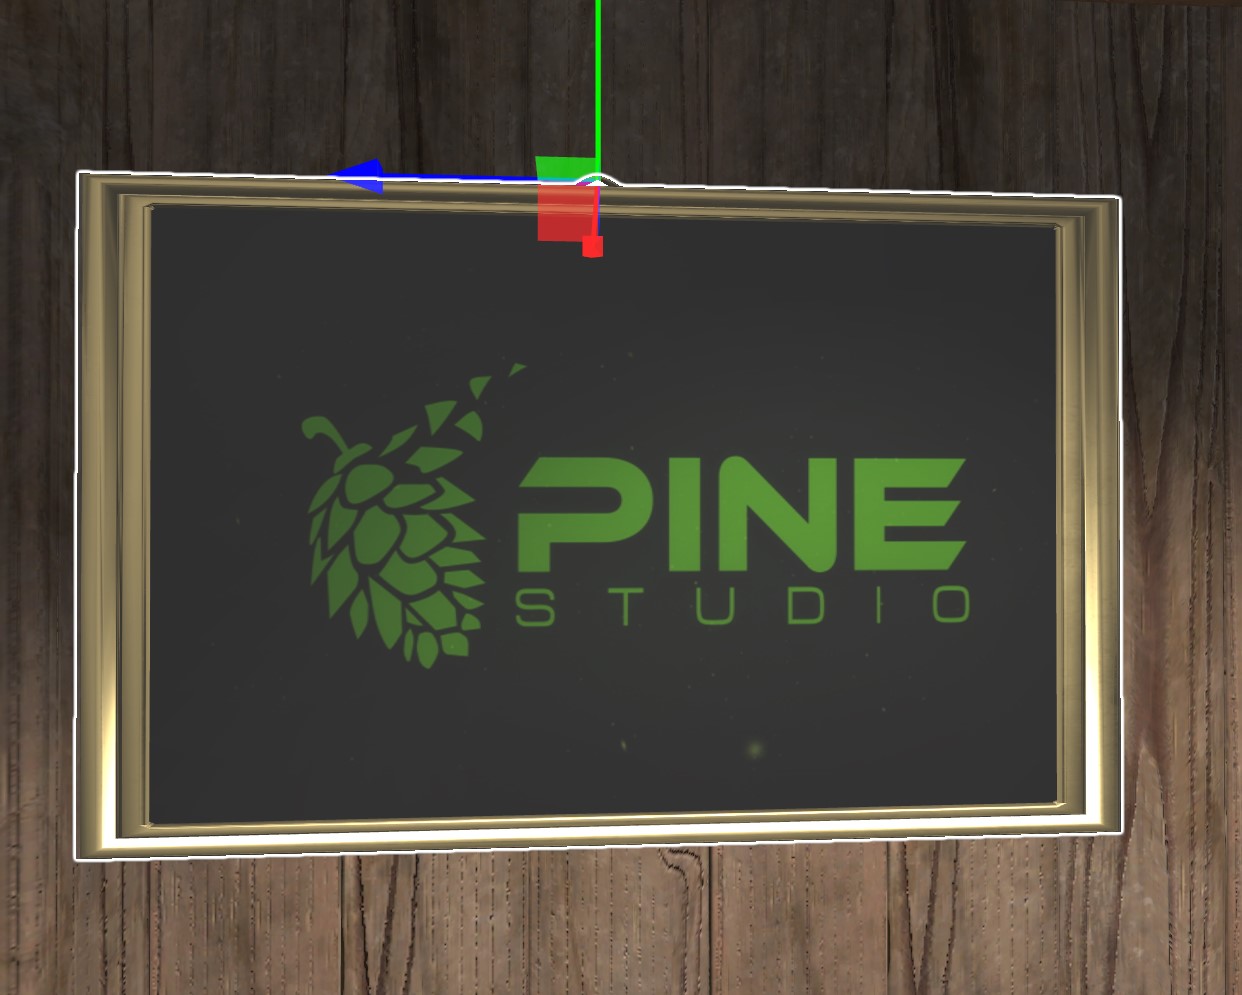
If you still want to edit the image a bit or adjust the texture, you do not need to close the editor. Just overwrite the file with the tweaked version. But make sure to instantly remove the texture replacement from the painting and re-select the new version of your texture replacement. This way you can not only see the change instantly, but also prevent the editor from overwriting your improved file with the old again if you save your room.
Programs
I use Paint for simple adjustments with e.g. paintings. I do not need to work with transparency there nor with layers. And this simple changes are more quickly done in paint than in other programs, because those will have multiple steps for the same process.
But for more complex changes or for working with overlay textures you will need a program that is capable of handling transparency. Paint can not do that.
If you posess and are able to handle Photoshop, go for that. If you either can handle Gimp or are eager to learn Gimp anyhow, go for Gimp.
But if you – like me – just want to get the job done with good results but without a complex program, go and try Paint.Net. It is a free downloadable program that has been around for ages. It is like a cross between Photoshop and Paint. Simple and intuitive to use, while it offers some of the basic Photoshop features.
Free Texture Resources
Here a list of useful websites:
https://freestocktextures.com/
https://ambientcg.com/
https://www.sharetextures.com/
https://polyhaven.com/
Thanks to obvious for his great guide on how to add custom textures, all credit to his effort. you can also read the original guide from Steam Community. enjoy the game.
Related Posts:
- Escape Simulator: Walkthrough for Edgar Allan Poe
- Escape Simulator: The Unusual Room Puzzle Guide
- Escape Simulator: All Tokens Guide in Steampunk DLC (32/32)