Overview
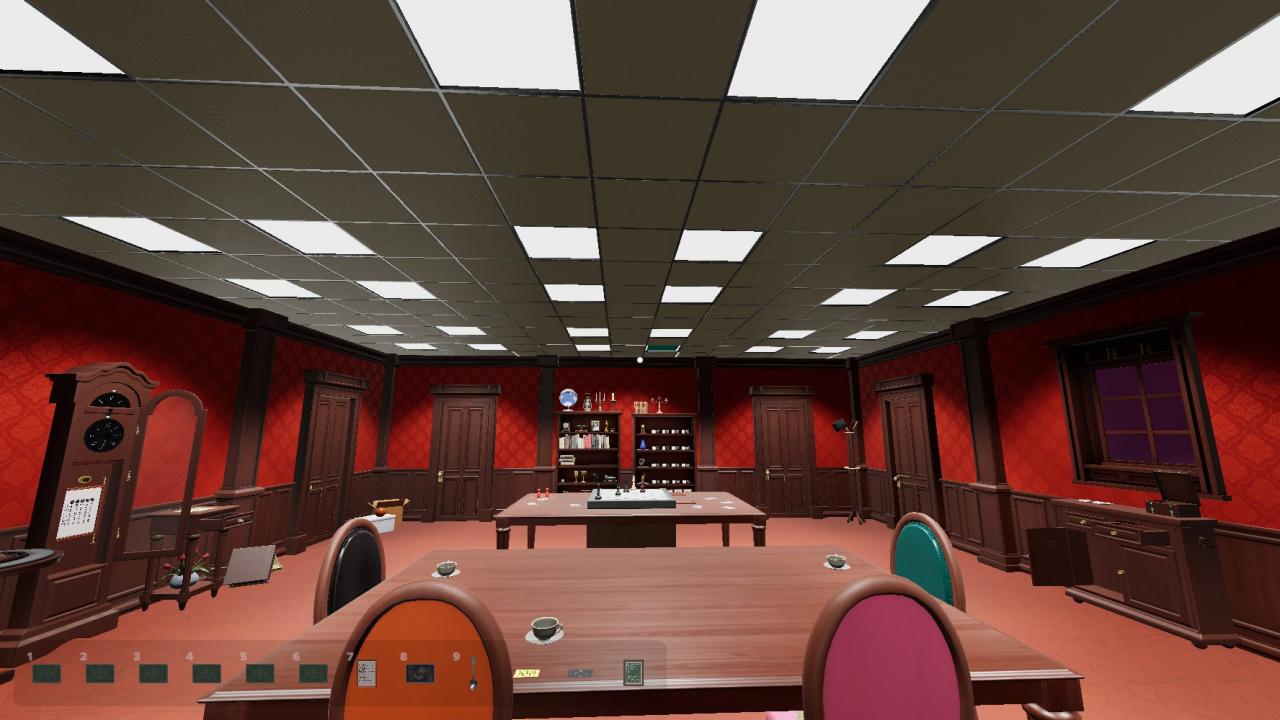
A custom Escape Room level by Kusane Hexaku.
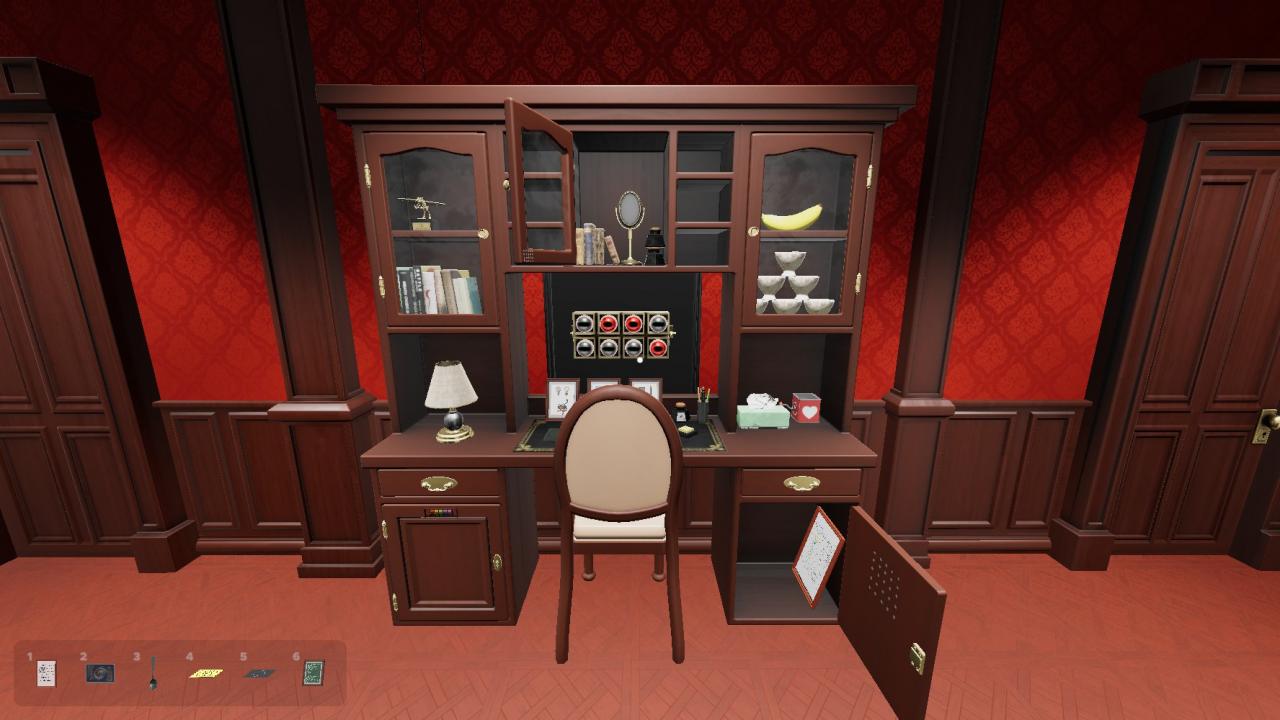
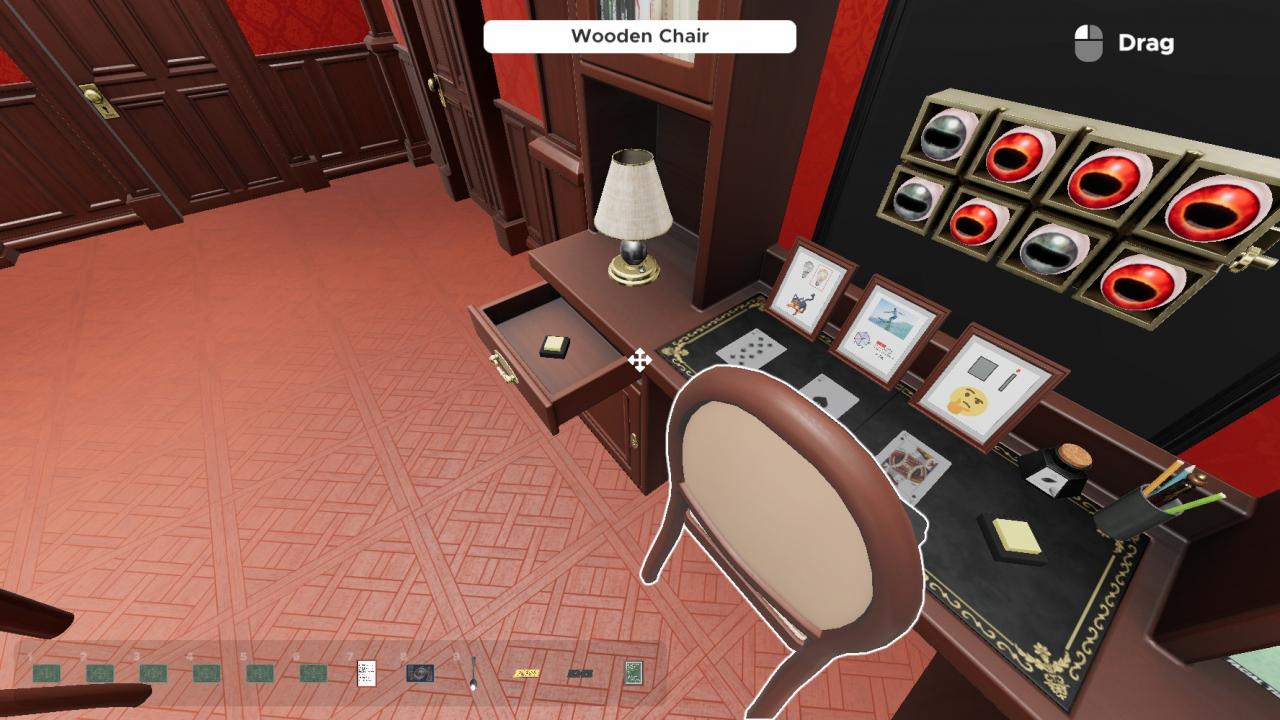
The main goal of the room is to activate all 8 of these eyes, by completing various objectives and puzzles around the room.
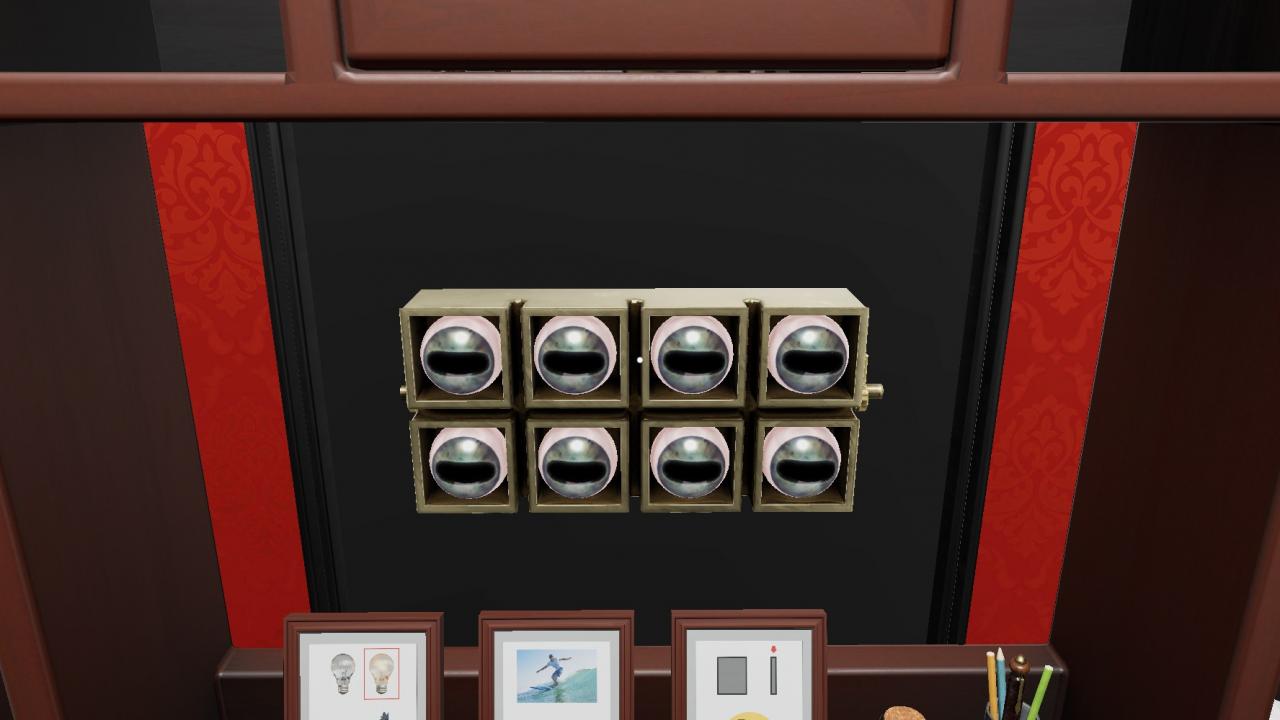
Once all eyes are activated, the exit will open up, and you can win the room.
The following sections will go into detail on the process of activating each eye.
Eye 2
Do not question why am I starting with Eye 2. It will make sense later.
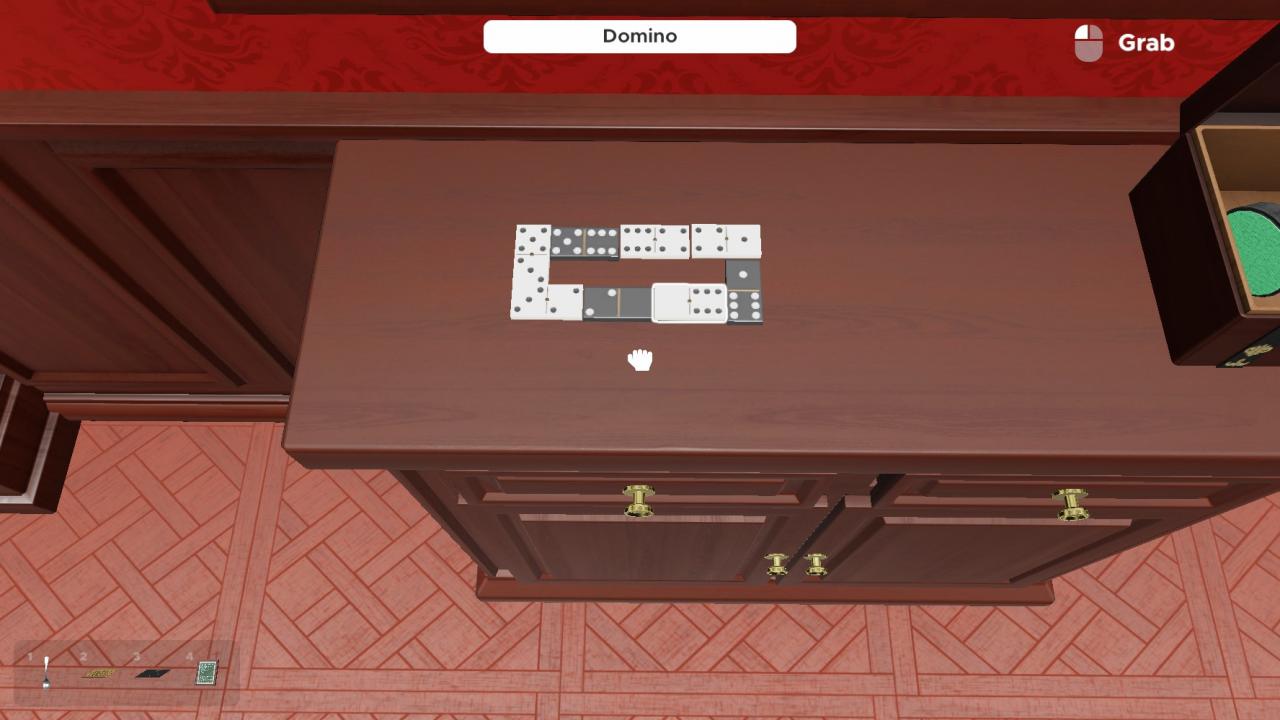
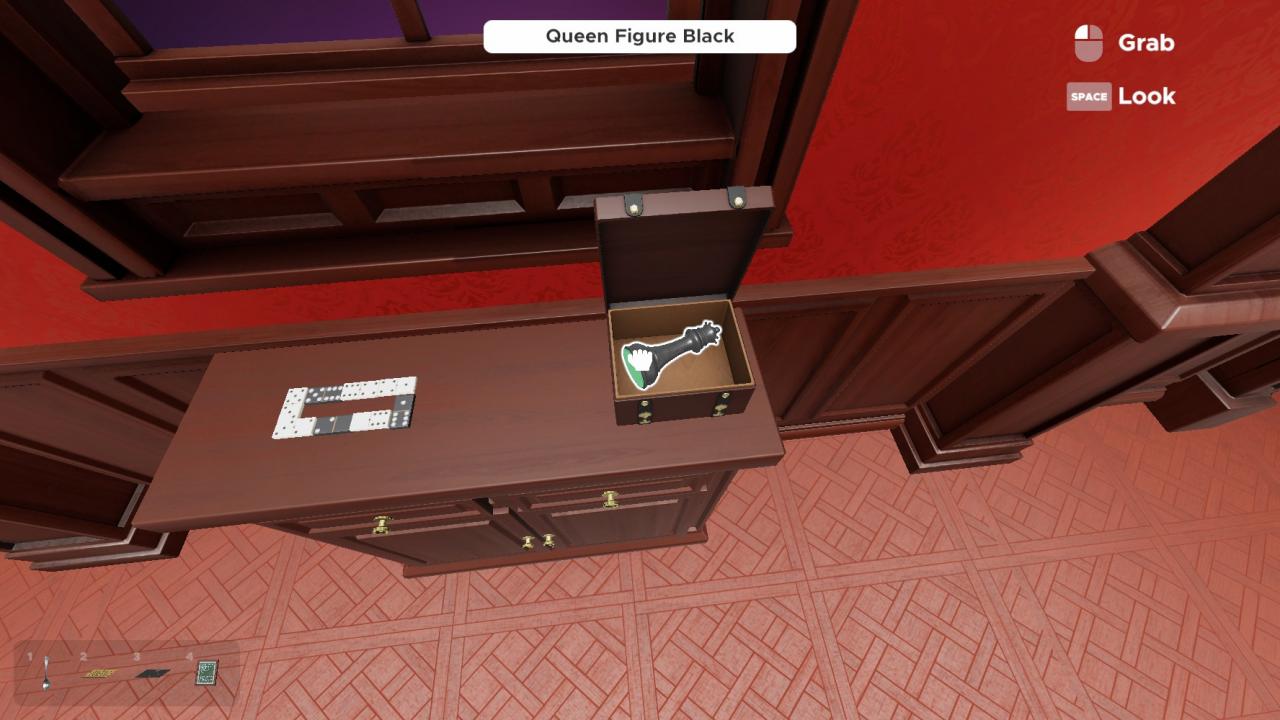
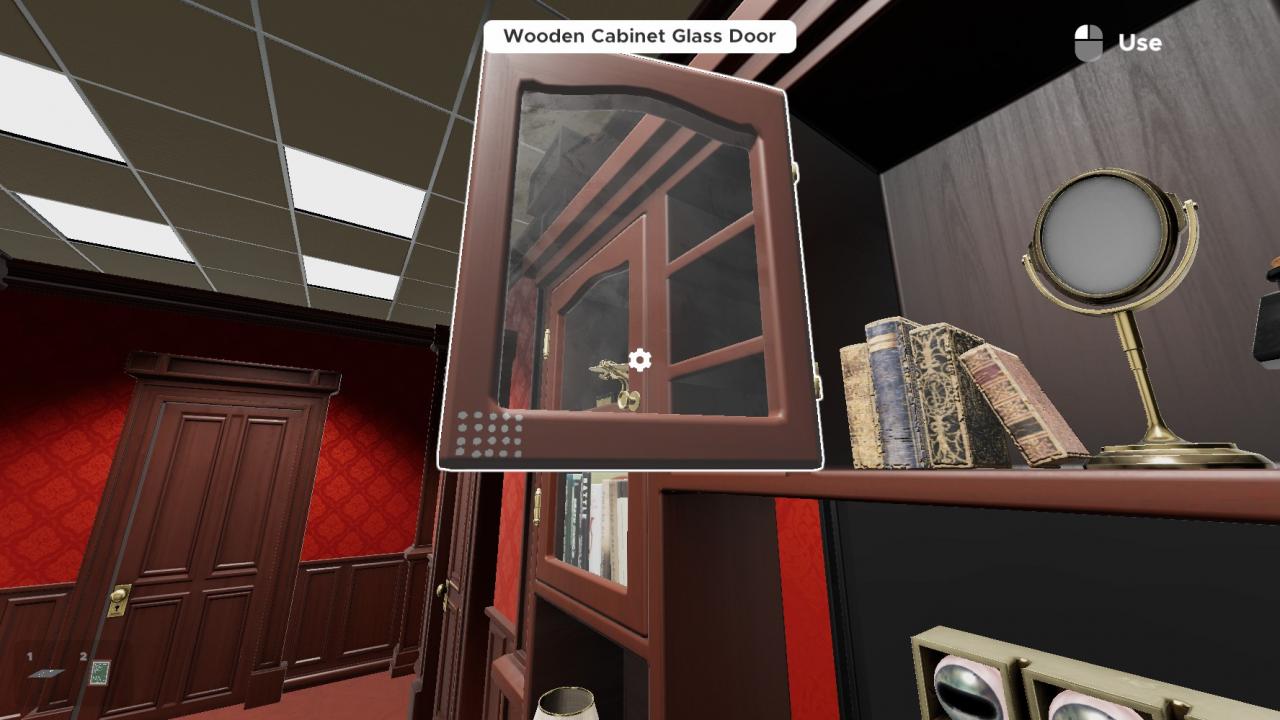
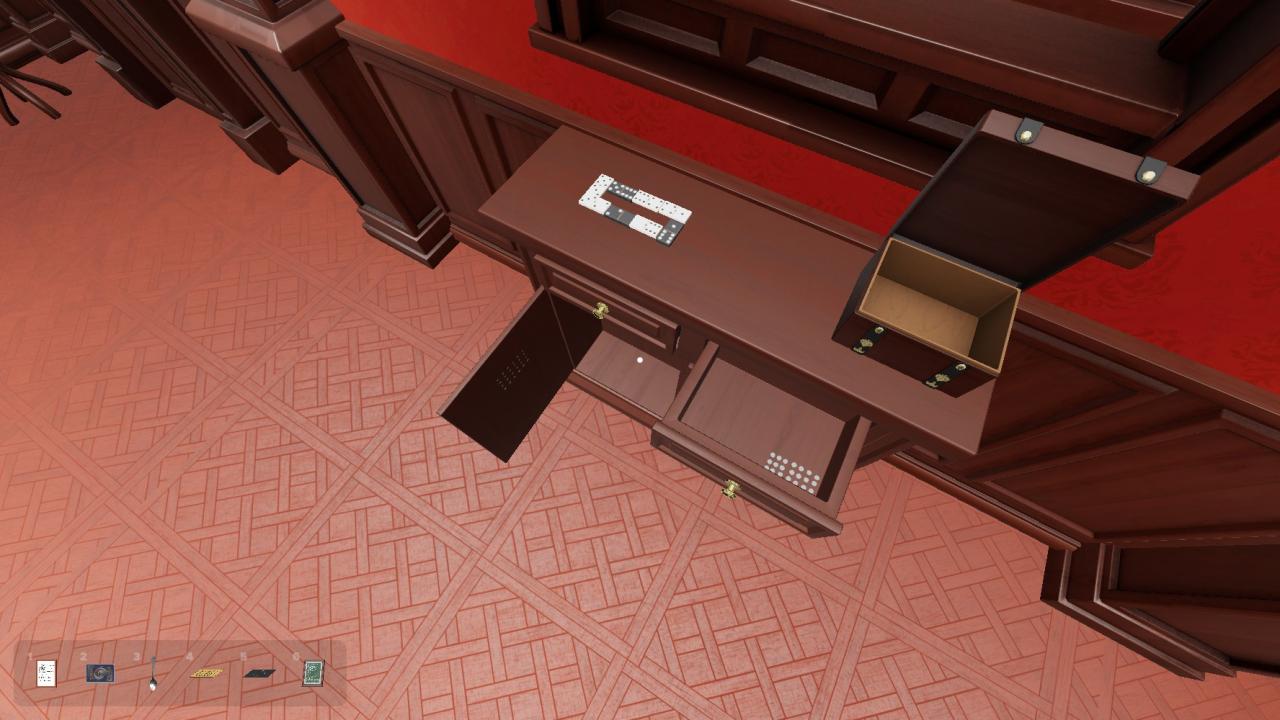
First, unlock this box at the window by completing this domino ring.
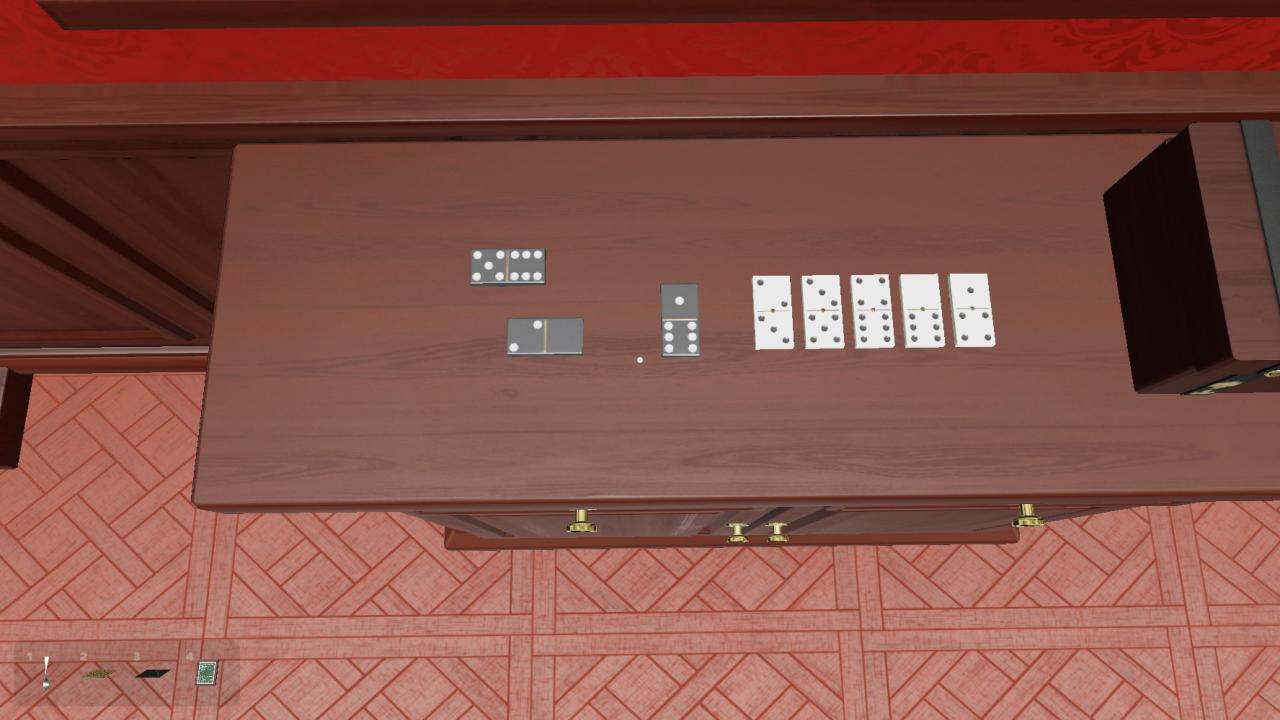
Each white pieces goes into the ring to complete the loop. Connect the dominoes by value like how you normally would.
Inside the box is a Black Chess Queen piece.
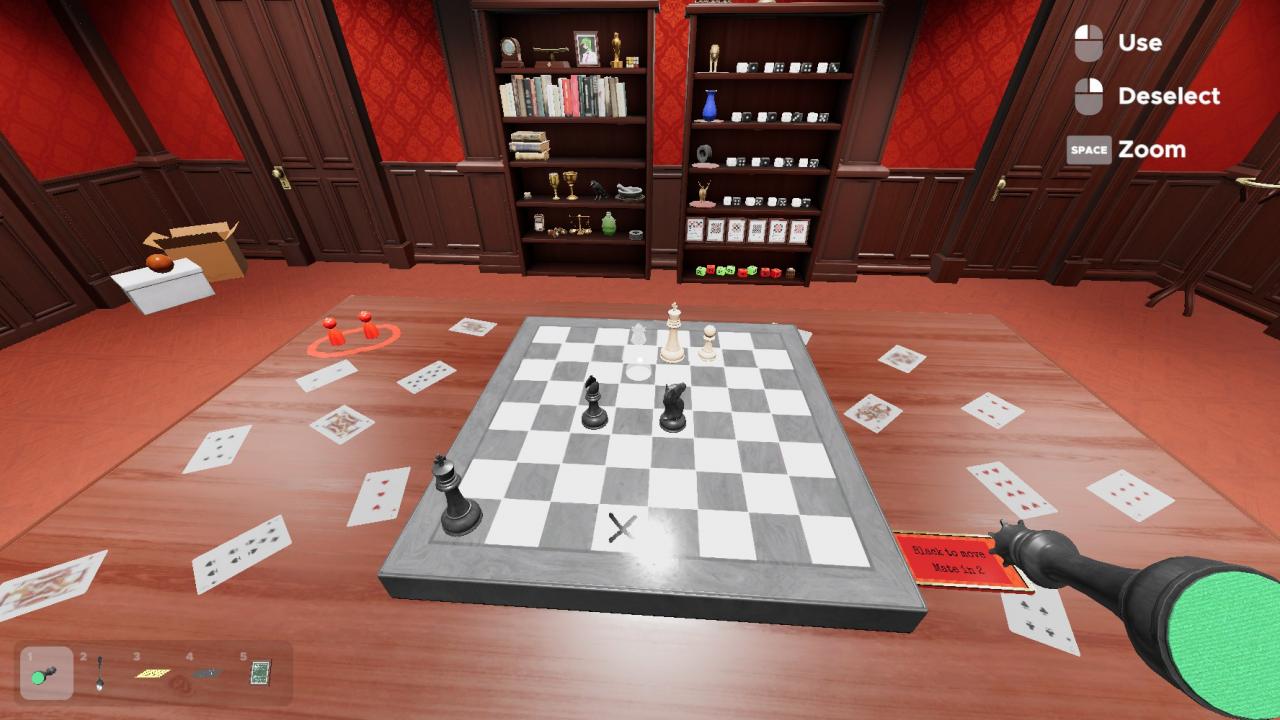
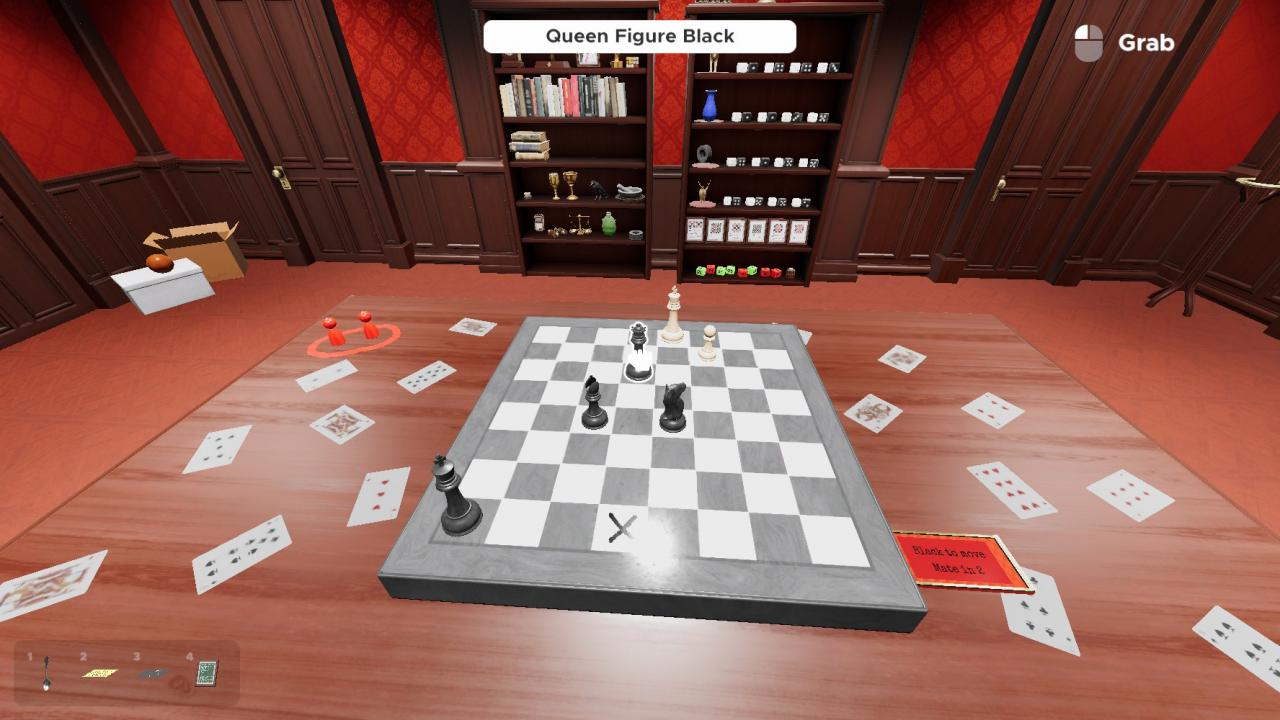
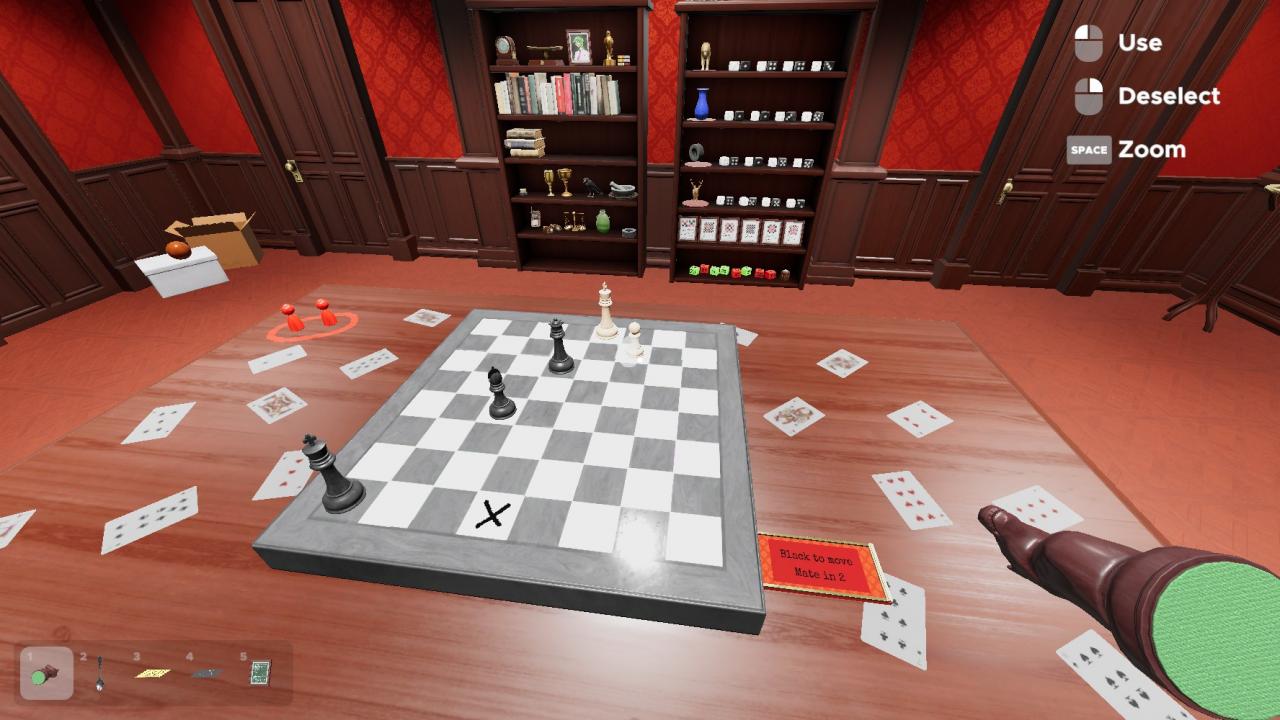
Take this Queen and place it on the X marked square on the chess board in the centre.
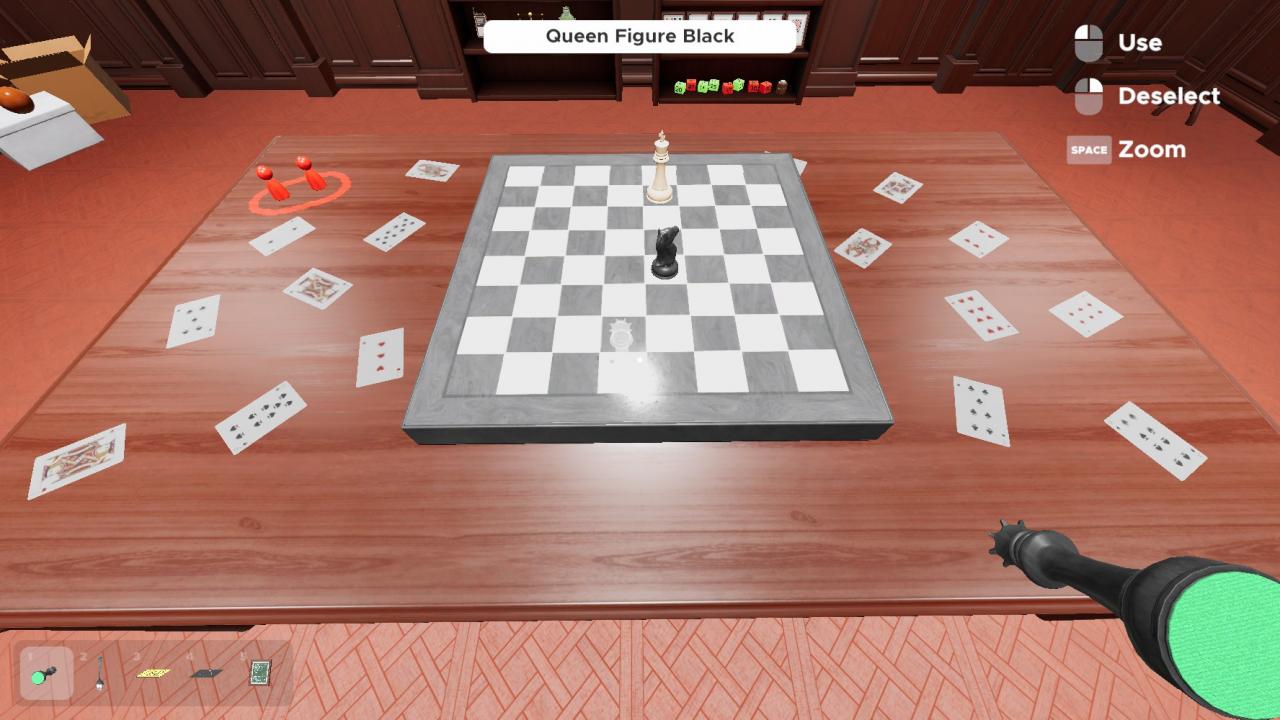
This will innitiate a Mate in 2 puzzle. However, do note that this puzzle is very easy and lenient for a Chess puzzle.
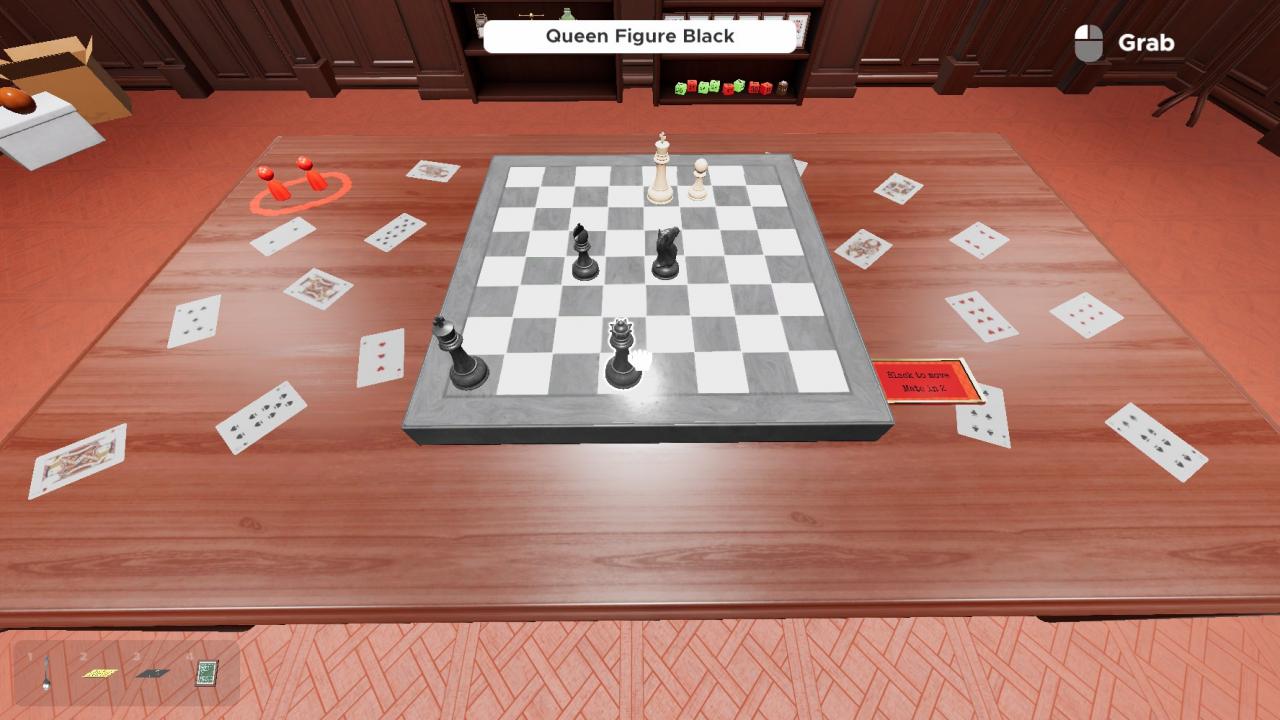
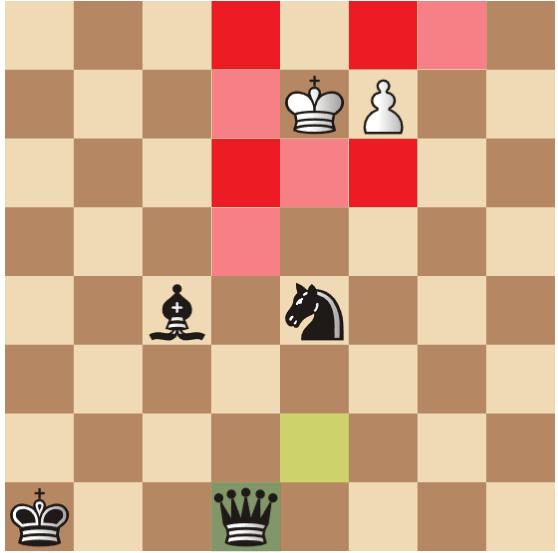
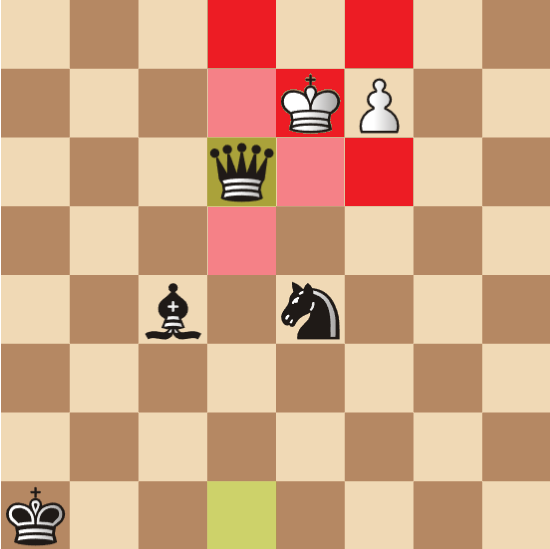
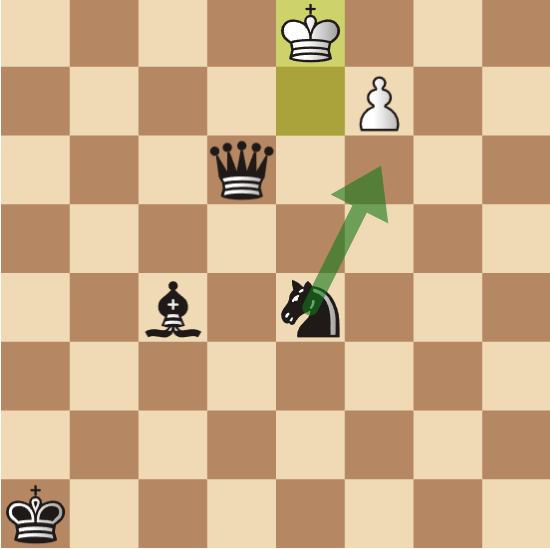
This is the board state of the puzzle.
Currently, the white King is actually already pretty trapped. It only has one safe space it can escape to.
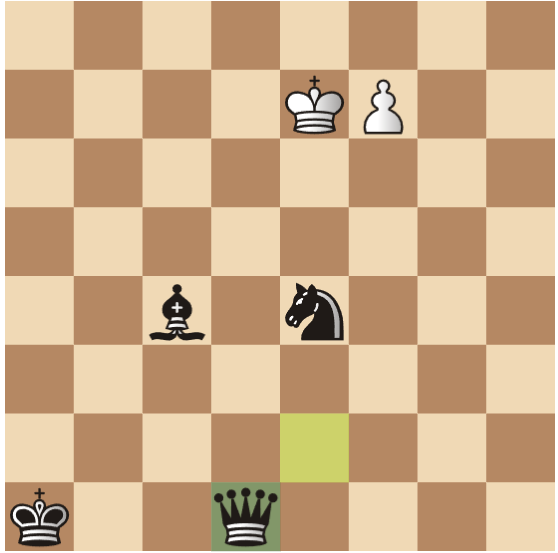
So, the first thing to do is to force the King to move into that space by Checking the King with our Queen.
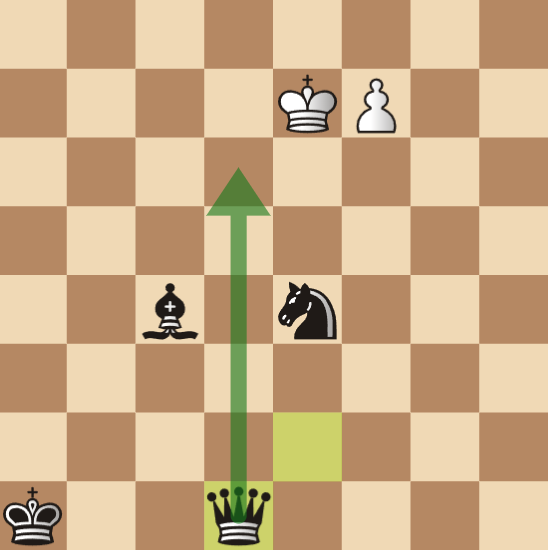
Now that the King is in Check, it is forced to move into the aforementioned square.
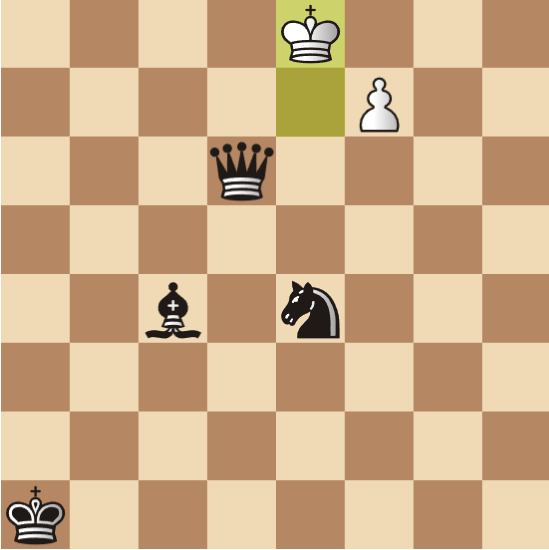
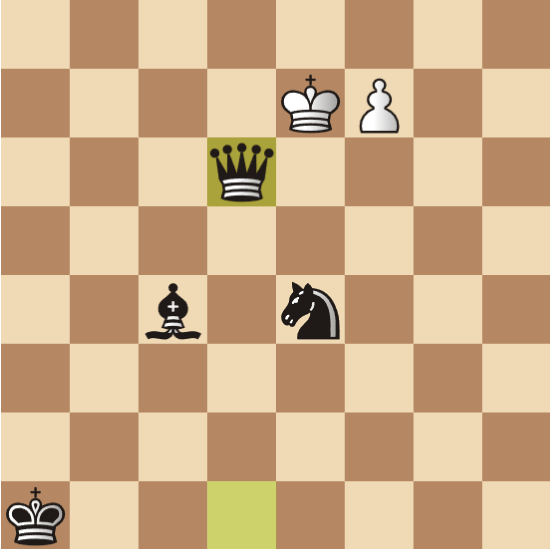
Still, the King is very much surrounded, so we can simply deliver another Check and it will be a Checkmate.
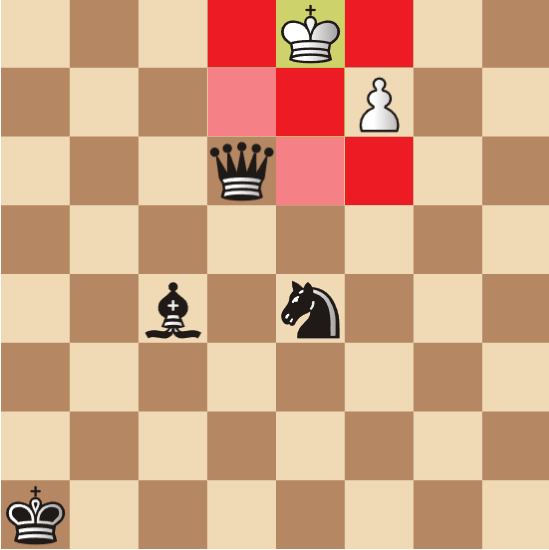
We can deliver a Check without breaking the line of sight of the Bishop and the Queen by moving the Knight here.
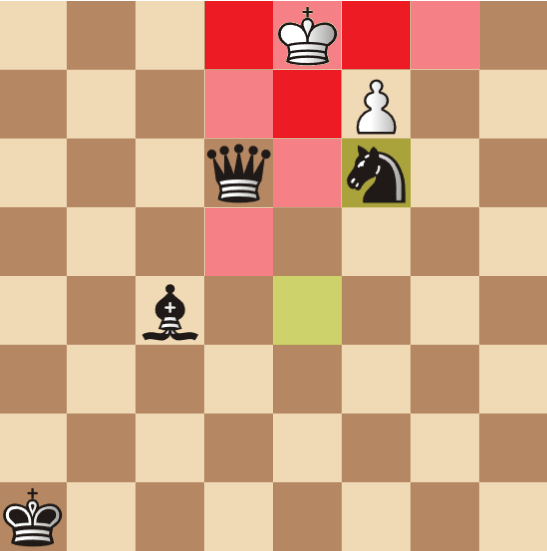
Now the King is under Check again, it cannot move to anywhere else, and the Pawn cannot save the Check, so it’s a Checkmate and the puzzle is solved.
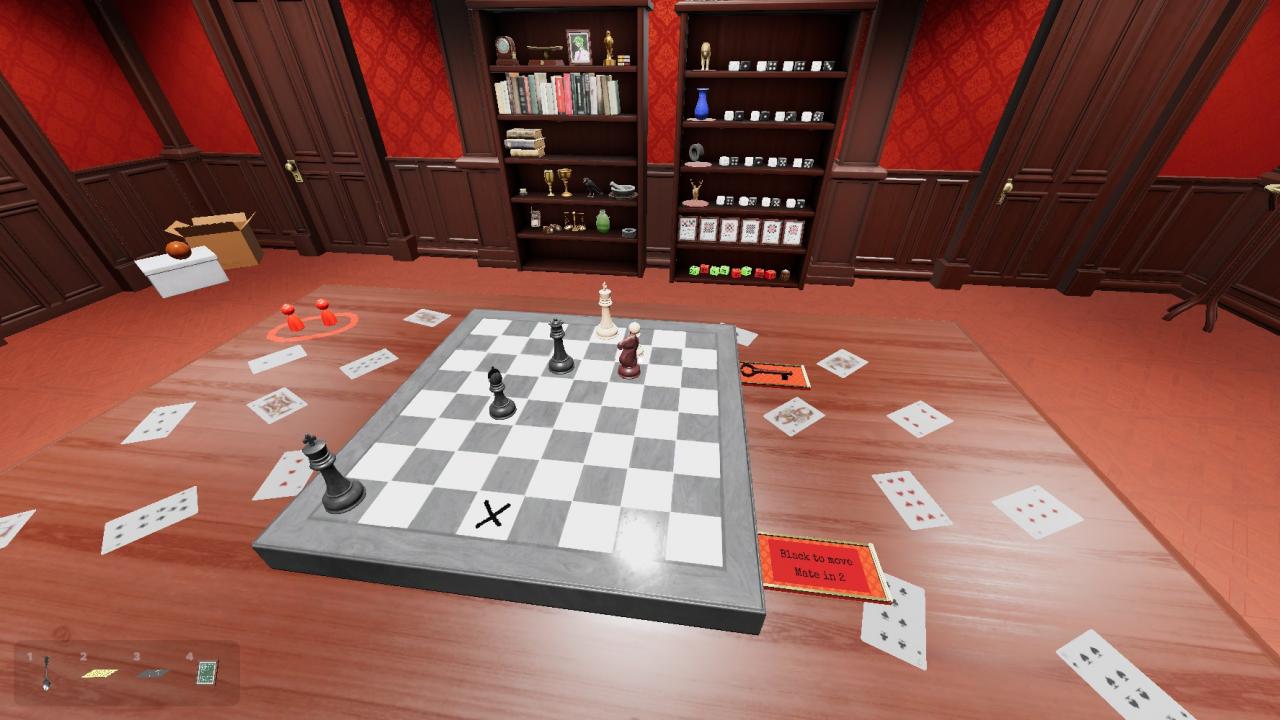
After solving the puzzle, you will be given a bronze key. Put it in this keyhole on the side of the cabinet you got the Queen from to activate the second eye.

The Dial Clock, The Glyph Cipher, and The Dice Cipher
Unless you already know the ciphers/the answer, in which case it’s only needed for Eye 6.The Dial Clock requires the correct combination of three symbols. Each dial has the same 8 symbols on them.
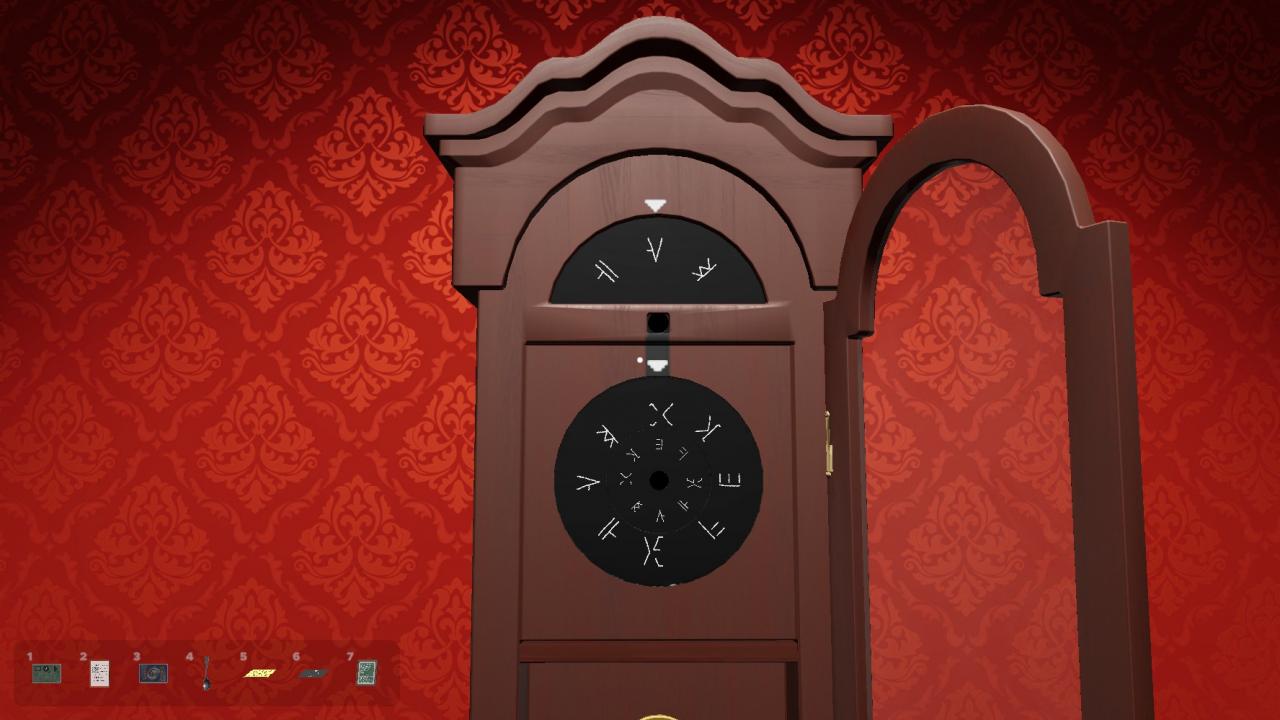
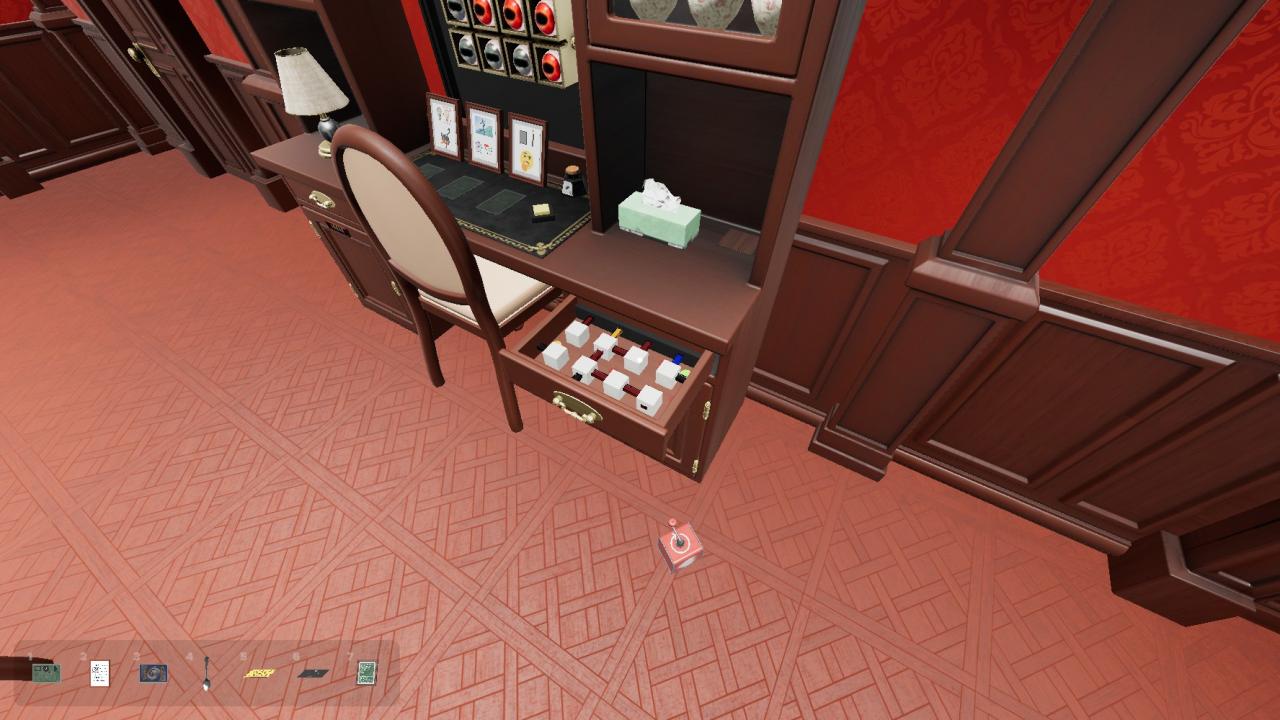
However, the symbols on the dials are no arbitrary symbols, as you’ll see.If you look inside this bottom right cabinet of the desk, you’ll find a bunch of stuff lying around.
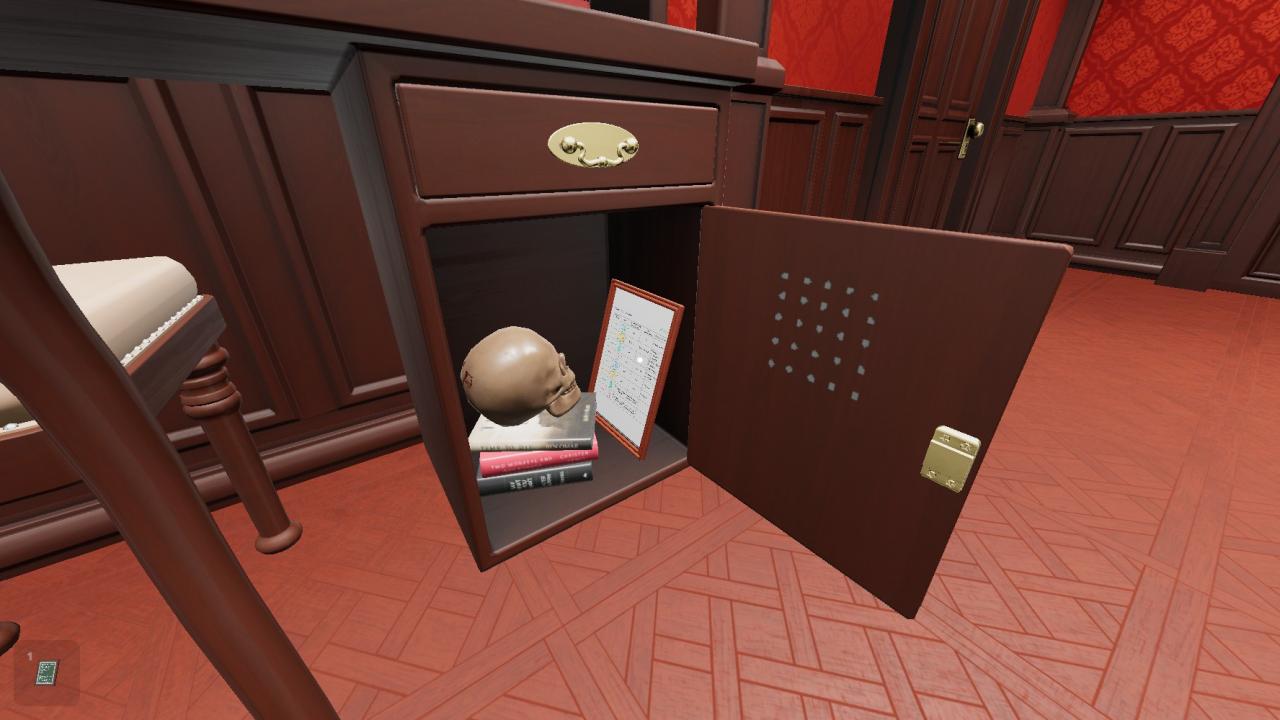
Under the pile of books, is a piece of paper that hold the key on how to decipher the glyphs.
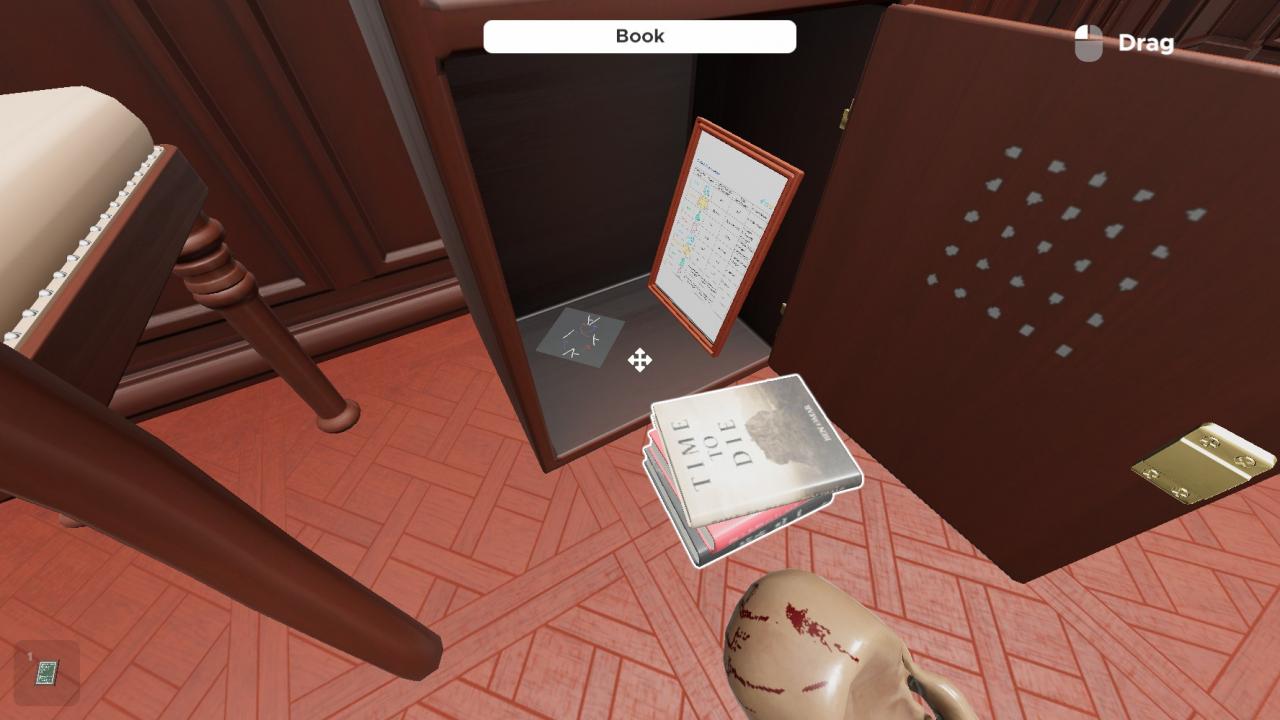
But, instead of being a lookup table for the symbols, you are instead giving this strange diagram.

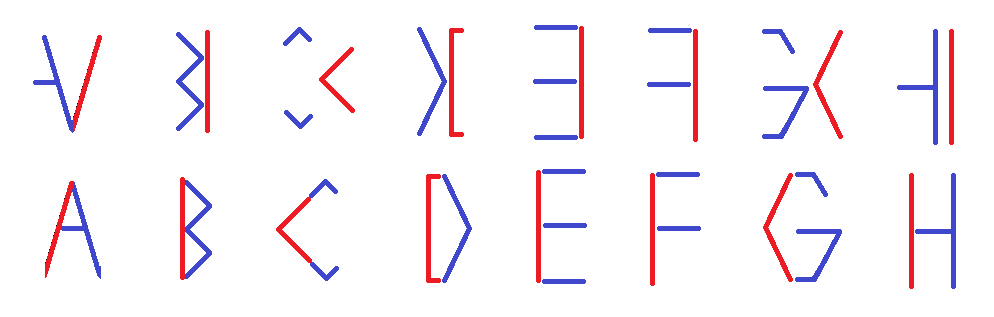
It shows one of the glyph on the dial, being split in two parts, and then those two part swapped to make an A.
What you were supposed to realise is that, this procedure can also be applied to all the other glyphs on the dials, and as it turns out, the glyphs are actually simply the letters A-H all this time.
So, now that we have done that, we now know that it’s not a combination of three symbols we are looking for — rather, we’re looking for a 3-letter code. But where would we find that word?
Well, on the same table with the chess board, there are also a bunch of playing cards scattered around the table. A few of these will be useful later, but for now we’re only looking for one specific thing.
If you look through the cards, you may notice that, one of these card have this strange markings on the back.
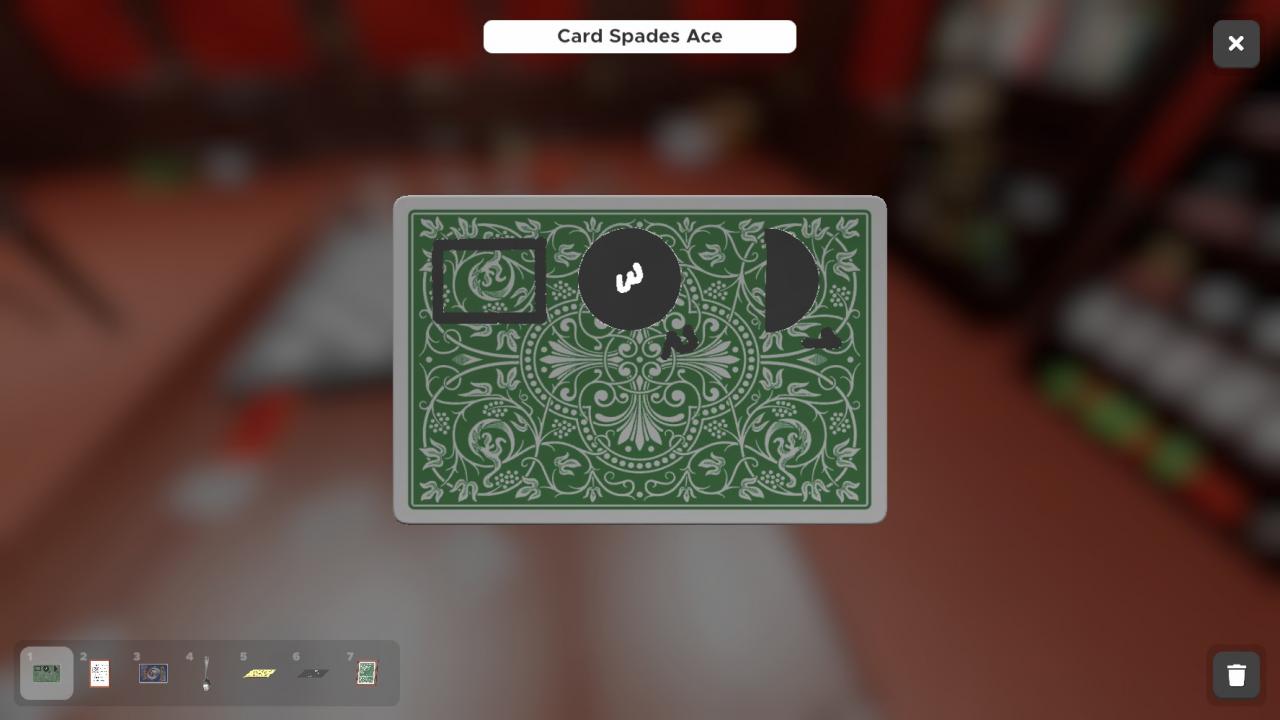
Doesn’t this look familiar?
That’s right, it’s the Dial Clock. The dial at the top is the first letter, the big dial in the centre is the second, and the small dial is the third.
Another thing to note, the card that has the marking seems to be the ACE of Spades, which so happen to be a 3-letter word, that can be spelt with the letters from A-H…
Inputting ACE on the Dial Clock and pressing the buttons reveals the lookup table for the Dice cipher, and also drops a black marble.
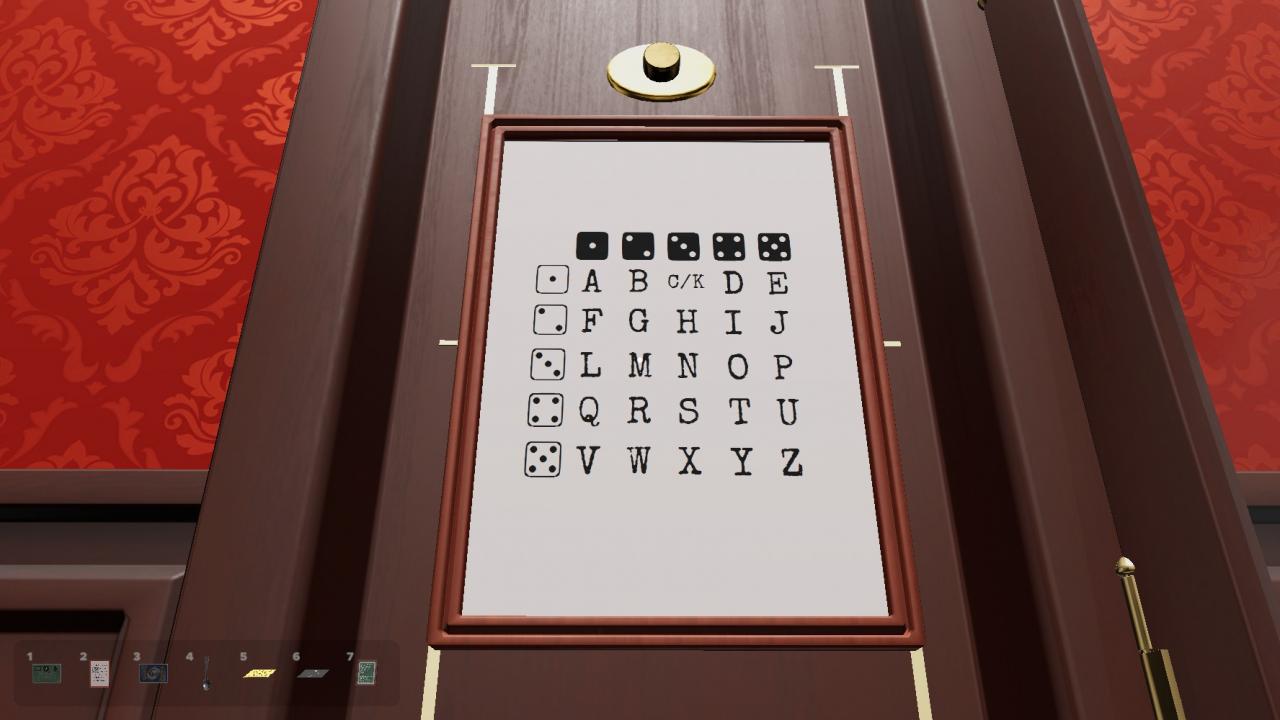
The Dice cipher will be used for Eye 1 and 3, while the marble will be used for Eye 6.
Eye 3
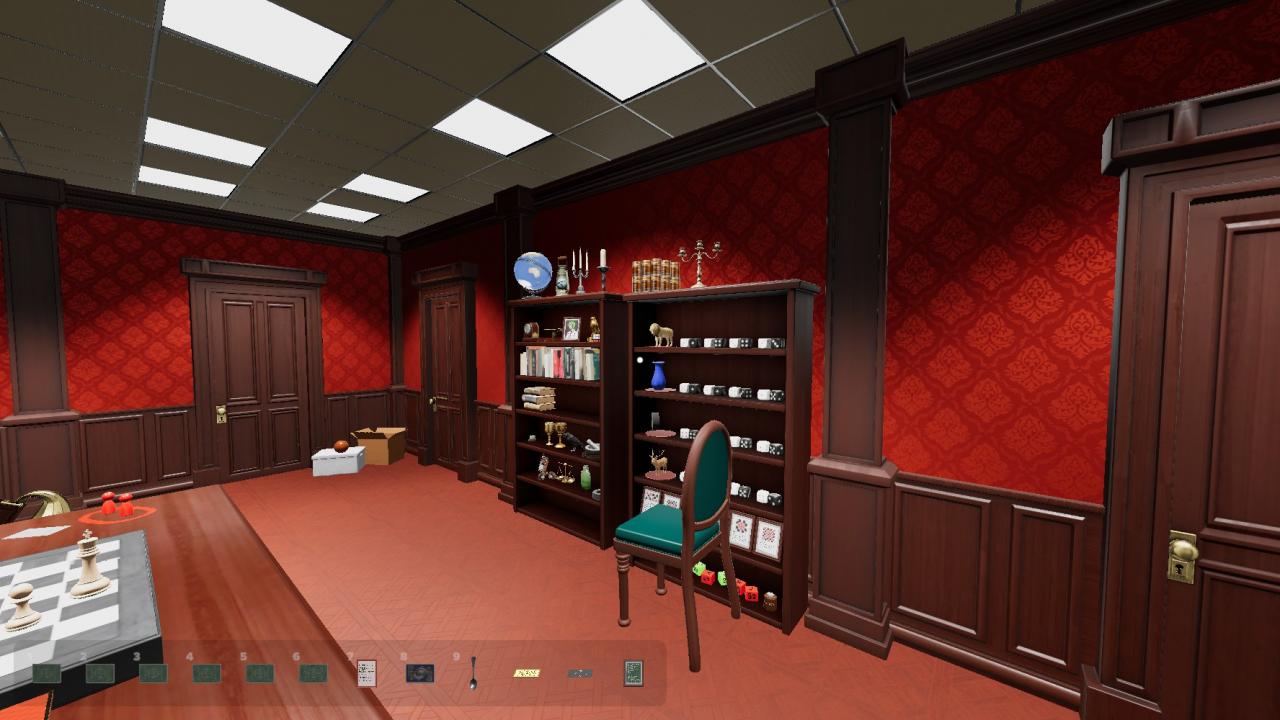
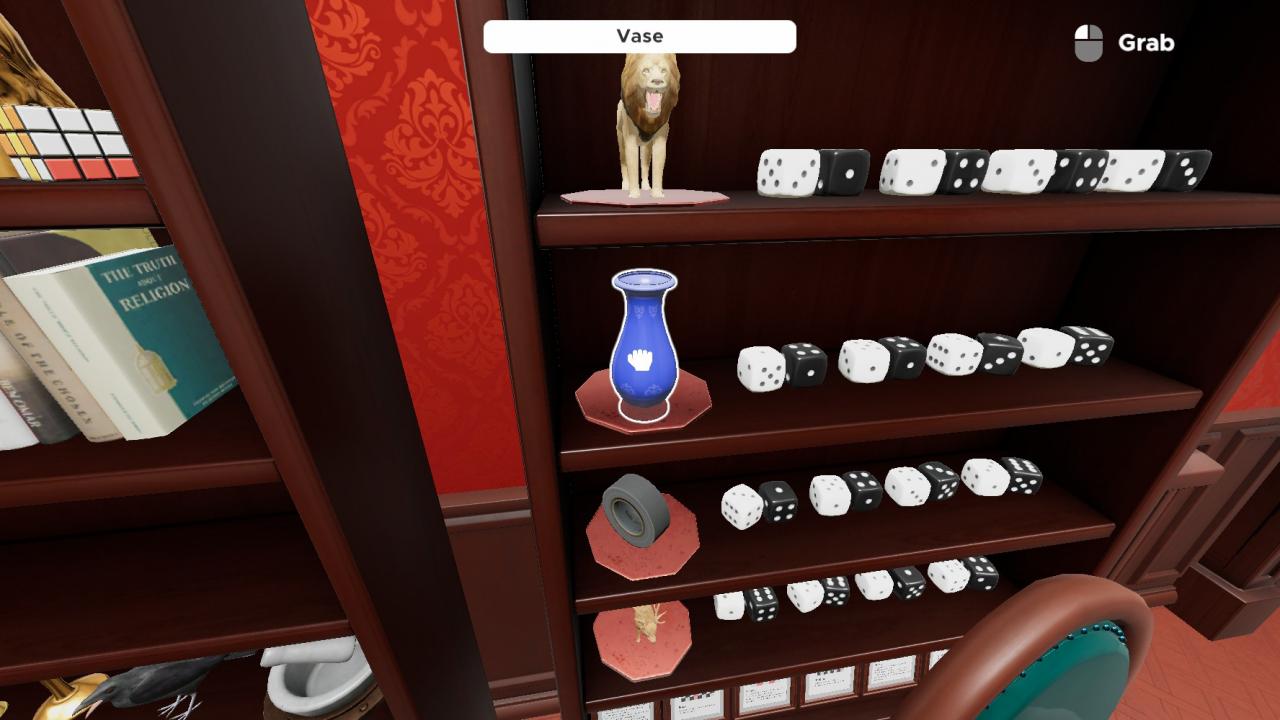
Eye number 3 is activated by completing the right display shelf with the correct objects from the left shelf.
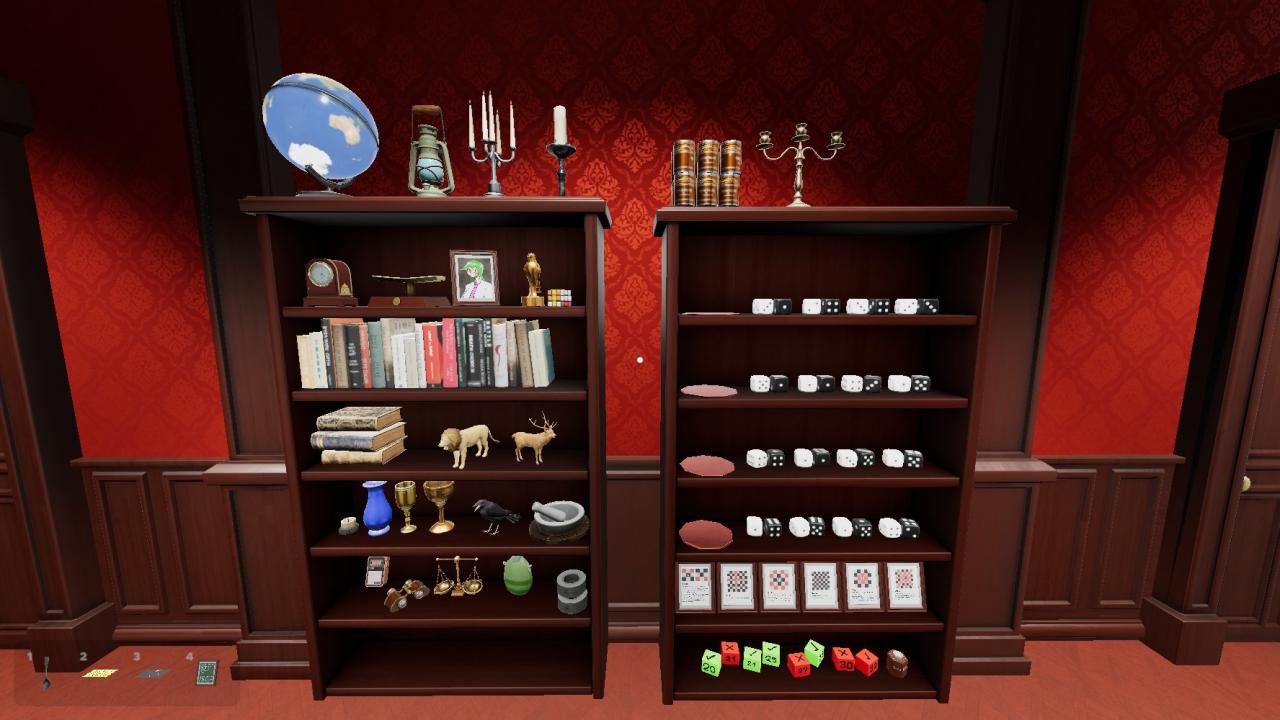
However, instead of there being clues to what object should go where, there are instead a bunch of dice on the shelf.
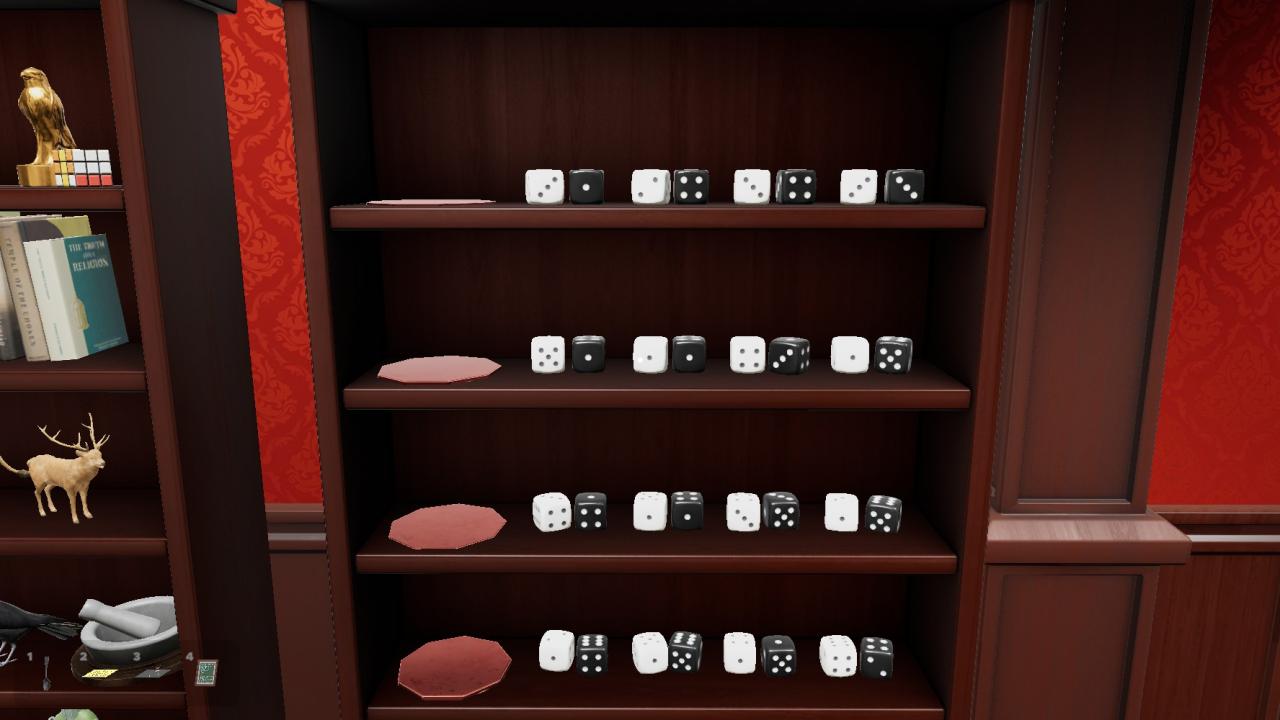
We can use the Dice cipher lookup table we just unlocked to decode the clues.
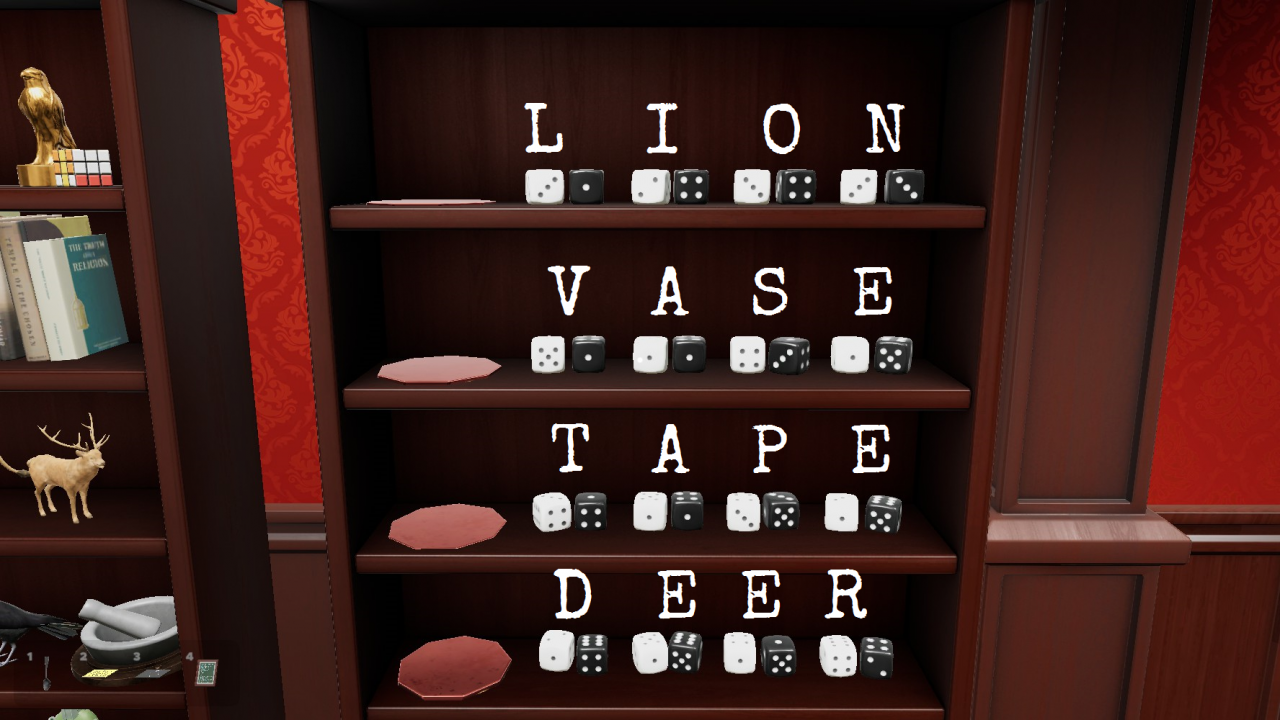
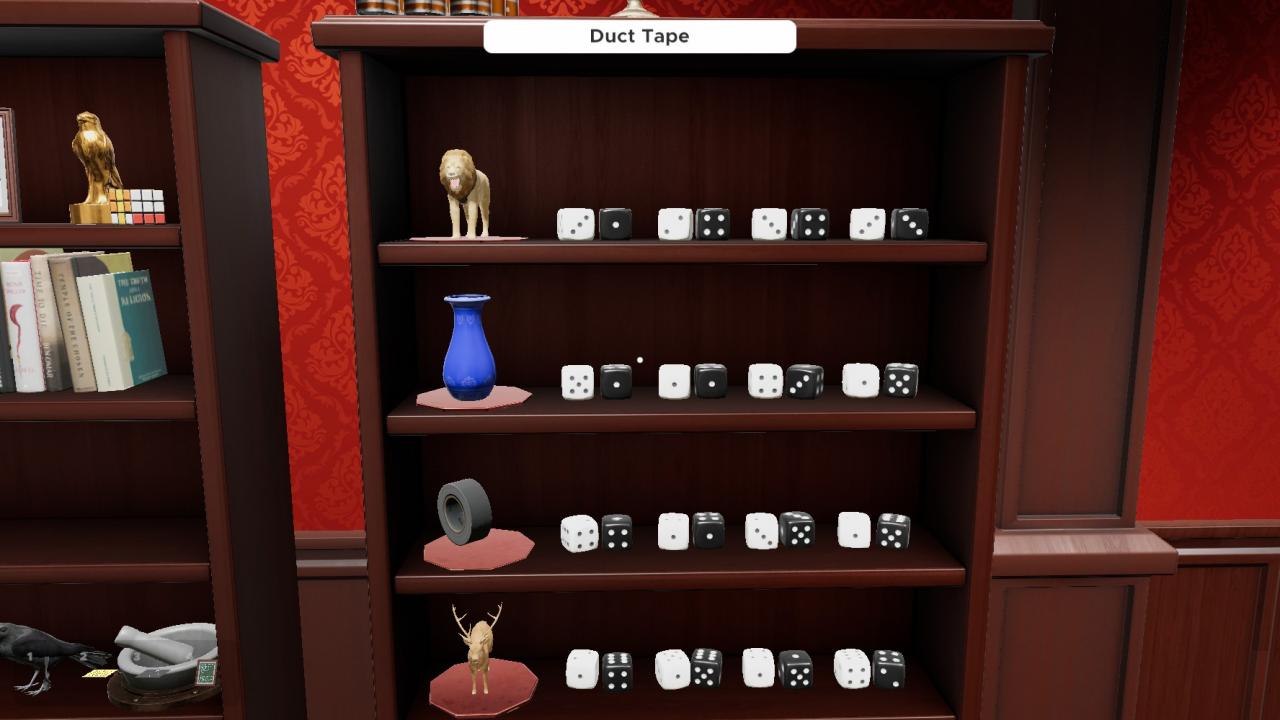
Putting the object on the pedestal accordingly to activate the Eye.
Fun fact!
The table used for the Dice cipher is actually just the Tap Code[en.wikipedia.org] table, but with the numbers on the side replaced with dice faces of the same value. However, I came up with the glyph swapping halves thing myself, originally to use in a escape room type level in a different game.
Eye 4
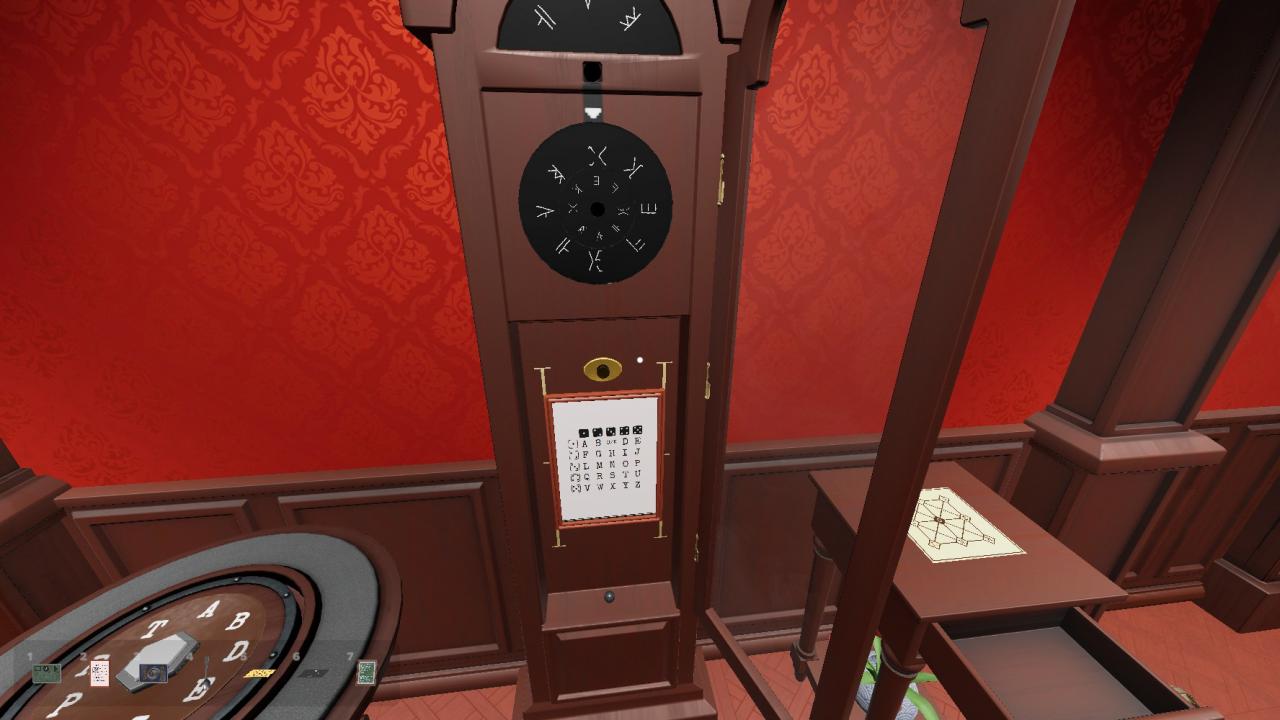
You may have seen something strange while reading the previous section.
It seems the cupboard door has some strange dot markings on it.
Once you started exploring the rest of the room, you’ll quickly notice that, every single interactable doors and drawers, have these dots on them as well.


If you look at the dot patterns, you’ll see that every single one of them has a unique number of dots.
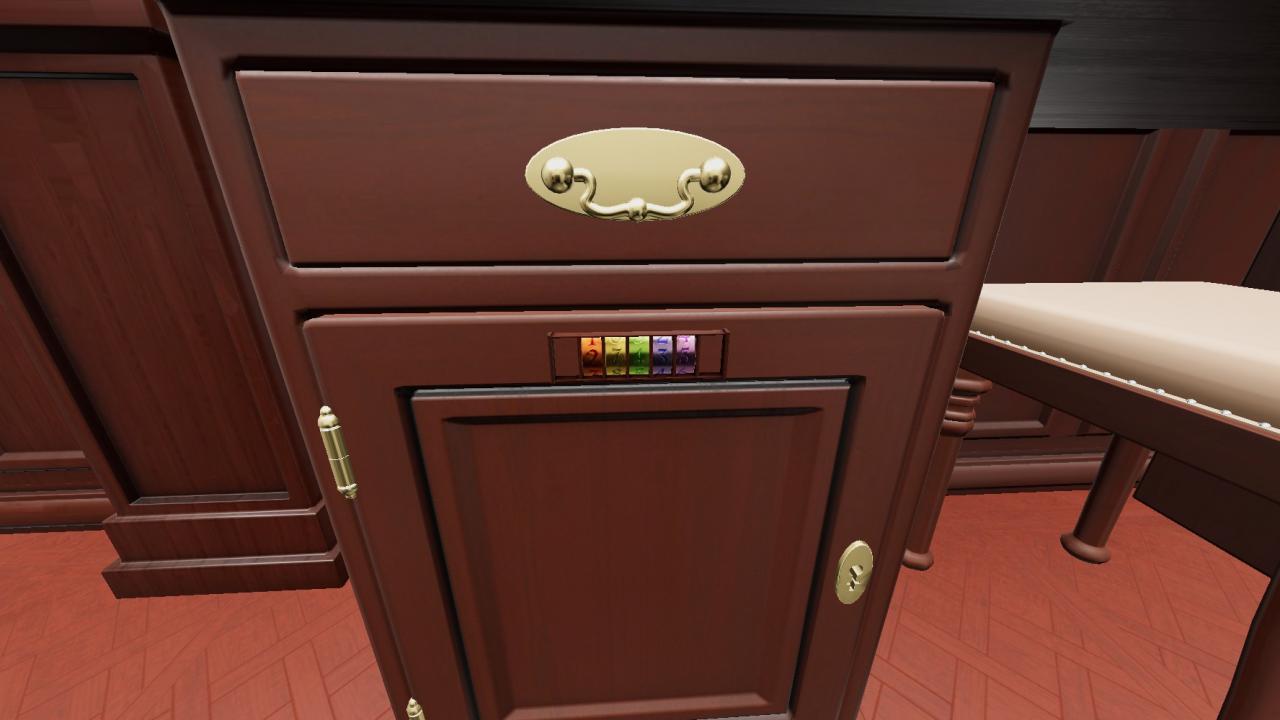
You may also notice this thing, at the bottom of the right shelf.
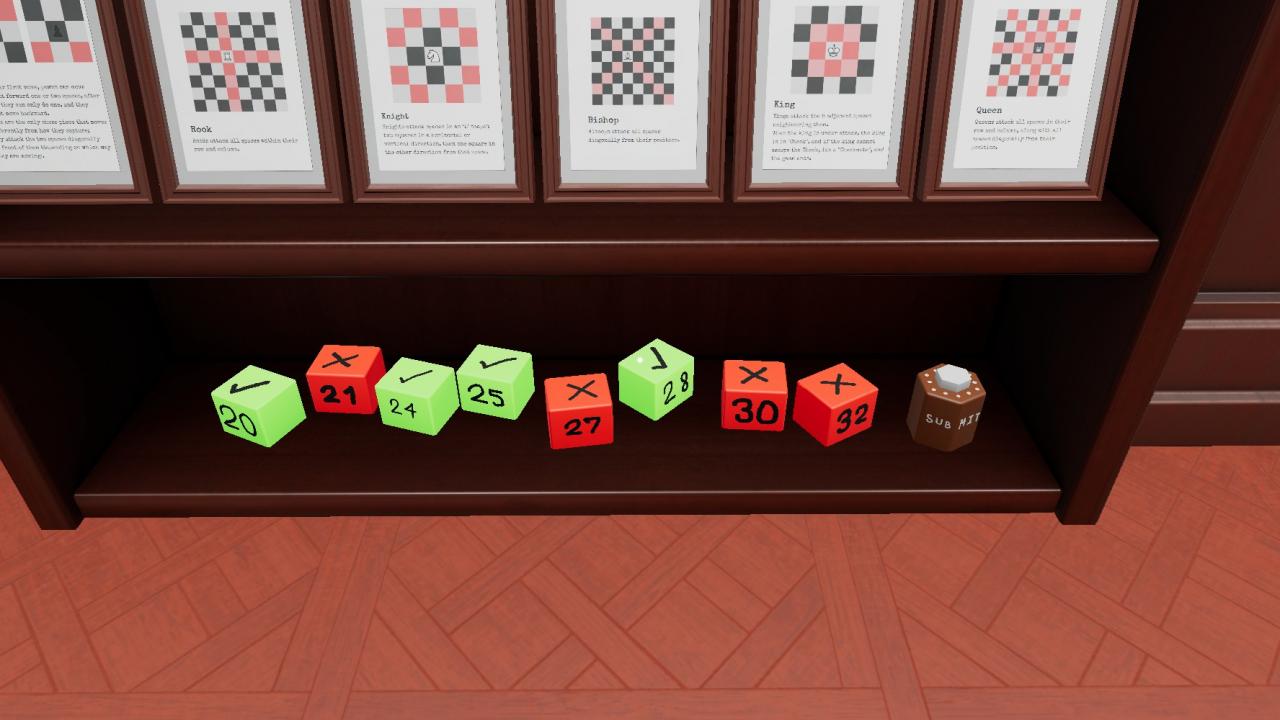
There are red and green cubes, labeled with different numbers on them, and a submit button.
In fact, these numbers matches up exactly to the number of dots you found on the doors and drawers.
To solve this puzzle, leave the doors and drawers that has the number of dots matching a green cube, and close the ones that matches the red cubes, and press submit.
 For the desk, open the top middle door (20), and the bottom right cupboard (25).
 For the cabinet by the window, open the bottom left cupboard (24), and the right drawer (28).
Eye 5
On the desk, there are these three picture frames with three slots for a playing card below them, and a button.
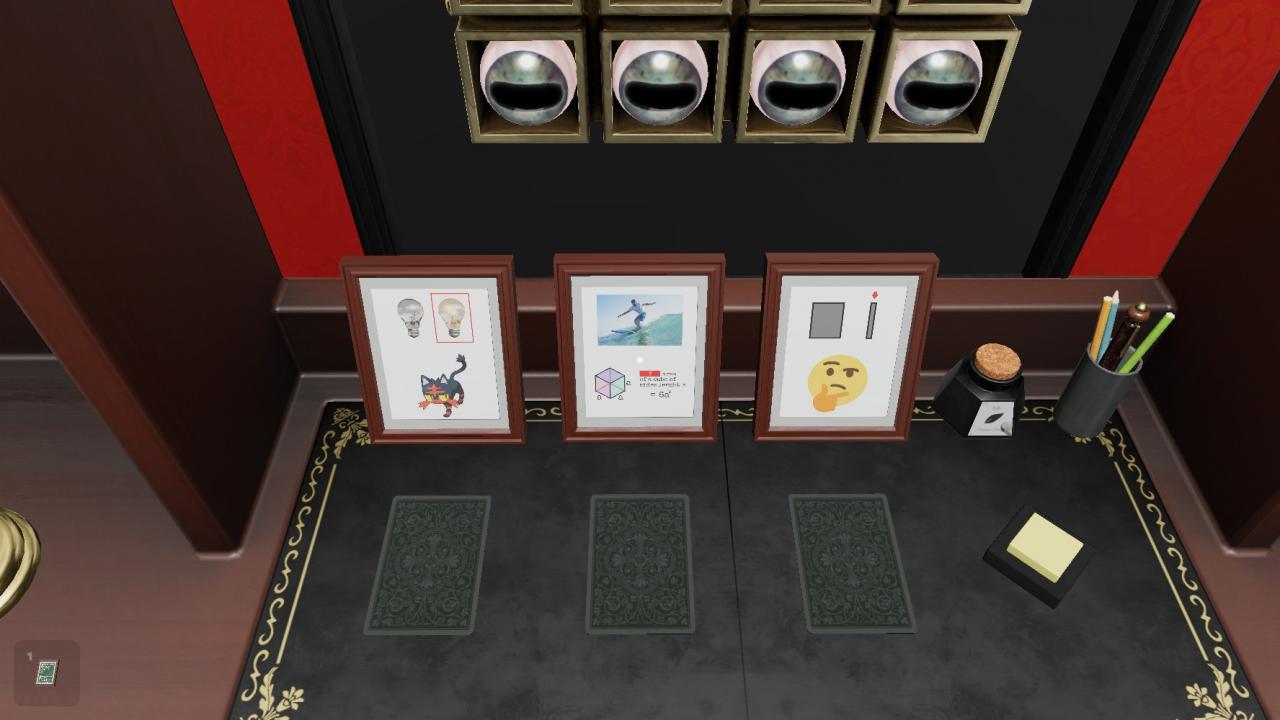
These pictures are a clue on which card goes in which slot.
This is a wordplay puzzle. Each frame has two images that clue two words. For each pair of picture, the word for the bottom picture is the word for the top picture, plus a card rank.
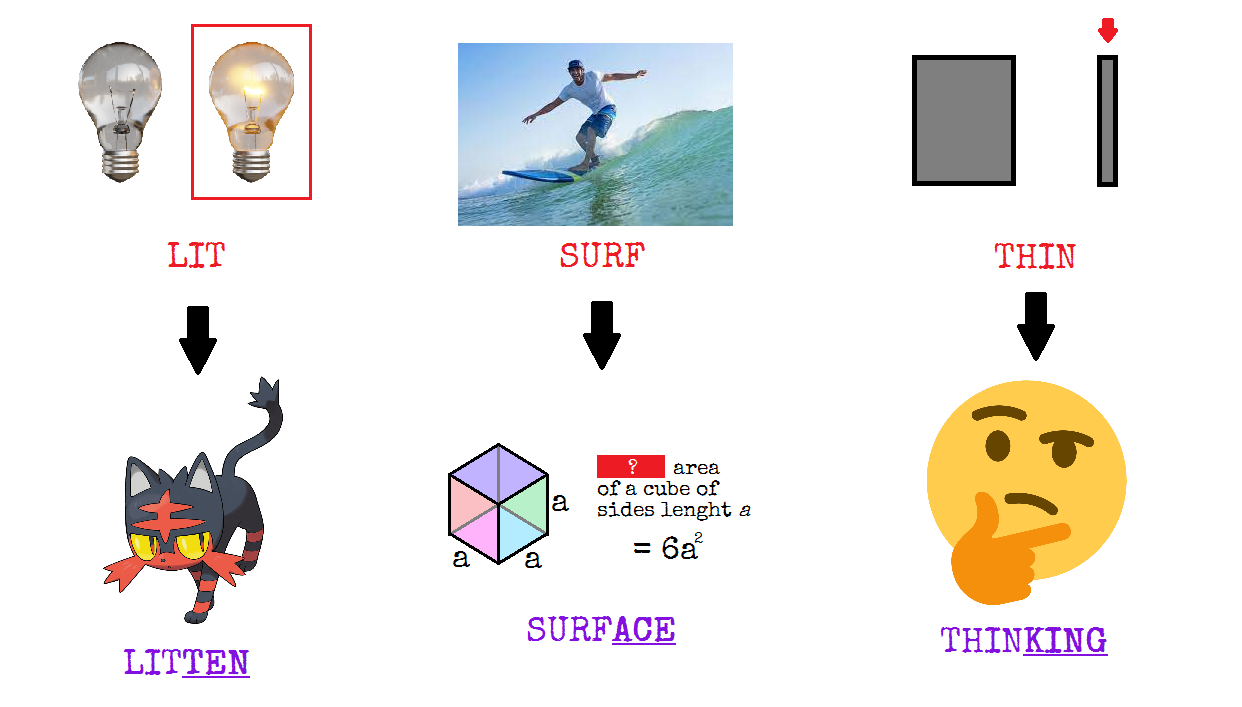

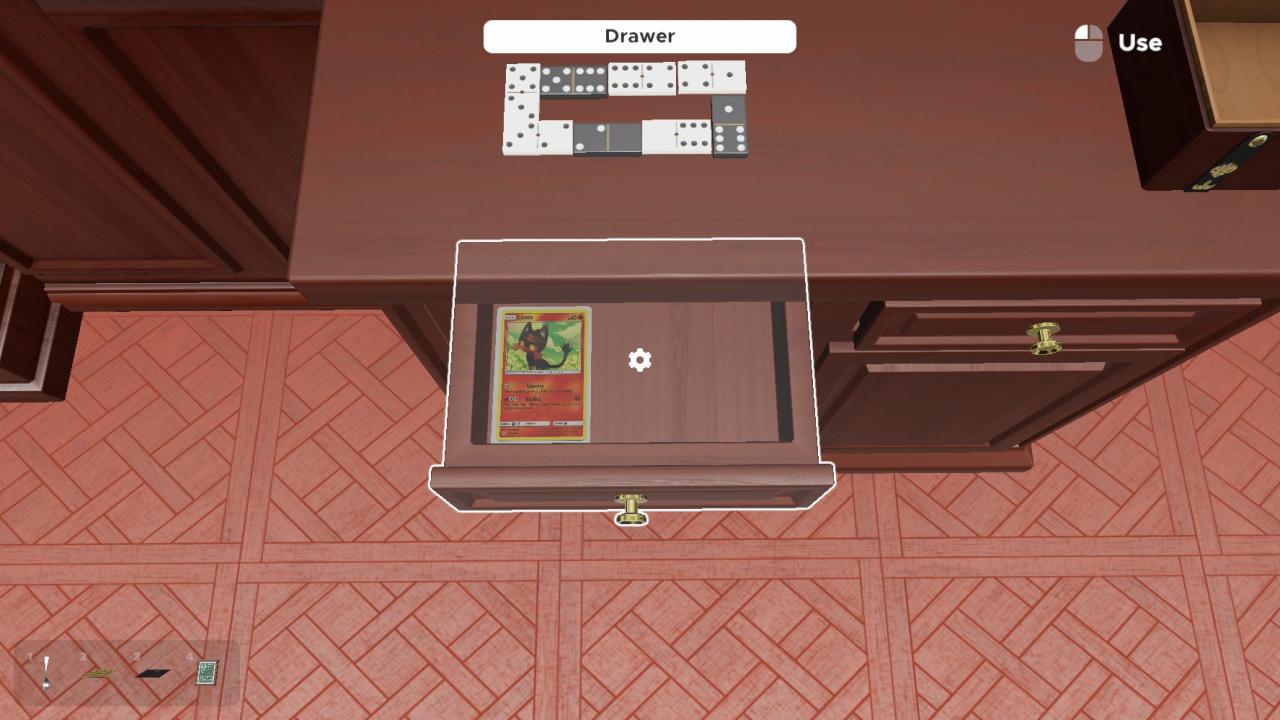
Note that, in case you do not know the Pokemon or know the formular of the surface area of a cube, there is a Litten Pokemon card in the this drawer,
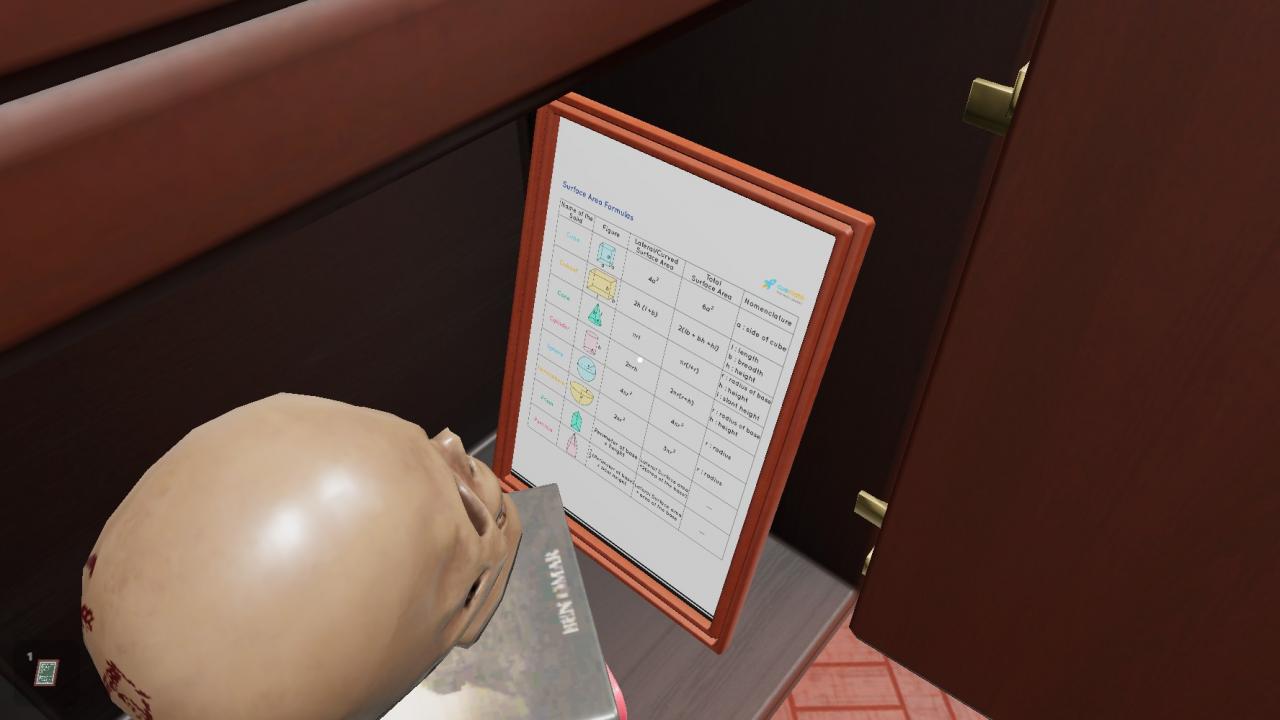
 and a table of surface area for various solids here.
Putting the cards of the correct value in the slots and pressing the button open this drawer, which reveals a different button.
When the button is pressed, you can see four lights in the ceiling taking turns showing a colour, before going back to all white again.
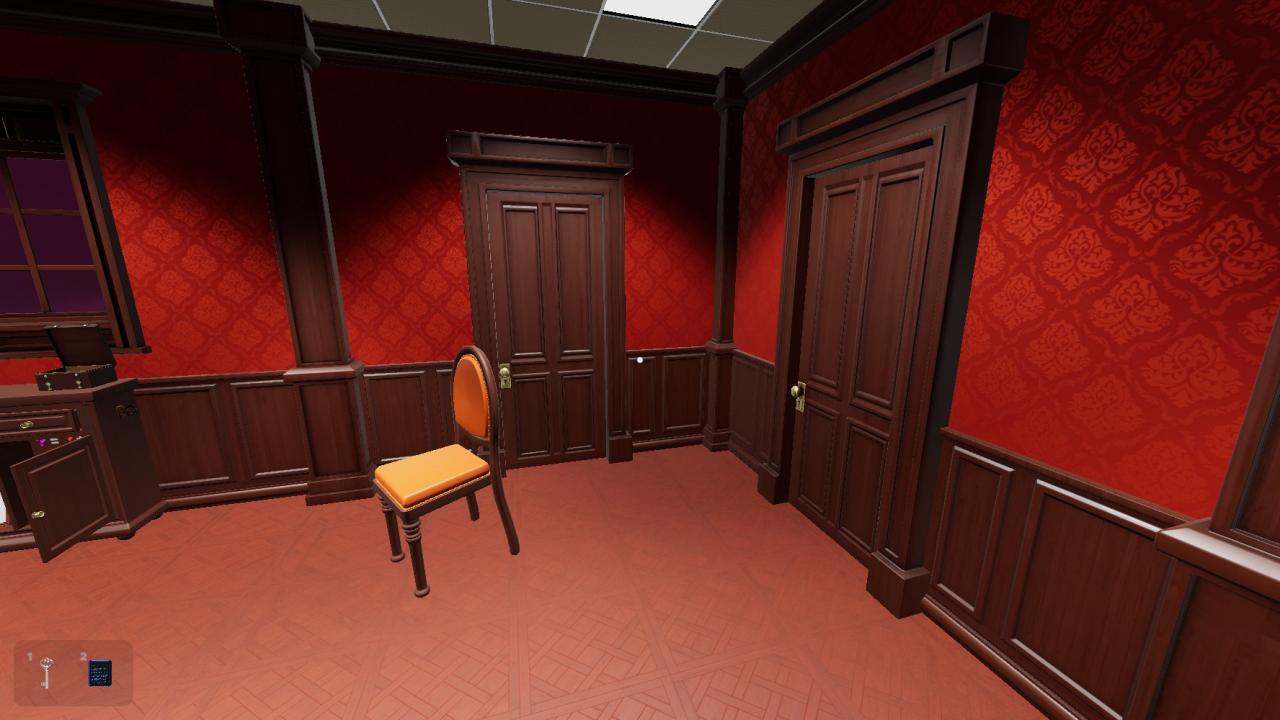
The colour that showed on these lights matches the colour of the chairs at the centre table.
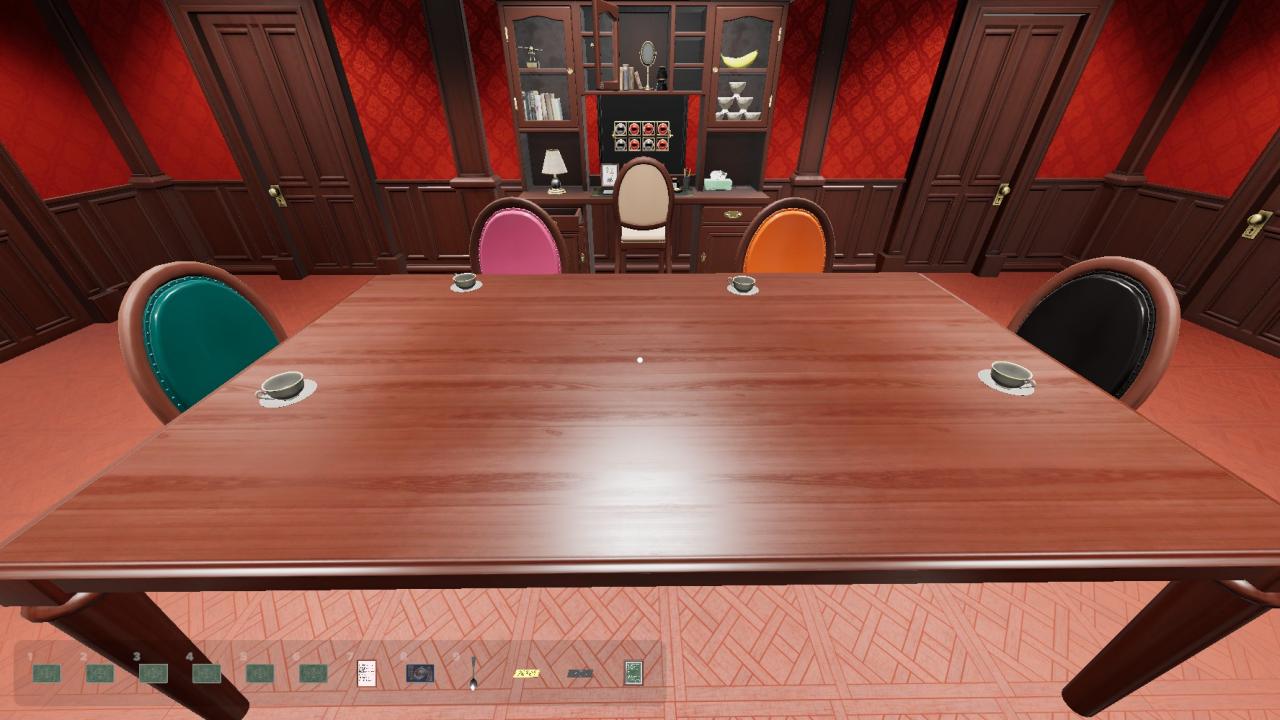
To activate the Eye, place each chair under the light that flashed that particular chair’s colour, and press the button again to submit.
 The orange chair goes up against the wall with the window.
 The cyan chair sits right in fornt of the right shelf.
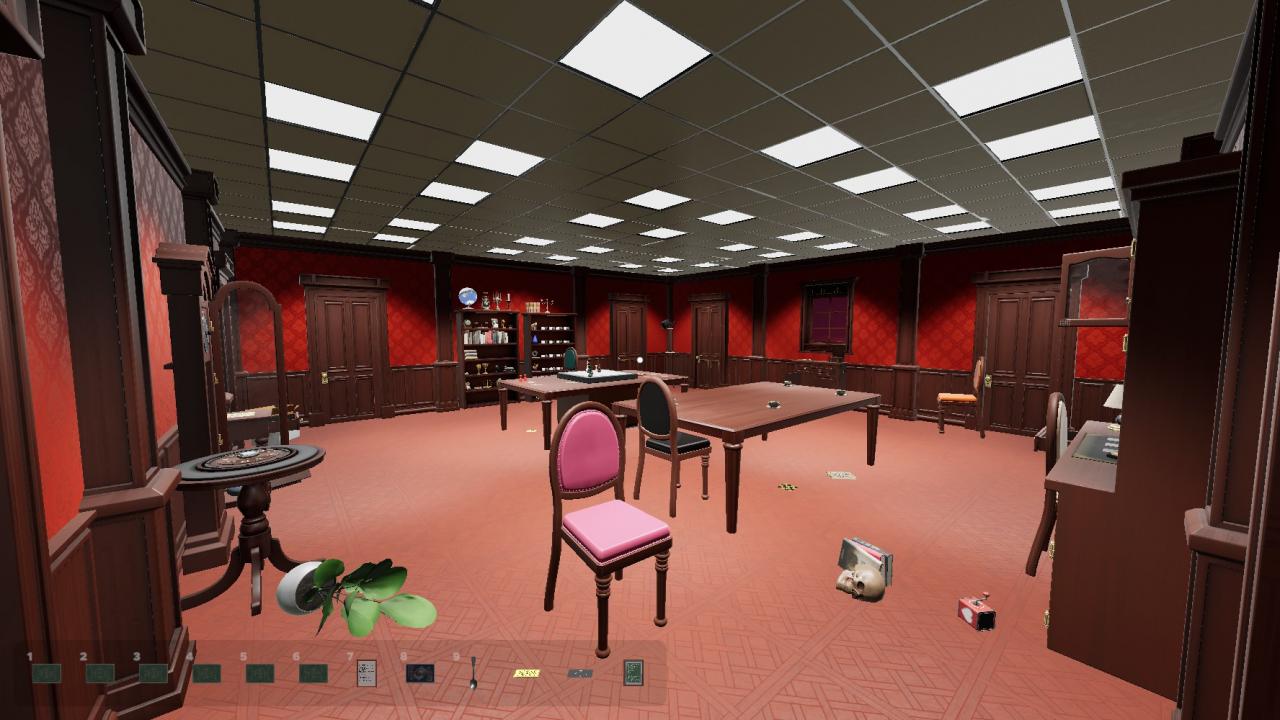 The pink chair is at this corner near the plant table.
 And finally, the black chair goes in the centre of the room.
Eye 6
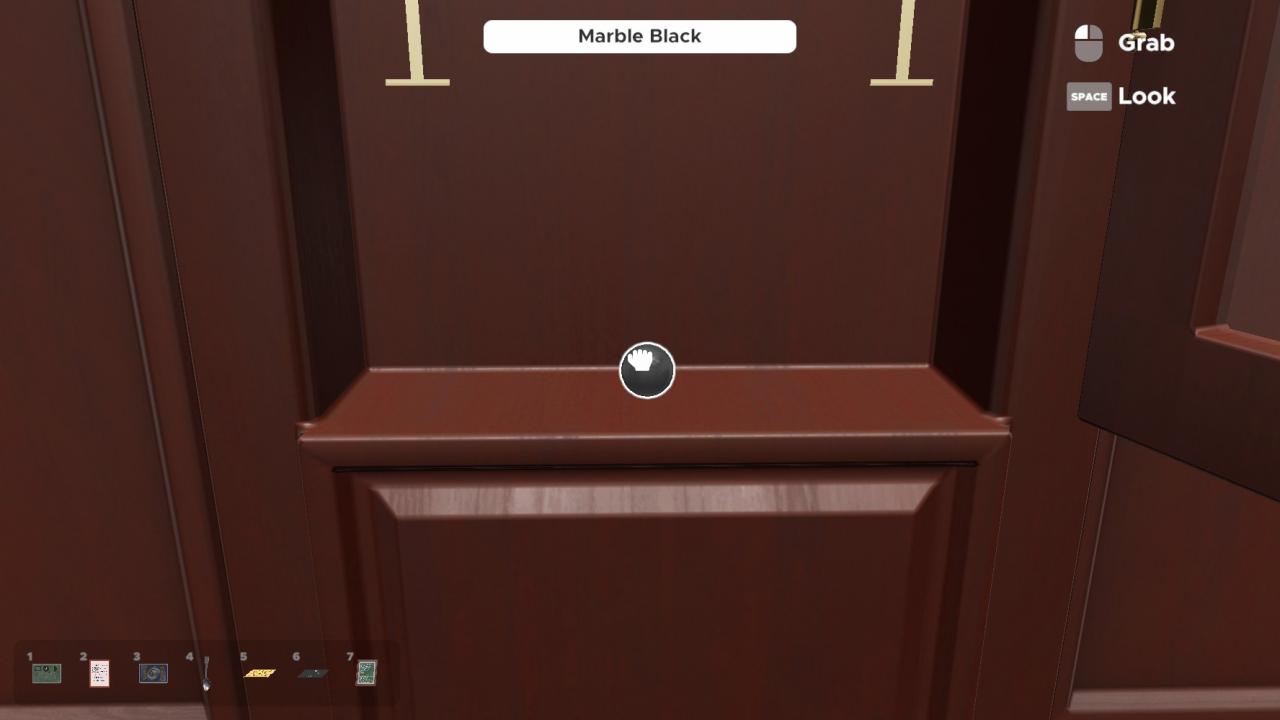
When you unlocked the Dial Clock, not only do you get the reference sheet for the Dice cipher, but you also get a black marble.
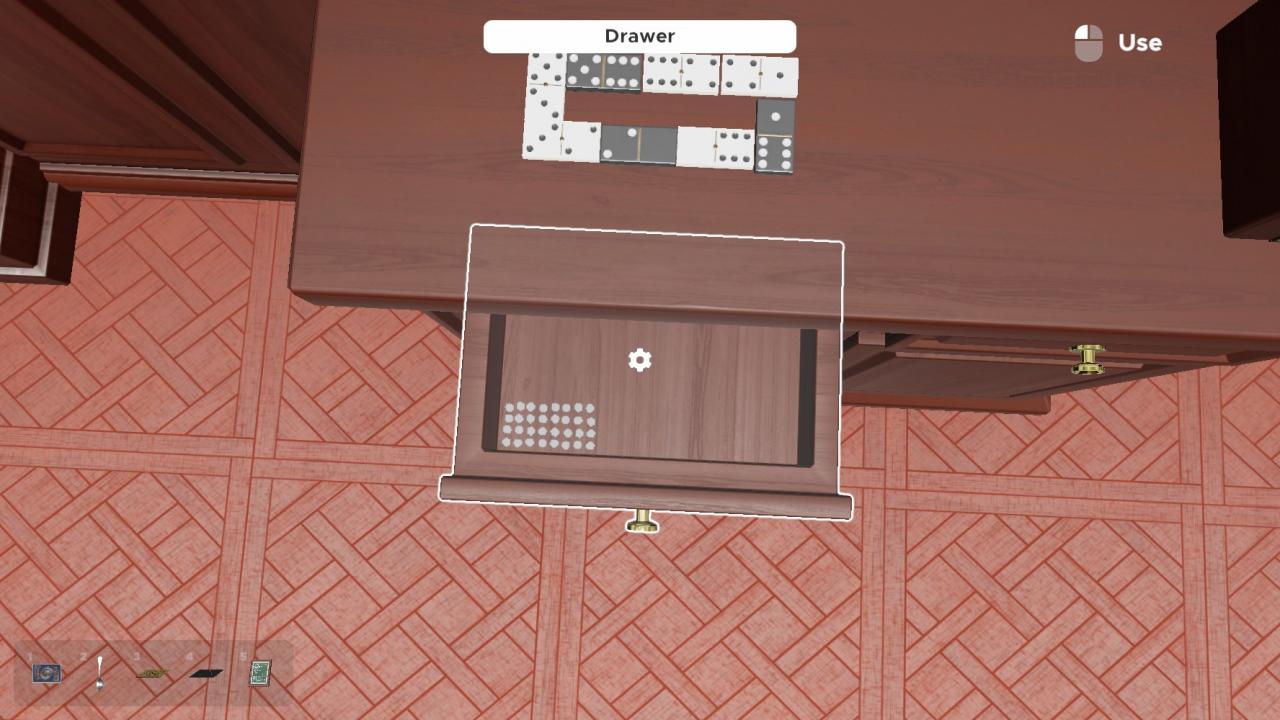
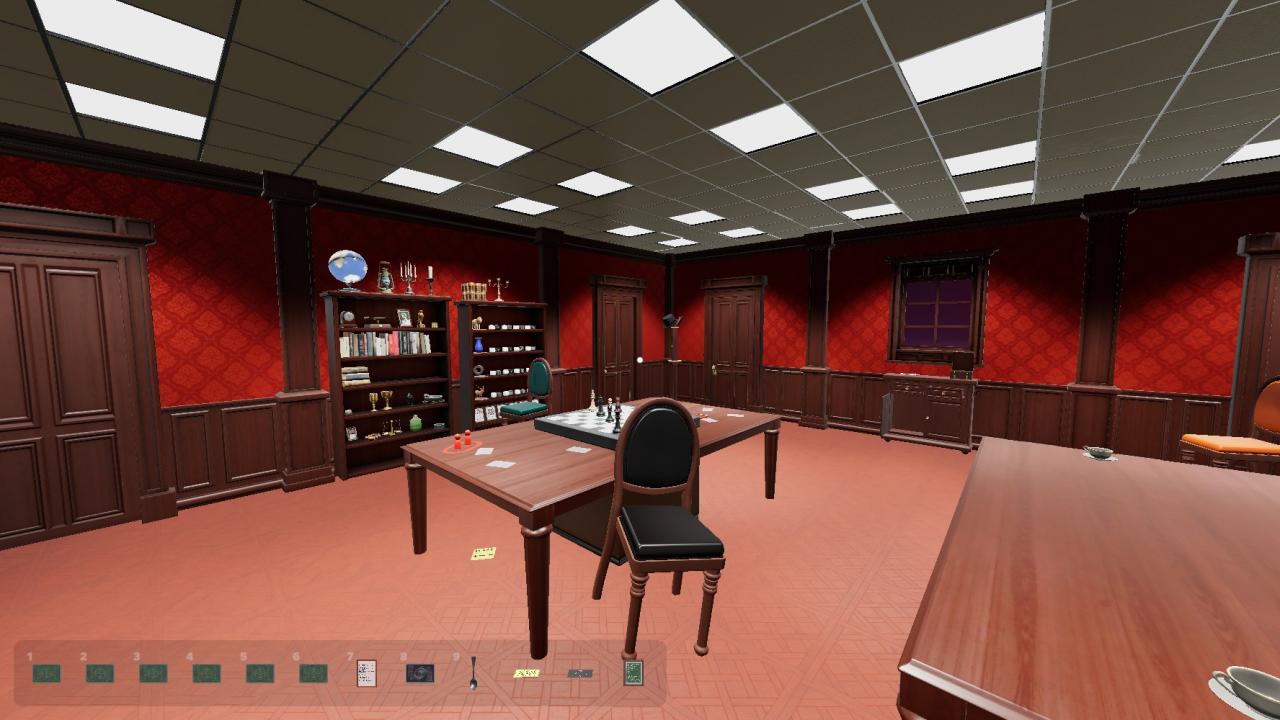
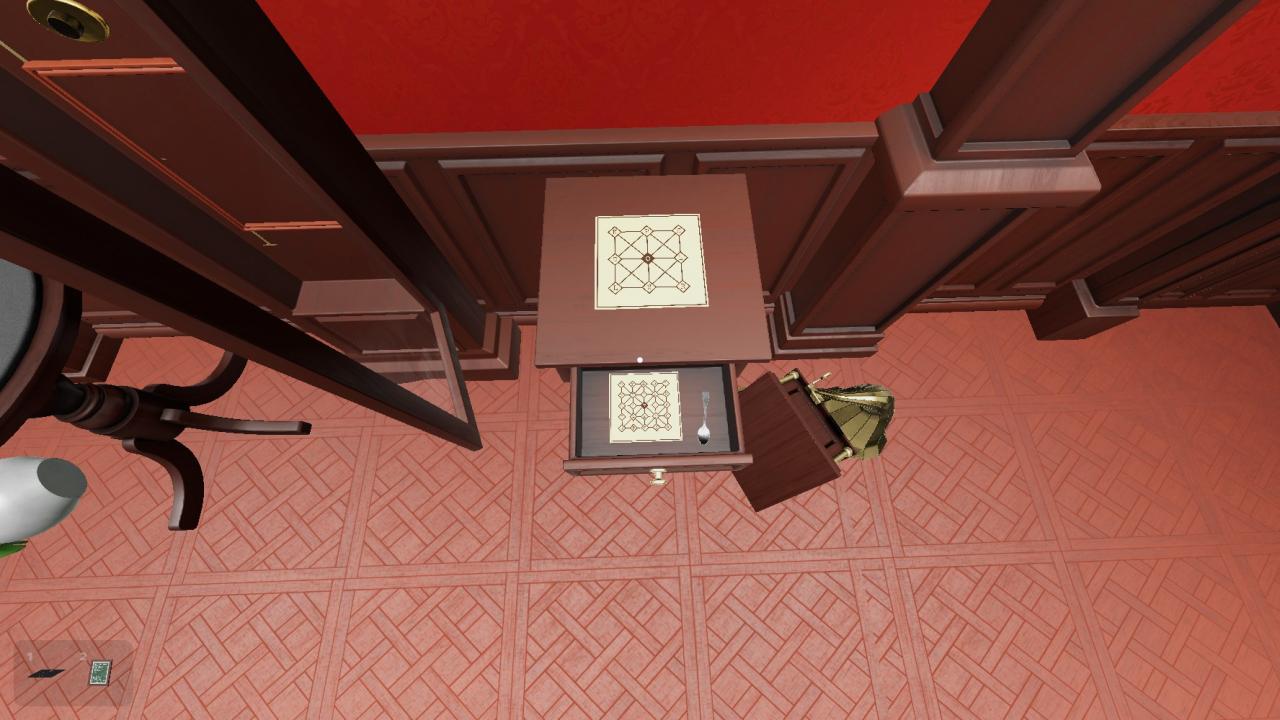
On the desk, there is this Jack-in-a-Box toy that sits on top of a suspicious differently coloured wooden patch.

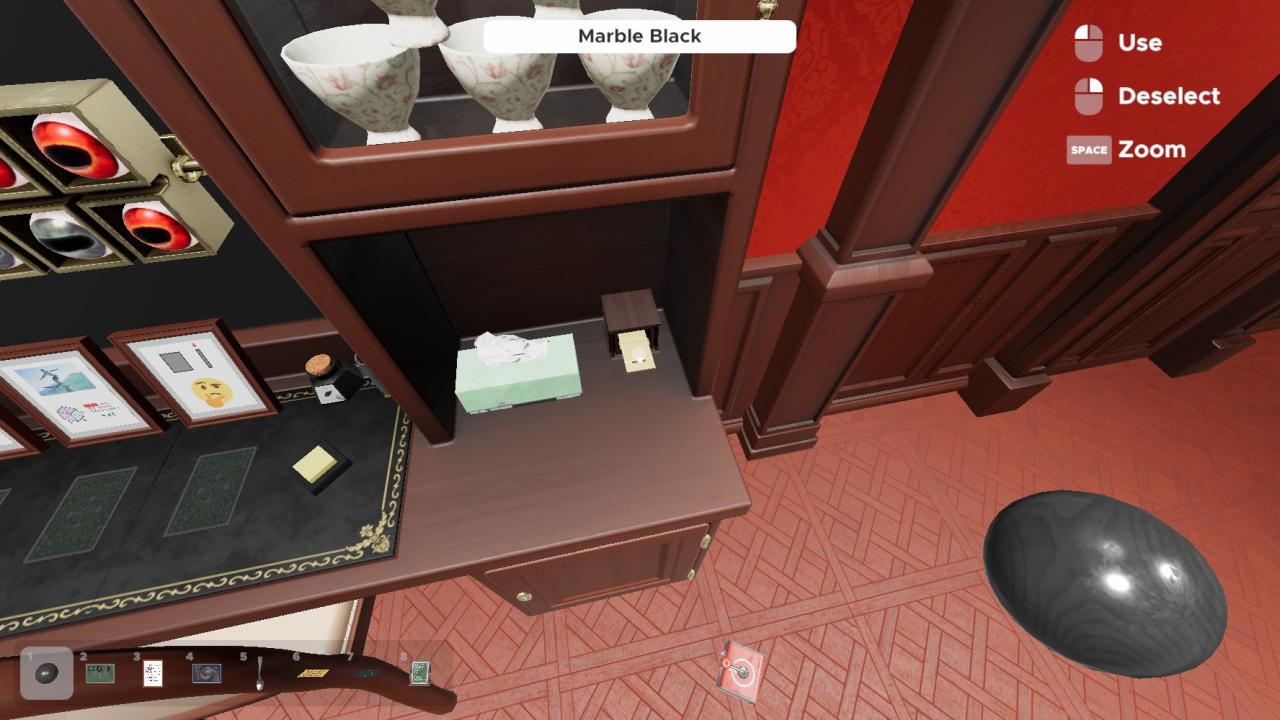
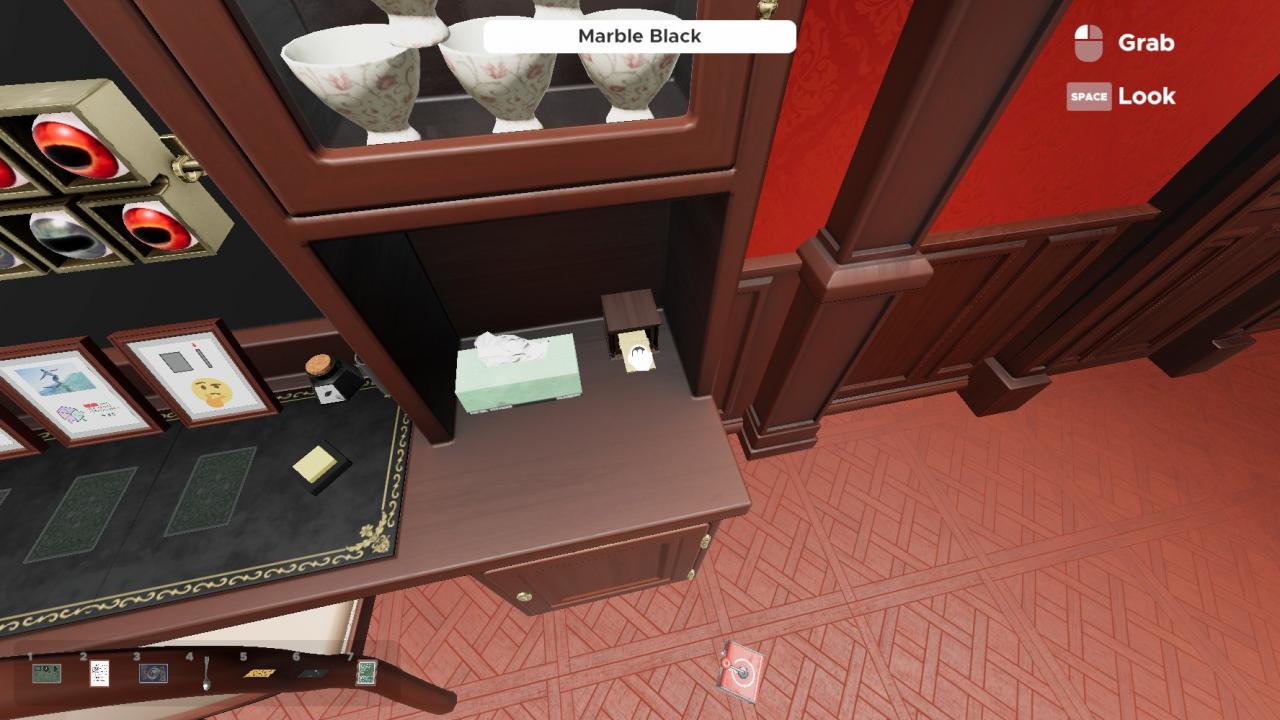
Removing the toy reveals a mechanical box that pops up and pushes out a little tray.
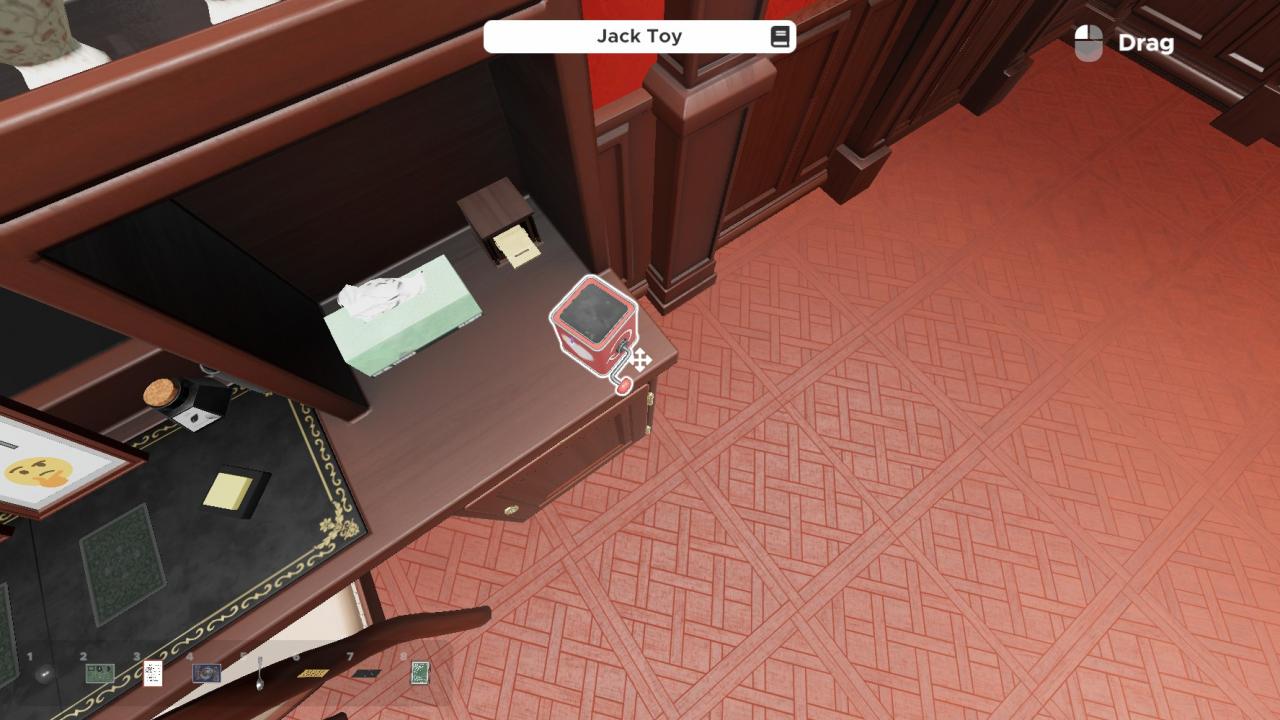
Place the marble on the tray, and the box will retract back down into the table.
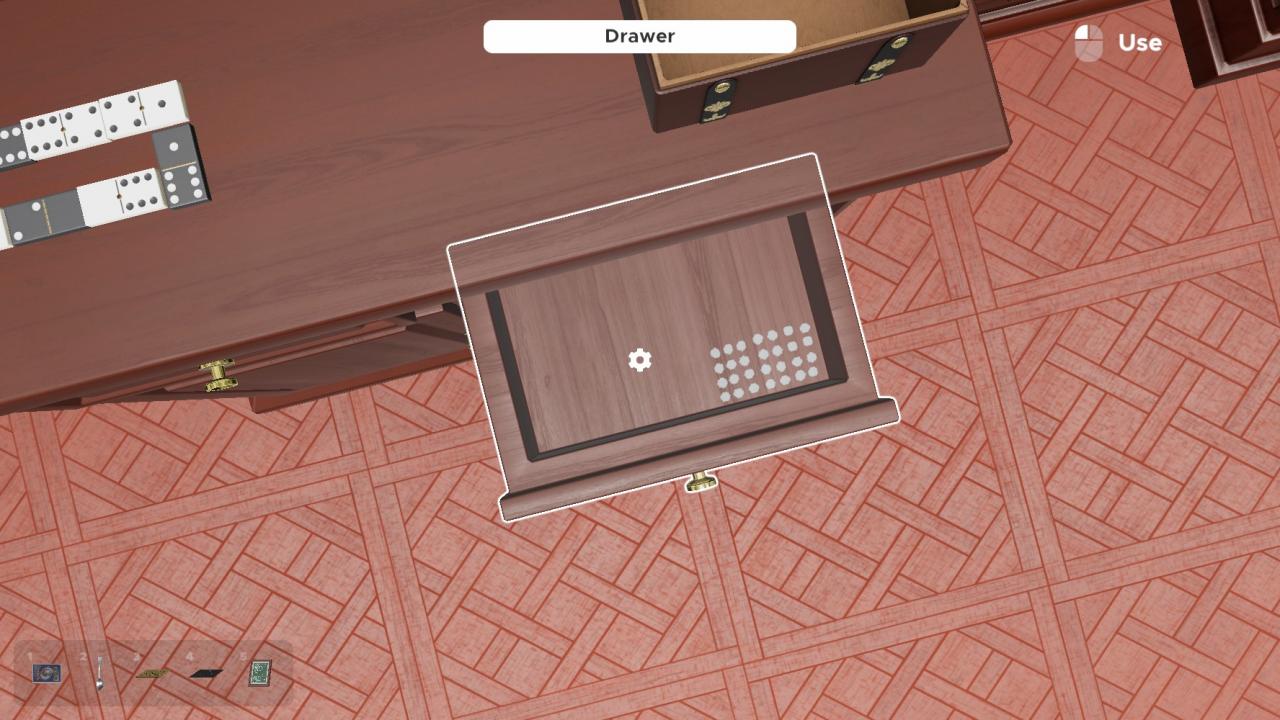
Now, the other drawer of the desk will open up to reveal a shifting marble maze.
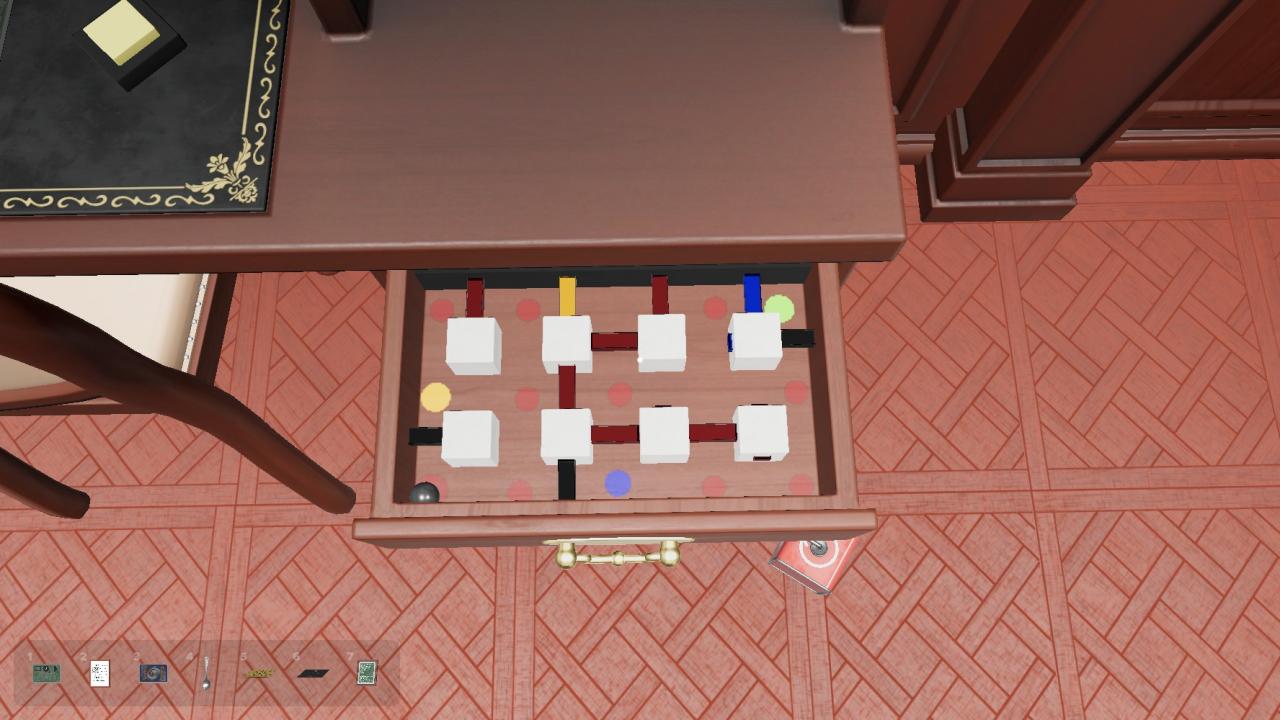
Drag the marble around the maze and get to the green spot to activate the Eye.
However, each time you pass a coloured spot on the floor, walls of that colour will toggle their state.
Here is the path to solve the maze.

Once the maze is solved, the drawer retracts back, and the sixth eye is activated.
Eye 7
The seventh eye features a single puzzle. It’s probably one of the hardest puzzle in the room, so that’s why it’s only one puzzle as oppose to the chain of a few puzzles other eyes have.
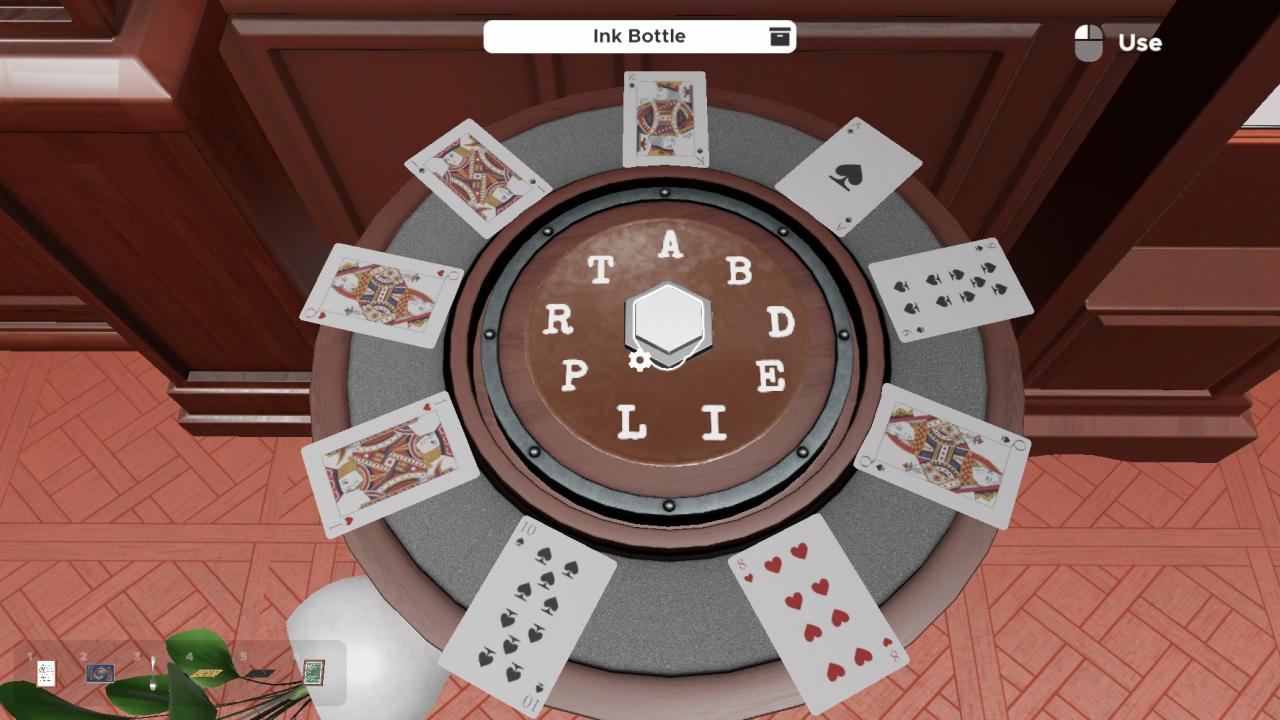
First, remove the plant from this round table next to the Dial Clock.
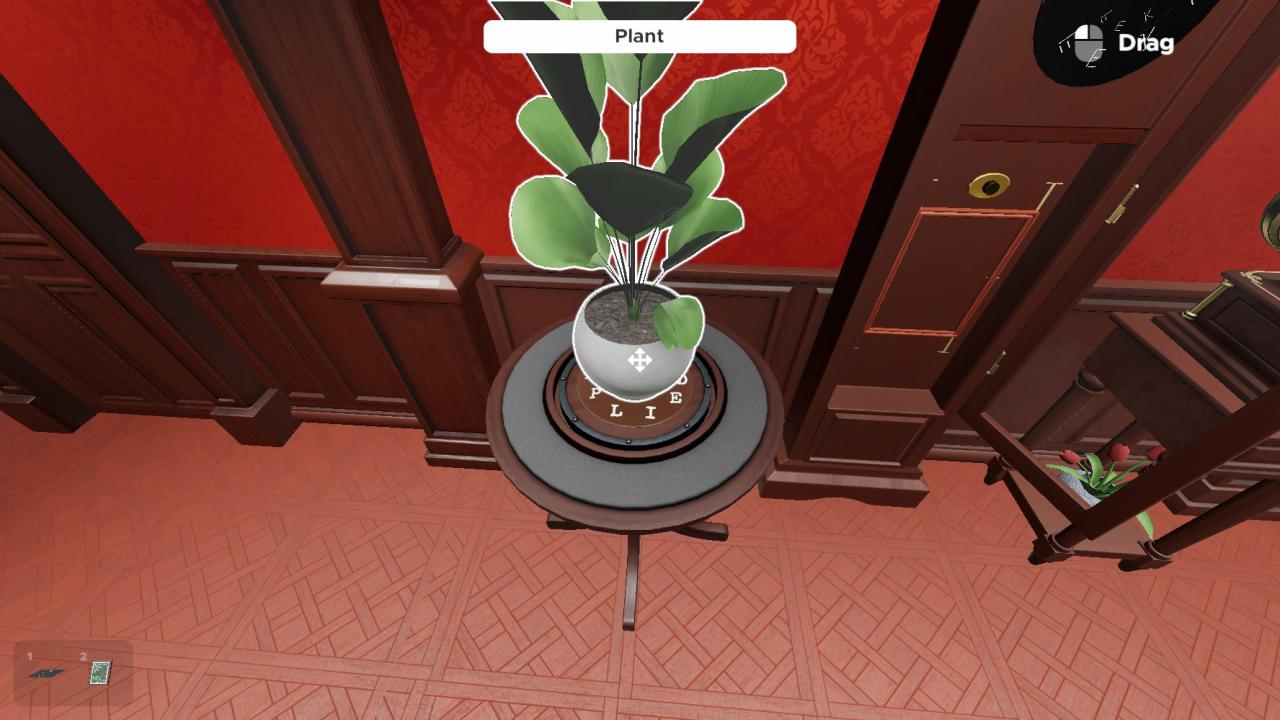
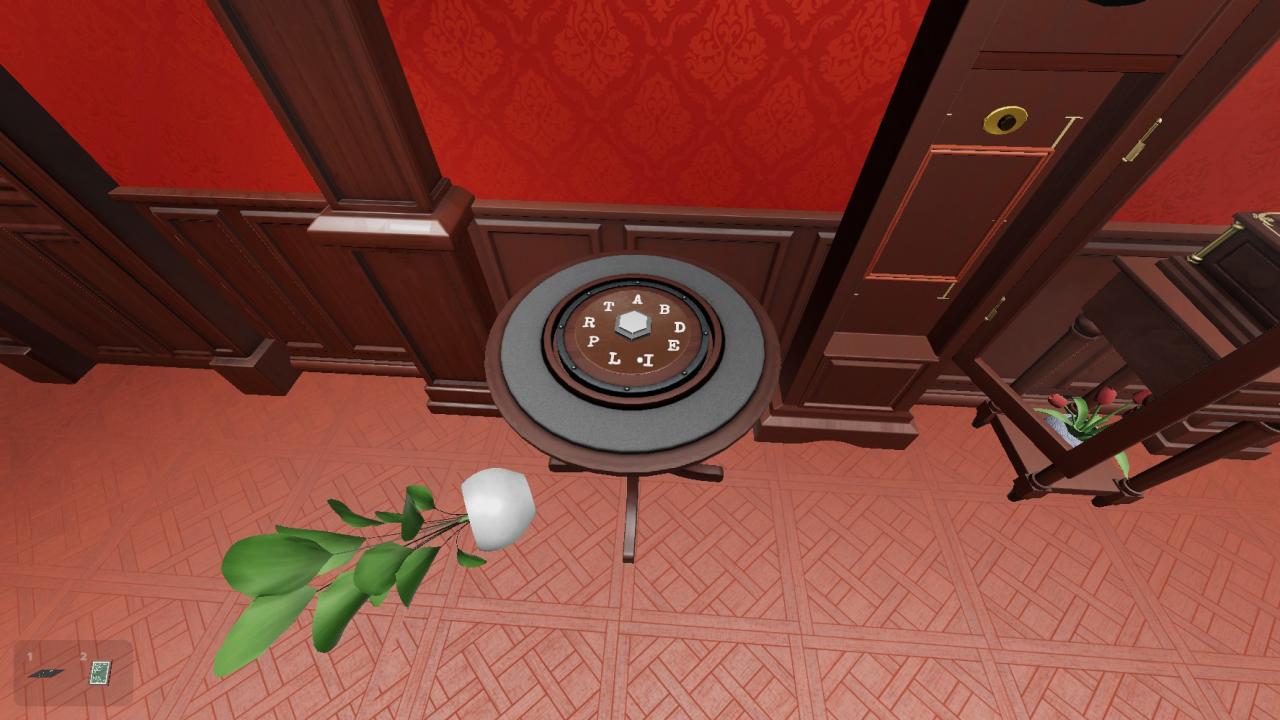
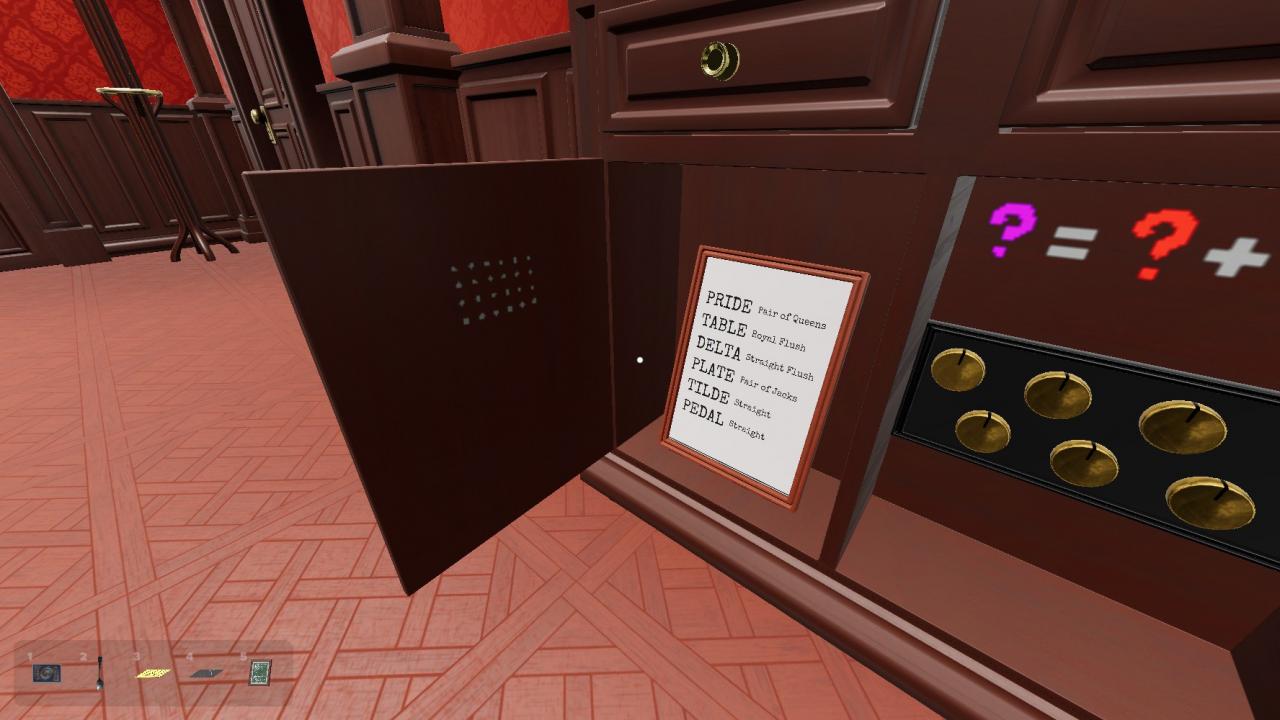
The table has letters written in a circle, and a submit button in the centre.
Next, in the bottom left cupboard of the cabinet by the window, there is this frame.

This picture shows six different 5-letter word, and the Poker hand associated with each of them.
All six of these words can be spelt entirely with the letters on the round table.
The puzzle is that, each letter is associated with a specific playing card, and when you combine them to make a 5-letter word, you can make a Poker hand.
To activate the seventh eye, figure out what card goes with each letter, place them on the table accordingly, and press submit.
The following will go into detail the intended logical path of this puzzle.
1. Start with the word TABLE, which is a Royal Flush. We don’t know which value goes to which card, but we know exactly the values of the five cards. We also know that they are the same suit.
2. Next, the word DELTA, which is a Straight Flush. The word DELTA shares all but one letter with the word TABLE, so we can roughly guess what cards there are in the hand currently.
DELTA is a Straight Flush, which mean 1) it has to be the same suit, and 2) it cannot be a Royal Flush. The only Straight you can make that shares 4 out of 5 cards with a Royal Flush is a 9-10-J-Q-K Straight, which mean we now know that D is a 9.
And, now that we know that the cards that are share between the two hands are A, E, L, and T, we can know for sure that none of these four can be the Ace, which mean B has to be the Ace.
3. Next, the word PLATE, which is a Pair of Jacks. Again, the word PLATE shares all but one letter with the word TABLE and DELTA, so we know the what the hand consists of.
Since we know that PLATE is a Pair of Jacks, and that none of A, E, L, and T cannot are the same card, we can deduce that P, which is unique to this word, has to be a Jack in order to make the pair.
4. Next, the word TILDE, which is a Pair of Jacks. This time, TILDE has two letters differing from TABLE and PLATE, but fortunately it’s still one letter away from DELTA.
TILDE is a Straight, but not a Straight Flush, which means I is a different suit. And, like what we did with DELTA, TILDE is a Straight that shares four of the five cards with DELTA, which is one step below a A-K-Q-J-10 straight. Since it’s cannot go back up, it must come down a step once more and therefore be an 8 to make the hand an 8-9-10-J-Q Straight.
And, A, which is the letter that’s missing from TILDE, must be the one card that is not shared between the two hands, which is the King.
Eye 7 (cont.)
5. Next, the word PEDAL, which is anoter Straight.
PEDAL is another Straight, but not a Straight Flush. So we know for sure that P is not Suit 1.
The three known cards of this hand is a 9, a Jack, and a King. So, the only way for this hand to be a straight, is to have the two unknown cards be a Queen and a 10 to make a 9-10-J-Q-K Straight.
Therefore, we now know than E and L are either a Queen or a 10, which means the remaining unknown card from the Royal Flush, which is T, must be the Jack of the Royal Flush.
6. Finally, the word PRIDE.
PRIDE is a Pair of Queens. We have three known cards out of the five, and none of them are Queens. Which means that, in order to make the Pair, both unknown cards have to be Queens.
So, R and E are both queens, and finally we can eliminate L being a Queen, which makes it a 10, and the rank of all cards are now known.
Once we know the value of all the cards we needed, we can figure out the suits by simply checking what cards we have available on the table.
Thankfully, most of the card on the table have unique values, with a few exception.
Since the table only has the King and Ace of Spades, we know that everything that has Suit 1 is the Spades. Additionally, the duplicate cards we need also have exactly one of each.
The final thing we have to work out is whether to take the 8 of Spades or 8 of Hearts.
But since we know that TILDE is an 8-9-10-J-Q Straight, not a Straight Flush, and with the four othe cards all being Spades, we must take the 8 of Hearts.
So, here is the final solution to the card puzzles.
We take those card and place them around the table accordingly, and press the button to submit.
Eye 8
Our first station for Eye 8 is the little locked drawer to the right of the Dial Clock.
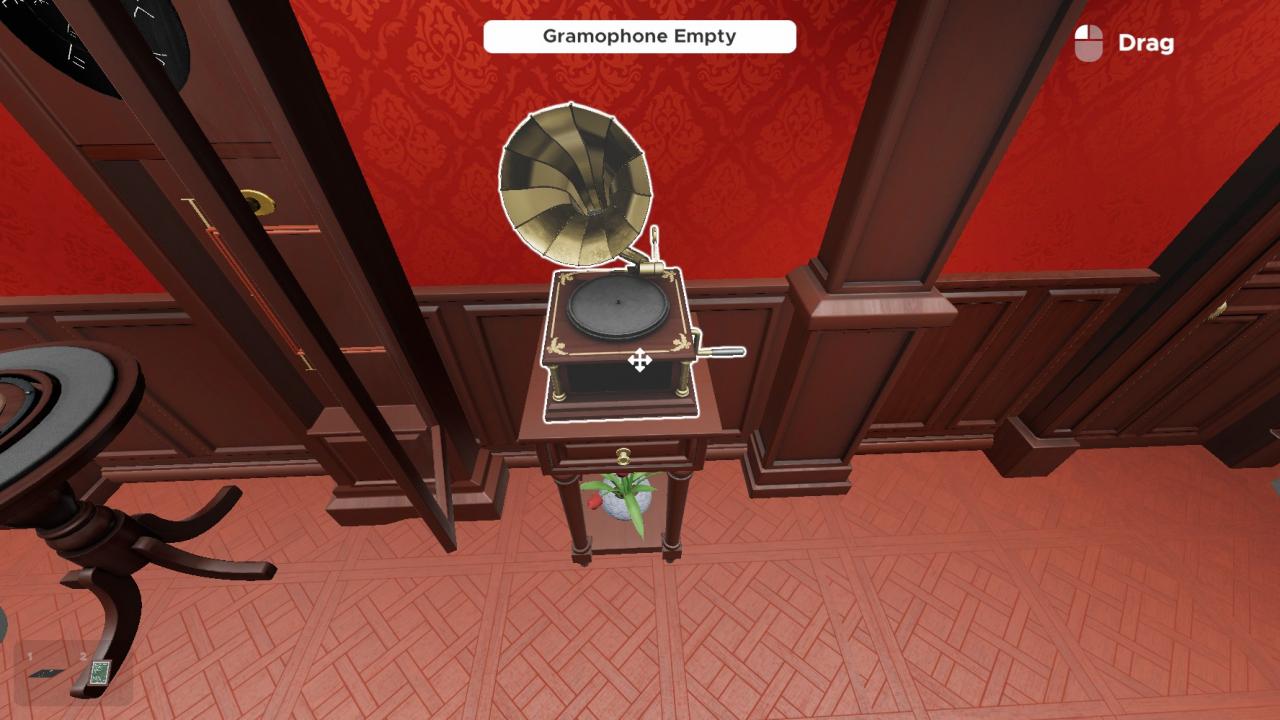
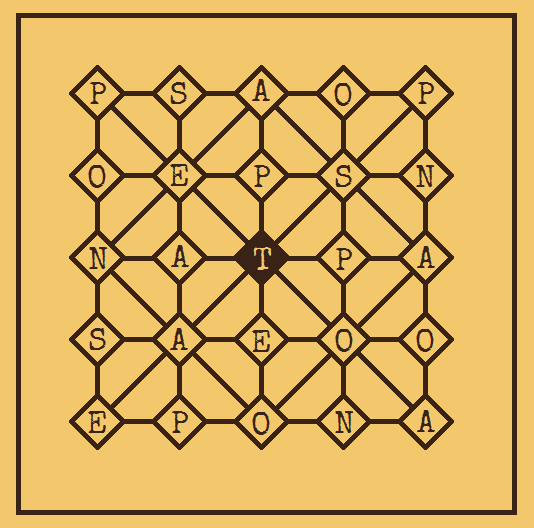
Drag the gramophone off to reveal this diagram.
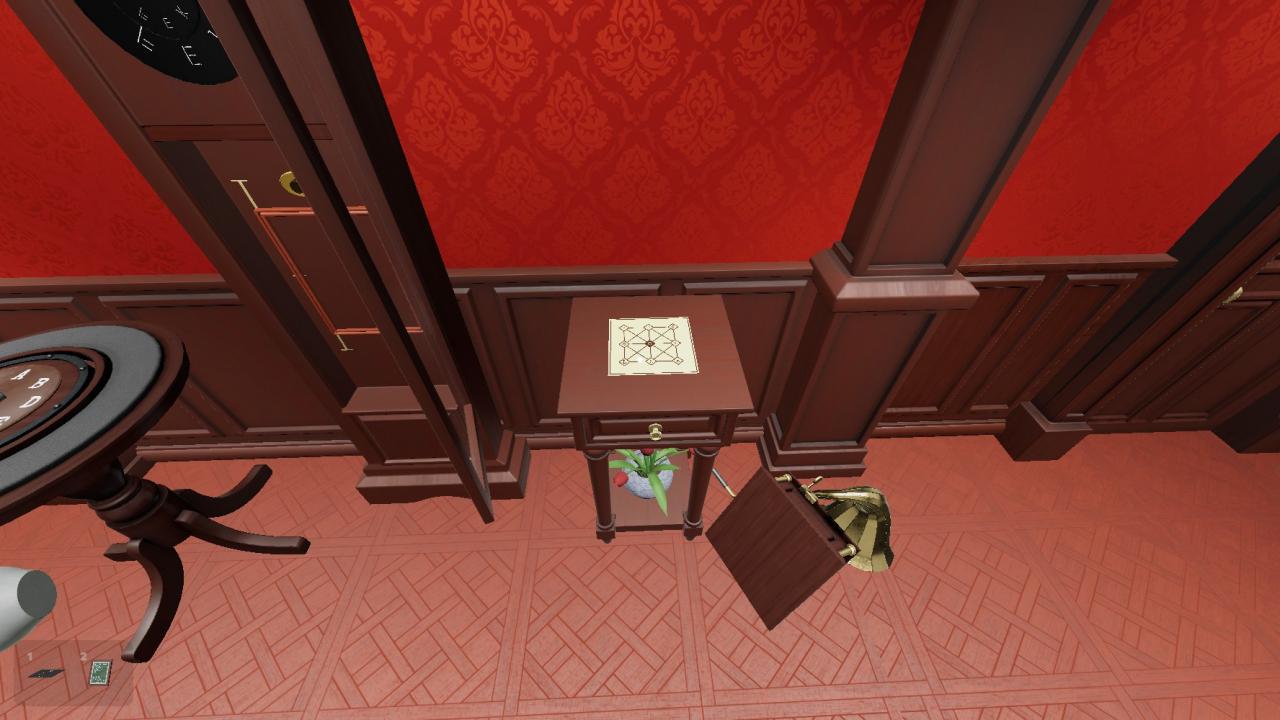
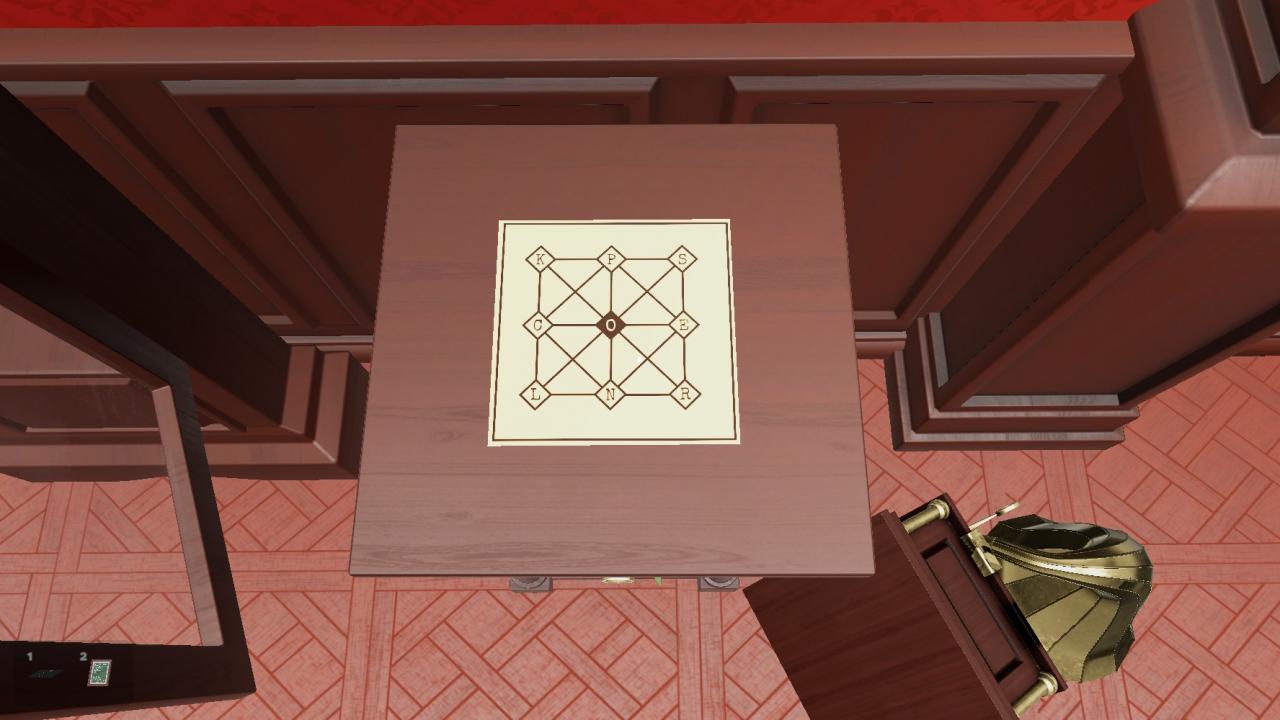
On the side of the drawer, you’ll see three dials that can be pointed to a specific direction.
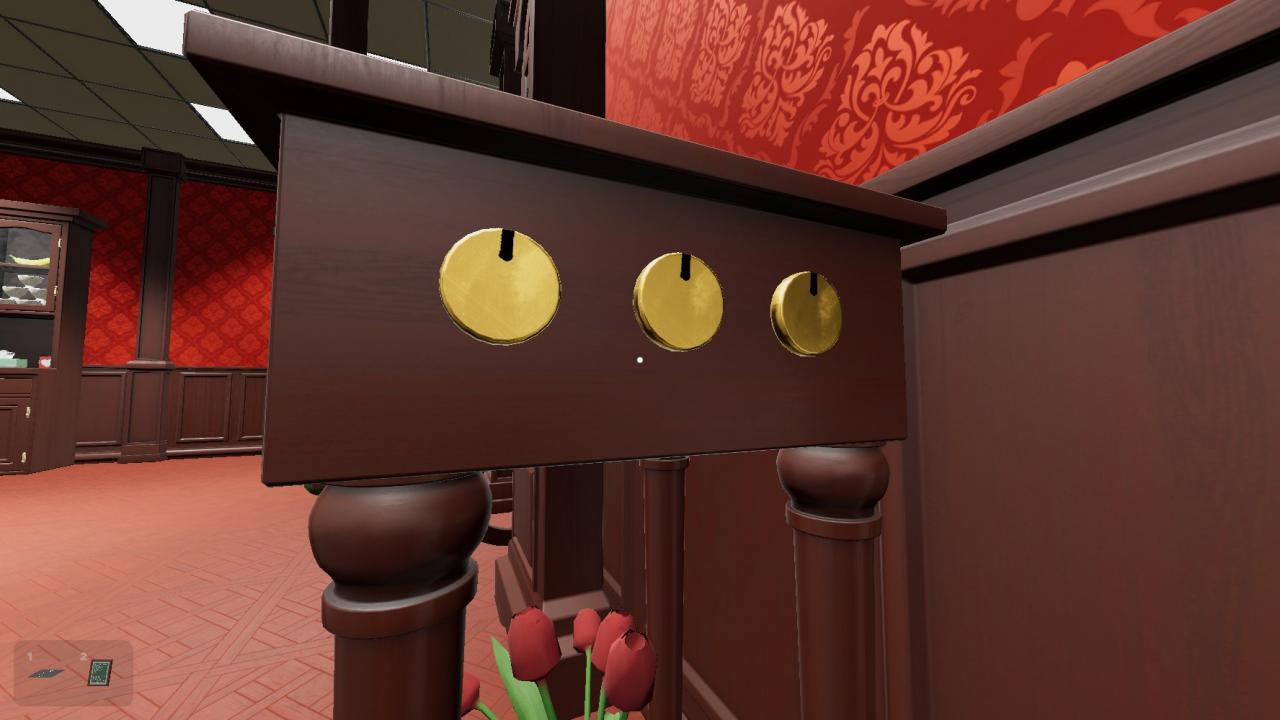
To unlock the drawer, you’d have to set the dials to the correct positions. But what’s the correct directions?
Starting at the centre of the diagram, take that letter, and move to a different node to grab the next letter, and continue until you have spelt the answer.
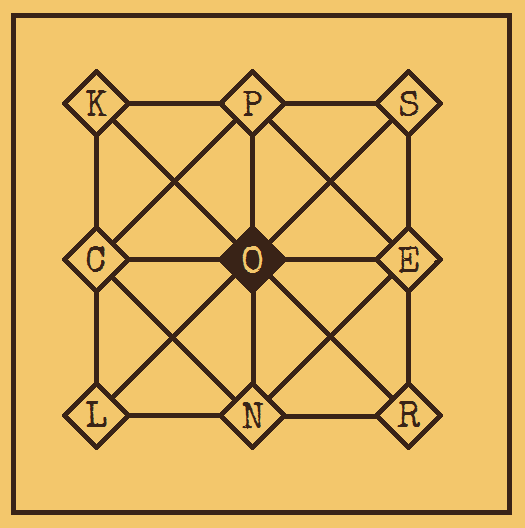
In this case, the answer is the word “OPEN”, which is appropriate for a locked drawer.
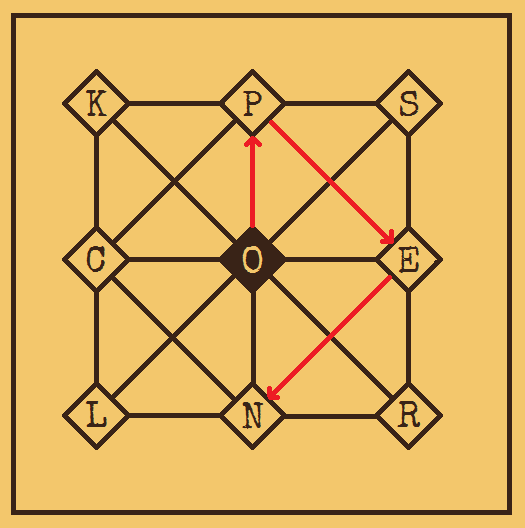
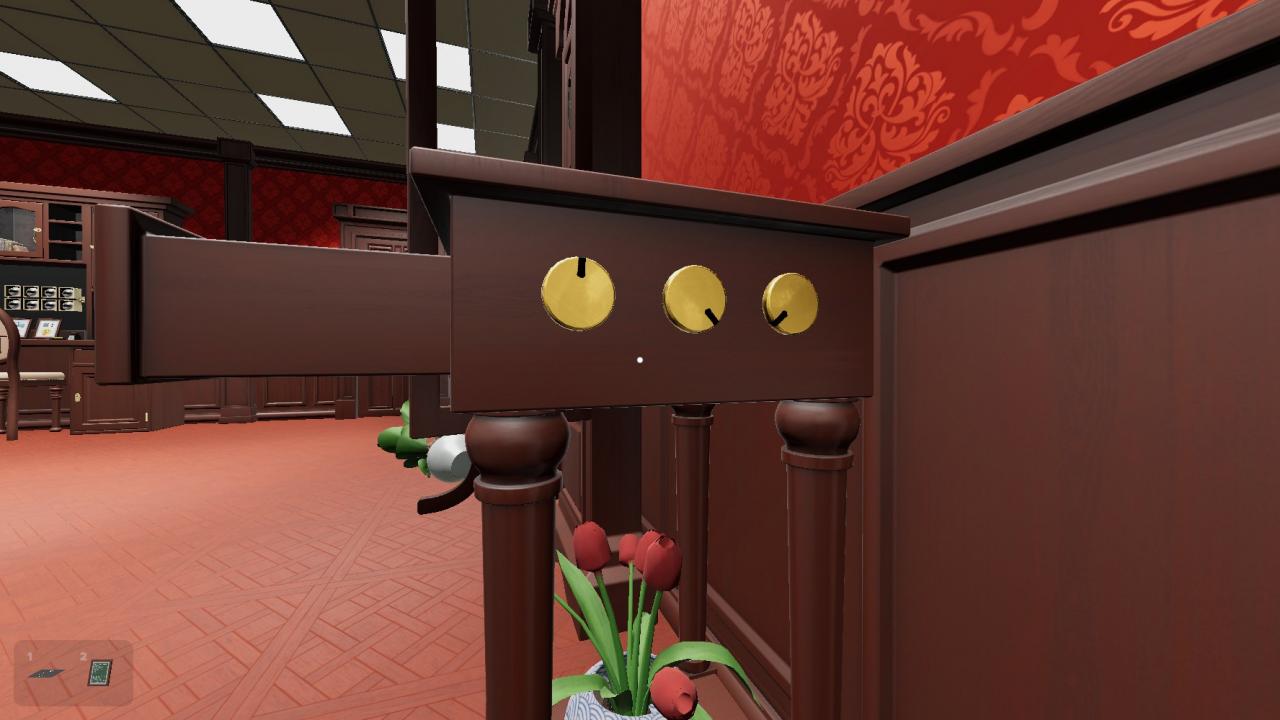
Then, you input the directions you took in order using the dials on the drawer. In this case, the combination is Up, Down-Right, and Down-Left.
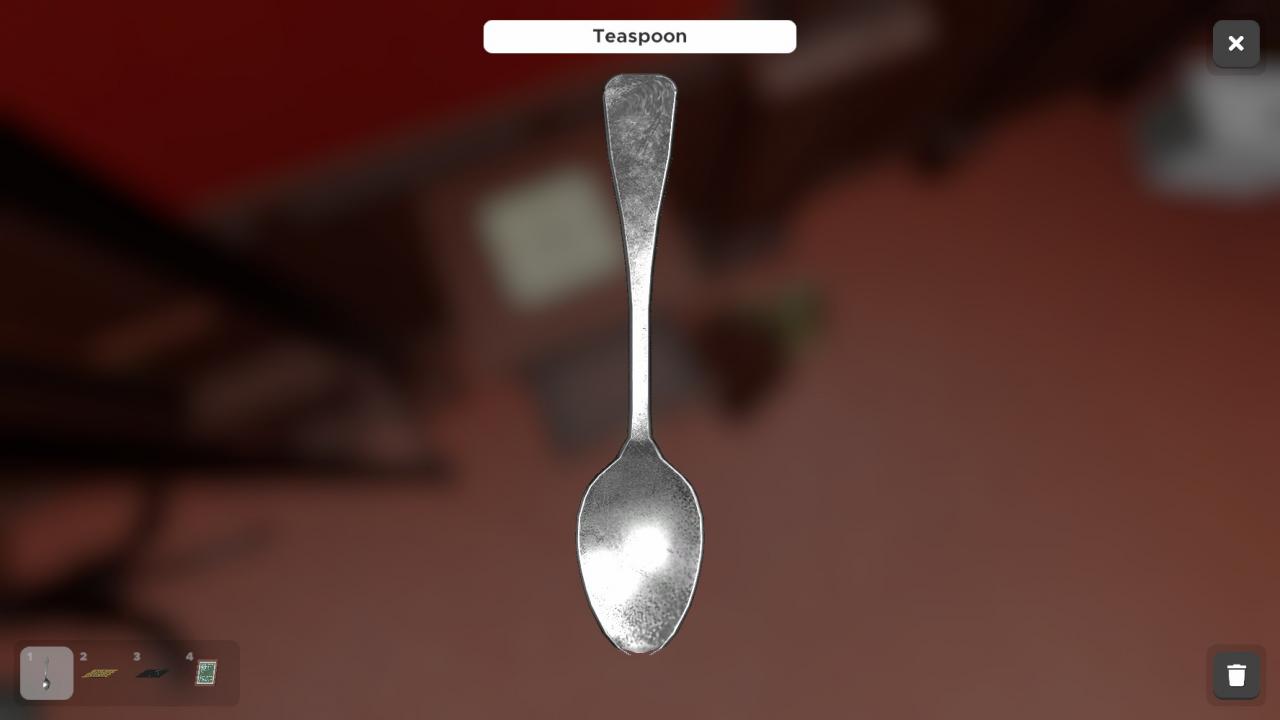
Inside the drawer is a new diagram, and a teaspoon.
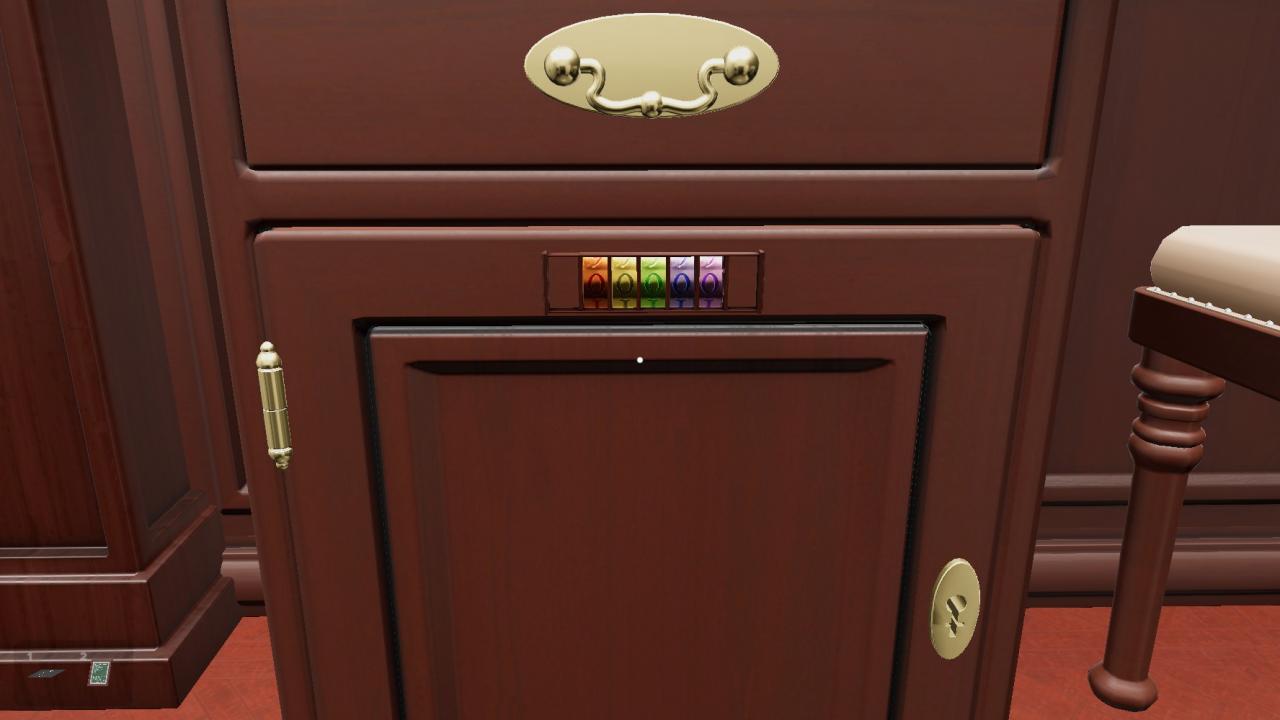
You might have also seen these dials in the bottom right cupboard by the window.

They look exactly like the dials on the side of the drawer. In fact, they are the same type of lock, just with a different diagram and word.
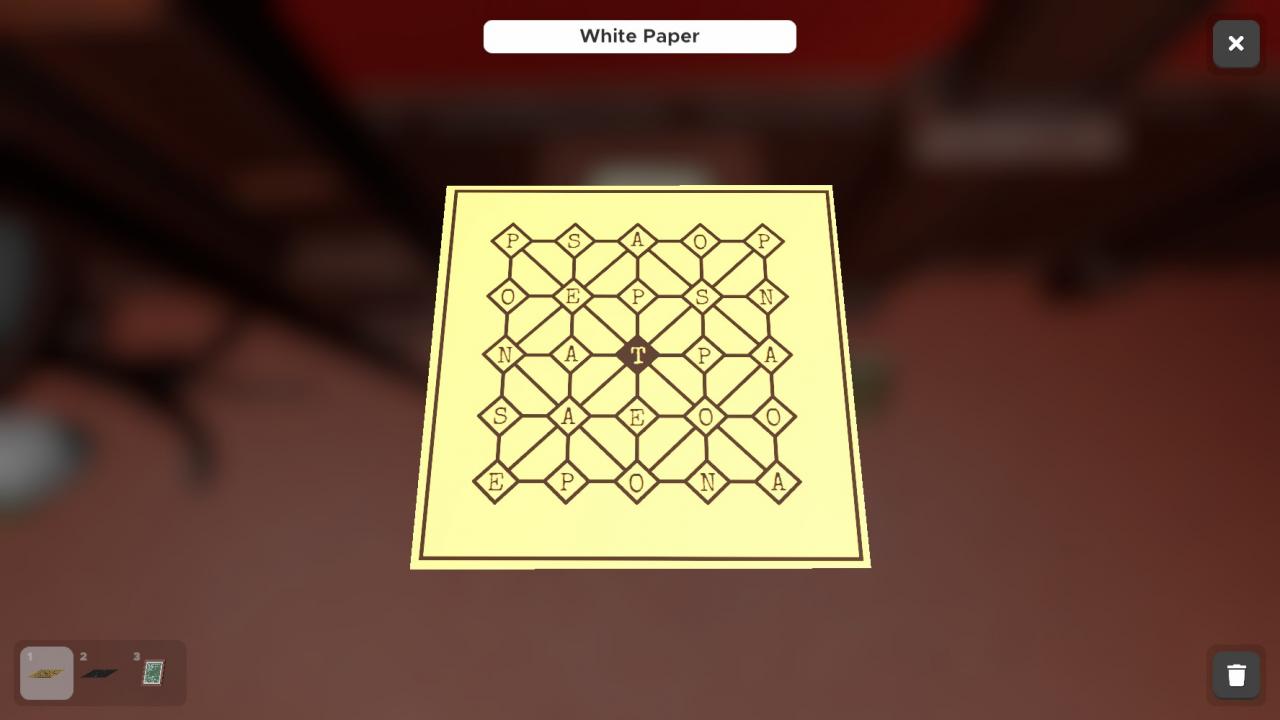
So we have the diagram. But what are we spelling this time?
Well, what was in the drawer with the diagram? Of course, it’s the teaspoon!
Use this diagram to spell the word TEASPOON, and then set the dials the same way you did with the drawer.
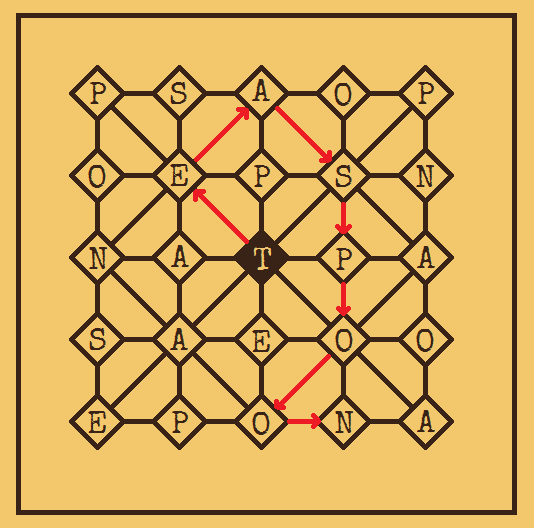 Up-Left, Up-Right, Down-Right, Down, Down, Down-Left, Right.
Once the dial have been set correctly, the 8th Eye will be activated.
Eye 1
So, here comes the thing I’ve been putting aside since the beginning — Eye 1.
Before starting on Eye 1, make sure you have solved the Dial Clock already. You might need it.
Eye 1 involves getting into this cabinet, which is locked with a 5-digit code.
There are clues scattered around the room for each digit of the code.
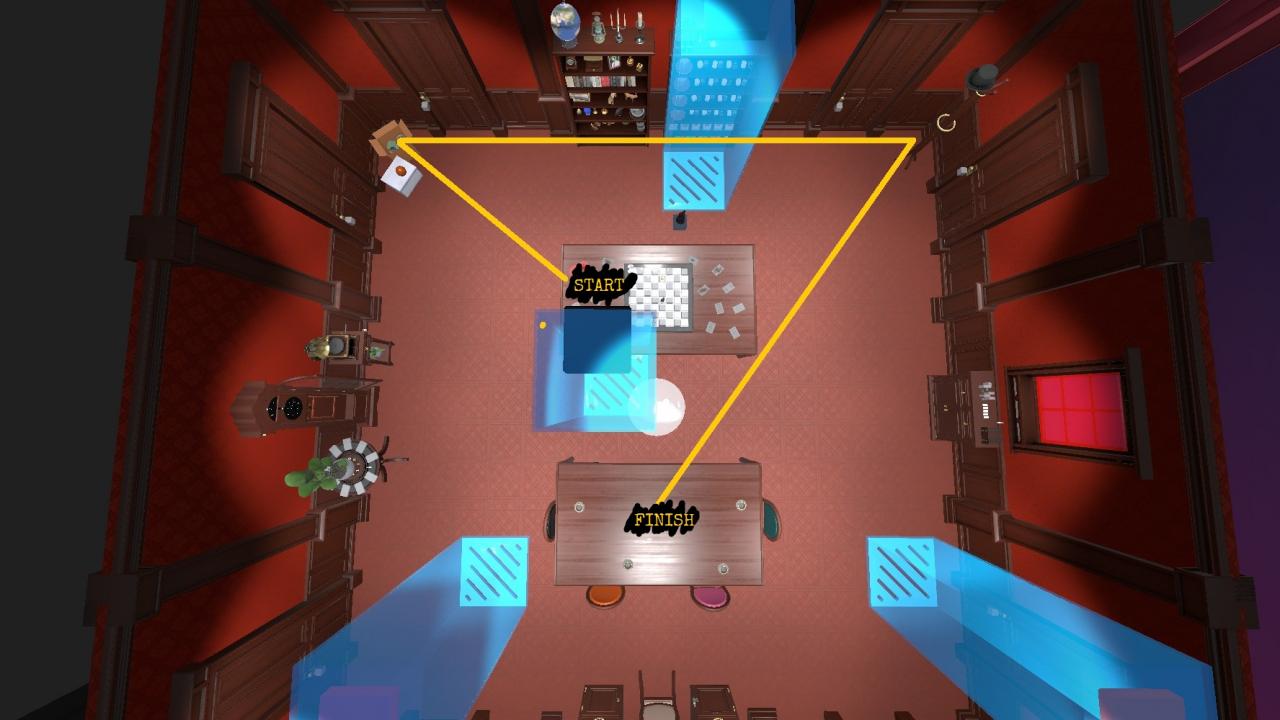
There are two red player pawns on the table with the Chess board, circled also in red.

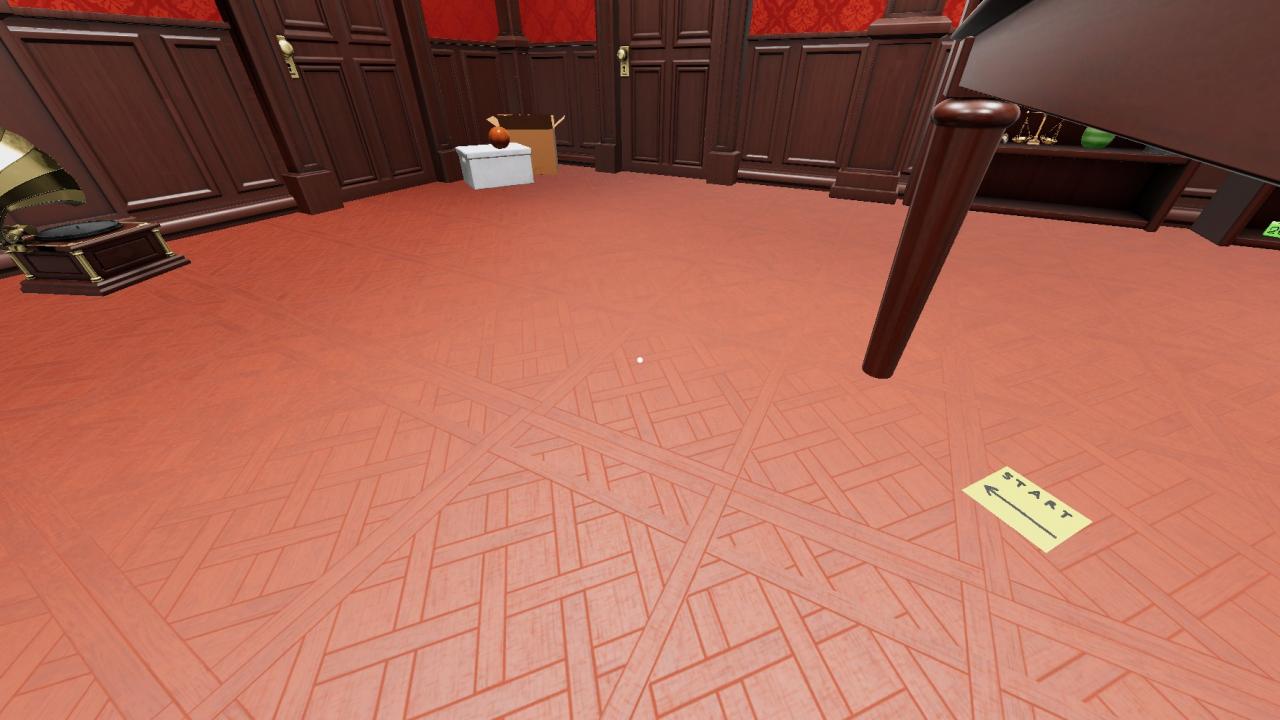
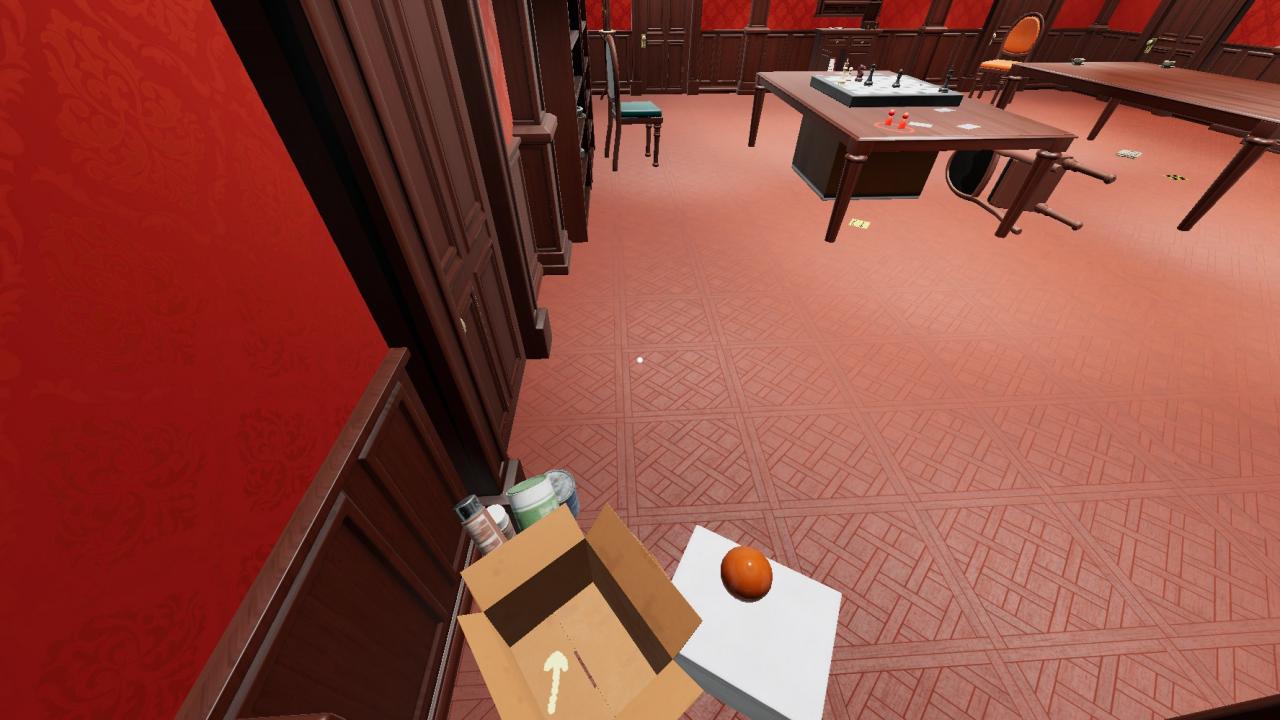
Under that very table is this piece of paper that says “Start” with an arrow.
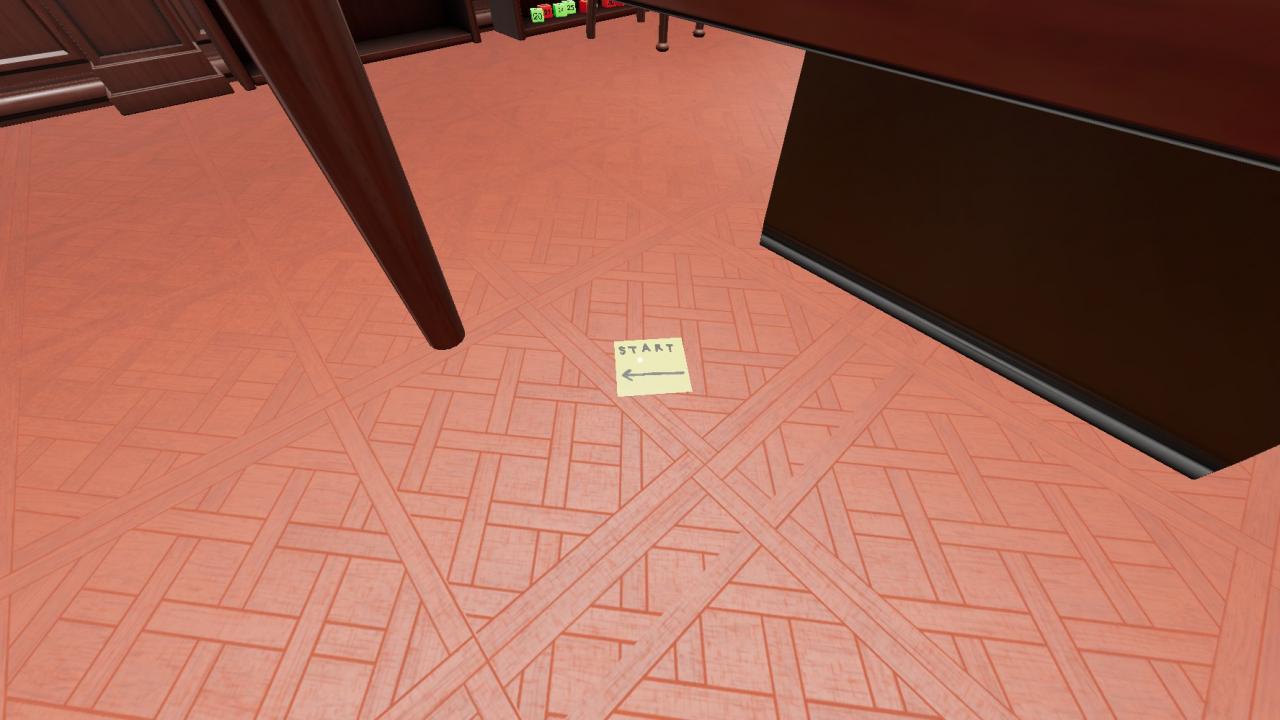
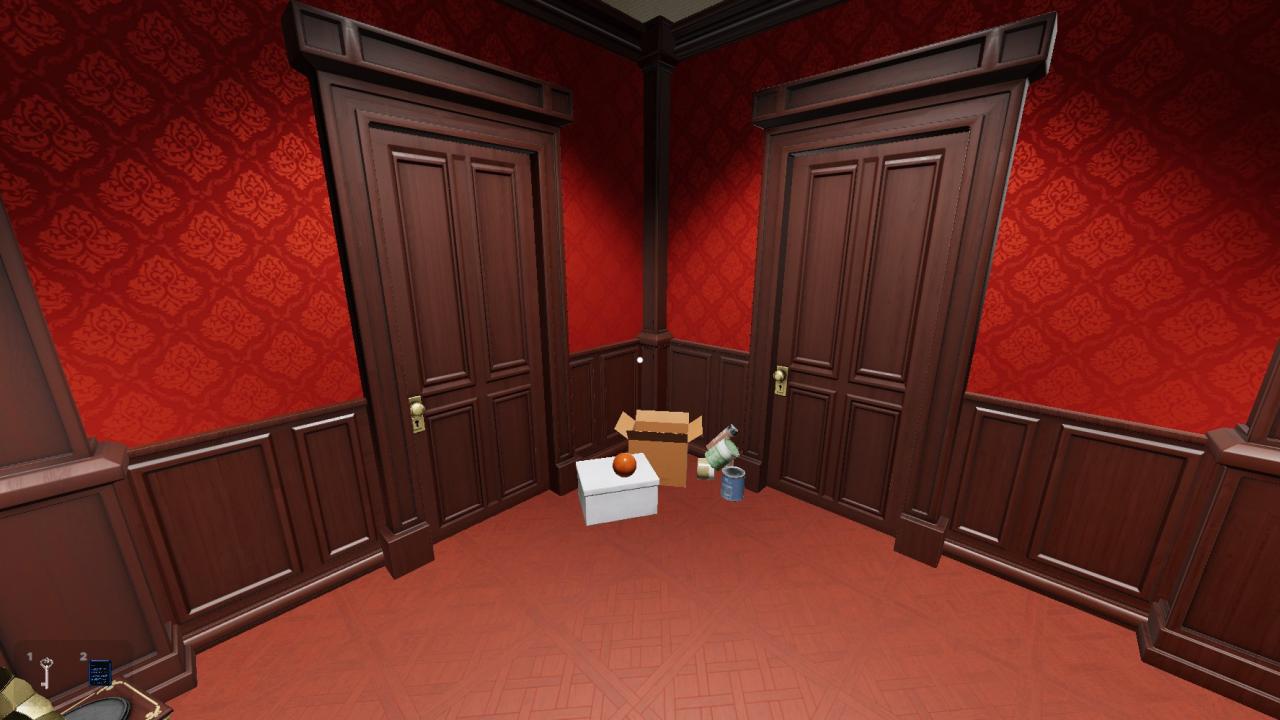
Following where the arrow is pointing at leads you to this box in the corner.
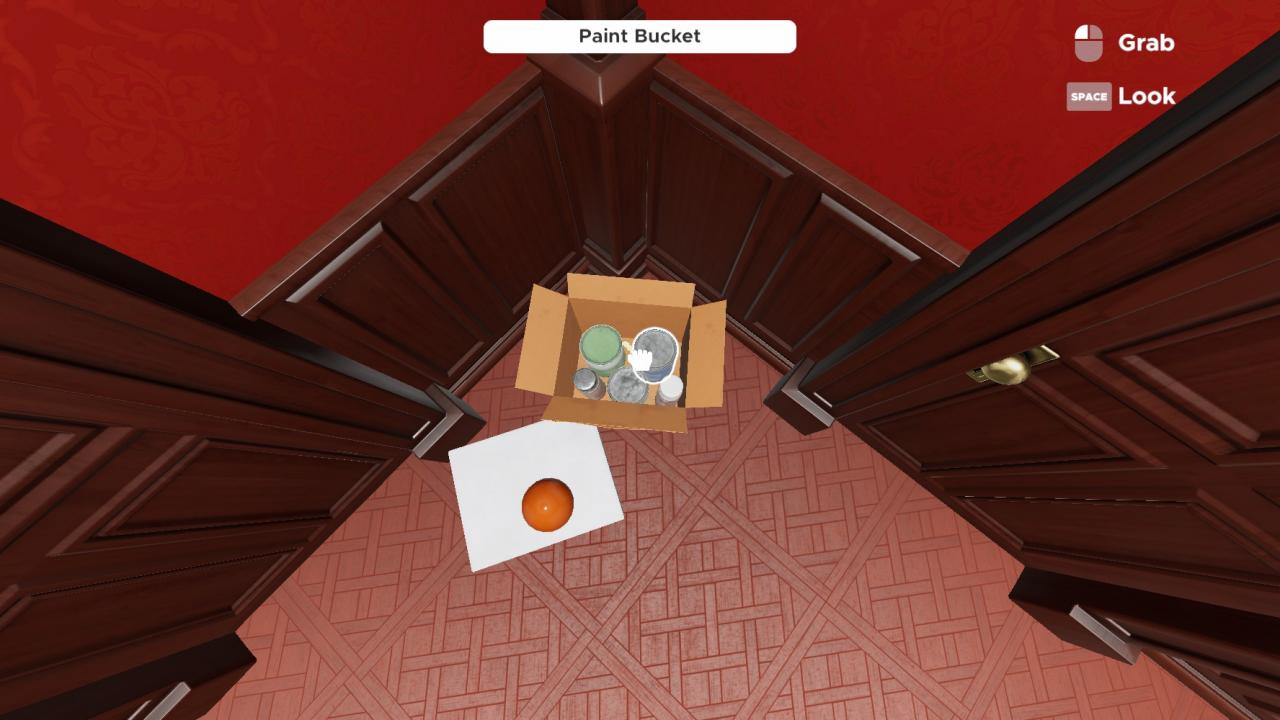
Taking out the cans reveals another arrow.
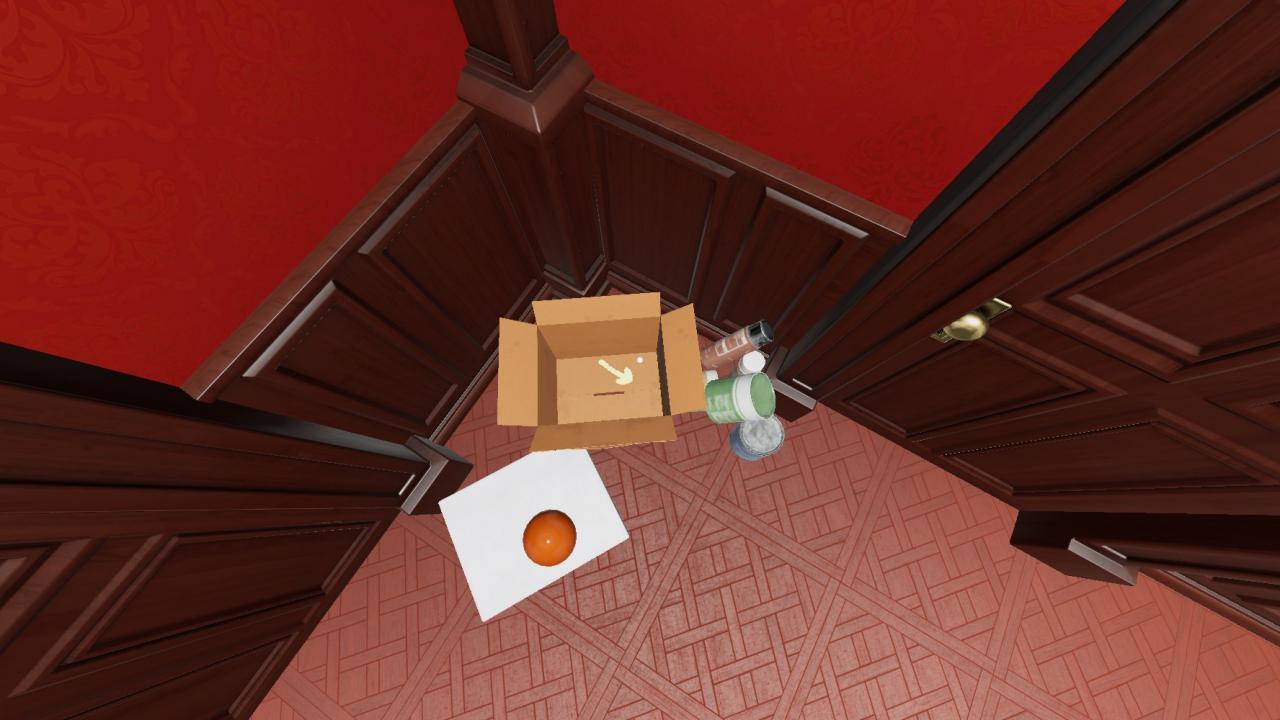
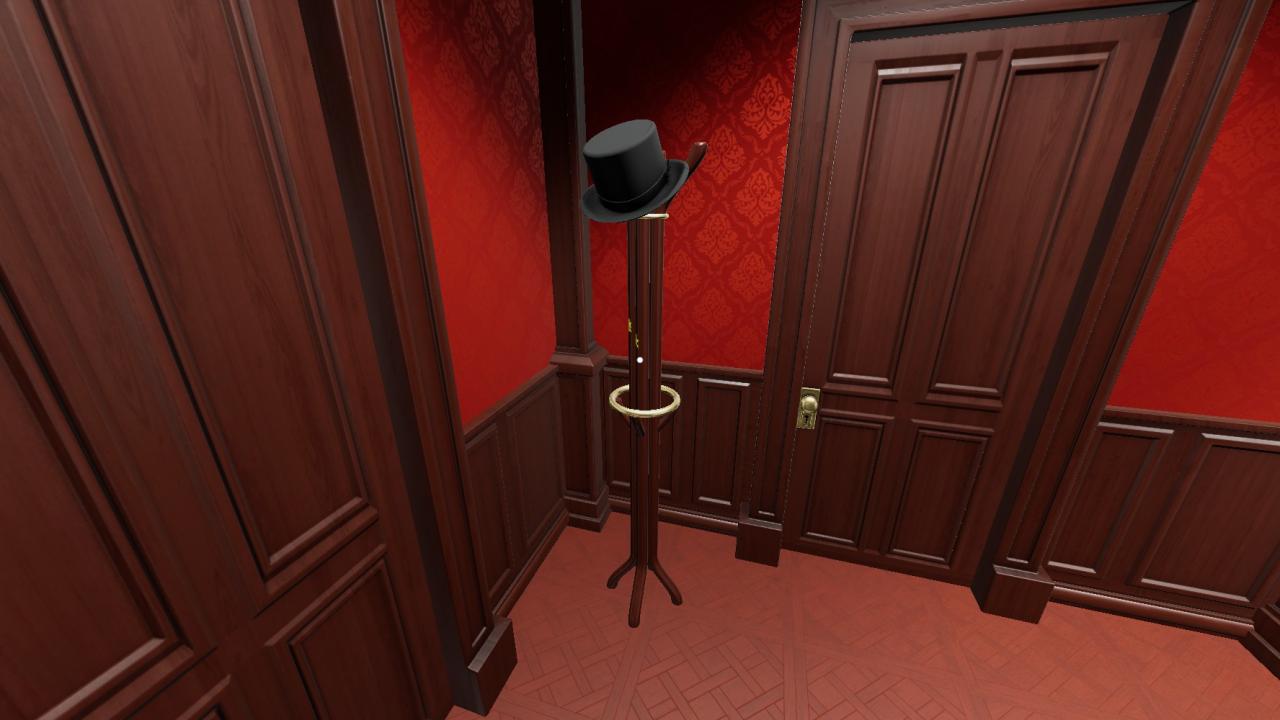
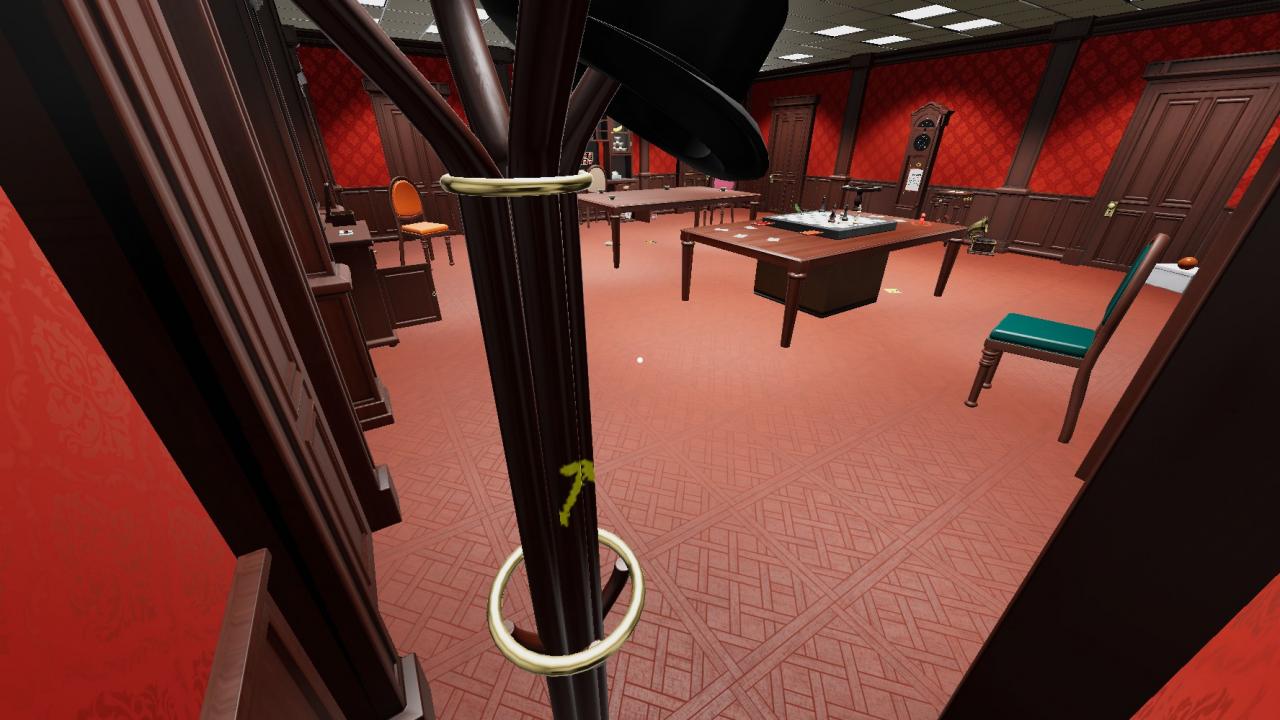
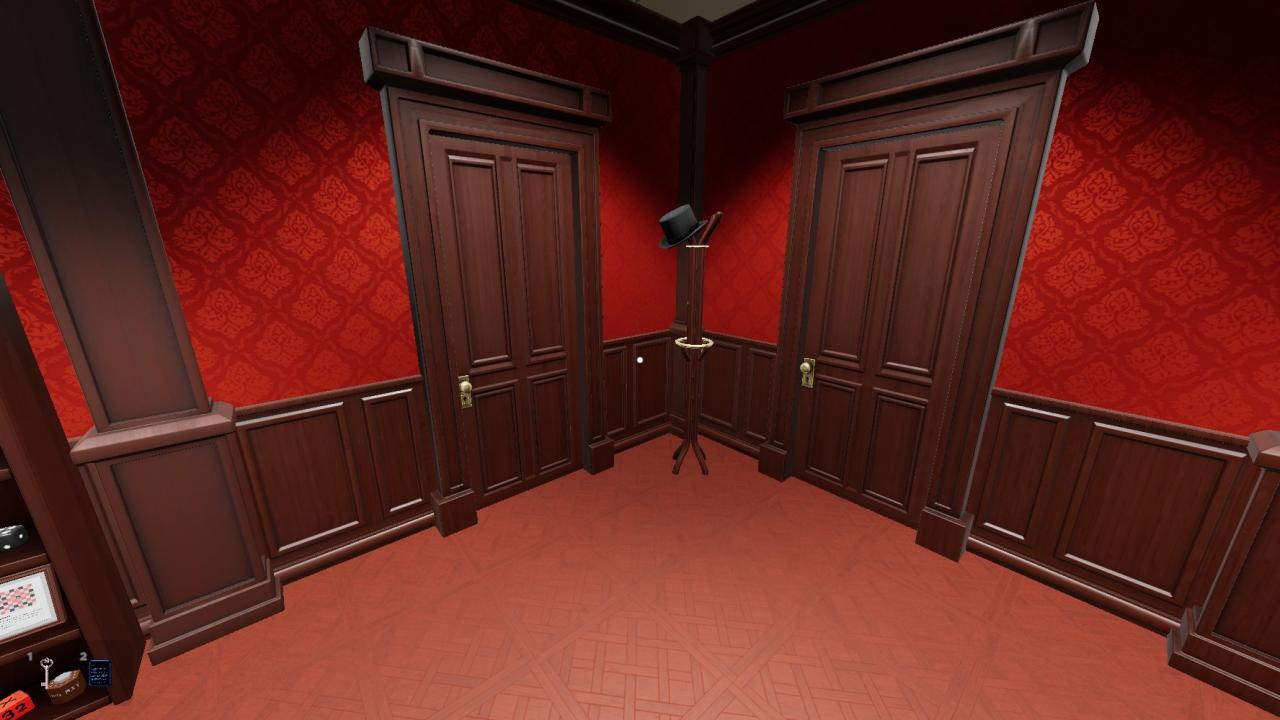
This arrow pointed to this coathanger, which has some paint on it.
Standing behind the coat hanger reveals an arrow pointing back toward the centre.
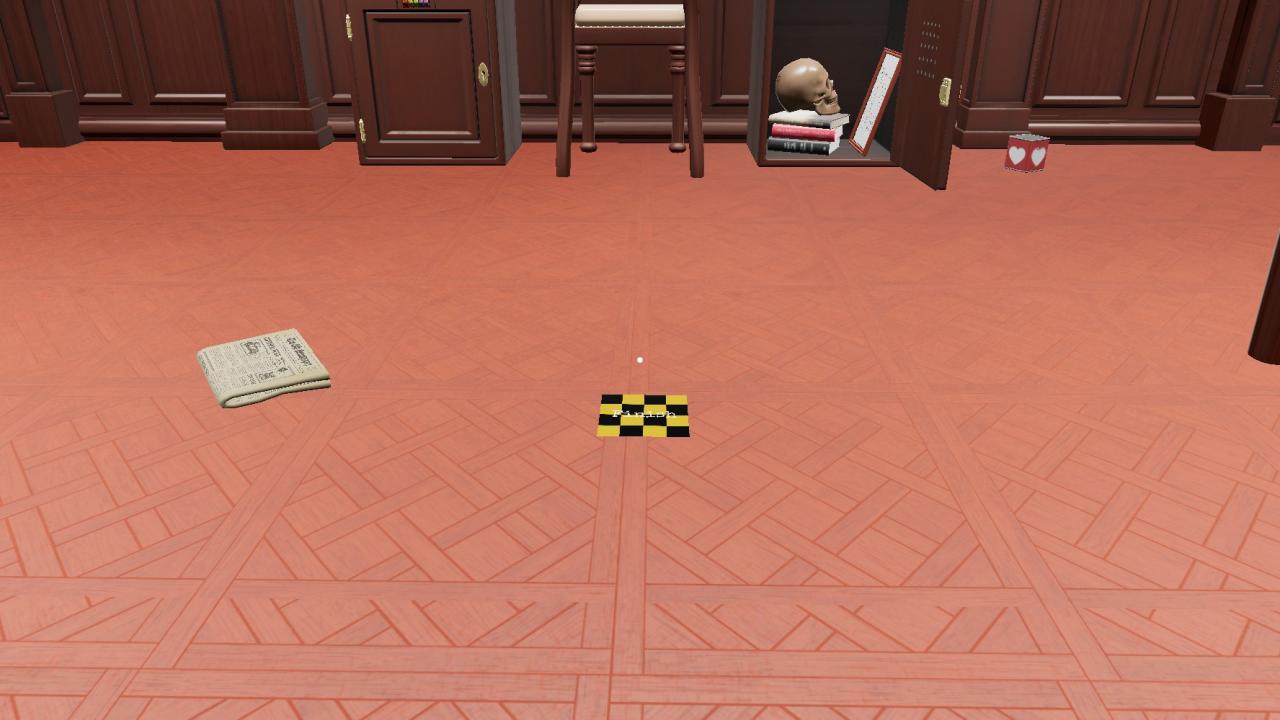
Following the arrow leads you to this Finish sign under the other table.
What you are supposed to realise is that, the arrows created a path around the room. Tracing out the path reveals that it writes out the digit 7.
This clock on the shelf has a Green minute hand pointing toward the number 4.

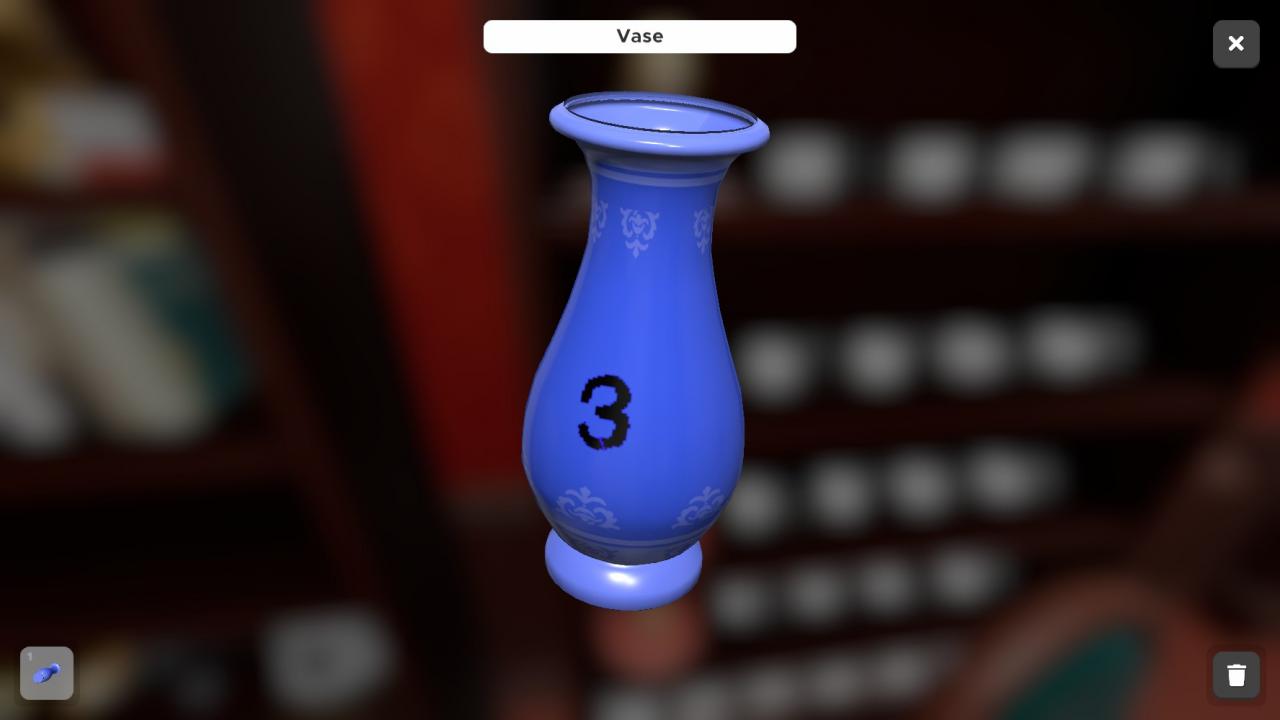
The blue vase that was used as one of the key for the shelf display has a 3 written on it.
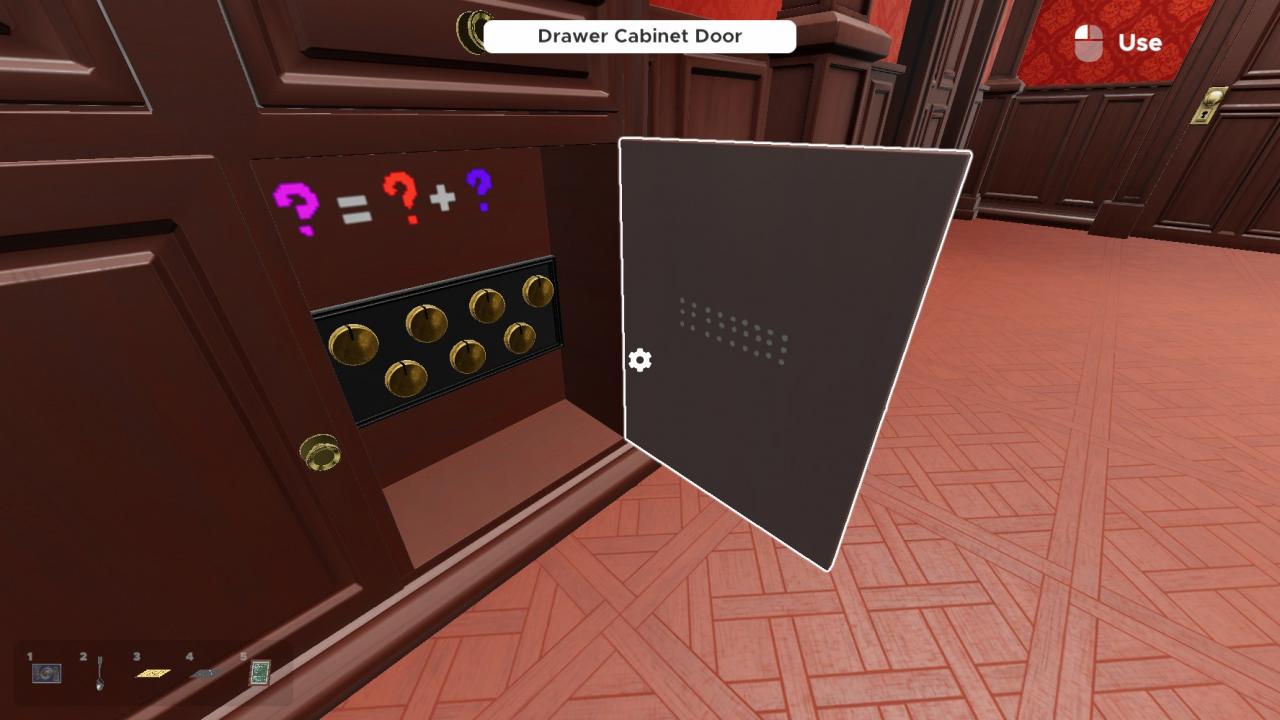
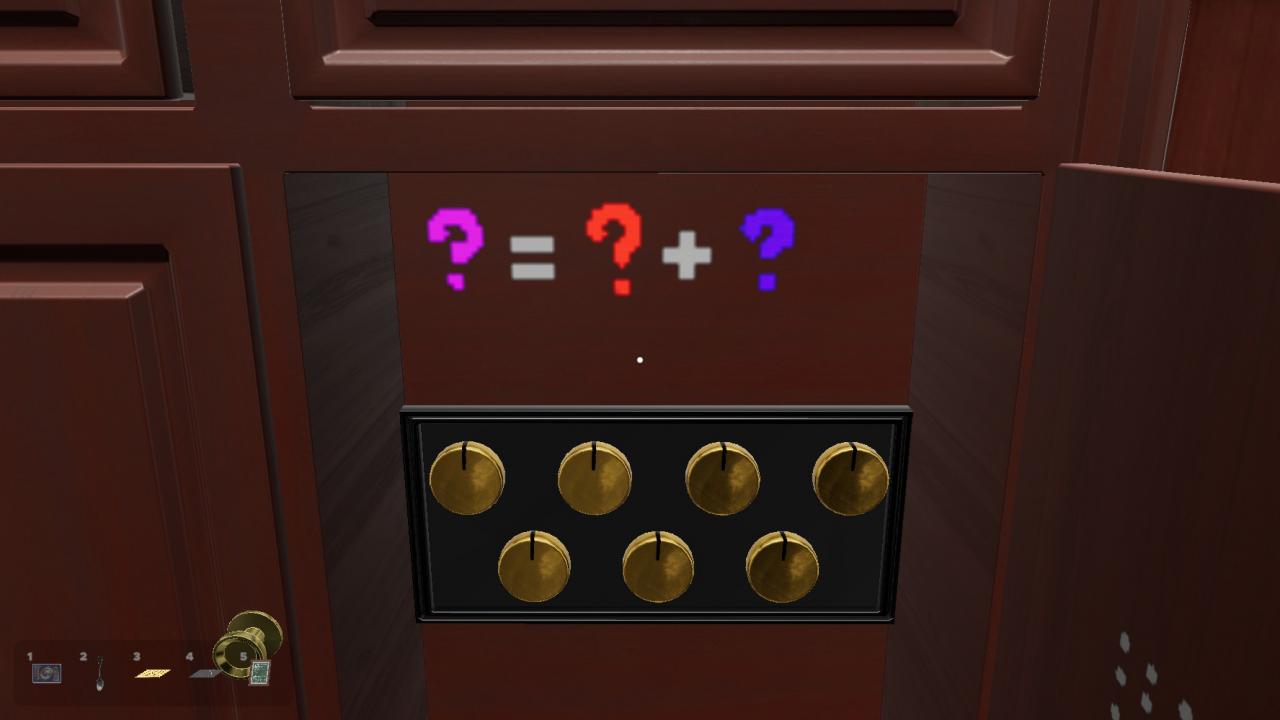
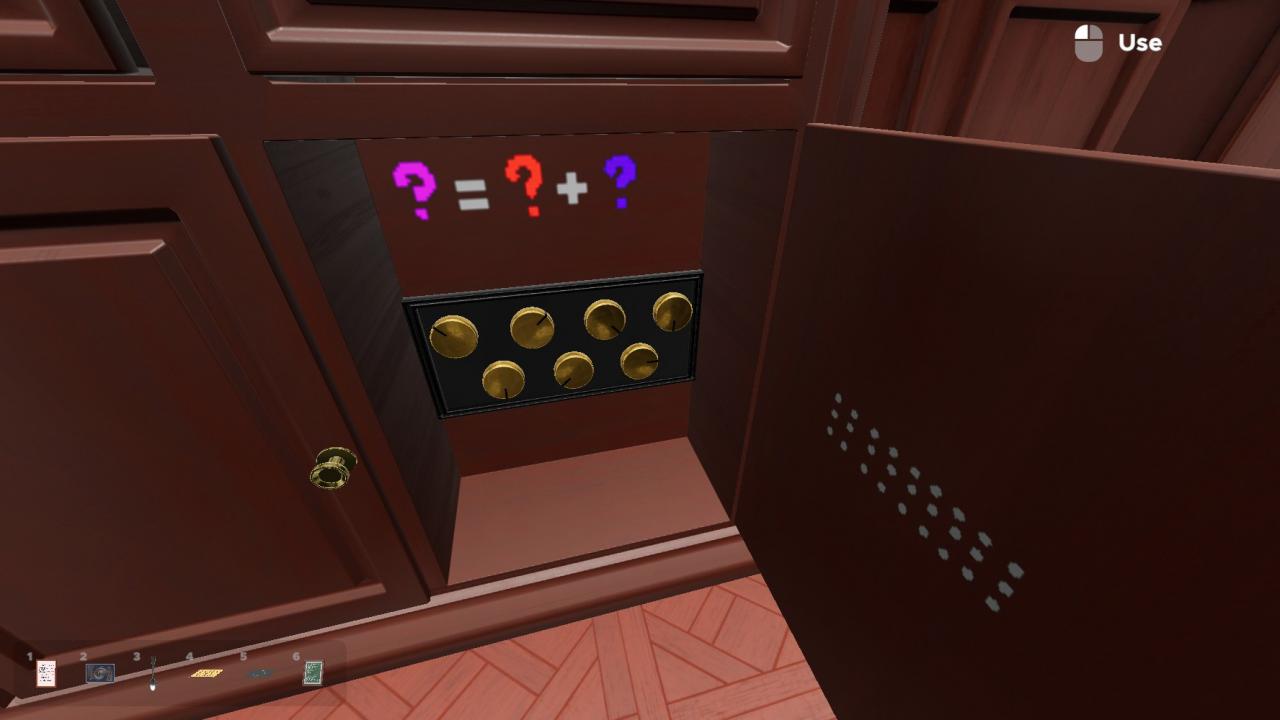
In the cupboard with the second set of letters dials, we see that Purple = Red + Blue.
Red is 2, and Blue is 3, so Purple is 5.
Inputting the code 27435 unlocks the door.
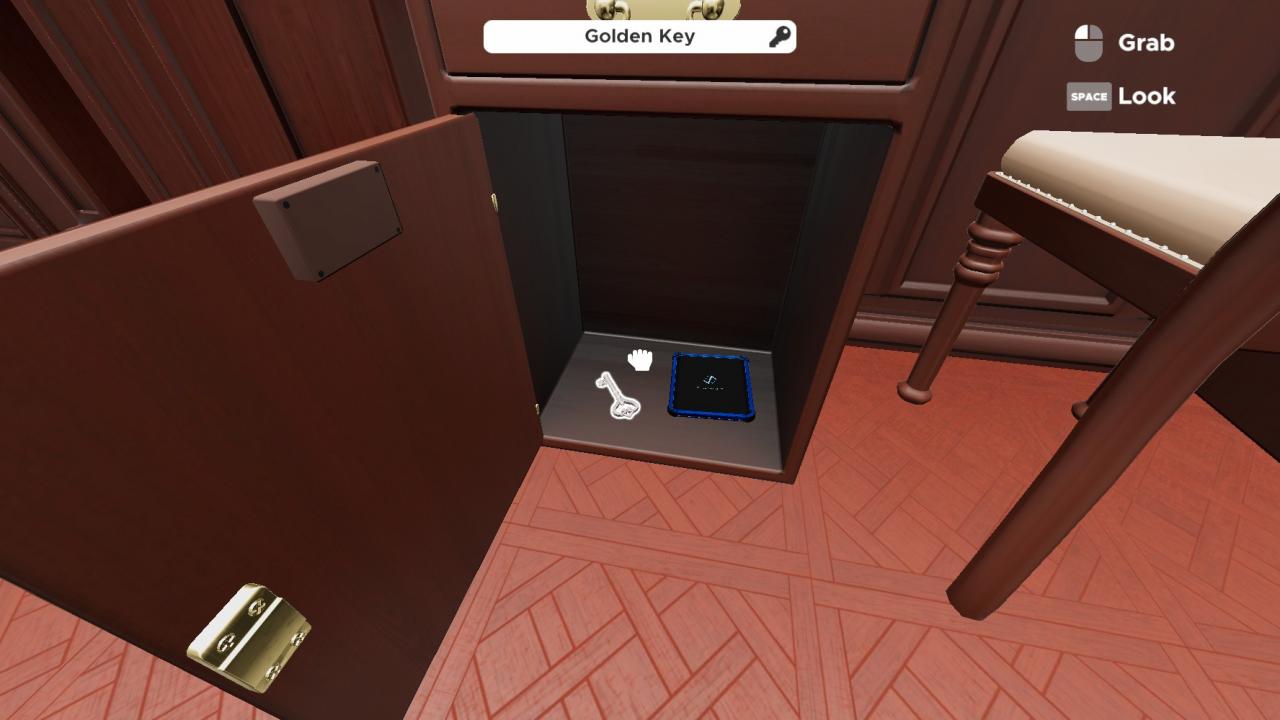
Inside the cupboard is a key and a tablet.
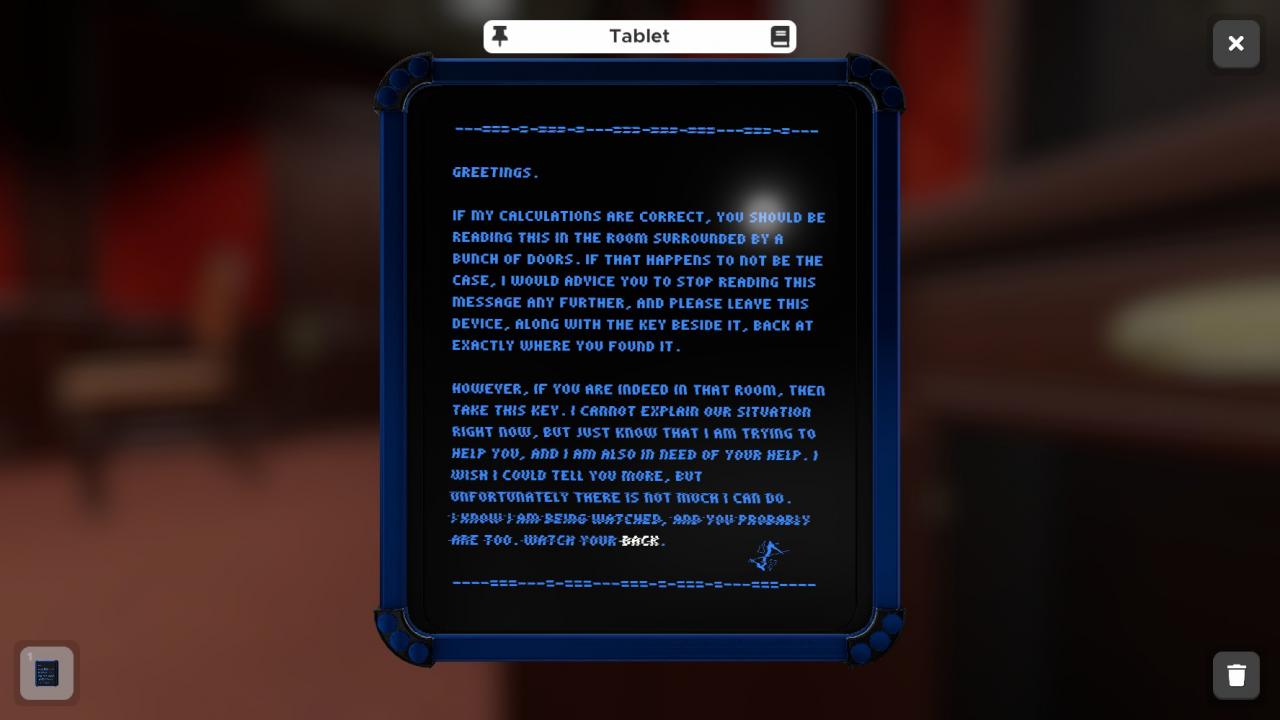
The word “back” is highlighted. On the back of the device, there is another message using the Dice cipher.
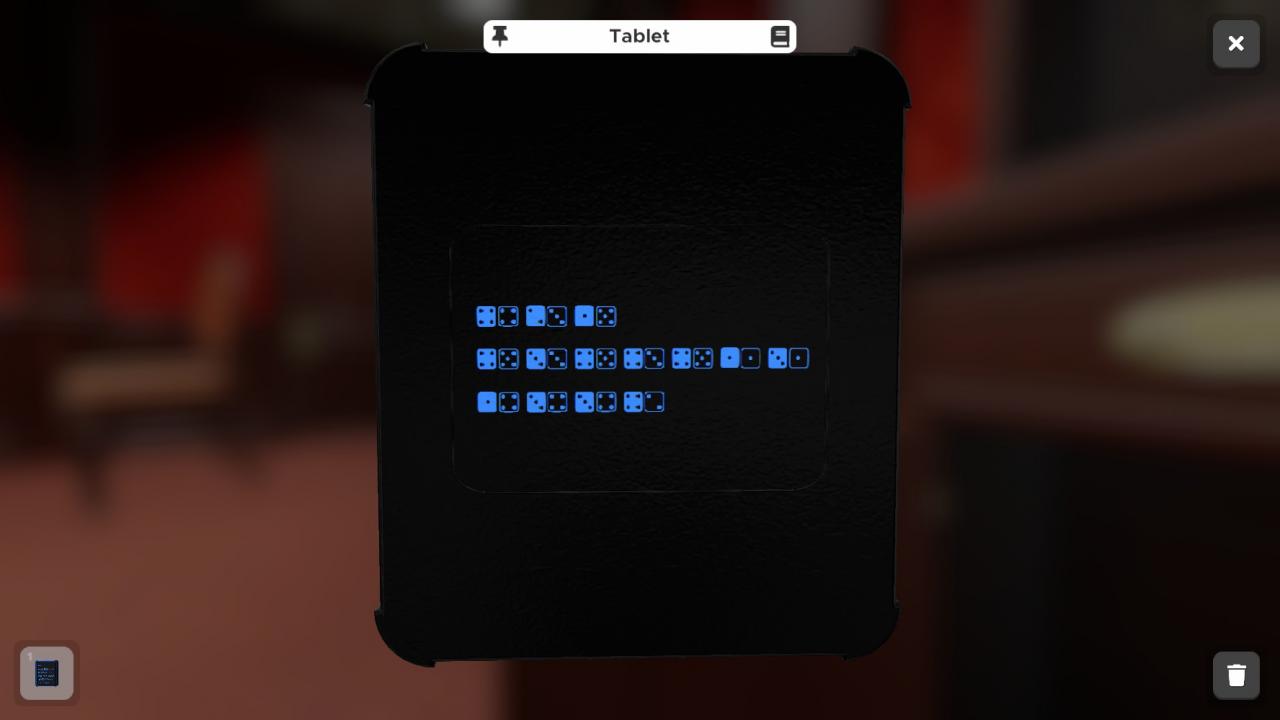
The phrase on the back reads “The Unusual Door”.
If you have been paying attention to the doors around the room…
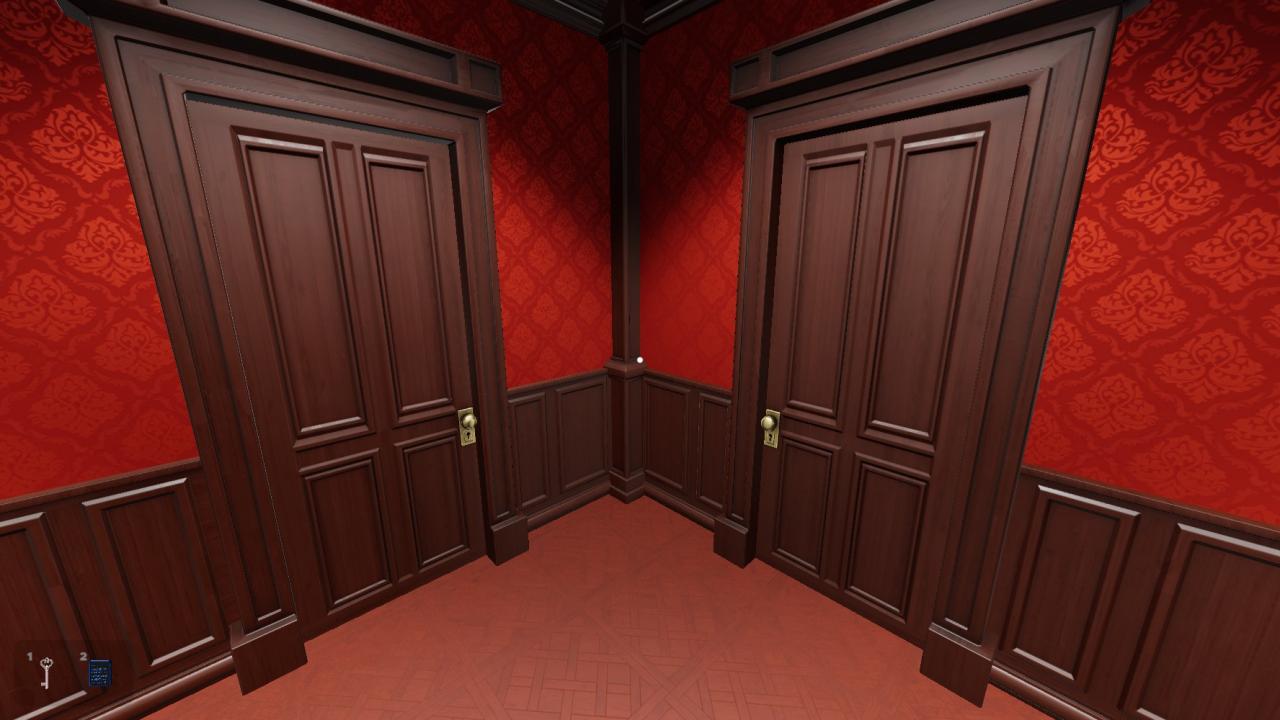
…you may have noticed that only ONE of them has the knob on the right side.
Put the given key in that door to activates the Eye.
Thanks to Kusane Hexaku for his great guide, all credit to his effort. you can also read the original guide from Steam Community. enjoy the game.
Related Posts:
- Escape Simulator: All Tokens Guide in Steampunk DLC (32/32)
- Escape Simulator: Walkthrough for Edgar Allan Poe
- Escape Simulator: How to Add Custom Textures