
This guide will discuss how to reach all achievements. This will include the location of all keys, the location of the voicemails and letters, and the conditions of each event.
Introduction
General Tips
- Some events are not decisions until a previous choice is made. For example, Tom cannot turn down Miranda at the party if he made the choice to text her earlier, whereas if he never texted it her, it becomes a decision. If you’re not paying close attention, this can really trip you when don’t notice that a scene was rewritten off camera.
- You don’t have to watch a scene more than once. If you want to change an event, you can do that on the time map itself. This is a massive time saver for experimenting.
- If you’re hunting for specific scenes or changes, give yourself only one independent variable and only change one decision at a time. Changing too much at once can make noticing the line of casualty difficult.
- By clicking on the character icons at the top of the visualizer, you can narrow down the time line to just the events that those specific characters are in. This also works for specific groups. For example, if you can’t remember the name of the scene where Tom and Linda have the choice that decided her ending, but you do remember that only the two of them are in it, you can use that to narrow the time line down to a handful of options.
- All choices have already played out by the time you get there and they have all default outcomes. To use A Terrible Choice as an example, where Jenny has to choose whether or not to leave a sleeping Ben to die, the default outcome is for her to stay and die, and her leaving is the alternative.
- If you have problems reading any of the letters lying around, you can use the R key to show a transcript in a neater font.
Game Progress
There are four locked rooms when the game starts: Raquel’s bedroom, the back garden, the dark room, and the hidden room. In order to unlock them all:
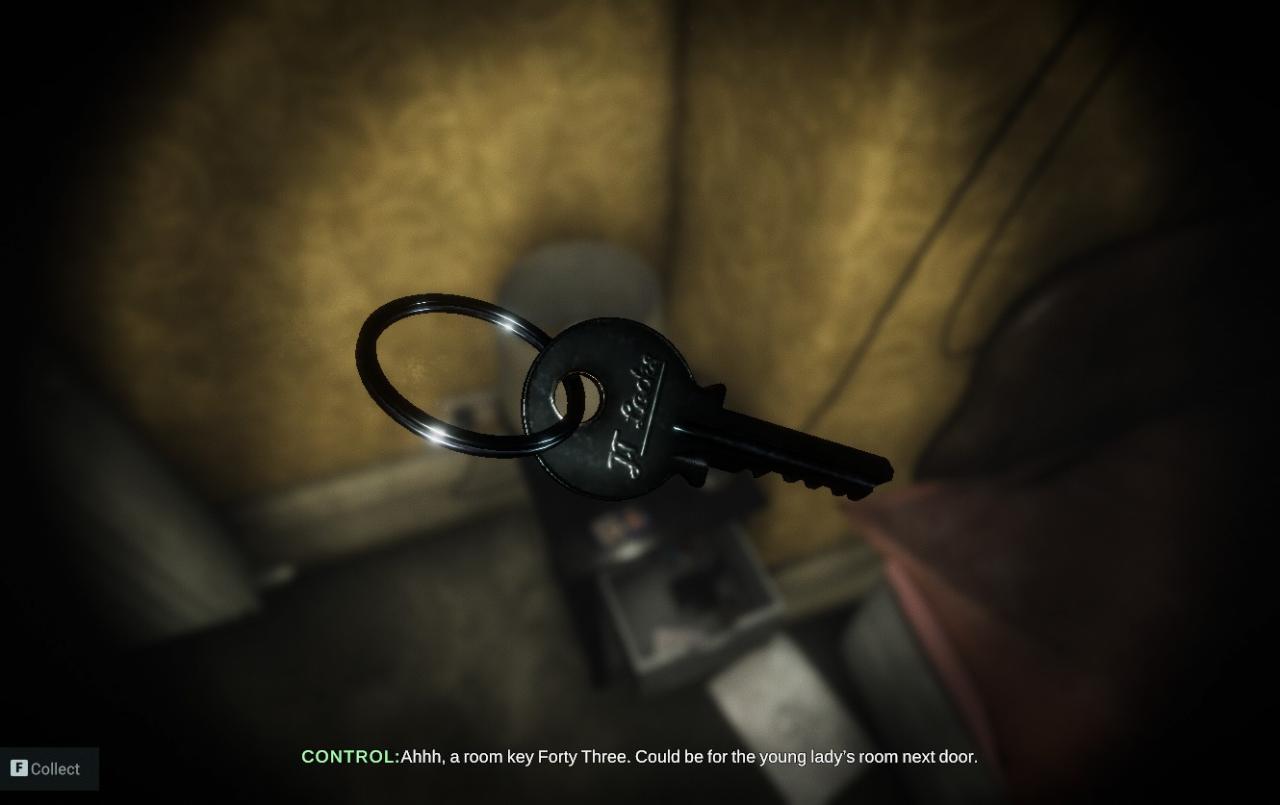
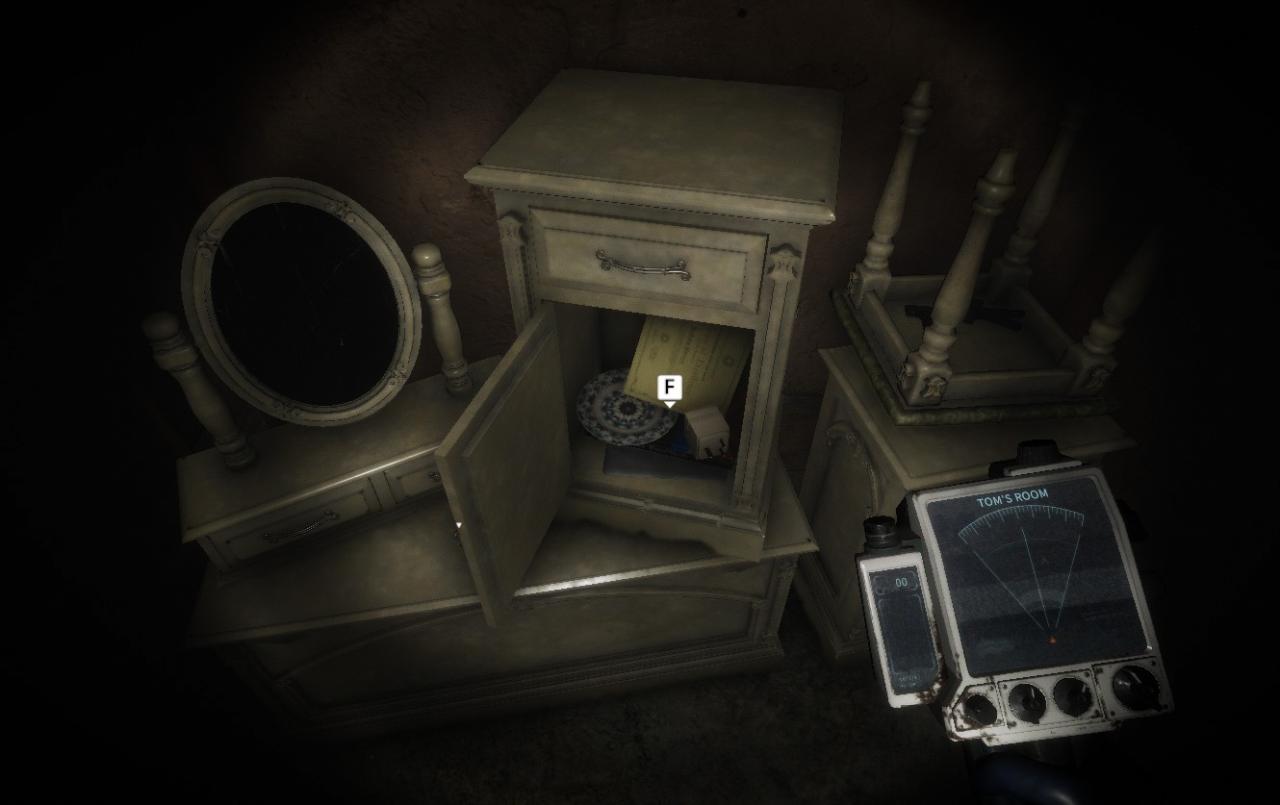
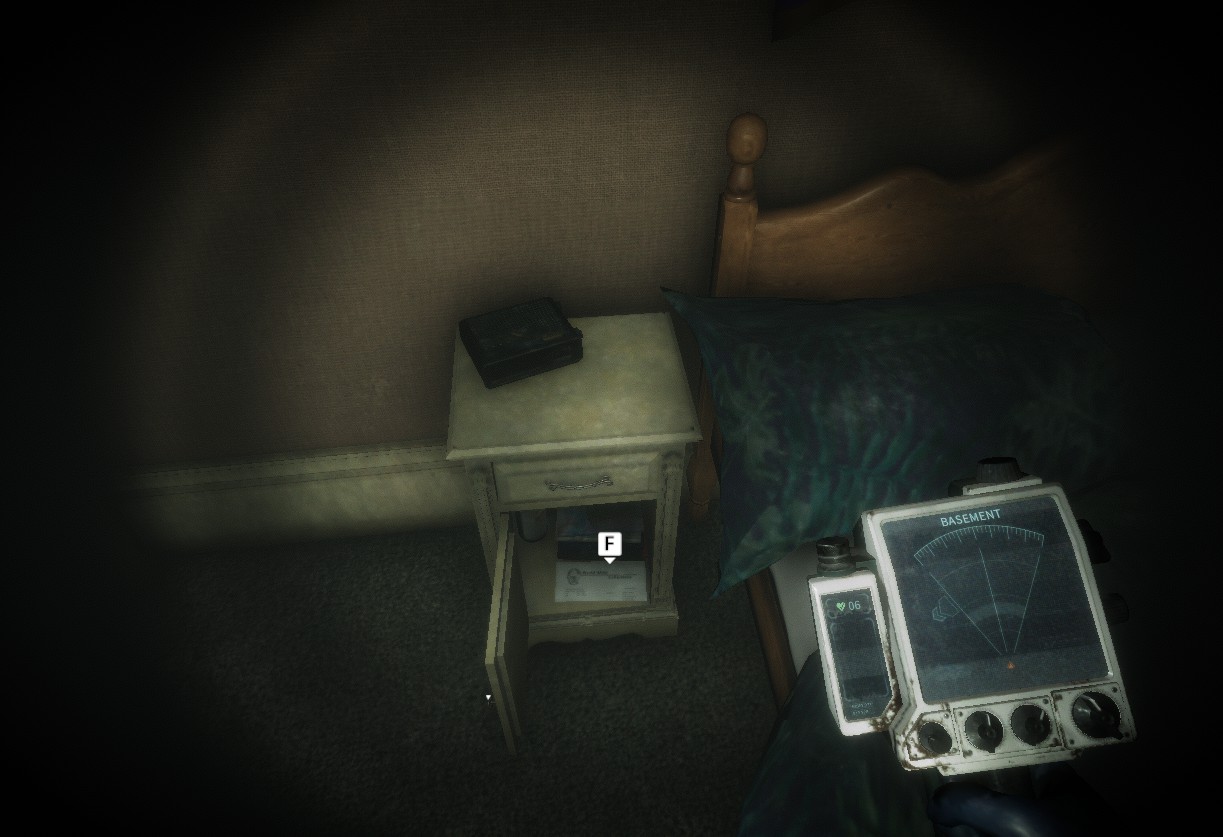
Raquel’s Bedroom: The key is in Jenny’s nightstand drawer. It’s pointed out in event 009 (Thin Walls), which is always available, but it’s available as soon as the game starts.
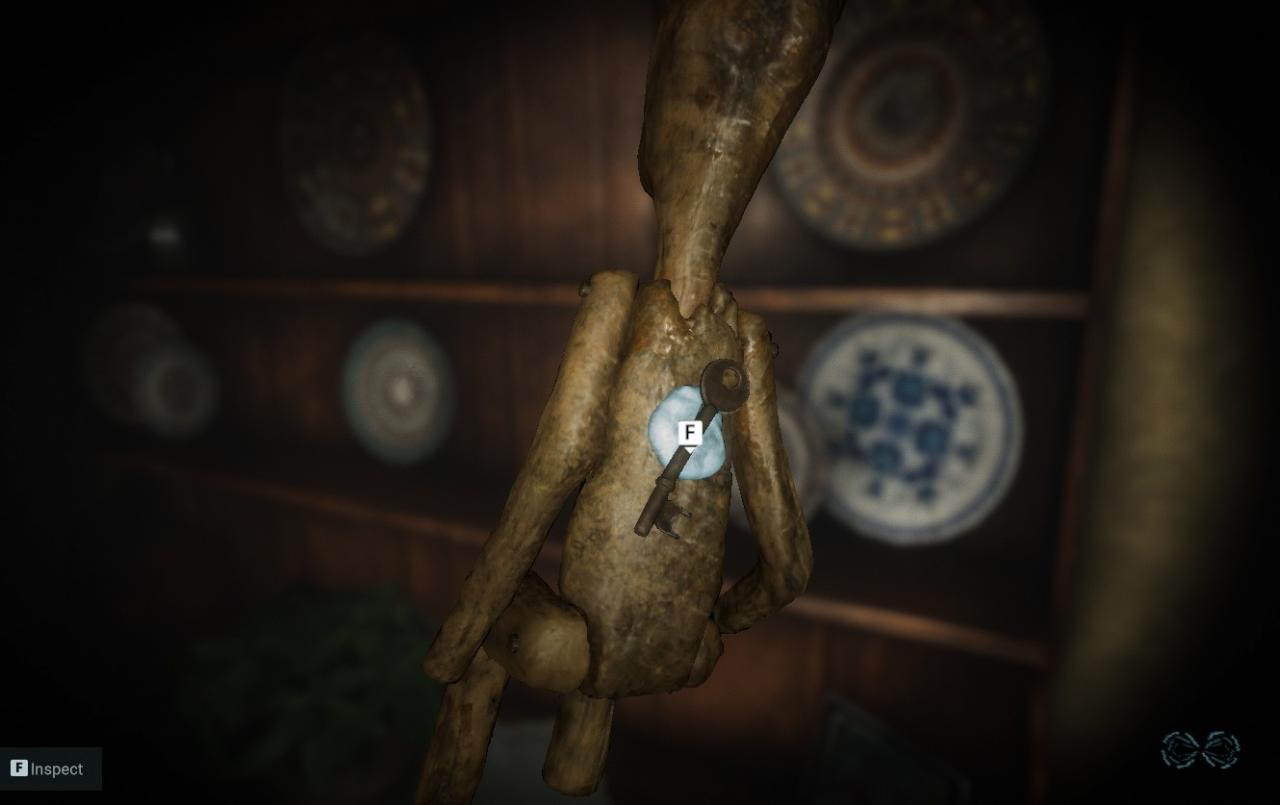
Backyard: In Event 27 (This Weekend?), when Tom and Linda talk in the kitchen, they reveal that the backyard key is on that scary little wooden doll on the kitchen shelf. You do need to witness the scene to examine the hiding spot.
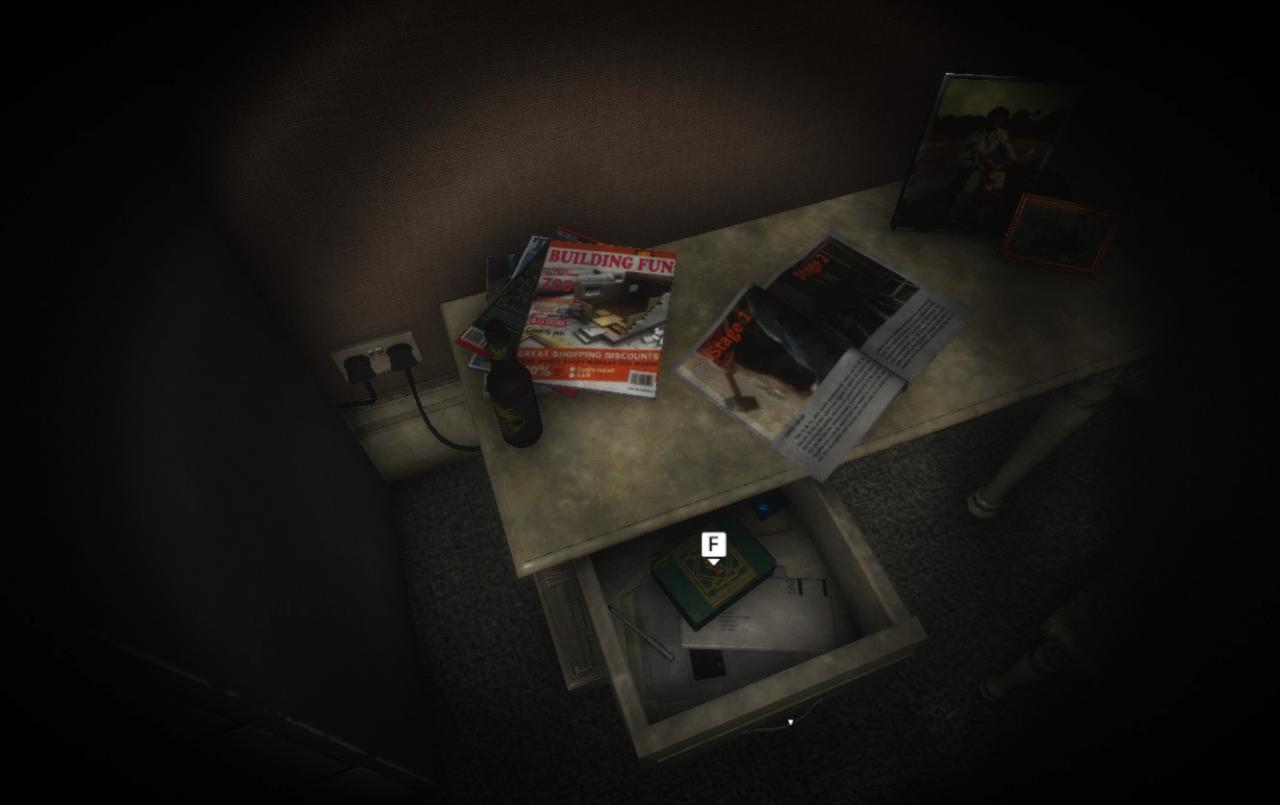
Dark Room: The combination for the locked dark room is in Ben and Jenny’s bedroom after a certain choice (Borrow a Camera?). If Raquel lends Jenny her camera, then a crumpled note with the code will appear in Ben and Jenny’s bedroom wastebasket. There will be a scene that points this out, where Jenny is talking on the phone in her bedroom (Bust Any Ghosts?) where she throws a note with the code in the wastepaper basket.

Hidden Room: Tom’s desk drawer, in a cigar box. To find this, you need to have Raquel follow Tom down the stairs (Late Night Smoke). Then, in Disapearing Act, have Tim distrust Raquel. During Singing in the Shower, have Raquel search his room for the key. In the next event, Keys to the Secret, she’ll search the room and find the hiding spot.
In addition to saving all six housemates, there’s one more hoop to jump through for the game’s ultimate ending. There’s something important in the hidden room’s safe. After unlocking all rooms, as outlined above, take the keys from the dark room table with the cannabis plants. Then, head to the dark room and unlock the filing cabinet by the door. This will give you the code to the safe on the back wall of the dark room, which will be a weird temporal device. When you cross the finish line and save all six people, having the device will allow you to return to the future. You will be asked head to Linda’s room, where the game will conclude and hand you the achievement.
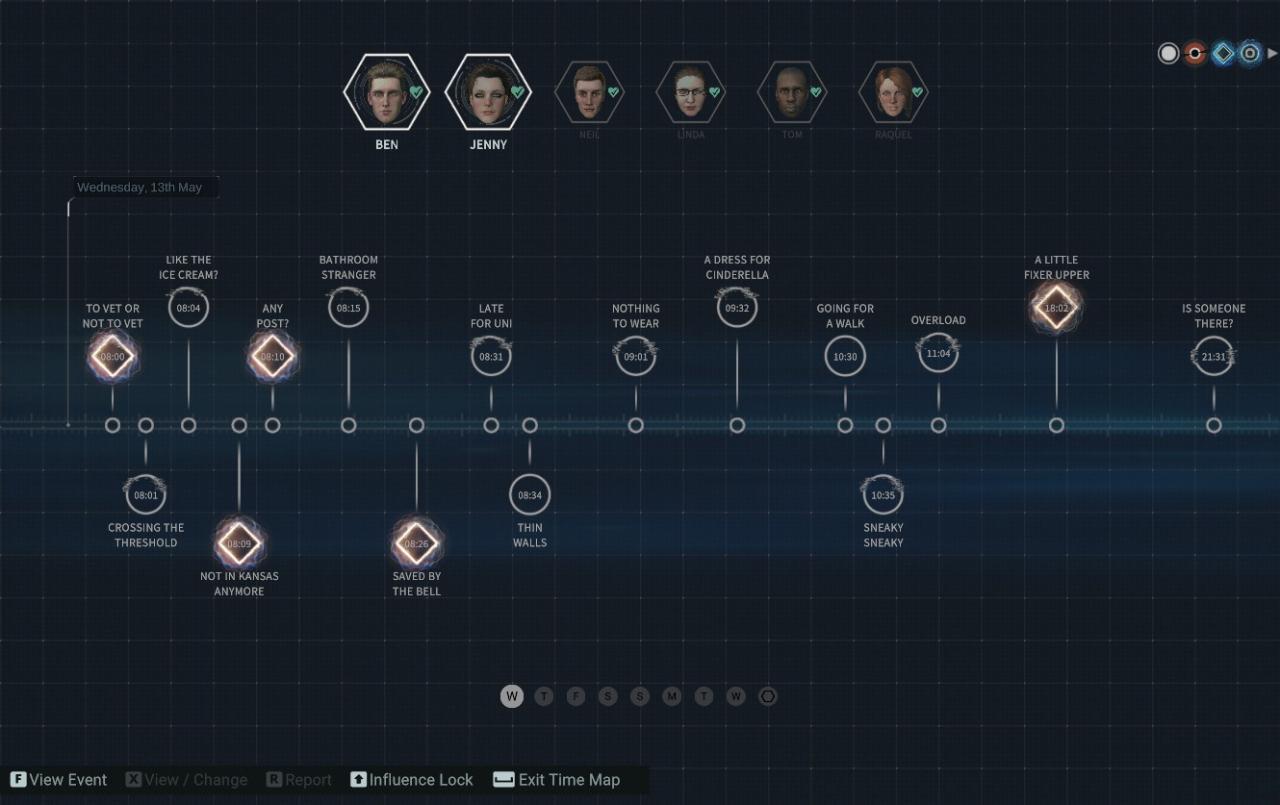
All Events – Introduction and Timeline
The timeline below has each event’s final name and be cross referenced against yours so you can find that last one you’re missing.


All Events – Part One
To Vet or Not To Vet?
Conditions: None
Decision: Whether or not Tom’s budgie dies in the fire
Crossing the Threshold
Conditions: None
Decision: None
Like the Ice Cream?
Conditions: None
Decision: None
Not in Kansas Anymore
Conditions: None
Decision: Whether or not the guitar and posters in Linda’s room will be there in the present
Any Post?
Conditions: None
Decision: Whether or not Neil double checks the mail and finds Ben’s job offer at this point.
Bathroom Stranger
Conditions: None
Decision: None
Saved by the Bell
Conditions: None
Decision: Whether or not Linda asks Neil about their parents. No affect on other events.
Late for Uni
Conditions: None
Decision: None
Thin Walls
Conditions: None
Decision: None
Special Note: This is when the location of Raquel’s room key (Jenny’s bedside table) is pointed out
Nothing to Wear
Conditions: None
Decision: None
A Dress for Cinderella
Conditions: None
Decision: None
Going for a Walk
Conditions: None
Decision: None
Sneaky Sneaky
Conditions:None
Decision: None
Overload
Conditions: None
Decision: None
A Little Fixer Upper
Conditions: None
Decision: Whether Linda learns about Tim’s mother or Raquel/Jenny’s history. Neither option has an effect and is primarily for flavor
Is Someone There?
Conditions: None
Decision: None
Late Night Chat
Conditions: In Any Post?, Neil double checked the mail
Decision: None
Tears Before Bedtime
Conditions: None
Decision: whether or not Neil comes in to talk. Unlocks A Bottle of Merlot
A Bottle of Merlot
Conditions: In Tears Before Bedtime, choose to check on Linda
Decision: None
Texting the Ex
Conditions: None
Decision: Whether or not Tom texts Miranda. Affects whether or not Miranda drops by the house and if Tom can resist Miranda at the party
He Texted Her
Conditions: In Texting the Ex, Tom chose to text Miranda
Decision: None
He Almost Texted Her
Conditions: In Texting the Ex, Tom chose not to text Miranda
Decision: None
Morning Sick Blues:
Conditions: None
Decision: Whether or not Raquel keeps Neil quiet over Jenny’s morning sickness.
Blowing a Fuse
Conditions: None
Decision: None
Textual Consequences
Conditions: In Texting the Ex, Tom chose to text Miranda
Decision: None
Jack of All Trades
Conditions: In Texting the Ex, Tom chose not to text Miranda
Decision: None
Thought I Heard Something
Conditions: None
Decision: None
You’re an Idiot
Conditions: None
Decision: None
This Weekend?
Conditions: None
Decision: None
Note: This event needs to be seen to find the backyard door key
You’ve Got a Big Mouth
Conditions: None
Decision: Whether Tom gets Ben and his friends to promise to not intervene in his relationship with Miranda. If not, someone will step in during the party.
Thanks for the Clothes
Conditions: None
Decision: Whether or not Linda asks about Raquel’s doll. First choice for Raquel’s best ending
Medical Drama
Conditions: In Any Post?, Neil did double check the mail.
Decision: Whether or not Ben tells Jenny about his job offer this point
Postal Drama
Conditions: In Any Post?, Neil did not double check the mail.
Decision: None
Medical Autopsy
Conditions: In Medical Drama, if Ben told Jenny about the Job Offer
Decision: None
Family Fortune
Conditions: None
Decision: None
Licensed to Drink
Conditions: None
Decision: Whether or not Neil heads out to drink
Where Did You Come From?
Conditions: None
Decision: None
Bit of a Nightmare
Conditions: None
Decision: None
Early Morning Chat
Conditions: Same as Postal Drama, Neil must not double check the mail in Any Post?
Decision: None
What Happened to You?
Conditions: Neil went out to drink in Licensed to Drink
Decision: Whether or not Ben asks about Neil’s frequent injuries. Unlocks an event at the party
Got You a Present
Conditions: None
Decision: Whether or not Jenny takes the pregnancy test. Sets up several events on Saturday
Passing The Test
Conditions: In Got You a Present, Jenny chose to take the pregnancy test
Decision: None
Picking a Playlist
Conditions: None
Decision: None
Cowboy Casanova
Conditions: None
Decision: None
Fixing a Drink
Conditions: None
Decision: None
Drinking for Two
Conditions: None
Decision: Whether or not Linda is drunk at the party
I Need A Wingman
Conditions: None
Decision: None
Not Cool Man
Conditions: None
Decision: None
Looking for Neil
Conditions: None
Decision: None
King of Weird
Conditions: None
Decision: None
Uninvited Guest
Conditions: None
Decision: None
Fancy Dress
Conditions: None
Decision: None
Pool Lessons
Conditions: None
Decision: None
Backyard Meeting
Conditions: None
Decision: None
Are You the Stripper?
Conditions: None
Decision: None
Just a Sip
Conditions: None
Decision: None
Miranda
Conditions: This always happens, but is only a decision if Tom did not text Miranda in Texting the Ex
Decision: If the condition is met, then Tom can turn down Miranda, skipping all the events of his friends trying to break them up and making sure he’s single
No One Steps Up
Conditions: Tom has not turned down Miranda, Linda is drunk, and Ben promised not to intervene in You’ve Got a Big Mouth
Decision: None
Someone Steps Up
Conditions: Tom has not turned down Miranda, and either Linda is sober or Ben did not promise to intervene. Both the Raquel and Linda versions of this scene share this event spot
Decision: None
Ding Dong the Witch is Dead
Conditions: In Miranda, Tom turned Miranda down
Decision: None
Raquel To The Rescue
Conditions: Tom does not turn down Miranda and Ben did not promise to intervene. It should be noted that this scene supersedes Linda’s version, so whether or not Linda is drunk is irrelevant to this specific scene
Decision: None
What The Hell Raquel?
Conditions: Raquel stepped up, same as above
Decision: None
Linda to the Rescue
Conditions: Tom does not turn down Miranda, Linda is sober, and Ben promised not to intervene.
Decision: None
What the Hell Linda?
Conditions: Linda stepped up, same as above
Decision: None
Worst Script Ever
Conditions: Linda is sober, from Drinking for Two
Decision: Whether or not Neil apologizes to Linda. No effect, just a sweet thing to do
Always Use Protection
Conditions: Linda is drunk, from Drinking for Two
Decision: None
What Do We Do With You?
Conditions: Linda is drunk
Decision: None
You’re Tom Cruise
Conditions: Linda is sober
Decision: None
The Three Amigas
Conditions: Linda is sober
Decision: None
More Than Gandhi
Conditions: In What Happened to You?, Ben pointed out the pattern
Decision: None
Mostly Drunk Amigas
Conditions: Linda is Drunk
Decision: None
Vic’s Big Night Out
Conditions: None
Decision: None
All Events – Part Two
Friday Night Fallout
Conditions: None
Decision: Whether or not Neil admits his anger issues
You Looking For Someone?
Conditions: Tom is single. Either he turned down Miranda, or Linda/Raquel intervened
Decision: None
Night Shipping
Conditions: Tom is single, Linda is drunk
Decision: Whether or not Tom and Linda sleep together.
Quality Time
Conditions: None
Decision: None
Sobering Up
Conditions: Linda is drunk and Tom hooked up with Miranda
Decision: None
Did We Do it?
Conditions: Linda slept with Tom
Decision: None
Neil’s Welcome
Conditions: Linda slept with Tom
Decision: None
Linda’s Welcome
Conditions: Linda did not sleep with Tom
Decision: None
Ice Cream Hangover
Conditions: None
Decision: None
Ex For Breakfast
Conditions: Tom slept with Miranda, so he didn’t turn her down and no one intervened
Decision: Whether or not Tom breaks off with Miranda
Can I Watch?
Conditions: None
Decision: None
In the Dark
Conditions: None
Decision: None
Football & Toiletries
Conditions: Back in Morning Sickness Blues, Raquel did not threaten Neil to silence
Decision: None
Take My Bike
Conditions: In Friday Night Fallout, Neil admitted he had a problem
Decision: None
Who’s This?
Conditions: None
Decision: Whether or not Raquel reveals the name of her doll
Food Shopping
Conditions: None
Decision: None
Where’s the Spoon?
Conditions: In I Got You a Present, Jenny took the test
Decision: Whether or not Jenny announces her pregnancy
Spoon Aftermath
Conditions: Jenny takes the pregnancy test and announces that she’s pregnant
Decision: None
Pudding and Custard
Conditions: In I Got You a Present, Jenny did not take the test
Decision: None
I Know about Jenny, But…
Conditions: Raquel threatened Neil into silence back in morning sickness blue, Jenny took the the pregnancy test, and she did not announce her pregnancy
Decision: None
I Know About Jenny
Conditions: Raquel threatened Neil into silence back in morning sickness blue, Jenny took the the pregnancy test, and she did not announce her pregnancy
Decision: None
Suspicious Minds
Conditions: Neil was not threatened into silence, Jenny took the test, and did not announce the pregnancy
Decision: Whether or not to announce the pregnancy
Late Night Smoke
Conditions: None
Decision: Whether or not Raquel follows Tom down the stairs
The Vanishing Landlord
Conditions: In Late Night Smoke, Raquel followed Tom
Decision: None
More-Ning Sickness
Conditions: None
Decision: None
Sleeping Beauty
Conditions: None
Decision: None
Mammoth Hunting
Conditions: Ben does not know that Jenny is pregnant
Decision: Whether or not Ben asks for Tom’s advice. No effect, just character building
Mammoth Revelation
Conditions: Ben does know that Jenny is pregnant
Decision: None
Breakfast in Bed
Conditions: Always occurs, but is only a decision when Tom has yet to reveal the job offer
Decision: If Ben has not revealed the job offer yet, this is a chance to do so
Are You Going Somewhere
Conditions: Always occurs, but is only a choice if Neil admitted he has a problem in Friday Night Fallout
Decision: Neil either stays home or goes for a bike ride
Disappearing Act
Conditions: Raquel followed Tom in Late Night Smoke
Decision: Tom can either deny, which sets up Raquel breaking in, or confirm, where they go downstairs together
The Lion, The Witch…
Conditions: Tom came clean to Raquel in Disappearing Act
Decision: None
Woah Mama
Conditions: Same as the previous
Decision: None
Singing in the Shower
Conditions: Tom did not tell Raquel in Disappearing Act
Decision: Whether Raquel search Tom’s room for the key or not
Keys to the Secret
Conditions: Raquel decided to search for the key in Singing in the Shower
Decision: None
Note: This scene is necessary to find the hidden room key
Narnia Here I Come
Conditions: Raquel decided to search for the key in Singing in the Shower
Decision: None
My Green Heaven
Conditions: Raquel decided to search for the key in Singing in the Shower
Decision: None
As If Nothing Happened…
Conditions: Raquel decided to search for the key in Singing in the Shower
Decision: None
So…The Basement?
Conditions: Raquel decided to search for the key in Singing in the Shower
Decision: None
Taking a Tour
Conditions: Raquel decided to search for the key in Singing in the Shower
Decision: None
Got a Weasel Problem
Conditions: Raquel found the hidden room
Decision: Whether or not Tom reveals that he’s being blackmailed
Where’s Your Bike?
Conditions: None
Decision: None
How Was Your Dad?
Conditions: None
Decision: None
Husband at the Door
Conditions: None
Decision: Whether or not Linda talks with her husband
When Are You Coming Home?
Conditions: Linda decided to talk in Husband at the Door
Decision: None
For Better or Worse
Conditions: None
Decision: Whether or not Raquel gives Linda advice
I Lost Your Bike
Conditions: Neil went out drinking in Licensed to Drink, admitted to Ben he had a problem in Friday Night Fallout, and went out for a ride in Are You Going Out?
Decision: None
Right about the Bike
Conditions: Neil did not go drinking in Licensed to Drink, admitted to Ben he had a problem in Friday Night Fallout, and went out for a ride in Are You Going Out?
Decision: None
You Got Two Grand?
Conditions: Tom reveals he’s being blackmailed in Got a Weasel Problem
Decision: Whether or not Raquel involves Ben in Tom’s blackmail troubles
We Need a Chat
Conditions: Ben learned of the blackmail You Got Two Grand?
Decision: None
Borrow a Camera?
Conditions: None
Decision: Whether or not Jenny gets the camera. Sets up a ton of events on Monday
Something to Tell You
Conditions: Jenny did not take a the test in Got You a Present
Decision: Whether or not Jenny reveals her pregnancy
All Events – Part Three
The Old Homestead
Conditions: None
Decision: Whether or not Ben takes his parent’s job offer. Creates a voice mail; no plot effect
Raquel Reflects
Conditions: None
Decision: None
Secrets and Lies
Conditions: None
Decision:
A Notable Camera
Conditions: Jenny asked for the camera in Borrow a Camera?
Decision: None
Getting It on Film
Conditions: Jenny asked for the camera in Borrow a Camera?
Decision: None
Chamomile Tea For Two
Conditions: Jenny did not ask for the camera in Borrow a Camera? Additionally, this scene is only a choice if Linda asked about the doll in Thanks for the Clothes and Raquel said the name in Who’s This?
Decision: If both conditions are met, Linda can choose to relay the name of the doll to Jenny
Must Have Been a Cat
Conditions: Jenny asked for the camera in Borrow a Camera? Additionally, this scene is only a choice if Linda asked about the doll in Thanks for the Clothes and Raquel said the name in Who’s This?
Decision: If both conditions are met, Linda can choose to relay the name of the doll to Jenny
Bust Any Ghosts?
Conditions: Jenny asked for the camera in Borrow a Camera?
Decision: None
Note: This event points out the dark room combination
White Rabbit
Conditions: None
Decision: None
Are We Okay?
Conditions: Linda and Tom slept together
Decision: None
Are You Okay Down There?
Conditions: Linda and Tom did not sleep together
Decision: None
Washing Dirty Laundry
Conditions: Linda admitted to sleeping with Tom
Decision: Whether or not Neil confronts Tom or heads to his room
Questions and Answers
Conditions: Neil went to his room after Washing Dirty Laundry
Decision: None
You Shagged My Sister
Conditions: Neil confronted Tom after Washing Dirty Laundry
Decision: None
Did Dad Ever Hit You?
Conditions: Neil confronted Tom after Washing Dirty Laundry
Decision: None
Talking Down Tom
Conditions: Neil confronted Tom after Washing Dirty Laundry
Decision: None
Let’s Talk About Neil
Conditions: Neil confronted Tom after Washing Dirty Laundry
Decision: Whether or not Linda shares the reveal with Tom/Ben
No Van, Carpet, Shovel
Conditions: Linda shared the reveal in Let’s Talk About Neil
Decision: None
Doc Vs Weasel
Conditions: Raquel shared that Tom is being blackmailed to Ben in You Got Two Grand?
Decision: None
A Very Nice Car
Conditions: Raquel shared that Tom is being blackmailed to Ben in You Got Two Grand?
Decision: None
Linda Reflects
Conditions: None
Decision: None
An Interesting Development
Conditions: Jenny asked for the camera in Borrow a Camera?
Decision: None
So What It Is It?
Conditions: Jenny borrowed the camera during Borrow a Camera?
Decision: Whether or not Jenny goes off her meds
You Named the Doll
Conditions: Jenny learned the name of the doll from Linda in Must Have Been a Cat
Decision: None
Alas Poor Megan
Conditions: Jenny learned the name of the doll from Linda in Must Have Been a Cat
Decision: Whether or not Raquel lets go of her guilt
Note: Vital for best ending
A Punchy Apology
Conditions: Neil confronted Tom in Washing Dirty Laundry
Decision: Whether or not Tom evicts Neil. This will not change the ending, but it will create a unique text message for Neil
Remote Control???
Conditions: This one is a little unintuitive. If Neil heads to his room in Washing Dirty Laundry, he’ll run off with the living room remote, causing this scene
Decision: None
Pass the Gravy
Conditions: Neil confronted Tom in Washing Dirty Laundry
Decision: None
Shall We Go See Your Mum
Conditions: Weasel needs to be dealt with (share info in You Got Two Grand?) and Raquel needs to let go of Megan in Alas Poor Megan. In turn, several events need to be coordinated so that those happen. A more in depth explanation will be in the Righter of Wrongs section.
Decision: Whether or not Raquel/Tom are out of the house on the night of the fire
Note:Absolutely vital for the best ending
Moving Out
Conditions: Tom did not sleep with Linda. There are three possible situations. If Linda does not talk to her husband (Husband at the Door) and does not receive advice (For Better or Worse), she will be locked into returning to her bad marriage. If she doesn’t talk and does receive advice, she’ll be given a choice between bad marriage and moving out. If she talks and receives advice, she’ll have the choice between happy marriage and moving out.
Decision: Whether or not Linda returns to her husband.
Because of Us?
Conditions: Tom slept with Linda.
Decision: Same as Moving Out, with same conditions
Handsfree Packing
Conditions: Linda improved her relationship with her husband and chose to move back in with him
Decision: None
Drinking and Packing
Conditions: Linda’s relationship with he husband did not improve and she chose to move back with him.
Decision: None
Neil Phone Home?
Conditions: Neil confronted Tom in Washing Dirty Laundry
Decision: Neil either plays a game (awake during the fire) or calls his mother (sets up next event)
Could Murder a Drink
Conditions: Neil went to his room after Washing Dirty Laundry
Decision: None
School Disco Plus
Conditions: Neil doesn’t learn that Linda slept with Tom, so either keep it secret or don’t have them sleep together
Decision: None
Final Confession
Conditions: This event will be skipped if there’s nothing to confess, but there are two different things for Jenny to confess. If she has not revealed that she’s pregnant, this is the last chance. If she has revealed she’s pregnant and she went off her meds, that can be confessed.
Decision: Two different ones. Whether or not Jenny reveals she’s pregnant, or whether or not Jenny reveals she went off her meds.
Pills and Pillows
Conditions: Jenny did not reveal she was pregnant/off her meds in Final Confession. This event will happen otherwise, but the option to reveal the job offer will only happen if Ben has yet to do so
Decision: If the conditions are met, Ben can reveal his job offer, kickstarting a huge fight.
Alone in the Doghouse
Conditions: Tom is out of the house (went out with Raquel in Shall we See your Mum?) and Ben and Kenny had an argument (either from Final Confession or Pills and Pillows)
Decision: None
Doghouse Reilly
Conditions: Tom is in the house (did not go out with Raquel in Shall we See your Mum? or did not unlock that event) and Ben and Kenny had an argument (either from Final Confession or Pills and Pillows)
Decision: Whether or not Ben and Tom head out to the pub and survive the fire
Do You Want to Be Alone?
Conditions: Raquel is in the house (went out with Tom in Shall we See your Mum?) and Ben and Kenny had an argument (either from Final Confession or Pills
Decision: Whether or not Raquel spends the night with Jenny and if they survive the fire
Cried Herself to Sleep
Conditions: Raquel is out of the house (went out with Tom in Shall we See your Mum? or did not unlock that event) and Ben and Kenny had an argument (either from Final Confession or Pills and Pillows)
Decision: None
To Be Continued…
Conditions: Neil called his mother in Neil Phone Home?
Decision: Whether or not Neil is awake during the fire
Time For Bed
Conditions: Same as Handsfree Packing. Linda improved her relationship with her husband and chose to move back.
Decision: None
Here’s Looking at You Kid
Conditions: Raquel has not deal with her baggage and did not let go of Megan in Alas Poor Megan
Decision: None
No One To Watch Over Me
Conditions: Raquel dealt with her baggage and let go of Megan in Alas Poor Megan. Additionally, she was not with Tom or Megan on the night of the fire
Decision: None
All Events – Part Four
Comfortably Numb
Conditions: Tom and Ben went out during Doghouse Reilly
Decision: None
Late Night Movie
Conditions: Tom and Ben went out during Doghouse Reilly
Decision: None
Bruised and Drunk
Conditions: Neil was drunk the night of the fire. Neil did not learn of the Tom/Linda affair
Decision: None
Extra Yardage
Conditions: Both Tom and Raquel cleared all their baggage and chose to head out that night in Shall We Go See Your Mum?
Decision: None
One Step in the Dark
Conditions: Tom was not with Ben or Raquel on the night of the fire
Decision: None
No Answer at the Door
Conditions: Neil is awake while Linda is drunk. Neil chose to play a game in whatever path after learning about the Tom/Linda affair, while Linda made no improvements
Decision: None
Who’s That Knocking
Conditions: Neil is awake while Linda is asleep
Decision: None
Fireside Meeting
Conditions: Both Neil and Linda are awake during the fire. Linda chose to look for a flat in Because of Us? and Neil chose to play games in Neil Phone Home?/To Be Continued or went to his room after Washing Dirty Laundry
Decision: None
Tryin’ To Wake the Dead
Conditions: Linda was awake while Neil was drunk. Linda improved her situation and chose to find a flat, while Neil never learned about the Linda/Tom relationship
Decision: None
Let’s Get Outta Here
Conditions: Linda was awake while Neil was asleep. Linda improved her situation and chose to find a flat, while Neil chose to sleep in To Be Continued…
Decision: None
Gonna Get the Doc
Conditions: Tom and Ben went out to the pub in Doghouse Reilly
Decision: None
No Cure for the Doc
Conditions: Ben was alone during the fire. Fought with Jen in Pills and Pillows/Final Confession and Tom was dead or with Raquel.
Decision: None
Wakey Wakey
Conditions: Raquel dealt with her baggage and gave up Megan in Alas Poor Megan, and was with neither Jenny or Tom during the fire.
Decision: None
Ladybirds Fly Away
Conditions: Jenny and Ben fought, and Jenny stayed the night with Raquel in Do You Want to Be Alone?
Decision: None
A Terrible Choice
Conditions: Ben and Jenny did not fight or reveal the pregnancy on the night of the fire
Decision: Whether or not Jenny leaves Ben to die
Post Interruptus
Conditions: Jenny revealed her pregnancy in Final Confession
Decision: None
Together Until Death
Conditions: Jenny stayed with Ben in A Terrible Choice
Decision: None
Jenny Leaves the Doc
Conditions:Jenny left Ben in A Terrible Choice
Decision: None
Linda in the Smoke
Conditions: Linda was asleep, not drunk, while Neil was drunk/asleep. She improved her situation with her husband, chose to move back with, but Neil either chose to sleep or did not learn about the Tom/Linda affair
Decision: None
Alone in the Dark
Conditions: Linda was drunk at the time of the fire. No attempts to improve her situation (For Better or Worse) were made and she did not choose to find a flat
Decision: None
Out for the Final Count
Conditions:Neil was drunk during the fire. Either he did not learn about Tim and Linda or they did not sleep together
Decision: None
Out the Window
Conditions:Neil was asleep, but not drunk, and Linda was asleep/drunk during the fire. This requires Neil to confront Tom in Washing Dirty Laundry and to choose to sleep during To Be Continued…, in addition to Linda choosing to return to her husband
Decision: None
Overcome by Smoke
Conditions: Raquel dies. Either she wasn’t with Raquel, or she didn’t resolve her baggage and give up Megan in Alas Poor Megan. If Raquel gives up Megan, she will live regardless of other decisions.
Decision: None
All by Myself
Conditions: Jenny is alone. Fought with Ben and turned down Raquel’s offer in Do You Want to Be Alone?
Decision: None
The Conclusion Event
Conditions: Anything that affects who dies or who lives
Decision:None
Note: This is the firefighter event from the tutorial. Everyone who is currently alive will be in the backyard.
Righter of Wrongs
Rescue any one person. You’ll get it sooner or later, but the easiest one is to change Jenny’s last choice and have her leave Ben.
This can be unlocked the same way as Righter of Wrongs, but there’s multiple valid combinations. The conditions where each individual person lives is as follows:
- Linda and Neil have similar conditions for surviving: they either have to be awake at the time of the fire (Linda moves out and Neil either argues with Linda, after she sleeps with Tom, in his room or chooses to play games) or one of them has to be awake while the other is asleep, but not drunk (Linda moves back in while Neil is awake, or Neil heads to bed after calling his mother and Linda moves out). If both are asleep, then both of them will die.
- For Ben and Jenny, either reveal the pregnancy at the last possible point so that they’re both awake, or have an argument on the final night, followed up with Jenny spending the night with Raquel while Ben heads to the pub with Tom.
- Raquel either has to completely deal with her personal trauma (same conditions as ideal ending), spend the night with Tom (complete both of their ideal paths), or spend the night with Jenny
- Tom either heads to the pub with Ben or goes out with Raquel. There is no ending where he lives that does not require a second character.
Righter of Wrongs
Solve everyone’s emotional issues with everyone alive. When a person has a green heart with a check mark, they’ve reached their best outcome.

There are multiple feasible paths, so let’s start with the bare bones requirements for each person’s best outcomes.
- Ben and Jenny: Do NOT reveal Jenny’s pregnancy before the absolute final moment in Final Confession. When you reach that point, reveal the pregnancy.
- Raquel and Tom: Both of them need to completely deal with their baggage (Raquel lets go of Megan in Alas Poor Megan, Weasel is dealt with) in addition to the two of them heading out in Shall We See Your Mum?
- Neil and Linda: This one’s a little weird. Linda’s best ending, where she improves her relationship with her husband and moves back with him, will make sure she’s asleep during the fire, so Neil needs to be awake after dealing with his baggage, which requires Linda to have slept with Tom and to tell Neil after Secrets and Lies
Now, let’s synthesize all that information and make a path of decisions to make. Mind you, it’s possible for an event to occur in multiple ways (Tom not sleeping with Miranda has three possible set ups), so you might get the same results with different decisions. If I don’t mention a choice, it either doesn’t affect the ending (Jenny can go off her meds if she likes, as long as she reveals the pregnancy in Final Confession) or does not occur in that timeline. Do you what you think is best for those choices.
Texting the Ex
Do not text Miranda
Thanks for the Clothes
Ask about the doll
Got You a Present
Do not take the test. It won’t sink the run, but let’s keep chances to reveal the pregnancy to a minimum
Drinking for Two
Linda needs to drink
Miranda
Turn her down
Night Shipping
Have Linda sleep with Tom
Who’s This?
Reveal the name of the doll
Late Night Smoke
Follow Tom
Disappearing Act
Come clean to Raquel. Alternative works too, just needs another choice right after
Got a Weasel Problem
Reveal the blackmail to Raquel
Husband at the Door
Talk with Linda’s husband
For Better or For Worse
Give advice to Linda
You Got Two Grand?
Reveal the blackmail to Ben
Something to Tell You
Do not reveal the pregnancy
Secrets and Lies
Reveal the affair
Chamomile Tea for Two/Must Have Been a Cat
Tell the doll name to Linda. (Whether or not Jenny has the camera leads to a similar choice)
Washing Dirty Laundry
Send Neil to his room. The alternative works, but sets up another few choices, so this is quicket.
Alas Poor Megan
Give up Megan
Shall We Go See Your Mum?
Visit her that night
Because of Us
Head home to fix Linda’s life
Final Confession
Reveal the pregnancy
Collectibles
Each of the six characters has a cell phone, and they have a tendency to move around based on the current timeline. For example, Linda’s will move from her suitcase to her armchair to her bed based on current events. Additionally, the text messages and voicemails they receive change. In Tom’s case, his default message is threatening texts from Miranda. If he breaks off the relationship, then it’s a threatening voicemail from Weasel. If that’s dealt with, it’s a text from a loan application bot. If Tom has his ideal ending, then it’s texts from his mother. It should be noted that we’re finding the phones in the present, so it’s possible for some events to overwrite the voicemail with more recent messages.
For this achievement, we need to track down the voicemail that each character receives.
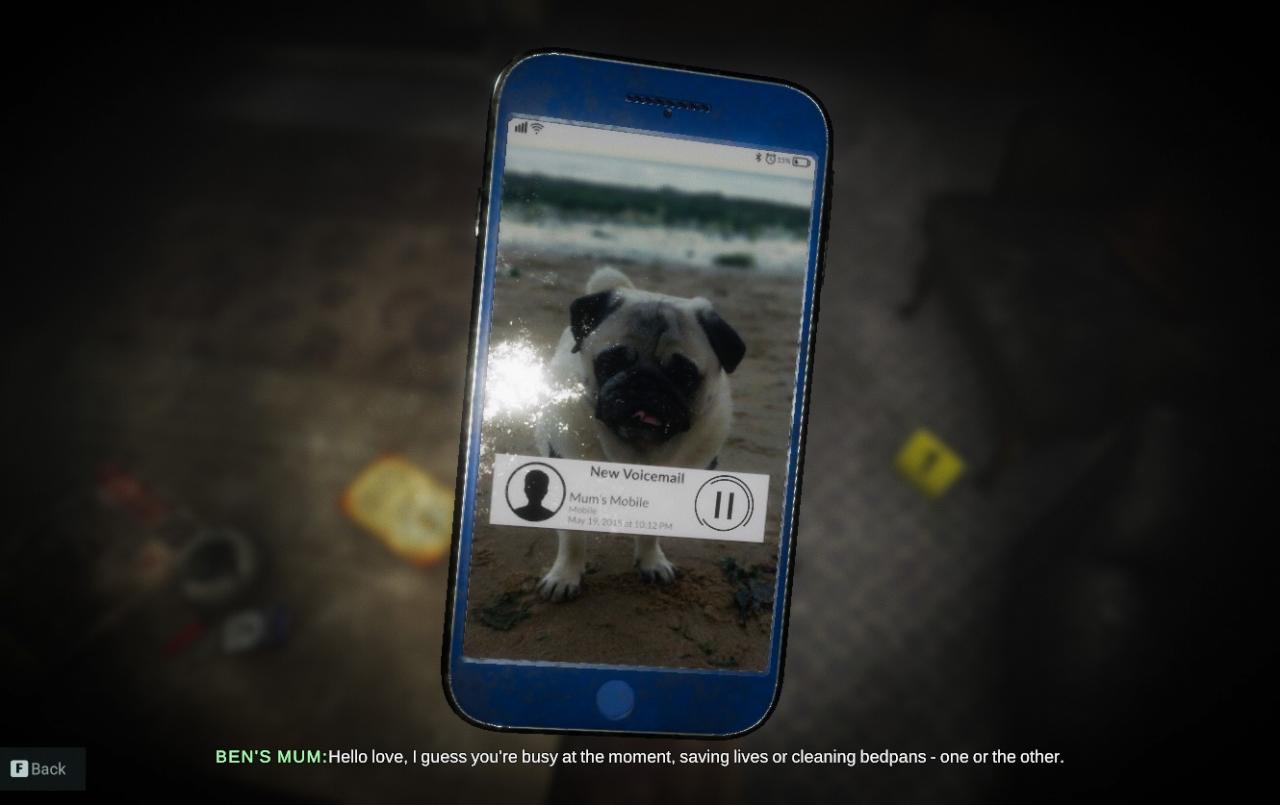
Ben:
Turn down his parent’s job offer. By default, Ben’s phone displays chatter with a doctor coworker. If he turns down the job offer, he’ll receive a voicemail from his mother. If he and Jenny have a fight over the other job offer on the night of the fire, it will be overwritten with distraught texts to Jenny. If he and Jenny stayed together, his phone should be by his desk. If they fought (fighting over the pills does NOT overwrite the voicemail), it will be by the living room couch.
Jenny:
If Jenny and Ben have a fight on the night of the fire (either over her meds or the job offer), she’ll have a voicemail from her mother. Jenny’s default message is a doctor’s appointment. To my knowledge, she has no other messages, although it’s very well possible she has an esoteric one I’ve missed. Her phone is on the couch in their bedroom.
Tom:
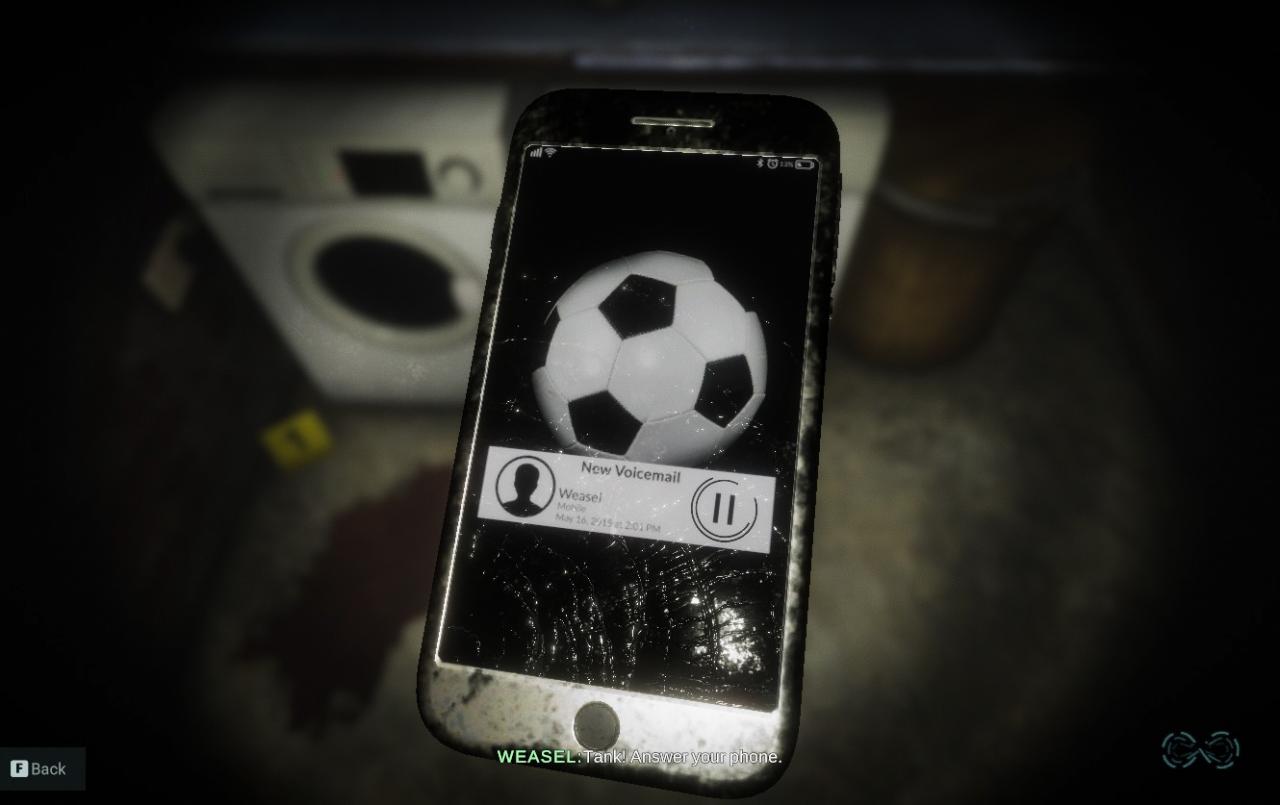
If Tom breaks up with Miranda and does NOT deal with Weasel, he’ll receive a threatening voicemail. If he does not break up with Miranda, he’ll have a text argument with her. If he deals with Weasel, but does not meet his mother with Raquel, he’ll have a text with a loan application. If he meets with his mother, the text will be from her. If Tom dies, then his phone will be by the bloodstain at the basement stairs. If he lives, it’s in his bedroom, by the armchair.
Raquel:
Reach the root of her trauma with Megan (Linda asks about the doll, Raquel tells Keigan the doll’s name, Linda tells Jenny about the doll, and Raquel decides to give the doll away) and she’ll get a call from Megan’s mother. The specific choice that spawns the call is giving up Megan. Additionally, she must not visit Tom’s mother that night, as that will overwrite the voice mail with texts from Tom’s mother. Raquel’s phone at voicemail conditions is on the left side of her bed on her nightstand

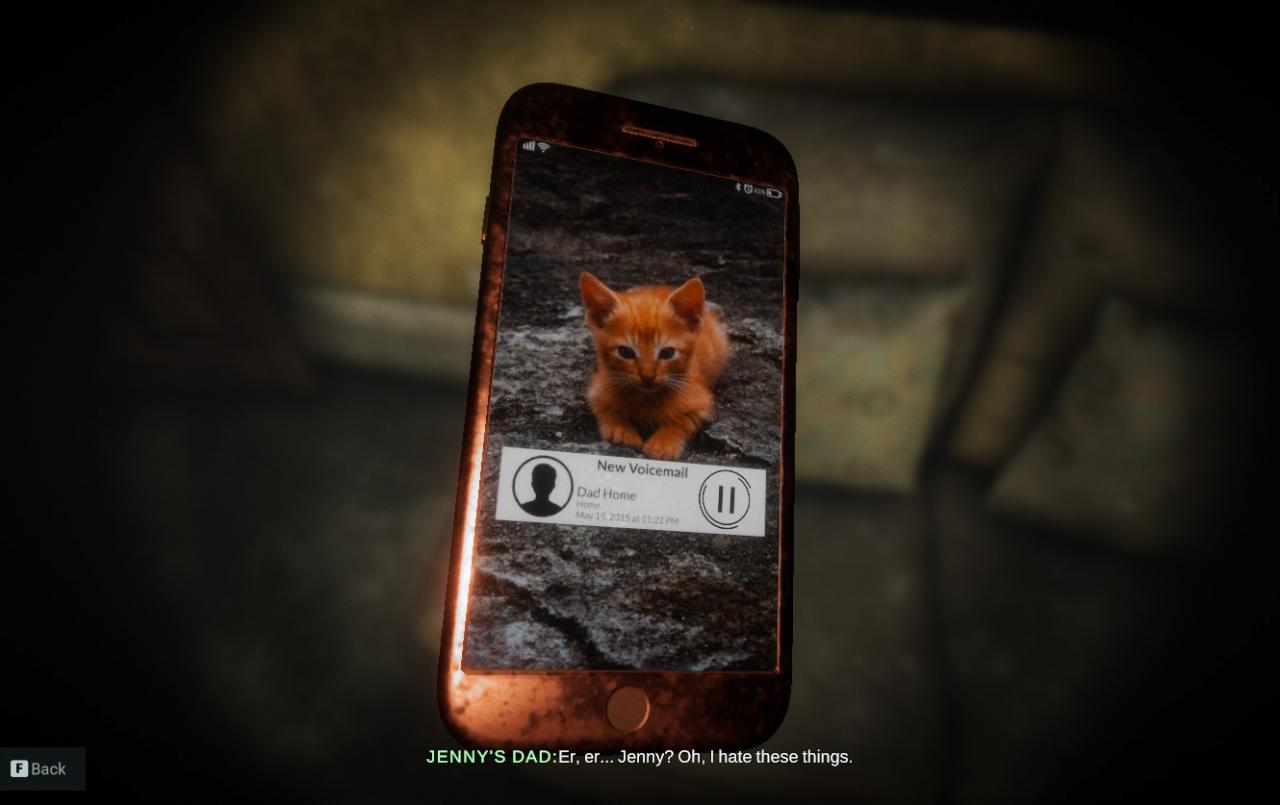
Linda:
Her voicemail, from her husband, has the same conditions as her ideal ending: choose to move back with her husband while asserting her needs. It will appear on her bedroom armchair. If she does nothing, it will be an awkward conversation with her son. If she decides to move out, it will be a flat listing. Linda’s voicemail phone is typically on her bedroom armchair, but if she went to wake up Neil during the fire, it would be on the floor outside his door

Neil:
Have Neil admit his anger issues and he’ll receive a phone call from a doctor. If Neil does not admit his anger issues, then he’ll have messages from Em. If Tom forces Neil to move out, it will be overridden by Neil flat hunting. His phone will be under his pillow by his nightstand.

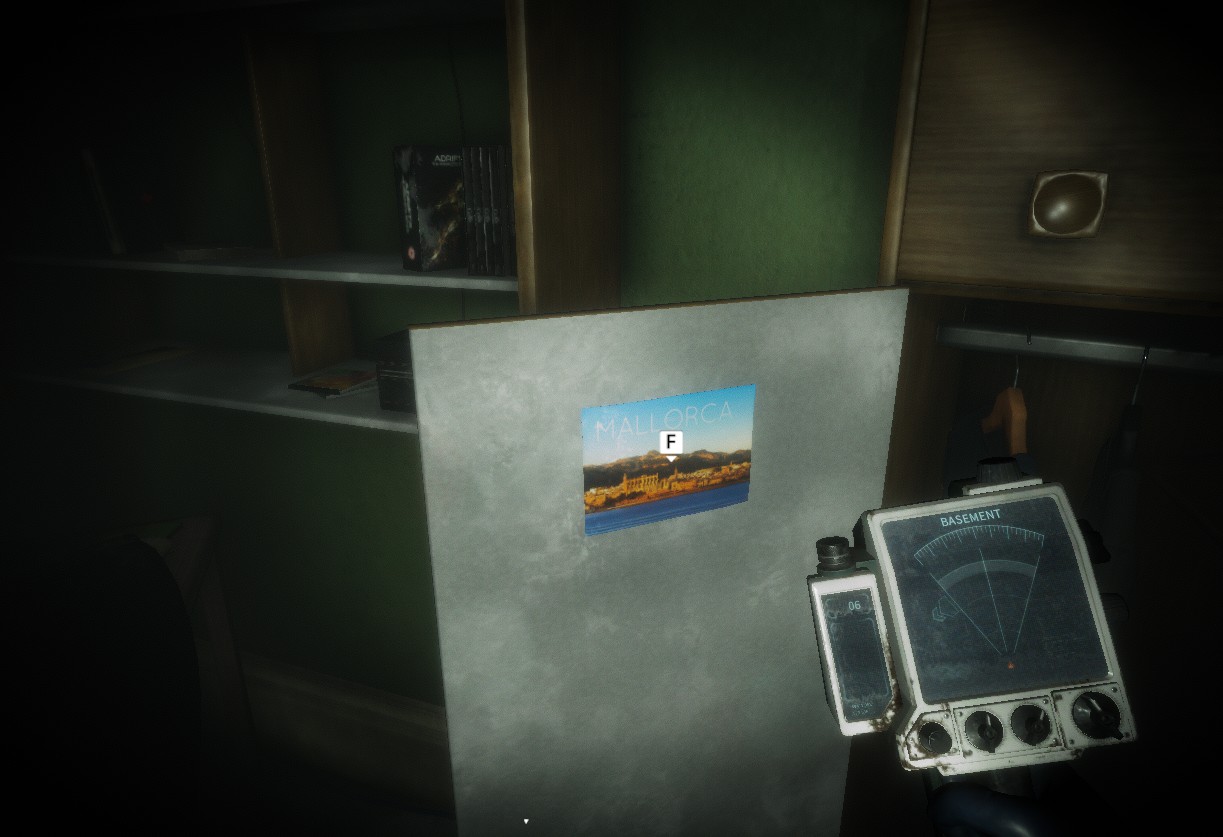
I’m not exactly certain as to what the game considers a letter, but my hunch is that it’s any document you can use the R key to read a transcript of. My justification is that I got the achievement when I found the flower receipt in Raquel’s purse, but before I found the anger issues brochure. Just in case, I’ll include as many things as I can. Some items can only be found after certain decisions are made,
Starting in the basement, going room by room upwards:
Everyone’s phones:
Location: Covered in voicemail section
Tom’s Mother’s Photography Degree:
Junk Room, inside cabinet by wardrobe
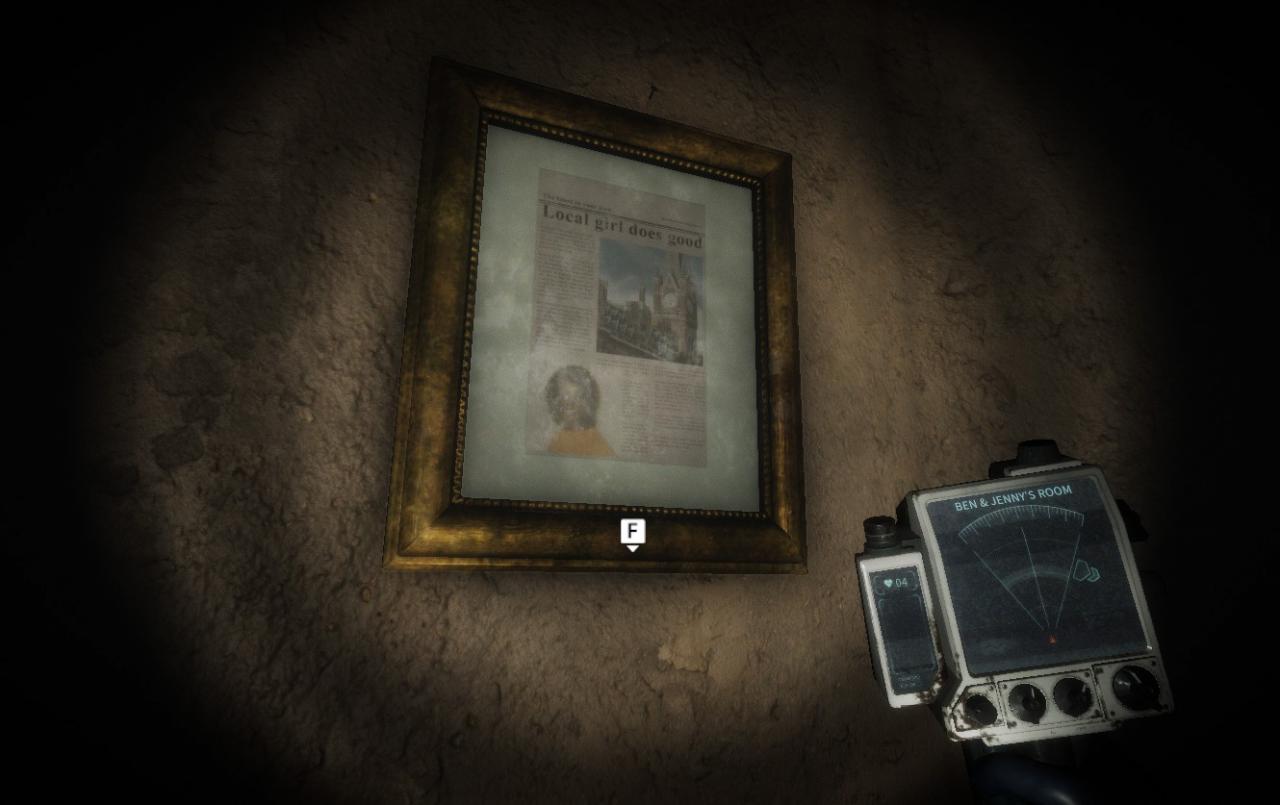
Newspaper Article about Tom’s Mom:
Junk Room, Framed on the wall by the entrance
Tom’s Mother Nursing Home Letter:
Hidden Room, on the Desk
Ambergate Sports Hall Flyer:
Hall, on the cork board by the backyard door. I believe it only appears if Neil went drinking in Liscence to Drink and admitted he has anger issues in Friday Night Fallout. Ben mentions trying the sports hall after the bike is stolen from Neil.

Photo of Young Tom:
Kitchen, in the leftmost drawer of the sideboard with the plates and doll
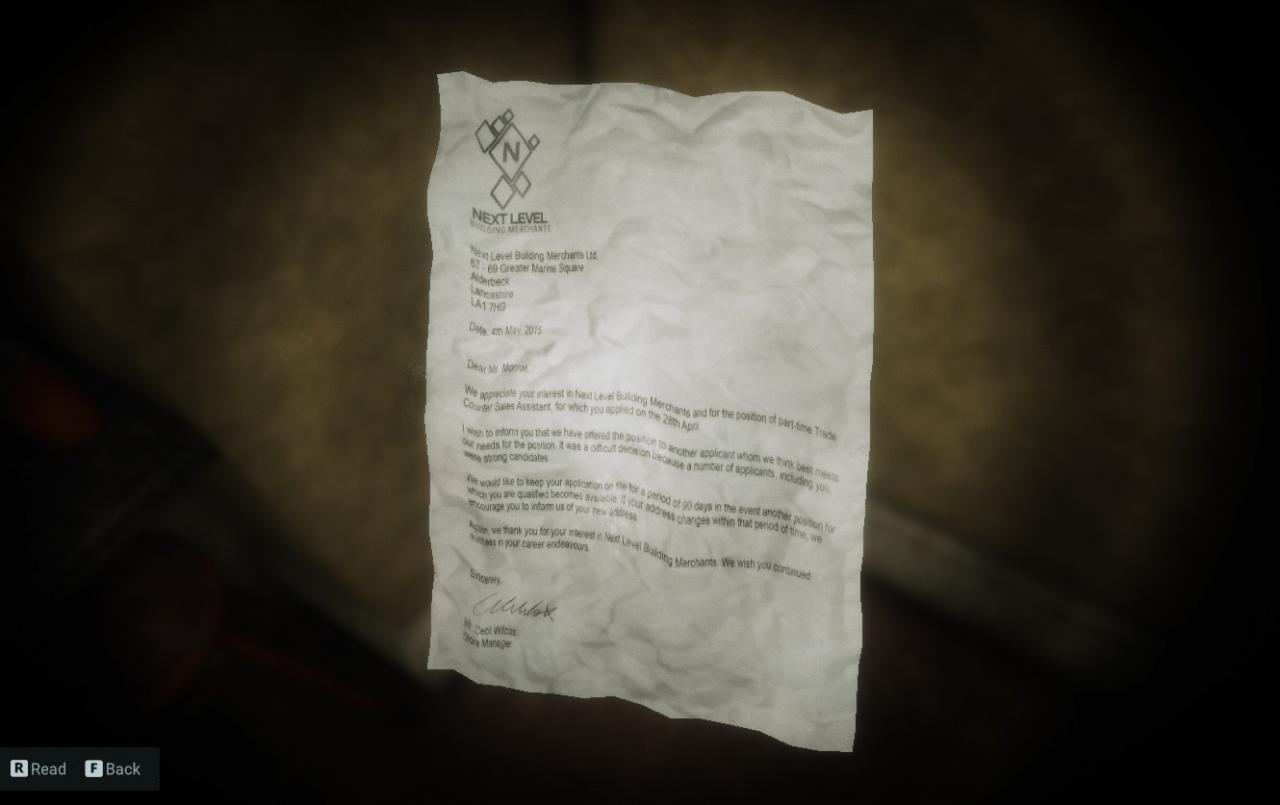
Rejection Letter:
Dining room, in the trash can between the bar and the dining table
Friday’s Shopping List:
Dining Room, on the ironing board
Worldwide Collector’s Letter:
Tom’s Room, left nightstand
Rent Ledger:
Tom’s Room, right nightstand drawer
Tom’s Mother’s Will:
Tom’s Room, inside wardrobe
Summer Ball Event Poster
Landing, side table by window and Raquel’s Room

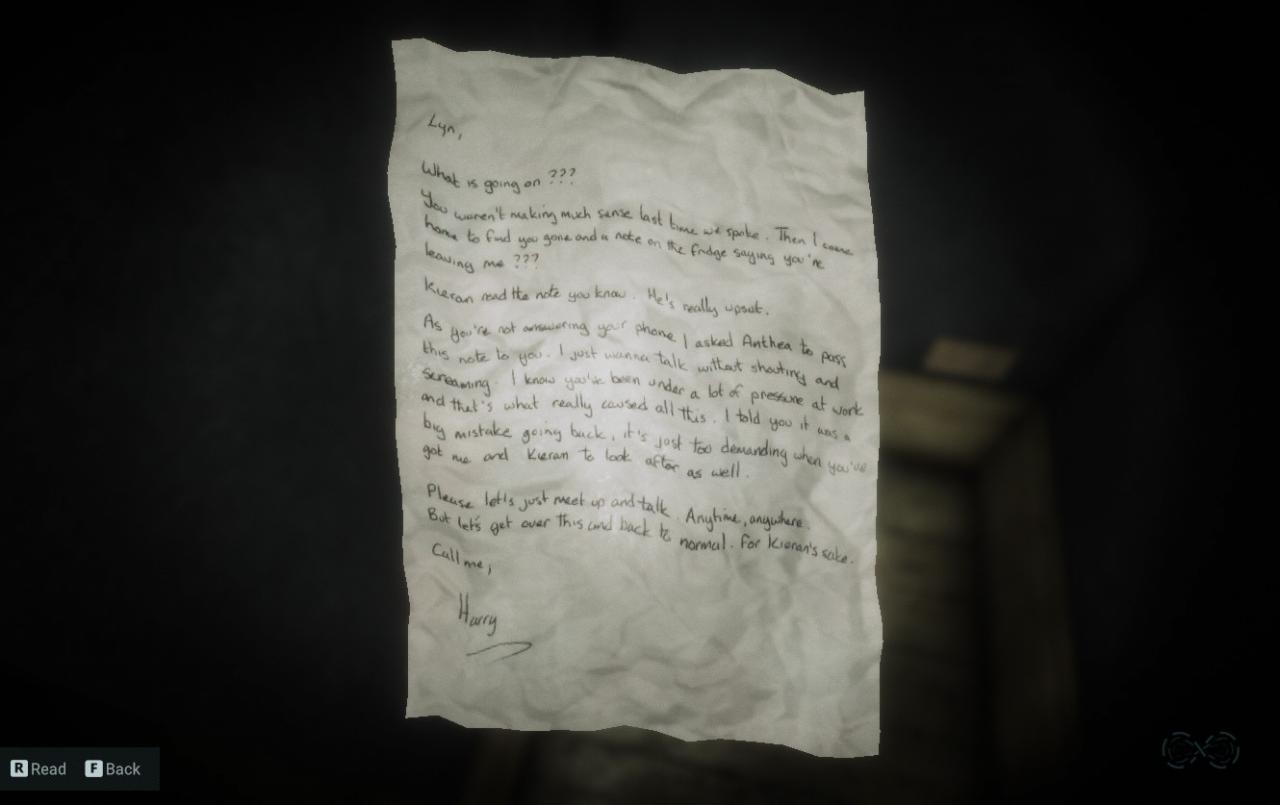
Letter from Linda’s Husband
Linda’s Room, her wastepaper basket in the corner behind the door
Linda’s Son’s Report Card:
Now this one is tricky. If Linda is returning to her husband, then she’s packed up her belongings. If she’s not, then they’re spread throughout the room. This means that the report card will be in her left nightstand ONLY if she chooses to look for another place to live.

Doctors4All Job Offer:
Ben and Jenny’s Room, moves around a little based on decisions. Is either in the desk drawer on the desk
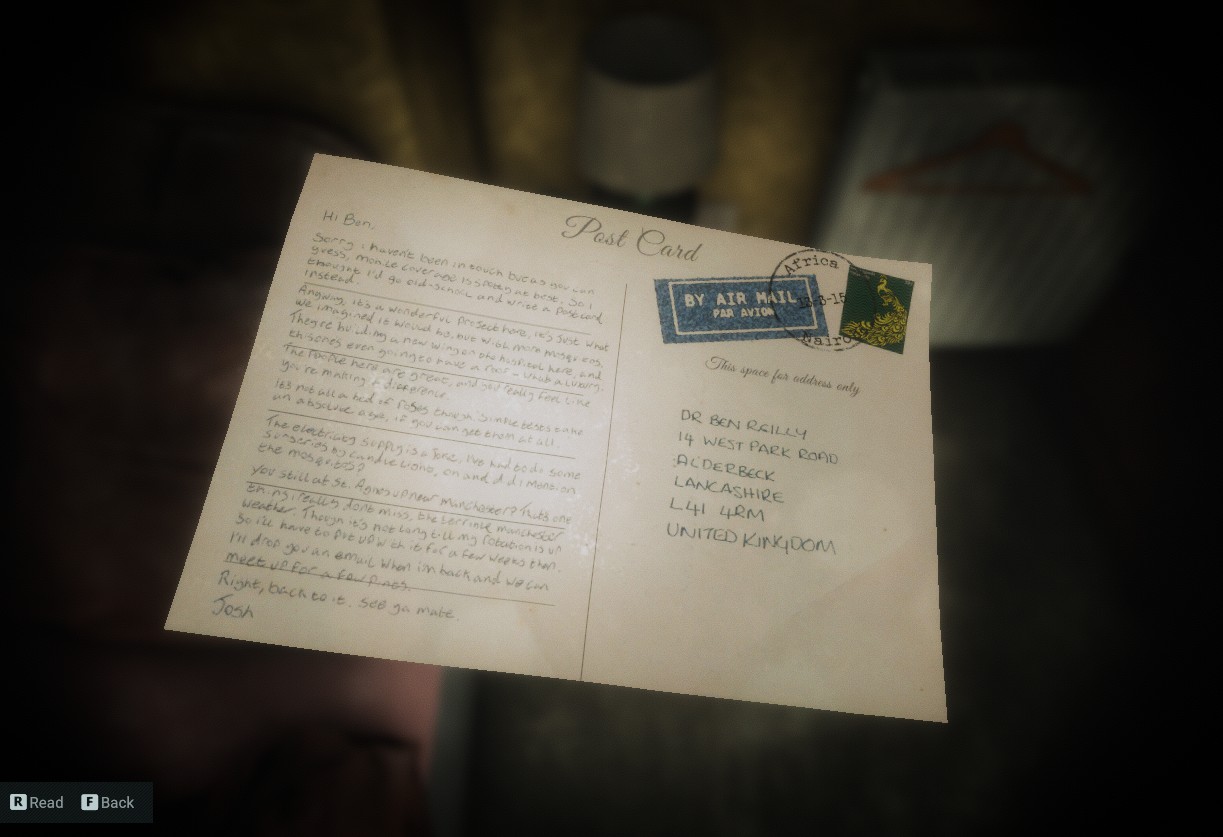
Ben’s Postcard:
Ben and Jenny’s Room, in Ben’s nightstand on the right side of the bed
Dark Room Combination
Ben and Jenny’s Room, crumpled up in wastebasket, but only if Jenny borrows the camera from Raquel
Photo of Megan:
Raquel’s Room, on her paint supplies desk
Newspaper Article about Hit and Run:
Raquel’s Room, in her right nightstand.
Memorial Flowers Receipt:
Raquel’s room. This one will ONLY spawn if Raquel has made her peace and given up Megan. At the foot of her bed in her black purse.

Letter from Neil’s Mum:
Neil’s Room, left drawer on desk with TV
Postcard From Ian:
Neil’s Room, on the inside of his left wardrobe door. Since this is the door that Neil tears off, it will not be visible if Neil heads to his room after Washing Dirty Laundry
Thanks to bearsbearsbears for his great guide, all credit to his effort. you can also read the original guide from Steam Community. enjoy the game.