A guild breaking down all the aspects and strats in one guide.
The Nations
![]()
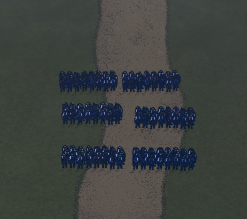
Germany
Germany has strong artillery that can be killed if the enemy gets too close, make sure to treat your artillery like they are your nuts, protect them at all costs (Unless you have reasons).
Germany also has efficiency on some of it’s infantry meaning they can change formations 2 times or switch formation then move (and vice versa) Which can be incredibly powerful if used right.
Unfortunately Germany suffers not being able to shoot far.
Strengths:
-Powerful artillery
-Efficiency perks
Weaknesses:
-Close range shooting for infantry (Except the Bavarians)
In a nutshell
Artillery focused, Maneuver focused
![]()
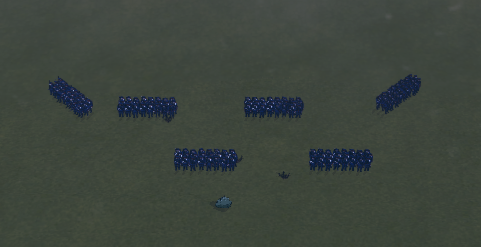
France
France has good infantry and along with the chassepot rifle can shoot 2 times in a 2 space range (Powerful). The French also have some powerful units, like the oldgaurd, foreign legionnaire and the mitrailleuse.
They have a versatile play-style
But with these the French have some poor artillery with 3 range (with only one exception, the 12lb field artillery).
Strengths:
-Great rifles
-decent infantry
Weaknesses:
– poor artillery
In a nutshell
Infantry focused
![]()
Britain
Britain has strong infantry that have strong shooting capabilities, meaning that they can do more shooting damage.
But you rely on shooting and your limited manpower, so I recommend shooting at a distance.
But with great power comes great payment, since Britain has very good units, they are expensive, so I recommend you play on the defensive and make great predictions and little mistakes.
Strengths:
-High shooting damage
-Great Units
Weaknesses:
-High unit cost
-Small army
In a nutshell
Quality focused
![]()
Russia
Russia has the advantage of lots of manpower and can summon hordes of troops.
Since the Russians have so many units, I recommend you have some in reserve because you don’t have enough orders to command all of them efficiently, but their big army does allow them to stay in battle for longer
However the Russians suffer from not being able to recover cohesion quickly
Strengths:
-Large army
-Inexpensive
Weaknesses:
-Low cohesion gain
In a nutshell
Quantity focused
![]()
Ottomans
Turkey has the advantage of lots of manpower with insanely inexpensive units, so they can easily spawn a horde.
I recommend you have some in reserve because you don’t have enough orders to command all of them efficiently, and since you have a large army, you can stay in battle longer.
I also recommend to shoot at a distance, because you rely on your cohesion.
But the Turks suffer from their easily broken cohesion, meaning that once they lose their cohesion, they’ll retreat.
Strengths:
-Large army
-inexpensive
Weaknesses:
-Easily broken
In a nutshell
Quantity focused
United States of America
The United States have affordable units and some militia, so it’s definitely good to use Quantity.
But some units of the United States have less cohesion, so far range is your best bet.
The United States has some good units like the U.S. Sharpshooters and the Iron Brigade.
Strengths:
-Decent Infantry of variety
-Inexpensive
Weaknesses:
-Low Cohesion
In a nutshell
Quantity Focused, Infantry Focused
Confederate States of America
The Confederate States have units with efficiency meaning that they can outmaneuver an opponent.
And they have relatively inexpensive units, so they can use Quantity.
and just like the United States, The Confederate States have some low cohesion units
Strengths:
-Inexpensive
Weaknesses:
-Low Cohesion
In a nutshell
Quantity Focused, Mobile Focused
Austria
Coming soon
Phases
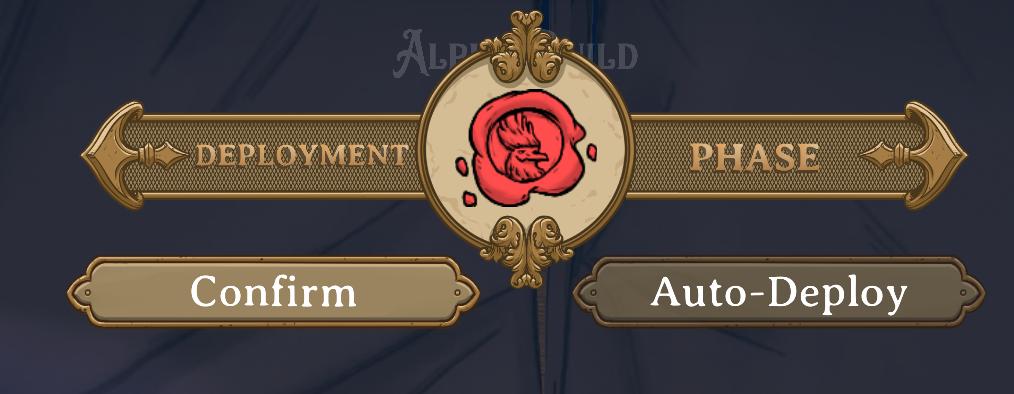 Deployment Phase
This is the phase you see when you first start the game
In this phase you must place your units, there cannot be any units not placed
If you hosted the game, then you place your units on the green tiles
If you are the client, then you spawn on the red tiles
 Order Phase
This is the phase where you command your troops with orders (more on orders in the next section)
There is a limit on how many orders you have, so I recommend you have some units not being commanded, kinda like a reserve
This is the phase where the orders actually go, so if you commanded your troop to move, then it will move
The game has both sides move at the same time, with one order from both going
And arrows will show troop movement
Orders
There are two types of orders: Fire orders, and Maneuver orders
Maneuver orders go first before Fire orders
 Charge Order
To charge, you need some movement and one attack order
Ex. You can’t move then charge, but if your formation allows you to (let’s say attack column) you can move but have at least one space to move left to charge (so move one then charge in this case) because charging requires you to move too
Click on a unit you want to charge the enemy, then right click the enemy (if you can in the range)
Great for pinning down opponents and killing low health units
 Volley Fire
Fire at your enemy, with the cost of one attack order
Ex. You can use one attack order to shoot once, and two to shoot twice
Click on a unit you want to shoot at the enemy, then right click on the enemy
Great for damaging enemies
 Fire at will Order
Shoot at your enemy when they come into range (only one damage per shot)
Ex. Fire at will is used mostly to inflict damage when an enemy moves forward
Click on a unit you want to fire at will
Great for defending
 Formations
This order is used to change unit formations (will be discussed after this current section)
Ex. It’s mostly used to increase damage or endure less damage
Click on a unit you want to switch formation, then select the formation you want
Great for adapting to the battlefield
 Reserve switch
This order is used to swap to a unit behind on the same tile
Ex. If you need to recover your unit infront, then swap to the back line to keep the fight going
Click on 2 units on the same tile, then press the button
Great for cycling units
Formations and Frontage
Only Infantry can use formations
The initial base charge damage is 1
The base shot damage is 2
 Close Order
We have the good ‘ol close order formation, which is basically your standard line. It’s a good formation, as it can endure charges and fires like normal.
Pros:
- Max shot damage
- Can endure frontal charges
Cons:
- Flank Vulnerable
- Max enemy shot damage
 Attack Column
Attack column is mostly used for charging or for more mobility and the unit may attack in this stance.
Pros:
- +1 Movement
- +1 initial charge damage
Cons:
- -1 Max shot damage
- +1 Enemy shot damage received
- limited frontage
 Open Order
Open Order is mostly used to reduce shot damage received.Pros:
- -1 Enemy shot damage
Cons:
- -1 Max shot damage
- Charge vulnerable
 March Column March Column is used to get the most mobility, and it can get more by going on roads. But the unit may not attack in this stance.
Pros:
- +1 Movement
- Can cross corners
- +1 Movement on roads
Cons:
- Charge vulnerable
- Enemy shot vulnerable
- Cannot attack
 Square Formation Square Formation is usually used if an enemy unit is charging you.
Pros:
- Less initial charge damage
- 360° frontage
Cons:
- -1 Max shot damage
- +1 Enemy shot damage
FrontageFrontage is key to shooting
 Close Order
 Attack Column
 Open Order
 Square Formation
Perks
Efficiency perk
+1 Maneuver Order
Ex. Can change formation then move (or vice versa)
Great for fast movement and out maneuvring an opponent
 Disciplined Range perk
+1 max shot damage
Ex. Can do 3 base damage instead of 2
Great for shooting
 Shock Charge perk
+2 initial charge damage
Ex. Will do 4 base charge damage when it charges first, but no more extra damage during the charge. No affect on the defensive thoogh
Great for charging units
 Melee Drill perk
-1 Initial melee damage endured
Ex. Will receive less damage when being charged at or charging
Great for charge vulnerable units, and for charging units
 Rugged perk
Ignore all terrain penalties
Ex. Will not be slowed down going through a forest, marshland, creek, etc
Great for going through terrain that would slow down other units
 Skirmisher perk
Does not get affected by attrition
Ex. Wont take damage when moving without cohesion
Great for units that have low health, like light infantry
 Disorganised perk
-1 cohesion regeneration
Ex. Will regain cohesion slower
Bad for units
 Easily Broken perk
Will retreat one tile when all cohesion is eliminated
Ex. Will retreat to a tile behind immediately, if no possible area to retreat to, the unit will die
Bad for units (especially units with low cohesion)
 Grapeshot perk
+2 adjacent damage
Ex. Will deal +2 damage when firing at an enemy unit bordering them (Including Corners)
Great for shooting adjacent targets
 Indirect Fire perk
Can shoot over units
Ex. Can ignore units that would block the range
Great for long ranged artillery
 Cumbersome perk
Can only do one order, except firing
Ex. Can shoot (Twice with the breech-loader perk) but can’t move in the same turn
Bad for units
The Armoury
 Breech-loading
This will give your units +1 Fire order
Ex. Can shoot twice, shoot then charge, etc.
Great for close range shoot outs
 Rifling
This perk will allow you to fire farther
Ex. Will give 2x range, so opposed to 3 x 1 infront, it will give 3 x 2 infront
Great for shooting at a distance
Example of range:
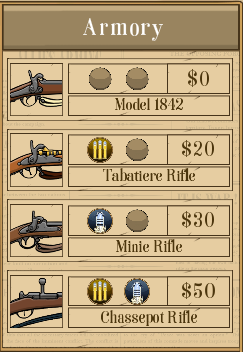 The four gun types
(The names are for clarification on the picture)
1. The ‘smoothbore’ (Model 1842)
2. The ‘breech-loader’ (Tabatiere rifle)
3. The ‘rifle’ (Minie rifle)
4. The ‘superior breech-loader’ (Chassepot rifle)
Prices are same for all nations
Beware that some guns for nations are only for specific units
Ex. German Bavarian line infantry are the only ones with access to the ‘superior breech-loader’
The ‘smoothbore’ should be used to save money or meat-shields
The ‘breech-loader’ should be used for units that get close to charge or harass
The ‘rifle’ should be used for professional shooting units, and as a cheaper alternative to the ‘superior breech-loader’
The ‘superior breech-loader’ should be given to units with high shooting capabilities
Health and Cohesion
 The blue bar is the cohesion of a unit
The green bar is the health of the unit
Cohesion kinda acts like a “shield” that will soak up damage until it’s gone. When a unit’s cohesion is gone, it will take attrition, and the health can be affected with any other damage to come.
Attrition will remove one health whenever it moves, and attrition can only be removed when a unit recovers its cohesion
Cohesion can only recover when not bordering an enemy unit (including corners).
Health will dictate how many troops are alive on the battlefield and will not affect a unit’s performance.
The Units
Here are the units and their types:
The unit pictures are just for show, none of the additions are for all unit types and sub-types
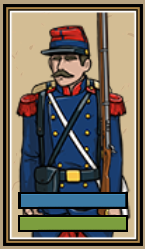
![]() Infantry is good for filling the ranks, and a good source of fire power and man power
Infantry is good for filling the ranks, and a good source of fire power and man power
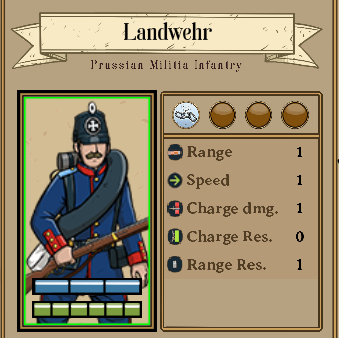 Militia Infantry
Militia Infantry is typically used for quantity, but personally I use it to protect my artillery from cavalry
Militia Infantry typically has the ‘Easily Broken’ perk
Overall it’s a unit if you have extra money to spend or just as a living wall
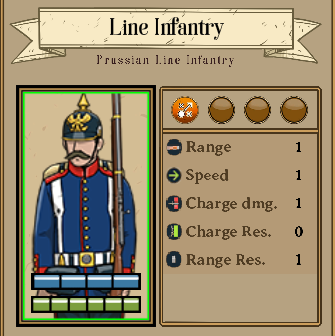 Line Infantry
Line Infantry is a very versatile class of units, as it can hold many perks for defending or attacking
Line Infantry is typically used as the main force of an army and can be utilised in a variety of ways
Overall Line Infantry is a good filler and is the main backbone of good armies
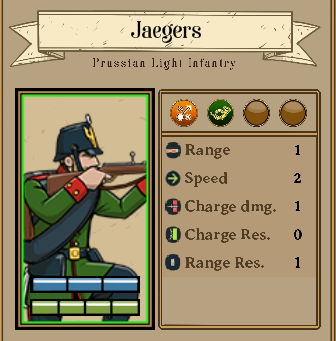 Light Infantry
Light Infantry is a skirmisher class, utilising hit and run tactics to deal damage to the enemy and not take much damage in return
All Light Infantry has +1 movement, meaning that it can move +1 space in any formation (so if Light Infantry goes into close order, it can still move 2 spaces opposed to one)
Light Infantry can also hold some perks, mostly ‘Skirmisher’, ‘Rugged’ and/or ‘Disciplined Range’
Overall Light infantry is good for harassing the enemy and hit and run tactics
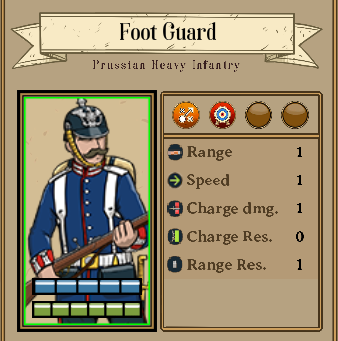 Heavy Infantry
Heavy Infantry is a class of units that mainly deal strong damage, and is usually protected by infantry, etc.
Heavy Infantry is a class of units that mainly have strong perks, such is ‘Disciplined Range’, ‘Shock Charge’, ‘Disciplined Melee’ and other perks, and they also have more cohesion
Overall Heavy Infantry is good for dealing damage to opponents and being a strong source of damage in an army
![]() Cavalry is a special class, as it relies on it’s melee and maneuvrability. But it takes +1 enemy short damage and also gets +1 mobility from roads
Cavalry is a special class, as it relies on it’s melee and maneuvrability. But it takes +1 enemy short damage and also gets +1 mobility from roads
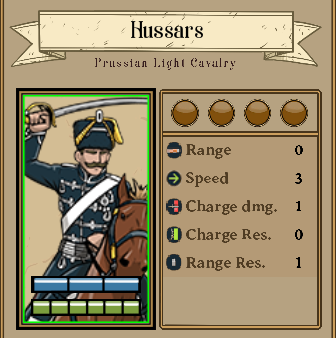 Light Cavalry
Light Cavalry is a good class for harassing the enemy, especially good at sniping vulnerable units such as artillery
Light Cavalry can have ‘Shock Charge’ and ‘Skirmisher’ and a quality of light cavalry and cavalry in general is that cavalry can cross corners and has great mobility
Overall, Light cavalry is a good class for harassing the enemy and going behind enemy lines
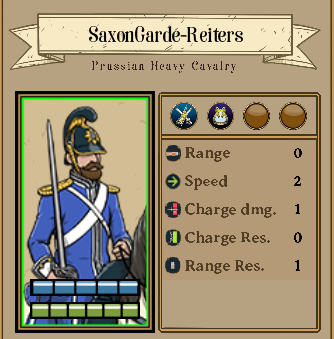 Heavy Cavalry
Heavy Cavalry is a good class for hitting the enemy hard, especially at the flanks
Heavy Cavalry usually has ‘Shock Charge’ and/or ‘Disciplined Melee’, but heavy cavalry doesn’t have as much mobility as Light Cavalry
Overall Heavy Cavalry is good for leading a charge or decimating units not good against charges
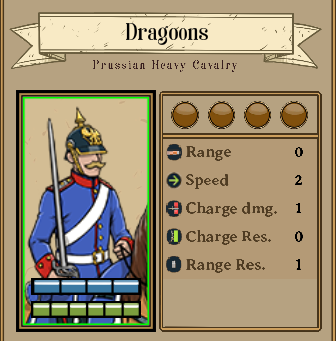 Dragoons (Heavy Cavalry Sub-Class)
Dragoons are a hybrid between infantry and cavalry (They currently do not have shooting capabilities) So they are the worst cavalry in the game
Dragoons have no perks, but are cheap for their bad mobility and lack of perks
Overall if you have extra money to spend and want cavalry over infantry, then be my guest
![]() Artillery hopefully makes up for it’s slow movement with it’s striking range. Overall good for softening the enemy up, but vulnerable to charges and shots
Artillery hopefully makes up for it’s slow movement with it’s striking range. Overall good for softening the enemy up, but vulnerable to charges and shots
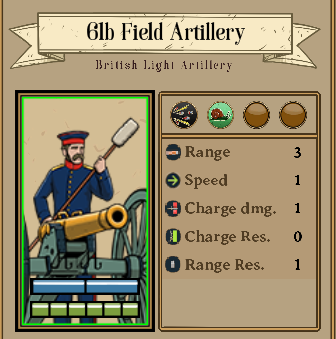 Light Artillery
Light Artillery is cheap but doesn’t have a lot of range compared to other artillery
Light Artillery usually has ‘Grape shot’, and a bad quality of all artillery is that they have the ‘Cumbersome’ perk
Overall Light Artillery is good at close ranges and not that expensive
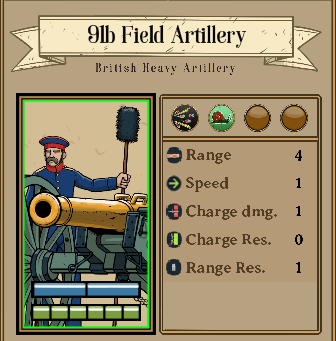 Heavy Artillery
Heavy Artillery is a bit pricey, but it has some good range
Heavy Artillery usually has ‘Grape shot’ or ‘Indirect Fire’ and can fire at a longer distance than Light Artillery
Overall Heavy Artillery is great for hitting the enemy at a distance
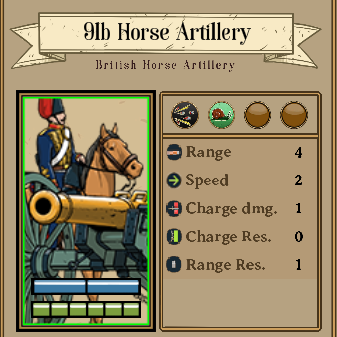 Horse Artillery
Horse Artillery has an advantage of being more mobile than regular artillery
Heavy Artillery usually has ‘Grape Shot’ but range can vary from nation to nation
Overall Horse Artillery is good for mobility
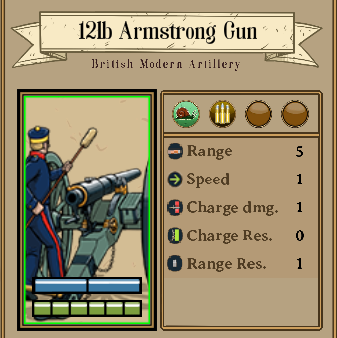 Modern Artillery
Modern Artillery is expensive, but makes up for it by have astonishing range
Modern Artillery has the ‘Breech-loader’ perk, meaning that it can fire two times
Overall Modern Artillery is good at long ranges and softening an opponent
 Rapidfire Artillery
Rapidfire Artillery is a bit pricey, and has the shortest range of all artillery types
Rapidfire Artillery has the ‘Breech-loader’ perk, meaning that it can fire two times and has ‘Grape Shot’
Overall Rapidfire Artillery is good at close ranges
Geography
Symbols:
![]()
Can give the mobility bonus Ex. March Column

Will not allow Maneuver Orders for one turn, but may use Attack Orders (except charge)

Will reduce enemy shot damage by -1
![]()
Cannot be stood on

Can give the mobility bonus and will reduce enemy shot damage by -1

Will not allow Maneuver Orders for one turn, but may use Attack Orders and will reduce enemy shot damage by -1
A unit in March Column will move in, wait for next phase then continue moving instead of moving in, waiting an entire turn, then continue moving when crossing terrain that gives a movement penalty
 Road Tile
Roads will give +1 mobility to the March Column formation, Cavalry, and Artillery
![]()
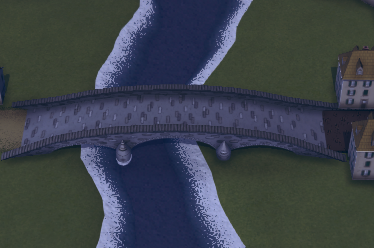 Bridge
+1 mobility to the March Column formation, Cavalry, and Artillery, and allows access over water
Can currently be crossed by units in all formations
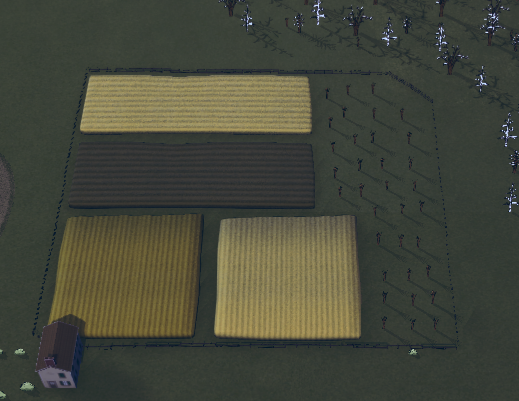 Farm Tile
A tile with a farm on it will provide + soft cover and will not slow your units down
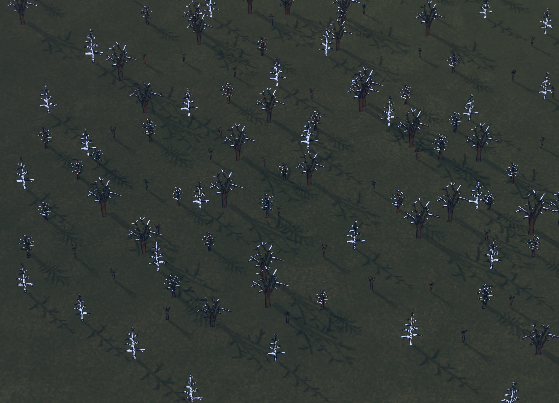 Forest Tile
A tile with a forest will provide + soft cover but will delay your unit’s down by one turn, unless if the unit is in Attack or March Column
Rock Tile
A tile with rocks will provide + soft cover but will delay your unit’s down by one turn
 City Tile
A tile with buildings on it will provide + soft cover and can give +1 mobility to the March Column formation, Cavalry, and Artillery
 Creek
Creek
Creeks will not provide any cover of sorts and will delay your units by one turn, unless the unit is in march column, but it will move in, wait for next phase then continue moving
 Shallow River Tile
A tile with a shallow river can be crossed, but it will delay your units by one turn unless the unit is in march column. But it will move in, wait for next phase, then continue moving
 Hill Tile
A tile with a hill with grant you one more layer of range (Like the rifling perk)
Ex. If a unit doesn’t have rifling, it will gain x 2. But if a unit has rifling, it will get x 3 range
 Cliff Tile
A tile with x 2 the elevation of the hill cannot be stood on and will block the range of an unit
![]()
 River Tile
A tile with a river on it is impassible, but it will not block the range of a unit
![]()
Basic Strategy and Tips
Here are some tips:
Exploit your opponent’s weakness
Your opponent has a nation, and knowing the nation’s weakness can give you a chance to exploit it
Ex. if your opponent is Germany, then you should try to take out their artillery, as it is a strong focus.
Also use guns at a long range, because Germany doesn’t have the ability (mostly) to shoot far with small arms.
Predict Movements
You should try to predict movements of your opponents units and prepare for it
Ex. If you predict your opponent is going to hit you from the side, then face your units to the side and place a volley order (and hopefully you predicted right)
Block Ranged Attacks
Shield a unit by blocking the range of the opponent
Ex. If you have a unit that you know is gonna get hit if the opponent shoots at it, then try to block the range with a unit close by (completely useless if the opponent is using ‘Indirect Fire’)
Thanks to rockyy013 for his great guide, all credit to his effort. you can also read the original guide from Steam Community. enjoy the game.