A guide for new players, designed to give them an easier understanding of the game than Godhood’s Early Access tutorial currently does. Gives the different terms and concepts thrown about by Godhood more context. Any reader who finishes this guide, will know how to play Godhood, without first having to play Godhood.
Introduction
A new player might already have a feeling they would like “War” over “Lust” when customizing their god, but that doesn’t explain what a “commandment” actually is and how it affects gameplay. Let alone what a “Totem” might do, why you are forced to dream in your first turn of the intro, what some of the resources do and what many of the late-game options are. Despite the simple, pleasing visuals, Godhood can be a surprisingly deep game with lots of plates to spin.
Sure, I got the hang of it after my first campaign and I’m sure you can too. All of this is forgivable too, since (as of the time of this writing – March 2020) it is an Early Access title.
Still, I’ve chosen to create this guide for people like me, who prefer a slightly more forgiving introduction to Godhood so that they don’t feel like spending their first campaign merely learning what everything does.
I can promise that any reader who finishes this guide, will know how to play Godhood, without having had to play Godhood first.
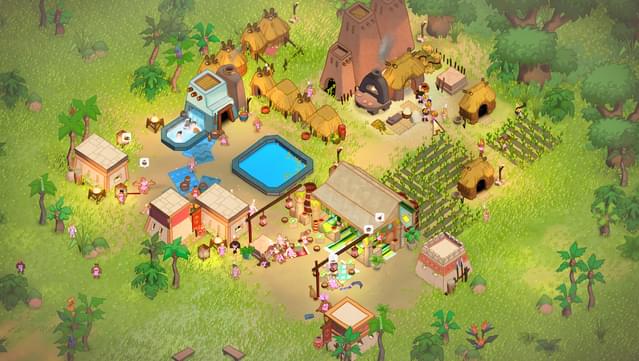
The first Sacrement during the intro of the game.
In essence, Godhood is a turn-based action RPG – and one that just so happens to play out by itself. As an RPG, it comes with all character stats you’d usually associate with that, and in fact, it’s these statistics that give context to everything else we’ll be doing during gameplay. For this reason alone it’s worth further investigating these stats before we look at the citybuilding or religious portions of the game.
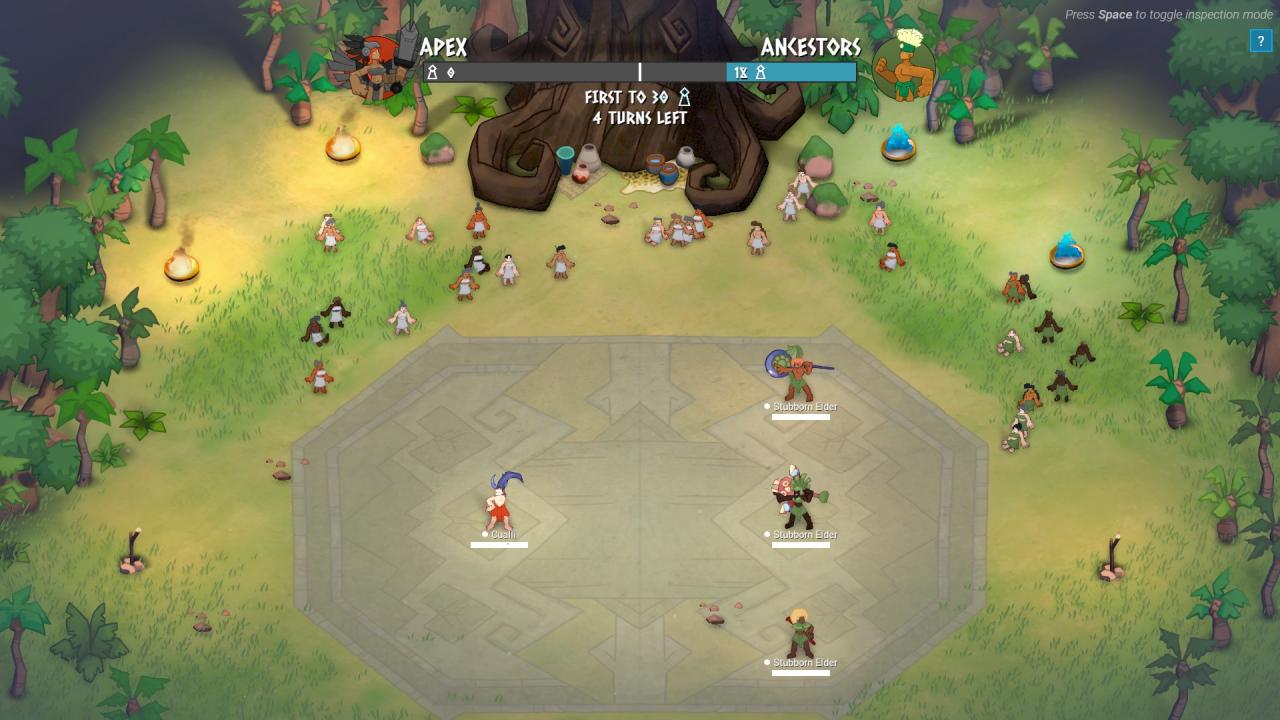
Circled in red are some of the most important statistics you might want to know about. The screen shown can be accessed by pausing the game with spacebar, then using the mousepointer to hover over the data.
From the image above, the four major concepts that this game deals with, are:
1.1 Health
1.2 Stats
1.3 Class
1.4 Affinity
1.1 Health, or how to win a Sacrement
Godhood’s first complication, is that sending your opponents to the hospital isn’t actually the primary objective of the game. It helps of course, but it’s not the fighters or the events in the arena that decide the outcome. It is in fact, the audience surrounding that arena that decide.
Your gawking, swooning, soon to be adoring followers.
Godhood is about converting the audience to your side. Not necessarily through battle, but by putting up a convincing show during that battle by any means possible.
To reflect this, Godhood’s second complication is that there are actually two different pools of health. Each of these is more susceptible to a different type of attack than the other.
Physical Health/Attacks
 The first and most obvious type of health/attack, are
Moral Health/Attacks
The second type of health/attack, are 
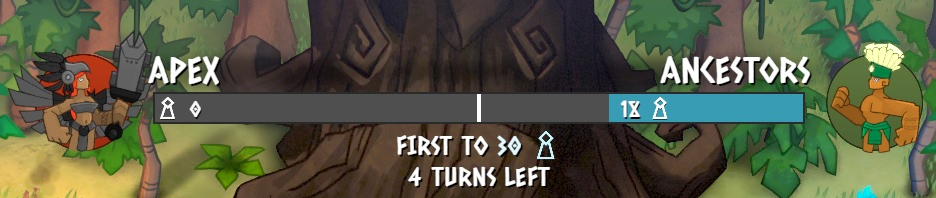
The Moral health bar at the top of the screen. When one team fills it up to the middle bar, they win. Shown also is the amount of audience that the middle of the bar represents.
This means that there exists a dynamic between a team of purely
Moral fighters.
It’s the job of Physical fighters to knock out the opposing team of Moral fighters, before the opposing moral fighters manage to impress the audience. Moral Fighters can’t win a Sacrement and convince people to follow them around when the Physical fighters have confined them to a hospital bed.
It’s the job of Moral fighters to impress the audience, before the opposing physical fighters manage to knock out the Moral fighters. Physical fighters can’t win a Sacrement if a Moral Team manages to prove the Physical fighters are just a bunch of unrefined pagan brutes and bullies.
Of course, Moral attacks don’t EXCLUSIVELY deal moral damage and the same goes for physical attacks. A physical fighter landing a deftly placed haymaker that launches an oppenent ten feet into the air, makes an impact on chin and audience both.
It’s usually better to build a team of either exclusively Moral Fighter, or exclusively Physical fighters. Mixing together a team that does both, will mostly lose against a specialized team, unless the player knows what they’re doing and their characters have an interesting dynamic of abilities that make up for it.
To see which attacks deal Moral Damage and which deal Physical damage, a player can hover their cursor over the individual attacks in the ability bar.

To lessen damages, there are also two different types of defense stats to lessen the blow of either type of attack. These two stats are shown directly below the health bar and presented as a blue Mirror symbol for defending against moral assaults, and a golden Shield for defending against Physical assaults.

More on how to increase these defenses in the next segment of this guide.
1.2 What’s in a Fighter? The Statistics
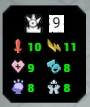
The above image gives a rundown of some of the more common statistics in the game. Perhaps the most obtuse are the big white ones at the top, showing a white symbol, next to a number.
The symbol is the “class” of the character. More on this later.
The number is the powerlevel of the character, but unlike in most other RPGs, this does not represent how many times the character has “leveled up”. Instead, it gives a general sense of how high the character’s stats are and how well they play to the character’s “class”. Again, more on this later.
Although the game is currently somewhat bad at giving context to terms, it’s not bad at all explaining the statistics. Hover over them with the pointer and a good rundown is given. Now that we understand the important differences between Physical and Moral Health/Attacks, these stats can be grouped together for a better frame of reference.
There are three of these: Might, Cunning and Health.
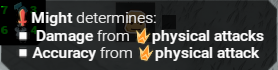

Basically, a Character’s Might statistic defines a
If you remember the yellow Shield symbol previously mentioned (defense against physical attack), then it’s the Heart Statistic that raises it.
Moral Stats
There are three of these: Charisma, Knowledge and Devotion.

Basically, a Character’s Moral statistic defines a
If you remember the blue Mirror symbol previously mentioned (defense against moral attack), then it’s the Devotion Statistic that raises it.
As you can see, the three statistics are easily categorized under their ability to be helpful to either Physical or Moral fighters.
This does not mean there shouldn’t be any crossover though. For a Physical fighter to have some devotion, grants them resistance against moral attack. The same goes for a Moral fighter and their resistance to Physical attack by investing in Health.
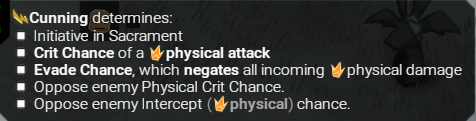
Even knowledge may be helpful for a Physical Fighter, to be able to single out a weaker individual on the opposing team, or cunning for a Moral Fighter, to be able to take their turn faster.
However, the benefits of that are small and I’d definitely wouldn’t recommend might for Moral fighters or vise versa. It’s better to stick to what your team is good at and build stats accordingly, instead of creating a generalist who’s good at nothing.
1.3 Levels, Classes and Character Jobs
Let’s for a moment, return to the two white symbols presented at the top of a fighter’s statsheet.
There are actually no levels in Godhood, or more accurately, the number in white doesn’t correspond to it. XP is awarded after every victory in the field and put into a bar, but when that bar fills up, the number in white won’t increase and neither is the character awarded an increase in statistics.
You now might be wondering “Well, then what do I get for my XP?”
The answer to that is “Options”. Most of these options can be found in the city-building part of the game and are called “Miracles”, but for now, let’s stick to just increasing our understanding of the characters themselves before discussing how we can improve them.
Out of the options you’re given after filling a character’s XP bar, the most important is the option of picking a job, or a “Class” for your character.
All characters you’ll receive beyond the one you begin with, start out as simple acolytes. These fighters are weak, unspecialized and have a random mix of both Physical and Moral attacks. They’re exactly the kinds of weak jacks-of-all-trades we don’t want to take into battle. If we do however and the Acolyte manages to grab enough XP to fill their bar, then they get to pick a Class for themselves. This happens only once and only after the first time you manage to “level up”.
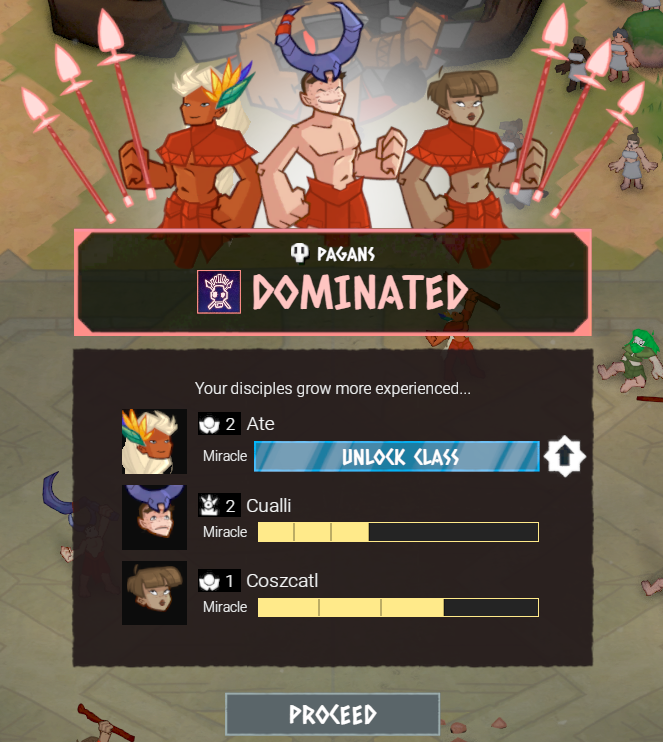
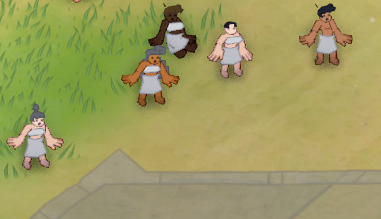
One of these characters has leveled up for the first time and is given the opportunity to select a class for themselves.
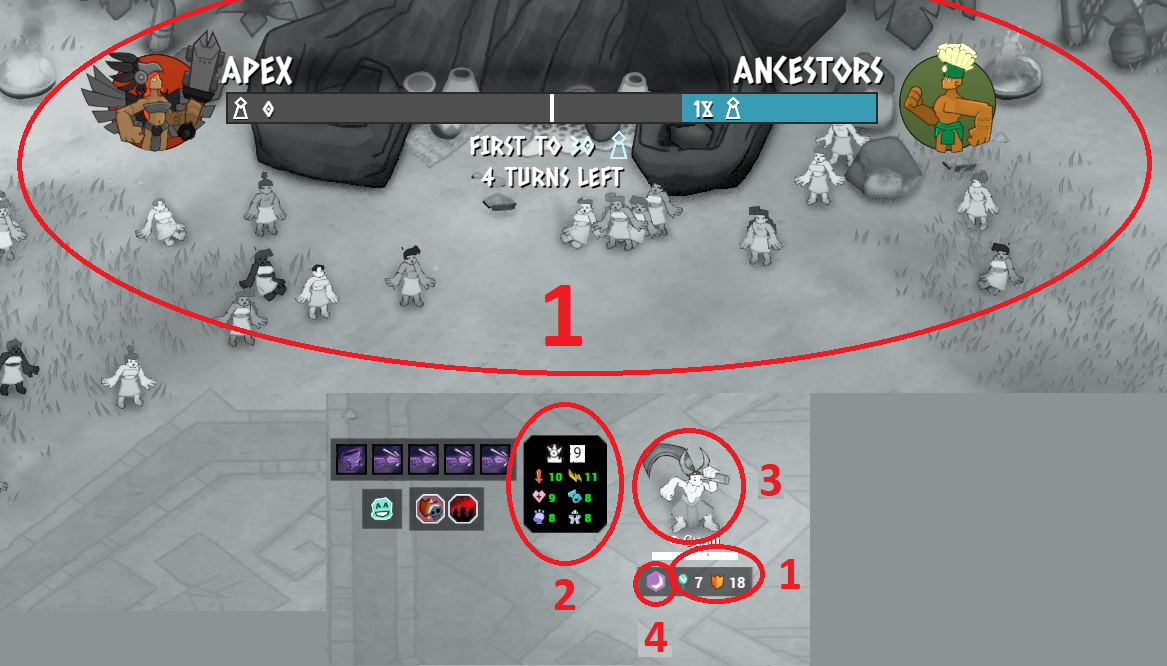
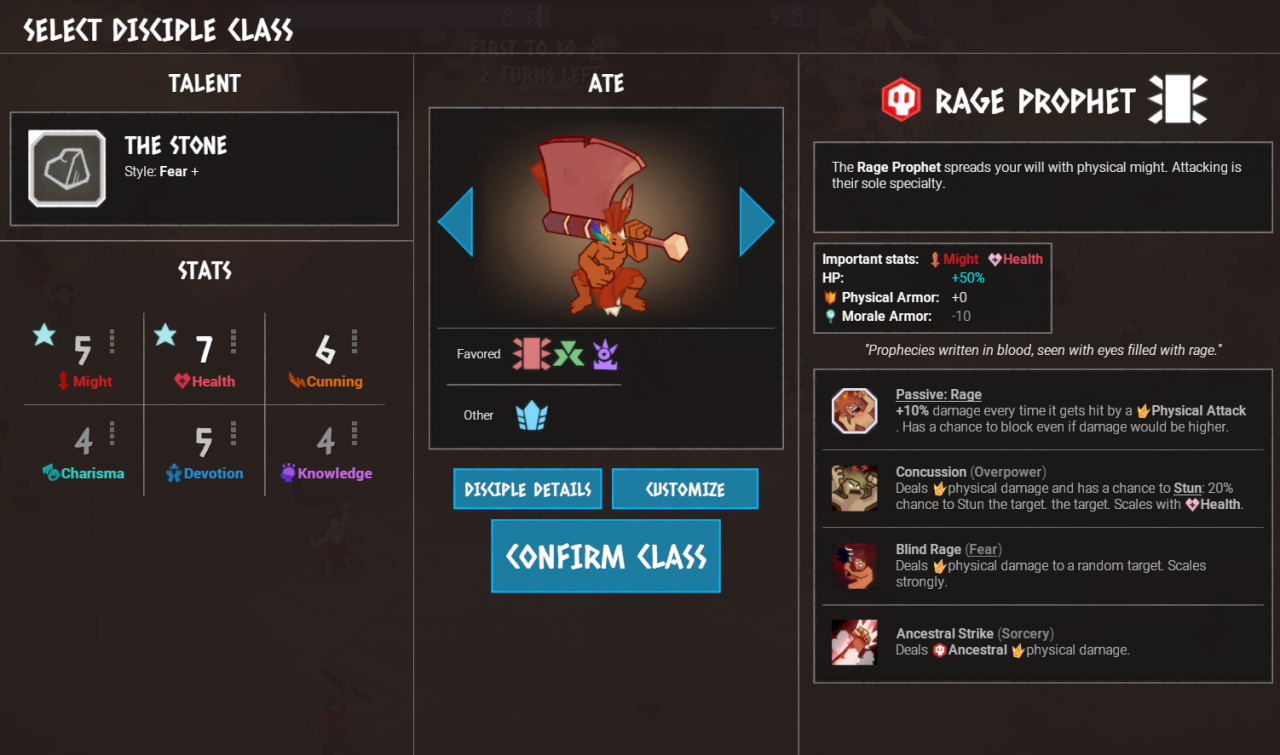
The trick to classes is that each of them is defined primarily by two of the six statistics previously discussed. These two are the most important for them. In the example below, the two most important statistics for the Class known as the “Rage Prophet”, are the statistics of Might and Health. Rage prophets are therefore class characters that can dish out and endure a great amount of Physical damage. This is signified by the little star symbols present in the listing of stats to the left of the screen (1).
The screen shown when an Acolyte is rewarded by picking a class for them, after leveling up for the first time.
The characters themselves, in the middle of the screen (2), also tell you what Classes are favored by them, based on the stats they possess. For a lowly acolyte who possesses high Health and high Might, becoming a Rage Prophet is the most intuitive and therefore favored. In this way, your characters are almost ordained to taking certain jobs from birth this way, though the player may choose to change fate.
When an Acolyte claims their class and graduates into a specialization, their otherwise weak mix of both Physical and Moral attacks, is then replaced by a line up of specialized abilities that suit them. This is shown on the right of the earlier image (3). For the Rage Prophet, this means a solid line-up of powerful Physical attacks.
There are many classes in the game and Steam User RVWinkle has created an excellent list of them, right here:

However, not all of them are available at any one time to a player. This has to do with yet another concept, called “Commandments”, or “Virtues” by the game. Basically, it’s the type of religion chosen by the player at the start. The abilities awarded by picking a class also come with interesting effects on gameplay and something called an “Elemental Affinity” is also awarded, but let’s not get ahead of ourselves and discuss these terms later.
To circle back to the white symbols above a character’s statsheet:
The white symbol to the left signifies a character’s class. Shown here is the symbol of a class known as the “Executioner”. If this were a Rage Prophet’s statsheet, it would’ve been a skull. When no class symbol is shown, we’re dealing with an acolyte.
The number in white next to that, is not an indication of level, or how many times a character has filled up the XP bar. It is instead, an indication of all of a character’s statistics, and how well they combine with a chosen character’s class. It is therefore a Powerlevel, rather than strictly a level in the classical RPG sense.
1.4 Class Affinities
It’s called Elemental Affinity and don’t worry, it’s one of the easiest concepts of the game to wrap your head around!
Whenever a character gets assigned a Class by the player, this also comes with an elemental affinity. From this moment on, the character represents one of the five qualities of sainthood.
These are:
Ancestry (Red)
Life (Yellow)
Dark (Purple)
Nature (Green)
Divinity (Aqua)

As you might be able to tell from the orientation of the arrows in the above image, it’s a basic rock-paper-scissors system. Red defeats Yellow, while Red itself gets stomped by Aqua.
The primary example from our previous explanation of the Class System – The Rage Prophet – is a
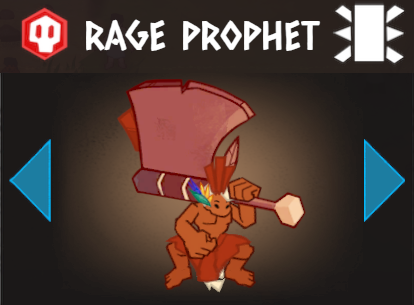
We can now also consider that the Rage Prophet it is a class with an elemental affinity for Red “Ancestry”, as shown by his white skull symbol to the left of their name, being set upon a red background.
The Rage Prophet isn’t alone in this. The Ambassador Class for example is also a Red “Ancestry” class, even though its primary statistics are Charisma and Devotion, which means the Ambassador has abilities that focus more on
Regardless of statistics, abilities or even powerlevel by quite some margin, both of these Red Ancestor classes are likely to easily beat any class that has an affinity for Yellow “Life”, while getting beaten by any Class that has an affinity for Aqua “Divinity”. The damage and the efficiency of the Class with an Elemental Affinity advantage, is far higher, while taking less damage in turn.
When the classes do not have an affinity that has a direct connection as shown in the diagram above, then battle continues as usual.
It is in the best interest of a player to have a healthy variety of characters with different affinities in their roster, and to therefore graduate their acolytes into a variety of classes. The Rage Prophet is fun to have on the battlefield, but if a player trains nothing but Rage Prophets, then they’re in trouble if they face an enemy team with a dominance of Aqua affinity Classes. Flexibility is key in Godhood.
1.5 To Summarize the basics of battle
The most important part of Godhood is the Sacrements (or battles). Within a Sacrement, the goal is to either deplete the physical health bar of each of the three opposing fighters by making
When a character has defenses to Physical or Moral damage done to them, both goals are slowed down from happening.
The strength of these attacks and the ability to endure, is governed by the six statistics that each fighter has.
These are Might, Cunning and Health (which are strongly associated with
And these are Charisma, Wisdom and Devotion (which are strongly associated with
Once characters have leveled up for the first times, they’re granted a Class. Every class is associated with two of the six character statistics. The character that gets to pick a class, favors and is best suited for the class that corresponds to their two highest statistics.
Classes also come with a rock-paper-scissors Elemental Affinity, that make classes better at fighting certain other classes that have an opposing Elemental Affinity.
2. Your religion
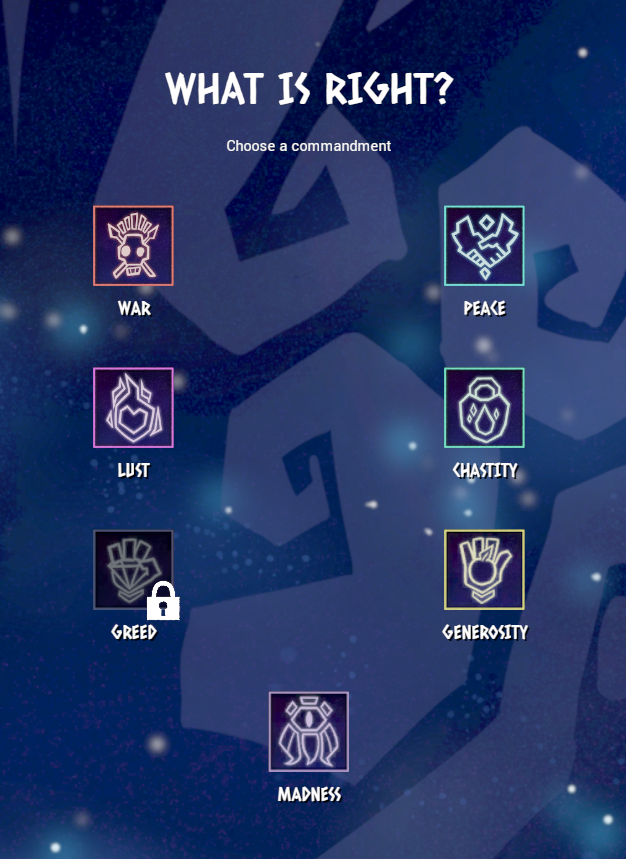
Commandments, yes. We all have an idea of what “Generosity” and “War” means and “Lust” might give us a good giggle, but what does it actually DO inside the game?
Commandments, basically decide on which of the many Character Classes in the game are available to you. And within that range of classes, each Commandment has a theme towards which Statistics appear most important to that Commandment.
Each Commandment also starts out with a character that’s already been granted a class from the start. This class is exclusive to that commandment.
On the amount of Elemental Affinities available, commandments have little bearing. Most get to pick from a range of Classes that together have all Elemental Affinities as options.
2.1 Commandments: War, Peace, Lust

Beast Walker
Smitesword
Cunning, Might
Might, Devotion
Green
Aqua
Chieftain
Harbinger
Guardian
Charisma, Might
Health, Charisma
Health, Cunning
Red
Purple
Yellow
Druid
Songsmith
Knowledge, Devotion
Charisma, Cunning
Green
Yellow
Druid
Songsmith
Knowledge, Devotion
Charisma, Cunning
Green
Yellow
Chieftain
Smitesword
Guardian
Charisma, Might
Might, Devotion
Health, Cunning
Red
Aqua
Yellow
Beast Walker
Harbinger
Cunning, Might
Health, Charisma
Green
Purple

Weaver
Chieftain
Knowledge, Charisma
Charisma, Might
Purple
Red
Rage Prophet
Harbinger
Beastwalker
Might, Health
Health, Charisma
Cunning, Might
Red
Purple
Green
Zealot
Druid
Devotion, Charisma
Knowledge, Devotion
Aqua
Green
2.2 Commandments: Chastity, Generosity, Madness

Smitesword
Harbinger
Might, Devotion
Health, Charisma
Aqua
Purple
Chieftain
Zealot
Druid
Charisma, Might
Devotion, Charisma
Knowledge, Devotion
Red
Aqua
Green
Songsmith
Beastwalker
Charisma, Cunning
Cunning, Might
Yellow
Green

Zealot
Chieftain
Devotion, Charisma
Charisma, Might
Aqua
Red
Songsmith
Weaver
Druid
Charisma, Cunning
Knowledge, Charisma
Knowledge, Devotion
Yellow
Purple
Green
Smitesword
Harbinger
Might, Devotion
Health, Charisma
Aqua
Purple

Druid
Smitesword
Knowledge, Devotion
Might, Devotion
Green
Aqua
Rage Prophet
Harbinger
Zealot
Might, Health
Health, Charisma
Devotion, Charisma
Red
Purple
Aqua
Beastwalker
Songsmith
Cunning, Might
Charisma, Cunning
Green
Yellow