In this guide, I will teach you how to make your own Custom Radio Station(s)!
Big thanks to Socialist Tsar who helped me learn making music mods some time ago!
Hopefully I can help anyone with this guide!
- Sublime Text[www.sublimetext.com] (Or any other program which can edit coding) to open .gui, .gfx, .yml, .asset files
- Paint Net[www.getpaint.net] to edit your album cover
- Windows Notepad to open .MOD files
These are completely Free to use.
I named my mod folder as “test”, you can name it to whatever you want. This is just what I’ll use for the guide.
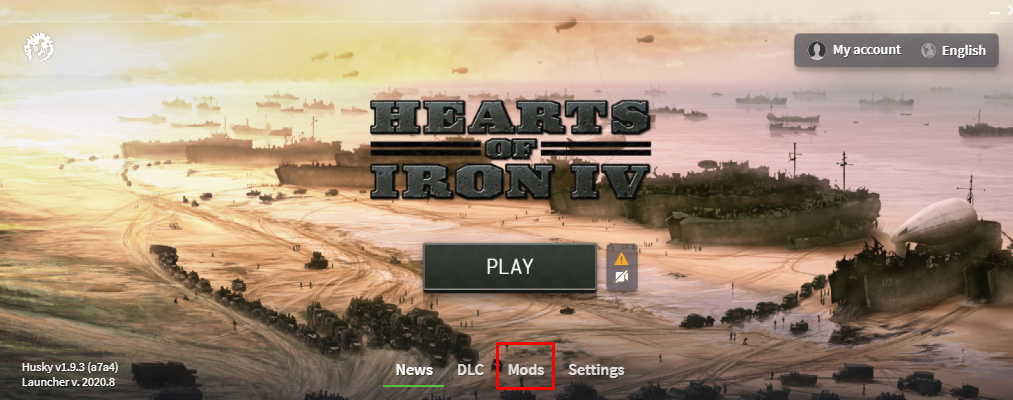
First, Open the Launcher and go to “Mods”
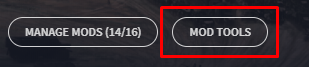
Then click “Mod Tools”
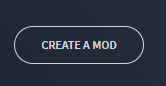
Now, “Create Mod”
After that you’ll see this window.
- Give your mod a name
- Type in the latest version
- At directory/___<– Give your mod a name (I used test for this guide)
- Now choose tags you’d want (I mean, this is kinda obvious)
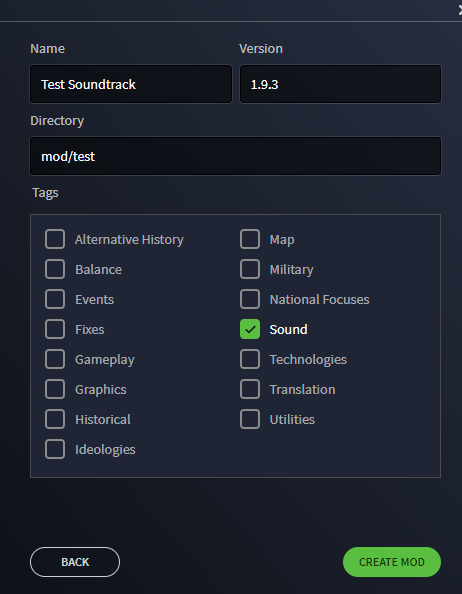
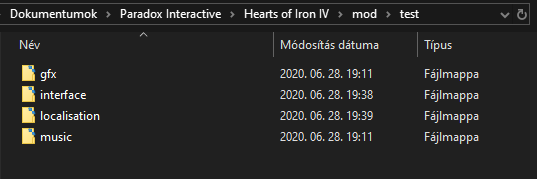
Now just click “Create Mod” and boom, now you have a mod folder which is located in “Documents\Paradox Interactive\Hearts of Iron IV\mod”
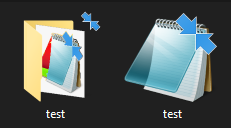
Your mod folder will appear (with the name you gave it) with a descriptor file inside of it (which is an .MOD file) and a .MOD file next to the folder with the name you gave it.
They will appear like this
- gfx/interface/topbar/musicplayer (By ” / ” I mean create a folder inside the folder)
- interface
- localisation
- music

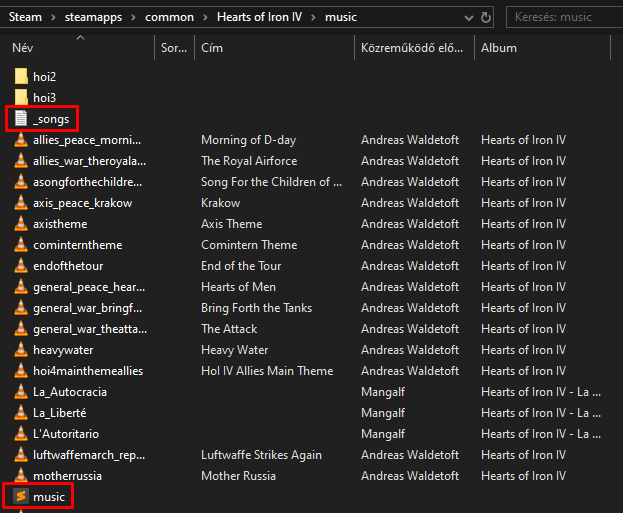
From the base game you’ll need these files. (This is optional but I highly recommend doing this since this really makes the whole process easier.)
You need “_songs.txt” and “music.asset” files and copy them into your mod’s “music” folder.[/b]
Rename both of them like “test” once they are in your mod’s music folder (Example)
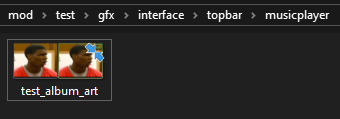
We also need an album cover which you can later change to your own liking. Now copy and paste “base_game_album_art” inside your mod’s “musicplayer” folder and be sure to have these folders in order
“mod\test\gfx\interface\topbar\musicplayer” and paste it inside here.
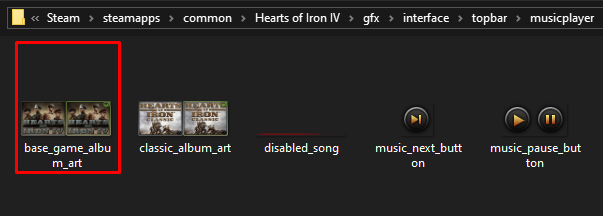
Rename it like “test_album_art” when it is inside your mod’s “gfx\interface\topbar\musicplayer” folder (Example) (Mine album art is already edited, you will have to edit yours yourself)

Interface files are also needed which you can get from here.
You need “musicplayer.gfx” and “music_station_base.gui”
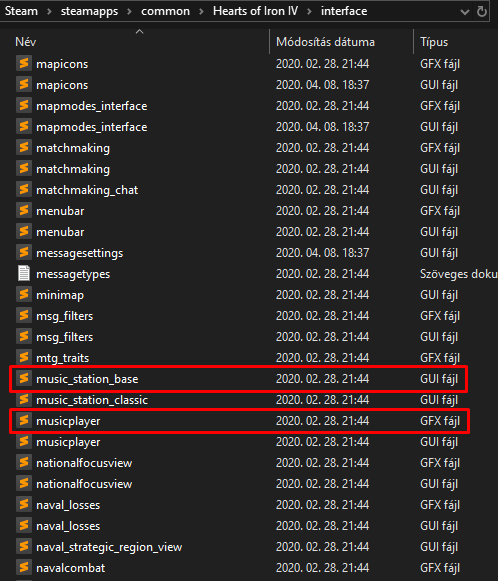
Rename them both like “test” when they are inside your mod’s “interface” folder (Example)
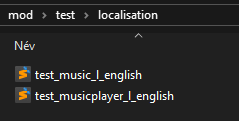
Let’s get some Localisation files too.
You need “music_l_english” and “musicplayer_l_english”
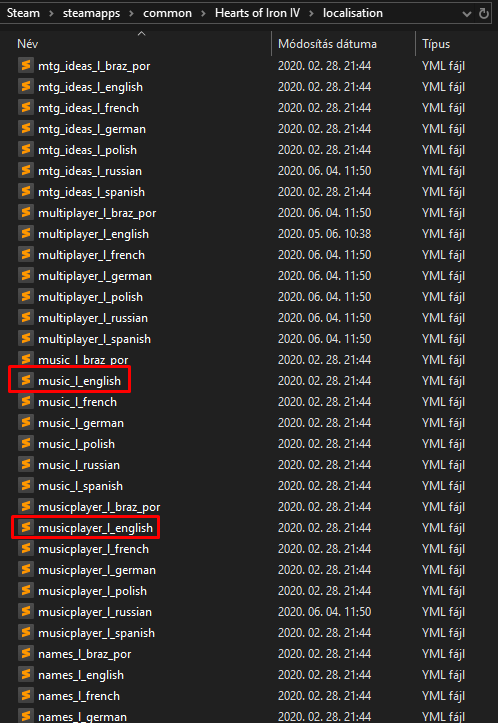
Rename these like “test_music_l_english” and “test_musicplayer_l_english” when it is inside your mod’s “localisation” folder (Example)

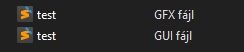
After you’ve done these, your mod folder should look like this with the files added inside the folders.
After you’ve got every file needed, you can start making your Custom Radio Station.
Time to edit all the files we’ve added to the mod folder.
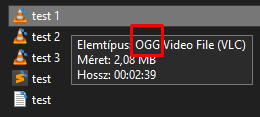
After you’ve got your OGG files, just put them in your music folder.
Now we need to edit both the .txt and .asset “test” files.
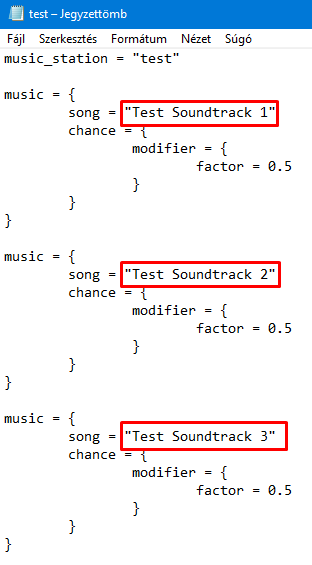
When you open up the “_songs.txt” file, this will greet you. (Example)

- Now open up your “test.txt” from inside your “music” folder.
- Change “base_music” to the mod folder’s name.
- Change “song = [Change this to the name you want to appear in the game’s Radio Station]”
After you’ve changed the files it should look similiar to this.
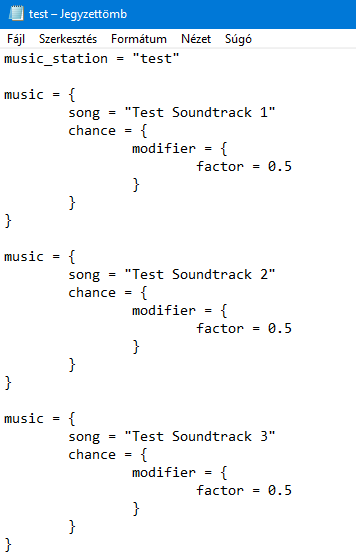
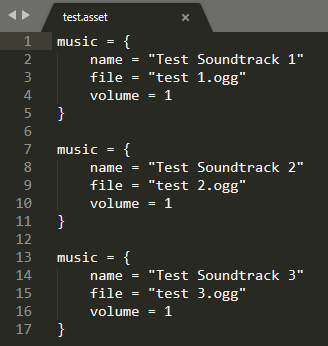
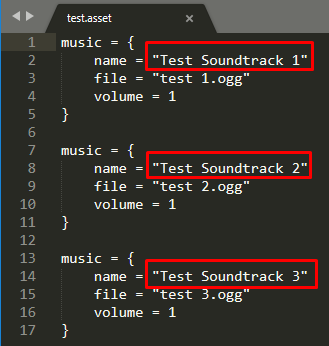
Now, onto the “music.asset” file. When you open it with “Sublime Text” it looks like this. (Example)
You just have to edit these lines:
- “name = “Test Soundtrack 1” (Write here the title of the song which will appear in the Radio Station)
- “file = “test 1.ogg” (Write here the song’s exact file name otherwise it won’t work properly)
- volume = 1 (You can change this to whatever you want between 1-0 since this just changes the volume, obviously) (0.25, 0.50, 0.70 for example)
After that it should look similiar to this
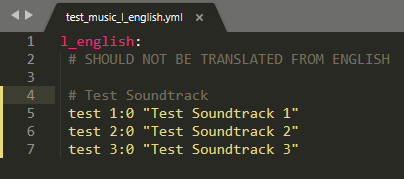
Now, let’s go to the “localisation” folder.
Open up “test_music_l_english” or whatever name you gave it. You’ll see this. (Example)
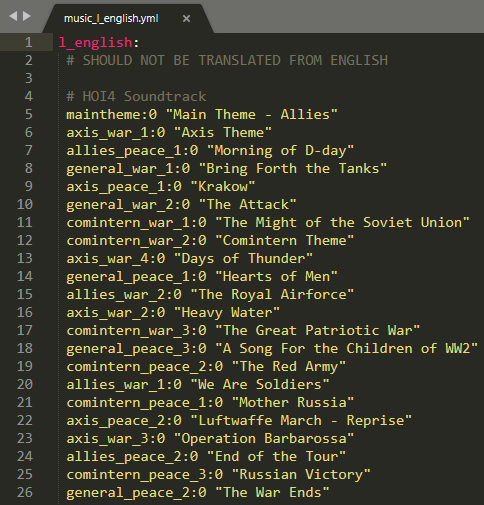
After editing it should look like this
Whatever you write between the quotation marks will be the song’s name in the Radio Station
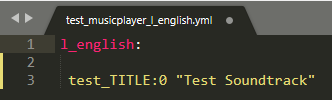
Now open “test_musicplayer_l_english” or whatever name you gave it. (Example)
You can delete every line inside of it except the first line which is l_english:
Whatever you write between the quotation marks will be the Radio Station’s name

Before:
After:
Be sure to save it as .dds file when you finish editing otherwise it won’t work!
You can change it to anything you’d like, I used bruh.
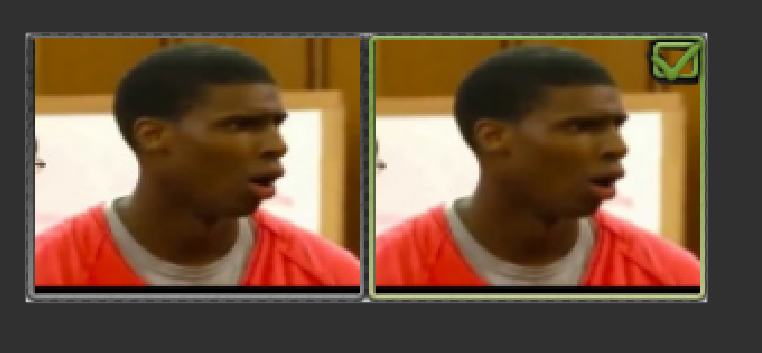
When you want to add a custom image make sure to resize them first before adding to at least 144×113 so they can fit in their frames. When you add them, add them as layer. Once you got your album cover in the left frame, just copy then paste it again and put it in the right frame. Then pick eraser and erase around the tick.
- The left one in the game will be when the Radio Station is not turned on
- The right one in the game will be when the Radio Station is turned on
Now you can safely delete the default album cover from your mod folder and then rename yours like “test_album_art” (Example)
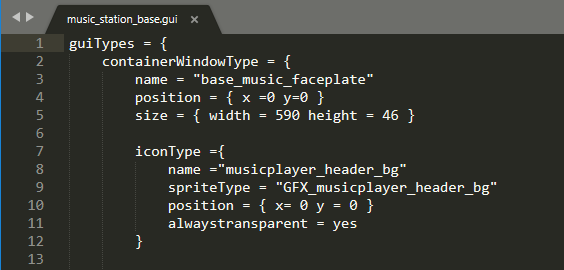
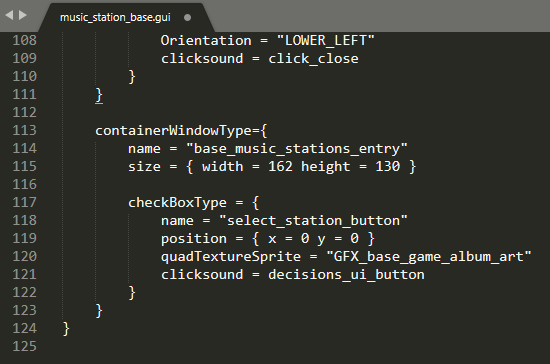
Now open “music_station_base” from your mod folder located in “mod\test\interface”
When you open it up you’ll see this (Example)
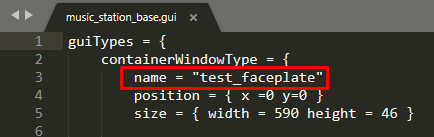
name = “base_music_faceplate” , Change “base_music_faceplate” to your mod folder’s name like this “test_faceplate”
After editing it should look like this
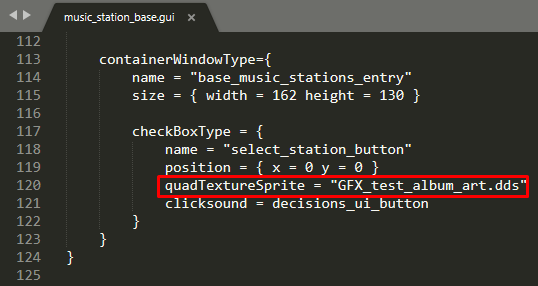
Now scroll down until you see these lines
quadTextureSprite = “GFX_base_game_album_art”, Change “GFX_base_game_album_art” like this “GFX_test_album_art.dds” (Example)
After editing it should look like this
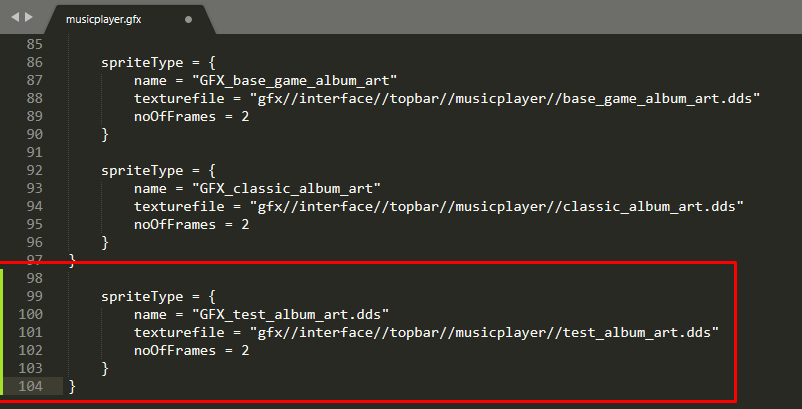
Now open up “musicplayer.gfx”, scroll down until you see these lines and add your own album cover like this
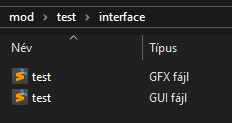
Now rename your “music_station_base” and “musicplayer” files to your mod’s folder name like this (Example)
Good job! We are done here.
For me, these music mods didn’t work locally so I had to upload them to the Steam Workshop first, subscribe to my own music mod on the workshop then in the launcher I had to choose the music mod which is from the workshop, not the local.
If it is a music mod you do not want to be public, you can just set your workshop mod private.
I could never make it work locally.. sorry!
- Open up the launcher
- Go to “Mod Tools”
- Select your mod to upload
- The mod’s version will be the same as it is in both .MOD files, both in “descriptor” and in the other .MOD file in the /mod directory. You will also need to use these to update your mod’s version to newer versions
- Choose whether you want to upload it to the “Paradox Mods” or the “Steam Workshop” (but obviously you will upload it to the Steam Workshop. Who wouldn’t?)
- Hit “Upload Mod”
Related Posts:
- Hearts of Iron IV: How to Fix Mod Not Showing Up Issue
- Hearts of Iron IV: How to Fix Missing Modifications 2021
- Hearts of Iron IV: Peace Conference Guide (BBA/Avalanche 1.12.3)
- Hearts of Iron IV: By Blood Alone DLC Guide
- Hearts of Iron IV: Romania MP Guide