The Radius can be confusing and unforgiving, learn what does what so you’re more likely to live another day.
Today, we’re here to help you not die as much by giving you a basic outline of most content in the game, since the game itself leaves you to discover that on your own, and by providing tips on how to make a stable income.
Disclaimer:
This guide is fuelled by my love for this game, and in an attempt to explain mechanics to help new players find a home in the Radius without being turned away by the difficulty. Due to the self-discovery part of the game, some anomalies or enemies don’t have proper names, and if they do, I don’t partake in the Discord to know. In these cases, I will provide my names for them, and they will be marked “as so”. Feel free to notify me if there is an official name or my information is wrong.
Edit:
While writing this guide, an official wiki has been started. This has provided proper names for most anomalies and mutants along with sneak peeks at future content. I will include official names alongside my nicknames just for fun.
This guide is also WIP, and since I’m a little slow at updating it, I’ll be writing it as I go so I don’t forget about it.
Without further delay, let’s start with what you’ll be looking at the most.
Your UI.
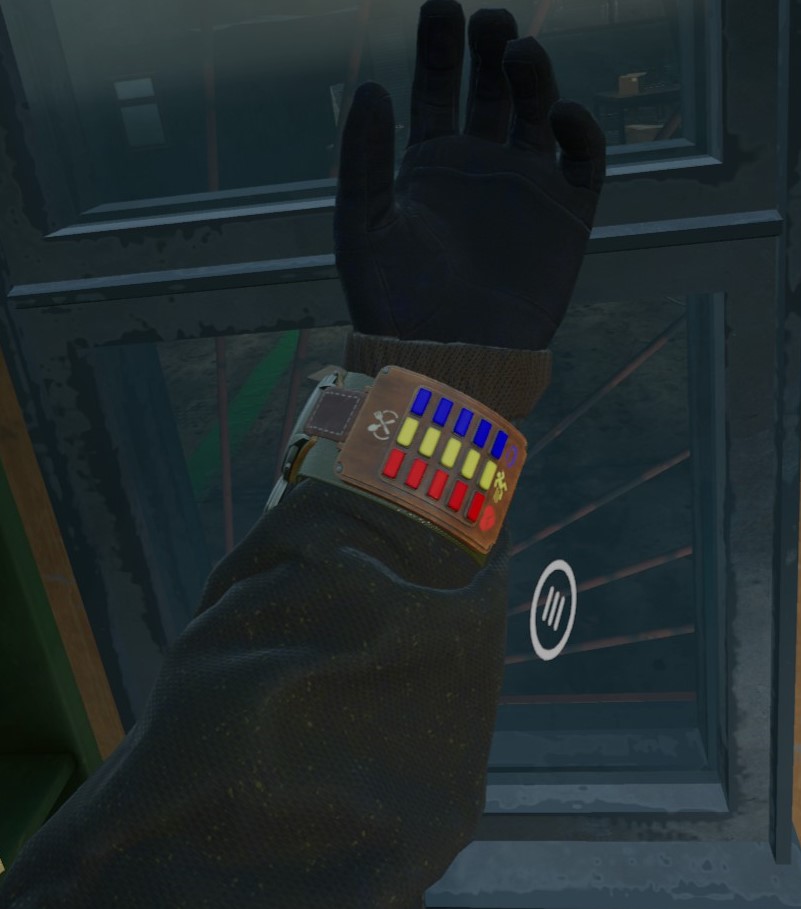
Red, your health.
Self-explanatory, if this reaches the bottom, you die. Each bar represents approximately 20% of your health. Health can be restored by sleeping at a shelter, using an injector, or activating a regen artifact.
Yellow, your stamina.
Exploring the Radius is a hungry job. As you loot, shoot and hunt, your stamina will drain at a steady rate, filling the lost bars in with a darker orange colour. These hunger bars are like a blockade for your stamina, and will determine how long you can sprint. Eat chocolate bars to restore a majority of your stamina.
Blue, your fatigue.
Everyone needs to sleep. Like hunger, fatigue is unavoidable and will gradually drain your bar. As it lowers, your player will yawn and begin to close their eyes, temporarily making it harder to see. This effect becomes slightly more common the sleepier you are, and if the bar reaches 20%-0%, you’re likely going to pass out on the spot, forcing you to sleep until the bar is refilled at the cost of most of your stamina and progressing time. Enemies do not move during the time you sleep, so don’t worry about being swarmed if you pass out and aren’t in active combat. Fatigue drops faster the higher your combined weight of backpack and holstered items.
Next is the watch itself.
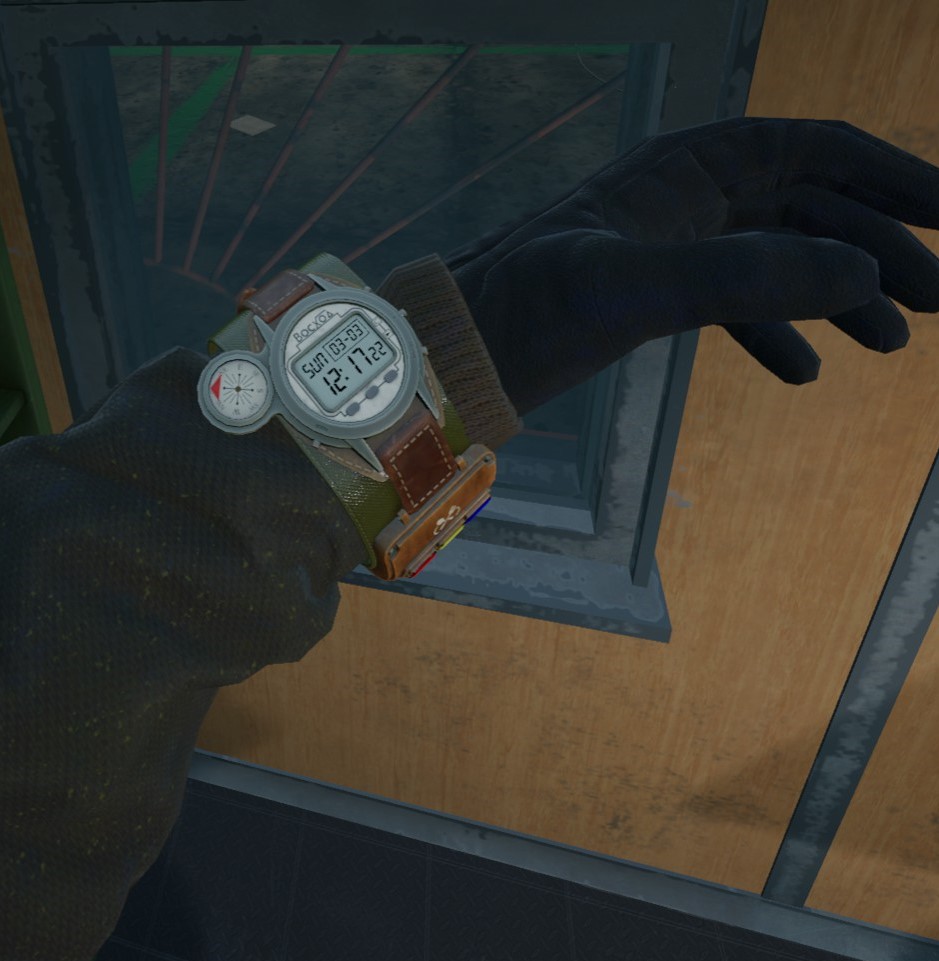
The watch is, unsurprisingly, a watch. It tells the time, with 7:00AM being the morning. I advise checking the time and attempting to begin raids on hostile-populated areas around 5AM to provide you with optimum daylight. It also displays the date in DAY/MONTH format, and has a compass which ALWAYS points towards the Radius. Be aware of the date, as maintenance is every week and will cost you $500.
Your map is essential, but so is your ability to read it.
The map does not show your active position, but contains a majority of the Radius’ landmarks. Being able to translate your surroundings onto the map is a vital skill in navigating, and ignoring it is an easy way to get lost until you memorise locations. The map thankfully marks a few of the available shelters, your main objective (red), optional objective (blue), entry point (green circle) mission intel (white) and last slept location (green triangle).
Use the magnifying glass to get a closer look, and the tapes you find can be inserted into the player on top. Other pages act as a journal, with mission information, found notes/tapes, and soon-to-come stash information. The map is located on your left hip and will always return if released.
With your wrist and map out of the way, let’s get to know your body and storage.
Luckily, that vest of yours contains all the slots you need to store and access your important items. The first 4 slots you’ll use are located on your outer torso and shoulders. These can hold your basic equipment, and are recommended for what you’ll use most, such as your knife, detector and probes. Once in these slots, the item will magnetise to the slot again if released close to your body, so don’t worry about precision when putting them away
Compatible items include:
Knives.
Probes.
Monoculars.
Flashlights.
Detectors.
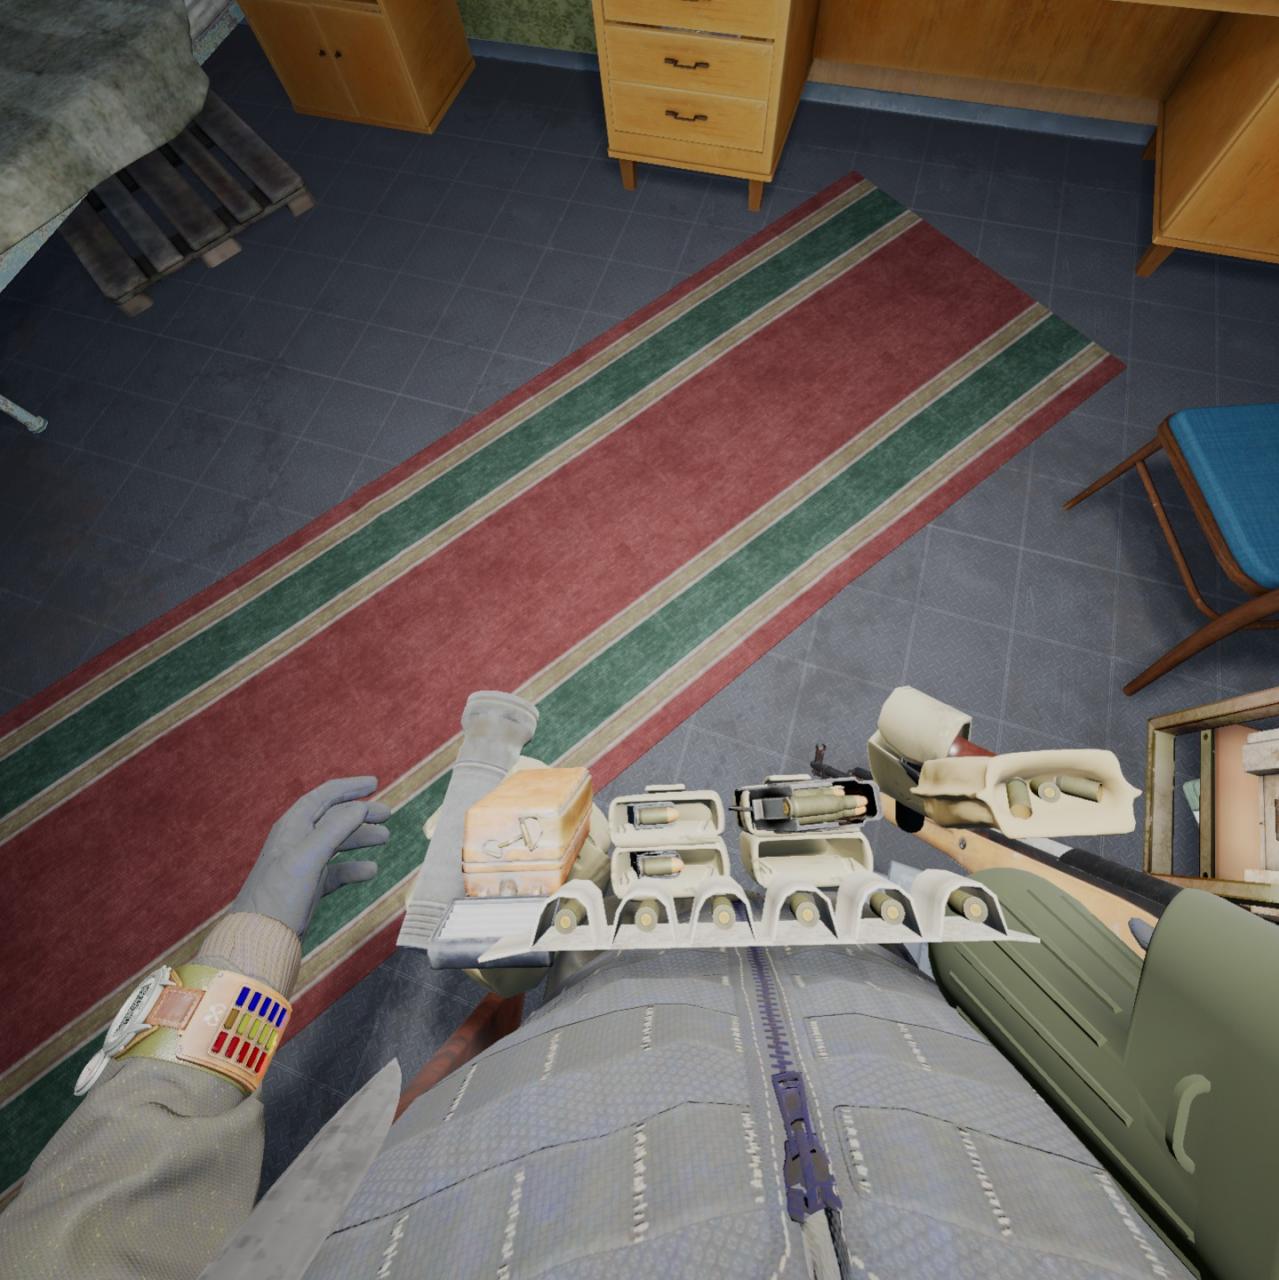
The centre chest holds your shell holster. Here you can store up to 6 loose rounds or shells for quick loading your shotguns or magazines. Dragging an ammo box across the chest will return the compatible ammo to the box. Located slightly under the shell belt are your 4 ammo pouches, capable of holding 4 magazines of any kind. I recommend leaving 1 empty to store your freshly emptied mag as you reload to save you searching the ground for it post-combat. Magazines cost, and losing them is wasted profit. You can reload a holstered magazine by pressing the compatible box against them.
On your right thigh rests your sidearm holster, keeping your Makarov or Pernach secured and ready for sudden attacks. Just behind your sidearm, on your hip is your primary weapon holster. All non-handgun weapons are kept here, ready for combat. Magazines can be inserted into a holstered firearm, but not released.
Opposite your sidearm, on your left thigh, is your drop pouch. This curious little bag can hold an oddly specific selection of items as a quick-access backpack, and has little, but effective, utility.
Compatible items include:
Flashlights.
Flares.
Grenades.
Other than holding your items, the pouch’s largest advantage is holding an active flashlight.
By placing it in your pouch, with the beam sticking out the front, you can have both hands free while the light follows your view. The light can only stay in the direction you point it though, meaning you’ll have to adjust based on elevation.
What S.T.A.L.K.E.R would be complete without a backpack capable of holding all their loot. With another primary firearm holster and storage for a sleeping bag, this survival kit will be where you organise your finds. However, the backpack should be considered an anomaly itself, due to its ability to carry as much as you can shove in it. By sticking objects out the sides and back of the bag, you can effectively multiply your storage by negating all the space taken by large objects. When you get a spare moment, organising your backpack to fit more items will help in the long run.
The backpack can be grabbed by reaching over your shoulder, can be carried around, and will automatically return if you move far enough away from it.
1. Flashlights in the backpack will remain on if off your shoulder, allowing you to carry it around like a beacon. This extreme vision comes at the cost of FPS and making you a glowing target for hostiles.
2. Save space by having flares and other large items sticking out the sides of the bag.
3. Your bag can be used as a shield from Spawners, covered later.
4. Place a second flashlight in your pouch at a lower angle to cover the blindspot a front-facing flashlight misses.
Related Posts:
- Into the Radius VR: Best Pistols and Ammo Guide (Tier List 2022)
- Into the Radius VR: Location of Pecho Plushies (Update 2.7)
- Into the Radius VR: All Stashed Weapons Locations