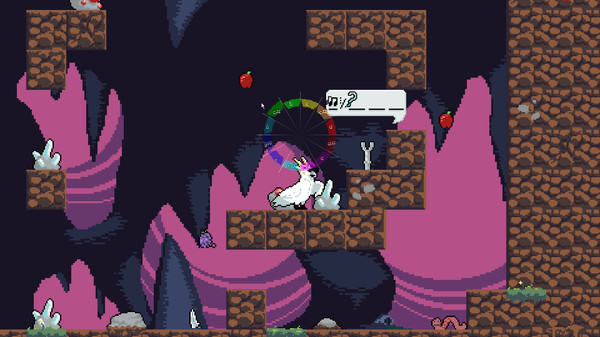
Migrate! A game dedicated to the quirkiness of birds. Here is basic information and default keybindings.
Controls – keyboard/mouse
————- ————- CONTROLS ————- ————-
KEYBOARD + MOUSE
interact… z
move… a / d
run… shift
jump… space
guard… s
light attack… q / left mouse
heavy attack… e / right mouse
use equipped… x / middle mouse
equip item… hover + middle click
item options…
KEYBOARD + MOUSE
interact… z
move… a / d
run… shift
jump… space
guard… s
light attack… q / left mouse
heavy attack… e / right mouse
use equipped… x / middle mouse
equip item… hover + middle click
item options…
- hover + right click
- left click to select menu option
move item… left click and drag to inventory/chest
sing…
- hold f
- move mouse / left click to select note
- release f to commit
craft…
- hold c to open
- scroll mouse wheel to cycle recipes
- press z to craft selection
self-talk (hint) w
Controls – gamepad
GAMEPAD
interact… x
move… left joystick left/right
run… hold left stick in
jump… a
guard… left joystick down
light attack… right bumper
heavy attack… left bumper
use equipped… b
equip item…
interact… x
move… left joystick left/right
run… hold left stick in
jump… a
guard… left joystick down
light attack… right bumper
heavy attack… left bumper
use equipped… b
equip item…
- left/right d-pad to cycle inventory
- x to equip item
item options…
- left/right d-pad to cycle inventory
- a to examine item
- b to cancel
- x to equip
- y to drop item
move item…
- up/down d-pad to switch between inventories
- a to send to switch item to next inventory
sing…
- hold left trigger
- move right thumbstick/click right thumstick in to select note
- release left thumbstick to commit
craft…
- hold right trigger
- right thumbstick up/down to cycle recipes
- press x to craft selected recipe
self-talk (hint) y
Goals
If you get lost in the beginning of the game, make sure you’ve investigated the palace of Grandnest.
Migrate’s game loop is informed by the roguelike genre.
Migrate’s game loop is informed by the roguelike genre.
- In general, if you die, you restart from scratch.
- In the dungeons, when you die you start back at the beginning of the worm tunnels.
- All your items and experience will be lost, however any wisdom previously gained will remain.
- When reaching at least as far as you did in the previous life, a gravestone will spawn somewhere until used. This gravestone can be used to access and take from your previous inventory.
- Your goal is Wisdom, which can be found in Icehome (city ruins in the demo), and must be returned to Grandnest.
From Grandnest, you may strike out on a migration, starting in the worm tunnels.
- Each stage is randomly generated. Tiles, resources, and enemies will be randomly distributed.
- The exit will be somewhere at the bottom of the room.
- Stages are timed. The timer expiring will send the Roc’s presence after you.
After each completed room, your depth is increased by one and you stop by a checkpoint.
- In the checkpoint, you may level up one skill with enough experience.
- Obelisks will be lit up for skills that may be advanced.
- Obelisks have a shopkeeper with various items. Drop items on the pudgeon to sell them.
- The checkpoint also has a hidden, unlockable merchant that will eventually help with crafting.
After each completed level (3 stages in general), you will find the next town.
- Towns may have quests, shortcuts, merchants, items, and secrets.
- Once a shortcut has been built, you can travel directly from Grandnest to start in that town.
Other tips
• The game never gets any easier (or harder). Mastery of the game’s mechanics, and knowledge of the world, determine your success.
• Momentum is kept navigating levels by utilizing your airstrike. While airborne, use your light attack to perform a quick downward strike. Striking an enemy, resource, or fruit will restore some stamina and bounce you upwards.
• The path through any stage is random, but unobstructed. You should be able to reach the next checkpoint without destroying any tiles.
• Make sure you have found the important object “the black chalice” exploring grandnest. Placing an equipped item in here will ensure it always spawns in your inventory. A pickaxe (which you can find or craft) is a good starting item.
By CATBUG!

