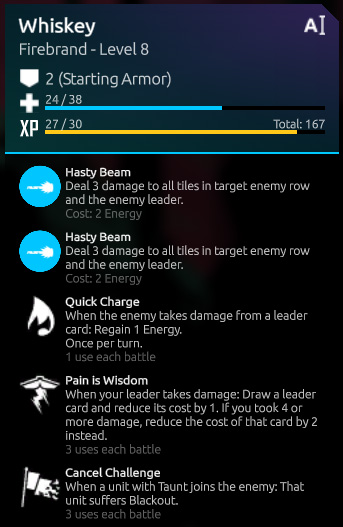
Notes on various strategies for Firebrand on V1.02.001 CHAKRA.
This is NOT a complete guide, just notes I have taken as I progressed through the game.
The Firebrand is one of the leaders that can be chosen for Nowhere Prophet. The leader cards he obtains through level up focus primarily on buffing followers or dealing damage. He is a forgiving leader to play due to his access to powerful damage attack cards. You can build him as a buffer or attack card dealer. I feel this leader is very newbie friendly. The Outcast deck works really well with him, almost like it was made for him due to the Hermits, Sappers and Wild Hands.
Remember when you use the heal function to put the Units you want healed inside your deck first. Those will take higher priority when you choose to heal.
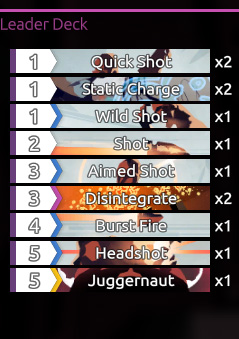
Level up as much as you can early on. The Firebrand’s level +5 spells are very powerful (especially Disintergrate).
Your starting hand should typically consist of a two or three drop depending on the equipment you obtain. Mulligan your hand till you have one.
I generally keep my hand low as it is hard to find duplicates of really good cards. I want to draw the followers I want at greater frequency.
Abuse Static Charge + Machinist Robes to draw your Disintergrates and having third eye amp to reduce attack card costs further (see notable items below). My typical starting move would typically be to static field an empty board (don’t want to hurt our own followers) to draw a reduced cost card and then spawn a follower afterwards.
In my opinion, Machinist Robes is a core item.
Rocket Launcher (2) – Hasty Blast – deal 3 damage to an area. Very useful board clear even when used as a single target attack. Best utilized in preventing the enemy from flooding the board.Assault Rifle (3) – Forward! – Target follower fights the first target in the opposing row, including the enemy leader. Nice way of getting extra damage in, think of it like a refresh. Attack with your follower then follow up with a Forward! for double damage. The only downside is the 3 cost making it expensive to utilize early in a fight. I prefer rocket launcher or beam rifle overall as they are versatile board control.
Beam Rifle (3) – Hasty Beam – Deal 3 damage to a row, including the enemy leader. Useful board clear/control. Combos with Demolition Charge.
Machine Gun (2) – Hasty Salvo – Deal 2 damage all targets in a target column. Useful board clear/control. Combos with Demolition Charge.
Mechanist Robes – Grants – Pain is Wisdom: When your leader takes damage, draw a card and reduce the cost by 1. If the damage was 4 or greater, reduce it by 2 instead. Synergizes well with static charge for free card draw. Combos very well with Third Eye Amp.
Third Eye Amp – Quick Charge – When the enemy takes damage from a leader card, regain 1 Energy. Once per turn. Very useful when using your attack cards. It does not let you go over max Energy. Use your attack card first to gain Energy. Synergizes with static charge and all attack cards, especially Disintergrate (3 cost 8 damage to opposing leader). Combos very well with Mechanist Robes.
Demolition Charge – Buried Knowledge – When you destroy an obstacle: Draw a leader card. This item can be insane if combined with a Beam Rifle or Machine Gun. You can draw 2-3 cards in one turn as obstacles become common place in the later maps.
Null Drone – Cancel Challenge – When a unit with Taunt joins the enemy, blackout (remove taunt and effects). Dismantles into White Noise – Deal 4 damage to all enemy units. Useful as an equip or a card. The equip effect is great against a bunch of elites and bosses that like to set up taunts.
Attack Drone – At the end of turn: deal 2 damage to random enemy target. This piece of equipment is very good, it will allow your rocket launcher or bream rifle to deal with 5 hp followers. It allows for early board control which is great as you will want to win your fights in three to four rounds before you start accumulating damage to your leader. There are versions of the Attack Drone that can dismantle into a beam card (5 damage to all enemy followers and leader in a row!).
Target Marker – Smart Targeting – When a follower that costs 3 or less joints your side: That follower gains Sniper. Very nice to have if you want to keep your 2 or 3 drops alive by hiding them behind a boulder. This is one of the few ways to deal with annoying enemies that use the scratch/slash/rend series of leader cards.
Armored Vest – Hard Cover – When a follower with Sniper joins your side: That follower gains Sniper. This combos very well with Target marker to keep your early followers alive. It is one of the very few ways to handle the enemies with Mind Wipe or Beam.
Signal Relay – Long Distance Call – When a non-convoy follower joins your side of the field: A copy of that follower joins your side. Goes well with Wild Hands and any follower/leader card that spawns a creature. You can build up a large board early on with one. You will loose less followers when you can use throw away creatures. Combos with Ruster Trap.
Ruster Trap – Ruster Call – Spawn a 2/2 Drone in a random tile. On it’s own it is not that great. When combined with Signal Relay it is very powerful.
Usually for followers go for cards with decent health for their summon cost so they can stay on the board and are less likely to be easily killed by the enemy. They’re mostly there to distract and provide the extra damage you need to finish off the enemy after you’ve burned them with attack cards. My decks are typically leaning more towards 3 to 4 drops and only 2-3 five drops.
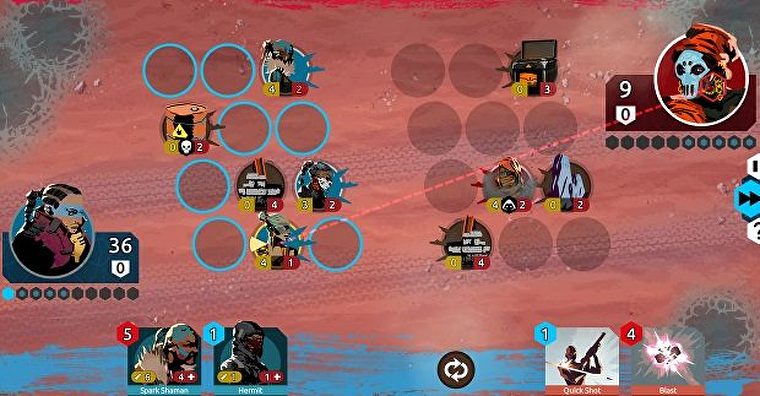
Common Mechanist: Hermit
Very cheap card that lets you draw a leader card. Very useful if you play attack cards. If wounded he’s a free card draw! Just make sure to not let him die. Especially against the enemies that have a lot of removal. I usually like to have a wounded one for the final boss (doesn’t matter if he dies at that point).
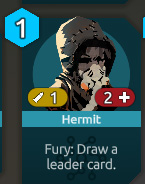
Rare Blue Devil: Blue Devil Elite
Very nice card that combos with static discharge and Third Eye Amp. You can potentially use this as a board wipe. Simply cast static discharge to damage your followers, regain 1 Energy from Third Eye, and then cast Blue Devil Elite for a potential enemy board wipe.
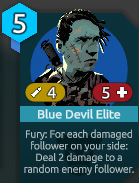
Legendary Blue Devil: Belligerent
A very good tank, useful against beasts that like to use early game 2/1 or 1/1 chargers. Should buy you enough time to burn them down.
Common Bandit: Bandit Sapper
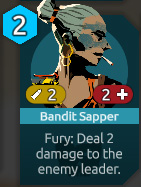
Free damage to the enemy is always good. When injured he’s just 1 cost for two damage to the opponent! Combos well with damage attack cards.
Rare Union: Custodian
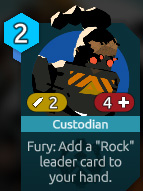
A very good card. Getting a free 0 cost 0/2 obstacle is very useful (be sure your leader hand isn’t full at four cards or else you will have wasted his fury). He has really good stats for the cost. Use the obstacle to block the opponent from attacking so you can buy time to burn their faces off with attack cards. Can use it to protect snipers if you are using the Target Marking equipment.
Legendary Union: Miner

Very good amount of hp to survive some early game threats. Usually stays alive long enough for you to cast your low cost attack cards which will trigger the incite effect.
Legendary Beast: Rockworm
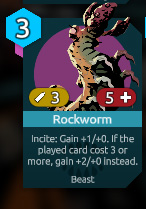
Very good amount of hp to survive some early game threats. Usually stays alive long enough for you to cast your low cost attack cards which will trigger the incite effect.
 On burdened difficulty, explore the first two maps as much as you can. After that it is usually better to pick your fights and not get too wounded in the process. In burdened difficulty it can be hard to keep hope up, which is why it is better to move faster through the later maps.
I would have preferred a better Third Eye Amp as the one I had was only 1 use. Static charge with Machinist Robes for card draw was very helpful. Headshot and Colossus were rarely used, probably only 1-2 times during the whole run. 5 Energy is too costly, especially when I want to do Disintergrate (3), gain 1 energy from Third Eye, Energy Beam (2) to kill an enemy follower into a Wildshot (1) or Quick Shot (1) for same energy but dealing 12 to 14 damage and killing one or more enemy followers with the beam. Got my null drone very late into the game, ended up only ever using the effect 2-3 times during the whole run.
Wounded hermits are great. Generally used around the 5 or 6 energy mark to draw out my Disintergrates and finish off my opponent. I generally rotate most of my followers around in order to keep my Energy curve consistent, generally favouring higher health followers. I typically get more wounded 2 to 3 drop followers as they are the first units to drop. Dedicated miner and Curator are great. Curator can be used to block mobs and buy you time with the obstacle. Followers are primarily there to distract your opponent and land a bit of damage. Most of your damage will come from your leader cards. I generally try to prevent wounds on my followers except for hermits. It can be hard near the end of the game when elites and bosses can use board clears such as Mind Wipe.
Example Victory on Doomed prior to final boss fight:

On Doomed difficulty, try not to explore too much as early on without items even regular enemies will build up wounds on your followers quite quickly. You definitely want to work on finding your first equipment, be it a town or an elite fight. When you progress to the second map enemies will typically have buffs on. By the end of the game they will have 2-3 buffs in place which will make it pretty hard to go through some fights. We want to keep our two and three drops alive as they can be a rare commodity. Rotate the two and three costs followers as much as you can; keep wounded out of play unless it is the Sapper or a Charge minion. Plan out path and make detours only if you think it is worth it to grab an extra node (like a town or commodity).
Try to get a good item early on, preferably a Machinist Robe. You won’t always get what you want, so build your deck according to what you find.
Plan out your starting move by seeing who your enemy is. Every enemy has a set deck that changes slightly as they level up. Take a look at the enemy sections of this guide. If you know they have Mind Seize or Mind Wipe, play accordingly. Don’t fill the whole board up and get blown up by it. Prepare your board for what your enemy might throw at you. If they have Burst Fire don’t line up your column, if they have Beam then don’t line up your rows.
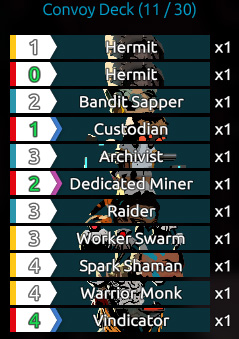
I managed to get lucky and found a Machinist Robe by the end of the first map. Got a lot of injured followers as the fights early on are very hard without equipment. By the second map I managed to get a Signal Relay and a Spawn Drone from dismantling an item. Wild Hand and Spawn Drone really helped reduce the amount of wounds. I tried my best to keep the Wild Hand from getting killed but it was a struggle until the third map when I found a second Signal Relay and a Ruster Trap. This allowed me to use the following openers:
If enemy has Mind Wipe, Mind Seize or Beam cards:
Static Charge > Draw a Leader Card > Ruster Call
If enemy does not have strong board clears:
Static Charge > Draw a Leader Card > Wild Hand (behind an obstacle if they use Scratch or Rend series of removal)
Ruster Call > Two Drop
Spawn your follower after Ruster Calls as you will know where open spots. Last thing you want is for the drone to block your two drop from attacking.
Wild Hand + Signal Relay + Ghram Alpha is a great combo. It allows you to refresh your beasts. Added a Lumbering Chambal for more synergy (I really did not have much luck finding beasts).
I got really lucky by the fourth map by obtaining another set of Machinst Robes and a Ruster Trap. The openings were ridiculous as I could flood a board early on with four followers or draw two reduced cost leader cards which allowed me to get my Disintergrates faster. I did get unlucky in this game in being unable to learn Disintergrate until the middle of my Third map.
Due to the items I got I preferred followers that could buff my men like the Black Star Overseer or Thug. Inspired Assault ended up being very useful in allowing the fight to snowball out of control.
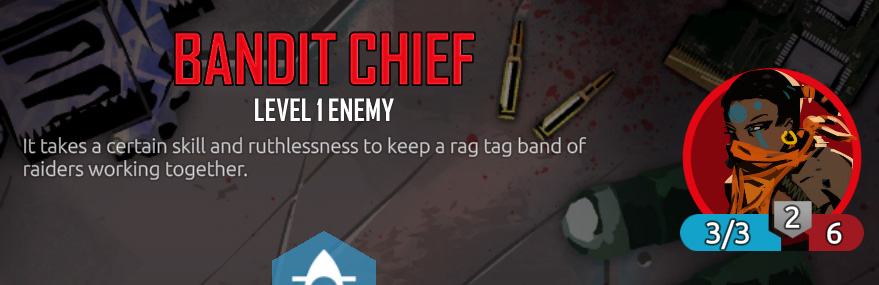 Bandit Chief
Watch out for salvo, try to stagger your men so your column isn’t threatened.Construct:
Spike Trap (1) – 2/1 – Shielded. Strain. When an enemy follower enters battle: They take 2 damage.
Autocannon (2) – 0/3 – Strain. At the start of your turn: Deal 2 damage to the first target in the opposing row.
Convoy:
Deserter (1) – 1/1 – When a friendly follower is destroyed: draw a convoy card.
Wanderer (1) – 1/2 – Taunt.
Cuthroat (2) – 2/2 – Stealth.
Scout (2) – 2/2
Bandit Raider (3) – 4/3
Black Star Hitman (3) – 3/3 – Stealth.
Explorer (3) – 3/3 – Sniper.
Shifty Scavenger (4) – 4/4 – When an allied follower is destroyed: Gain +1/1.
Leader:
Salvo (3) – Deal 2 damage to target column tiles.
Bandit Marauder
Convoy:
Hermit (1) – 1/2
Bandit Sapper (2) – 2/2 – Fury: Deal 2 damage to the enemy leader.
Scout (2) – 3/2
Bandit Raider (3) – 4/3
Looter (3) – 3/4 (Rare) – Fury: If you have 4 or fewer Energy maximum: Gain +1/1.
Leader:
Lucky Hit (0) – Increase the damage of target leader card in your hand by 1.
Spark (0) – Gain 1 Energy.
Inspiration (1) – Draw two leader cards.
Quick Shot (1) – Deal 1 damage to target.
Blessed Strength (2) – Target follower gains +1/2.
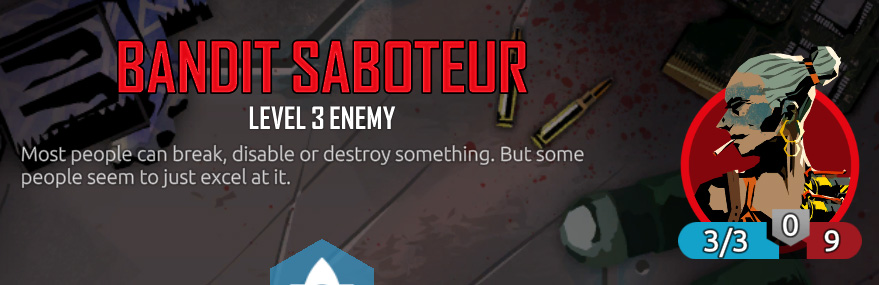 Bandit Saboteur
Construct:
Spike Trap (1) – 2/1 – Shielded. Strain. When a follower enters battle: They take 2 damage.
Spark Thrower (3) – 0/3 – Incite: deal 1 damage to the enemy leader.
Convoy:
Worker (1) – 1/1 – Leader gains 1 armor.
Bandit Sapper (2) – 2/2 – Fury: Deal 2 damage to the enemy leader.
Devoted Guard (3) – 3/3 – Taunt.
Leader:
Infect (1): Target follower gains -2/0.
Quick Shot (1) – Deal 1 damage to target.
Point Blank (3) – Deal 3 damage to target follower. If the target is stunned, destroy it instead.
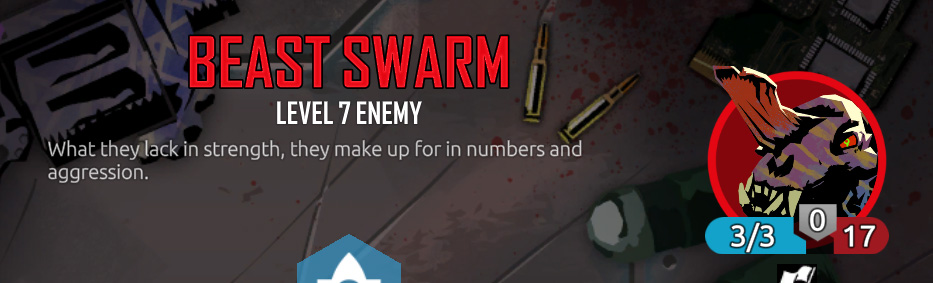 Beast Swarm
Convoy:
Ghram Charger (1) – 1/1 – Charge
Blackscale Ghram (2) – 4/1
Janwar Bear (4) – 4/2 – Charge.
Rabid Lizard (5) – 3/4 – Taunt. Poison.
Packleader (6) – 6/4 – Overwhelming. Revenge: Add two Blackscale Ghram to your hand.
Leader:
Scratch (0): deal 1 damage to frontline follower.
Reinfoce (1): draw a convoy.
Slash (2) – Deal 3 damage to enemy target in the frontline position.
Terrifying Howl (3) – All Followers suffer -1/1. Beasts gain +1/1 instead.
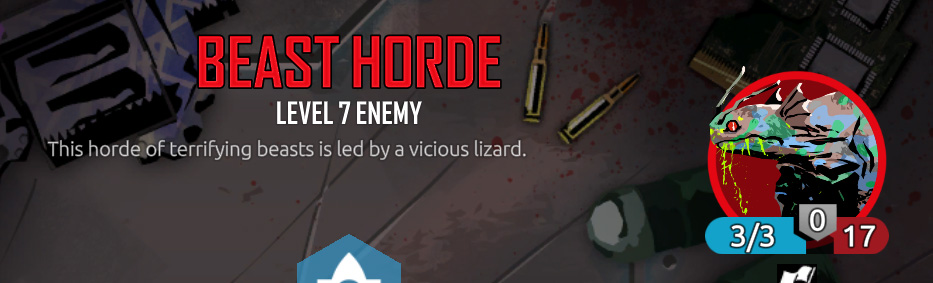 Beast Horde
Convoy:
Jaroon Climber (1) – 2/2
Black Scale Ghram (2) – 4/1
Rock Worm (3) – 3/5 – Incite: gain +1/0. If the card played cost 3 or more, gain +2/0 instead.
Sarata Glider (3) -3/2 – First Strike.
Rincha Bull (5) – 4/6 – Overwhelming.
Shaodow Bahja (5) – 6/5 – First Strike. Revenge: Shuffle 3 Scratch Cards into your leader deck.
Savage Shibana (7) – 7/7 – Overwhelming. Rage.
Leader:
Spark (0) – Regain 1 Energy.
Challenge (1) – Target follower gains taunt and is pulled.
Provoke (1) – Target follower gains Taunt. If the follower already has Taunt, gain +0/3 instead.
Hidden Strike (2) – Deal 4 damage to an undamaged follower.
Slash (2) – Deal 3 damage to enemy target in the frontline position.
Paralyzing Shock (4) – Destroy all stunned enemy followers. Stun all other followers.
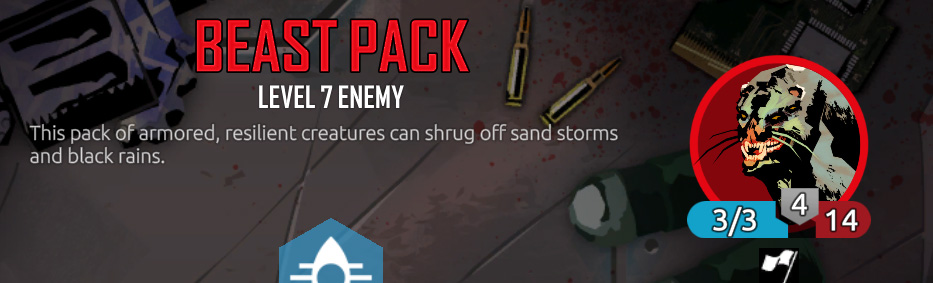 Beast Pack
Convoy:
Jaroon Climber (1) – 2/2
Sarata Glider (3) -3/2 – First Strike.
Kijat Youngling (3) – 3/2 – Poison
Lumbering Chambal (4) – 2/6 – Overwhelming. If your Energy maximum is 7 or greater, gain +4/0.
Leader:
Defend (0) – gain 2 armor
Challenge (1) – Target follower gains taunt and is pulled.
Guard (2) – gain 4 armor
Rend (3) – Deal 5 damage to enemy unit in frontline position.
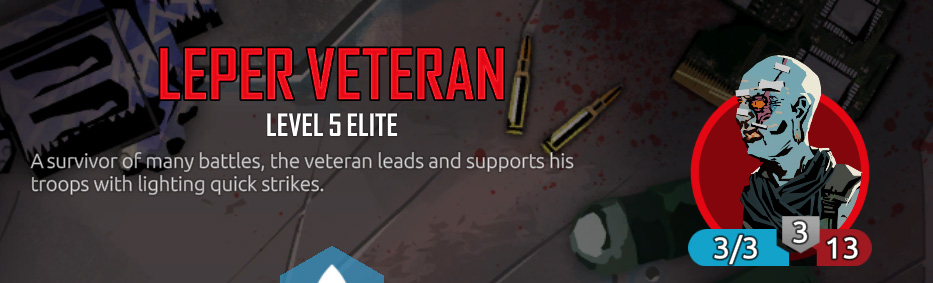 Leper Veteran
Convoy:
Devil’s Hand (4) – 3/5 – Sniper. Fury: All wounded convoy cards in your hand gain +2/0.
Blue Devil Grunt (5) – 5/3 – Robust.
Leader:
Blast Cover (0) – Destroy Target Obstacle
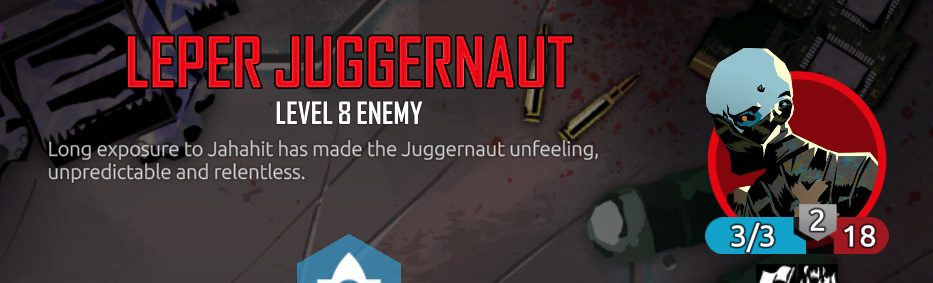 Leper Juggernaut
Convoy:
Warrior Monk (4) – 3/5 – Taunt.
Sniper (4) – 5/3 – Sniper.
Blue Devil Grunt (5) – 5/4 – Robust.
Leader:
Infect (1) – Target follower suffers -2/0.
Inner Peace (1) – Set Follower’s health equal to their attack.
Choking Fog (3) – All Followers suffer -2/2.
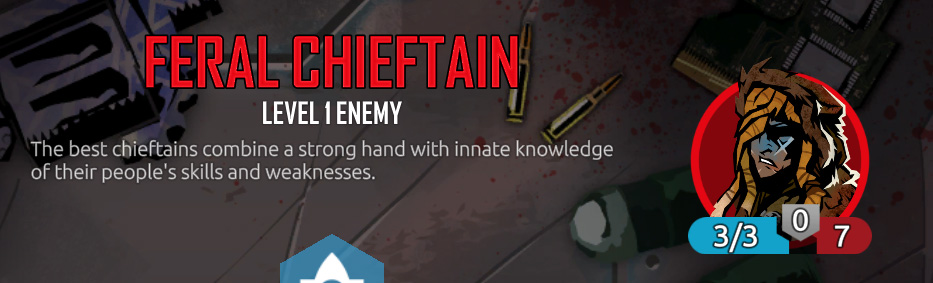 Feral Chieftain
Convoy:
Ghram Rager (1) – 1/1 – Charge.
Cutthroat (2) – 2/2 – Stealth
Blackscale Ghram (2) – 4/1
Hunter (2) – 1/2 – Poison.
Scout (2) – 3/2
Bandit Raider (3) – 4/3
Shepard (3) – 3/4
Crashjacker (4) – 5/4
Rabid Lizard (5) – 3/4 – Taunt. Poison.
Leader:
Lure (0) – Target follower gains Taunt.
Scratch (0) – Deal 1 damage to enemy unit in frontline position.
Bolster (1) – Target follower gains +1/1.
Rock Venom (1) – Target friendly follower gains poison and suffers -1/1.
Provoke (2) – Target follower gains taunt. If target already has taunt it gains +0/3 instead.
Slam (2) – Deal 1 damage and stun target follower.
Mercy Kill (2) – Destroy a damaged follower.
Slice (2) – Deal 2 damage to enemy unit in frontline position.
Rend (3) – Deal 5 damage to enemy unit in frontline position.
Shield Wall (3) – All friendly followers in target row gain taunt.
Feral Rider
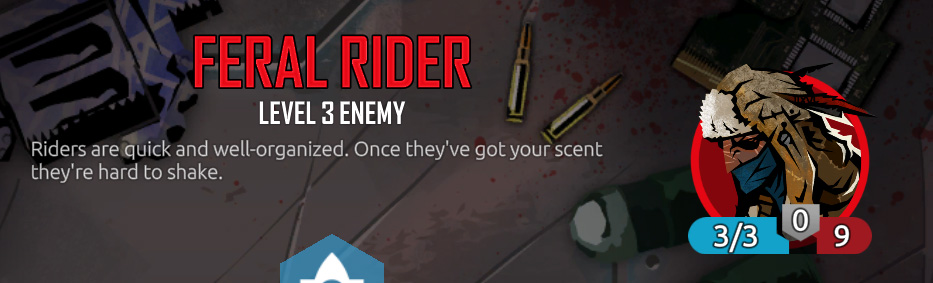 Construct:
Decoy (2) – 1/4 – Taunt.
Convoy:
Deserter (1) – 1/1 – When a friendly follower is destroyed: Draw a convoy card.
Jaroom Climber (2) – 2/2
Stranger (2) – 2/1 – Revenge: If this unit is destroyed by a follower, that follower suffers -2/1.
WIld Hand (2) – 2/3 – Fury: Spawn a 2/1 beast.
Defender (3) – 2/3 – Barrier. Revenge: Give a random friendly follower +0/3.
Shiram Acolyte (3) – 2/5 – Shielded.
Bruiser (4) – 5/4 – Overwhelm.
Revolutionary (4) – 4/5 – Revenge: Deal 1 damage to all enemy units.
Signalbearer (4) – 5/3 – At the end of your turn: If you have armor, lose 1 armor and gain +0/2.
Tinkerer (4) – 4/4 – Revenge: Spawn a 2/2 drone.
Leader:
Blackout (0) – Remove effects from target follower.
Lure (0) – Target follower gains Taunt.
Sacrifice (0) – Sacrifice target follower and gain X Energy, where X is target’s health.
Reinforce (1) – Draw a convoy card.
Rend (3) – Deal 5 damage to enemy unit in frontline position.
Supply (3) – All followers in target column gain +2/0.
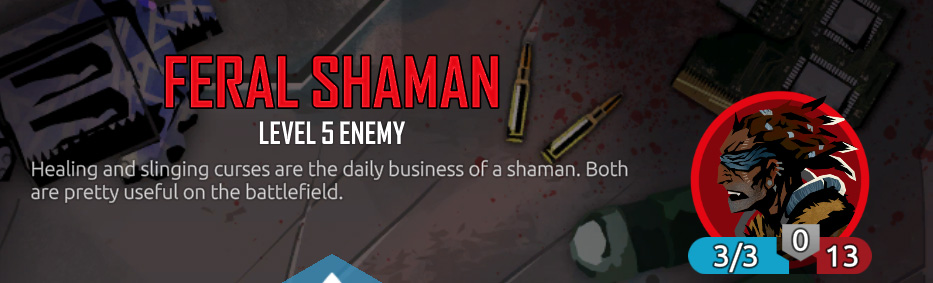 Feral Shaman
Convoy:
Scout (2) – 3/2
Spark Shaman (4) – 4/5 – Fury: Deal 1 damage to all followers.
Warrior Monk (4) – 3/5 – Taunt.
Stalwart (5) – 4/6 – Taunt.
Leader:
Static Charge (1) – Deal 1 damage to all followers and leader.
Mercy Kill (2) – Destroy damaged follower.
Crippling Strike (2) – Target follower suffers -2/0. If the target is damaged or wounded it suffers -4/0 instead.
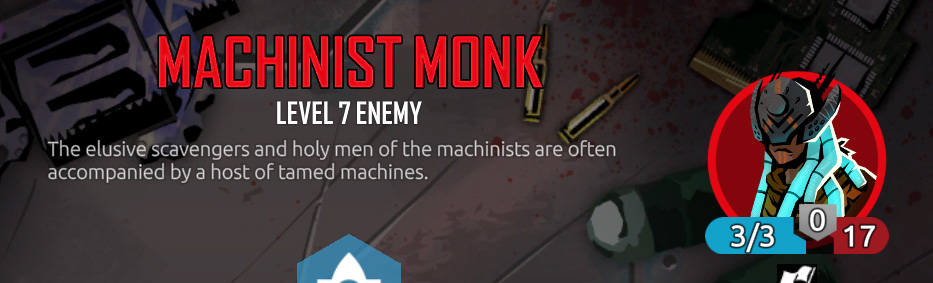 Machinist Monk
At Start of turn give +1 to friendly unit.
Construct:Convoy:
Deserter (1) – When an allied follower is destroyed: Draw a convoy card.
Archivist (3) – 3/3 Copy Enemy Leader Card
Guerilla Fighter (4) – 2/2 – Fury: Destroy a random enemy with taunt.
Dozer (4) – 3/6
Scavanger Savant (5) – 5/6
Leader:
Scratch (0) – 1 damage to target
Blackout (0) – Remove effects on target
Disassembler Drone (1) – Deal 1 damage. +1/+1 if target is a drone.
Mechanized Help (3) – Spawn two 2/2 Drones
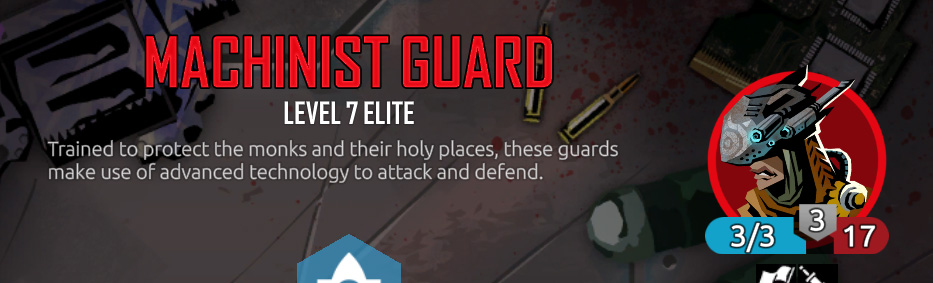 Machinist Guard
Convoy:
Hermit (1) – Draw a leader card.
Ranger (3) – 3/3 – Rage
Devoted Guard (3) – 3/3 – Taunt
Warrior Monk (4) – 3/5 – Taunt
Steadfast Ox (4) – 2/5 – Tuant, Shielded
Blockade (4) – 5/3 – Barrier, Fury: If enemy has 4 or more units, gain +0/4 and taunt.
Leader:
Defend (0) – gain 2 armor
Guard (2) – gain 4 armor
Beam (3) – Deal 2 damage to a row and leader.
Blinding Spray (4) – All tiles in target row suffer Blackout and then take 3 damage.
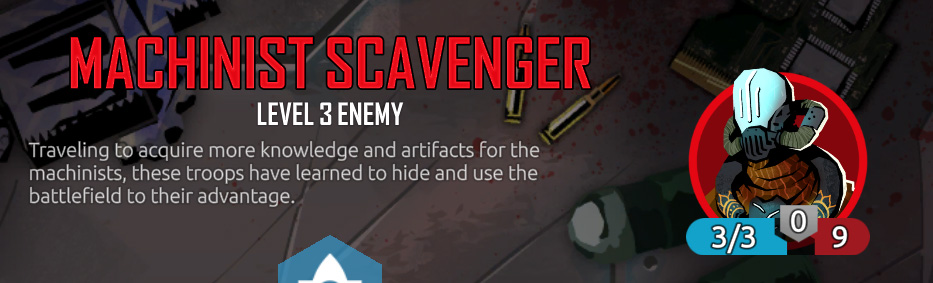 Machinist Scavenger
Construct:
Reinforcing Pattern (1) – Strain. At the start of your turn: Add a “Bolster” leader card to your hand and reduce its cost by 1.
Convoy:
Jaroon Climber (1) – 2/2
Medicant (3) – 3/4 – Fury: If this follower is wounded: Gain barrier.
Explorer (3) – 3/3 – Sniper.
Scavenger Savant (5) – 5/6
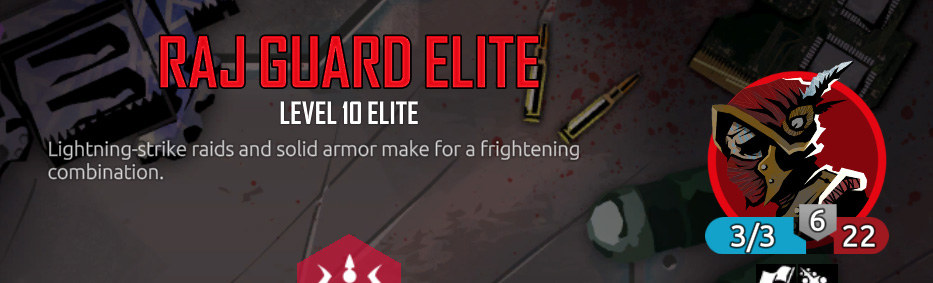 Raj Guard Elite
Convoy:
Slave Gladiator (2) – 2/2 – First Strike.
Raider (3) – 4/3
Veteran Slaver (4) – 3/6
Carver (5) – 5/3 – Deal 2 damage to all followers.
Leader:
Push (0) – Push target follower or obstacle
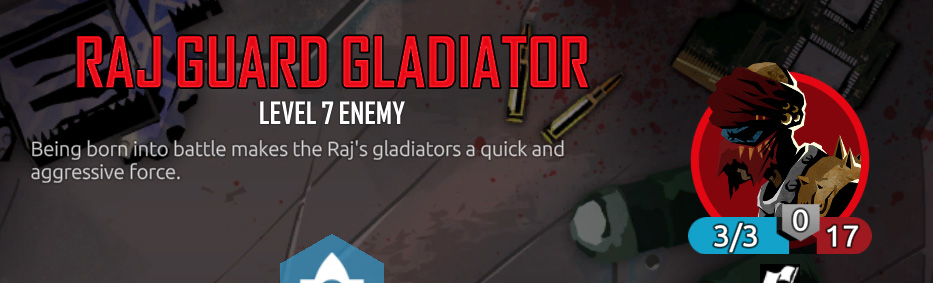 Raj Guard Gladiator
Convoy:
Heretic (1) – 0/4 – Taunt
Jaroom Climber (2) – 2/2
Scout (2) – 3/2
Slave Gladiator (2) – 2/2 – First Strike.
Ranger (3) – 3/3 – Rage.
Craver (5) – 5/3 – First Strike. Fury: Deal 2 damage to all followers.
Leader:
Infect (1) – Target follower gains -2/0.
Quick Shot (1) – Deal 1 damage to target.
Inner Peach (2) – Set follower’s health equal to their attack.
Due to common presence of robust, it is a good idea to save quick shots to deal with them.
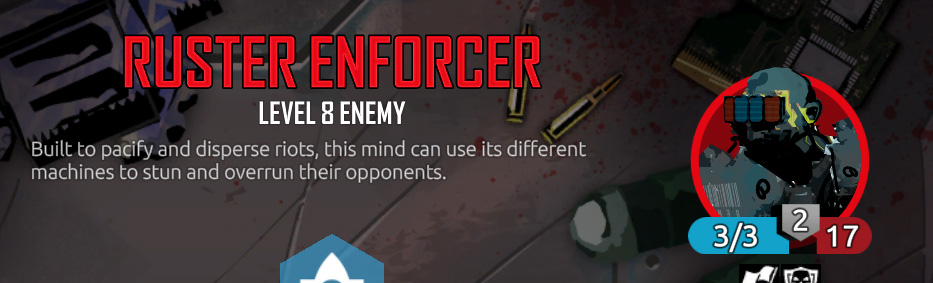 Ruster Enforcer
Convoy:
Razer (1) – 2/1
Buzzer (2) – 2/1 – Snipe.
Worker Sawrm (3) – 2/2 – Robust.
Leader:
Improvised Drone (1) – Spawn a 2/2 drone.
Provoke (1) – Target follower gains taunt.
Challenger (2) – Give taunt to target follower and pull forward.
Drone Batallion (3) – Fill a row on your side with 2/2 drones
Fortify (3) – Target friendly follower gains barrier and +2/0
Mind Wipe (4) – Deal 5 damage to all units. (Lv +8 versions only?)
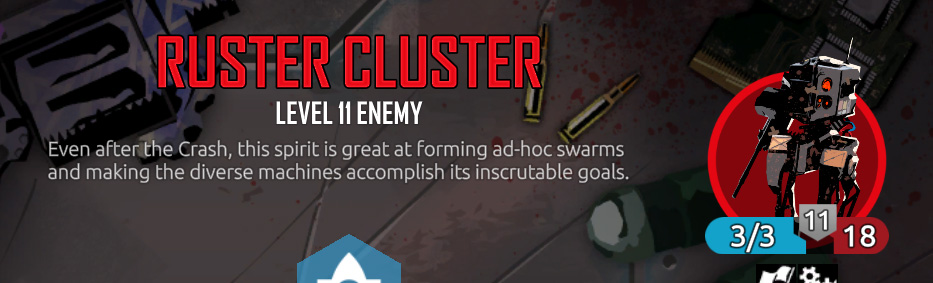 Ruster Cluster
Stone Chakra (2) – Strain. When a follower enters battle as a neighbour: That follower gains 0/+2 and taunt.
Convoy:
Razor (1) – 2/1
Buzzer (2) – 3/1
Cleanser (4) – 2/2 – First Strike. Robust.
Overseer (4) – 4/5 – Revenge: All drones gain +1/1.
Keeper (5) – 2/5 – Barrier.Taunt.
Leader:
Disassembler Swarm (1) – Deal 1 damage to target. If it is a drone gain +1/1 instead.
Improvised Drone (1) – Spawn a 2/2 drone.
Overcharge (2) – Reduce maximum Energy by 2 and refill Energy.
Mind Seize (3) – Deal 3 damage to all units. (Lv +8 versions only?)
Blind Shot (4) – Destroy a random follower. (Lv +8 versions only?)
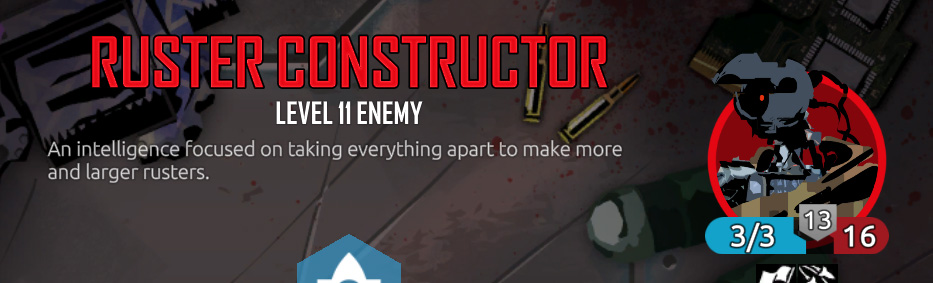 Ruster Constructor
Construct:
Autocannon (2) – 0/4 – Strain. At the start of your turn: Deal damage to the first target in the opposing row.
Convoy:
Cutter (2) – 2/1 – Barrier.
Worker Swarm (3) – 2/2 – Robust.
Shredder (6) – 7/4 – Fury: Deal 6×1 damage to random enemy units or obstacles.
Leader:
Disassembler Swarm – Deal 1 damage to target. If follower is a drone gain +1/1 instead.
Provoke (1) – Target follower gains taunt.
Wild Shot (1) – Deal 3 damage to a random enemy target. (lvl +8 versions)
Blessed Strength (2) – Target follower gains +1/2.
Righteous Strength (2) – Target follower gains +2/1.
Beam (3) – Deal 2 damage to a row and leader.
Piercing Ray (4) – Deal 4 damage to all tiles in enemy row and the enemy leader. (Lv +8 versions only?)
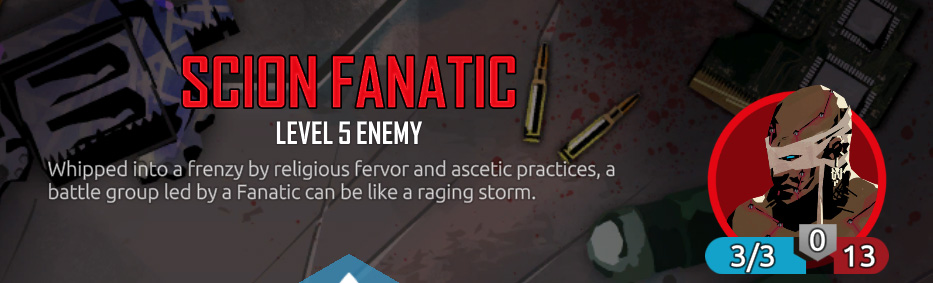 Scion Fanatic
Constructs:
Charging Support (2) – Follower with less than 2 attack gains Charge
Shrapnel Trap (3) – Shielded. Strain. When an enemy follower enters battle: They take 4 damage.
Convoy:
Deserter (1) – 1/1 – When a friendly follower is destroyed: draw a convoy card.
Gram Pup (1) – 1/1
Scrapper (2) – 2/2 – Fury: Deal 2 damage to enemy leader
Slave Gladiator (2) – 2/3 – First Strike.
Bandit Raider (3) – 4/3
Zealot (3) – 5/2 – Fury:Destroy a random follower.
Black Star Overseer (3) – 4/4 – Fury: Give all allied followers +1/0.
Scion Ravager (4) – 3/4 – Fury: Increase the cost of all enemy convoy by 1.
Leader:
Bold Strike (4) – Deal 4 damage to target follower. If follower is destroyed: all allied followers gain +2/0. (lvl 8+)
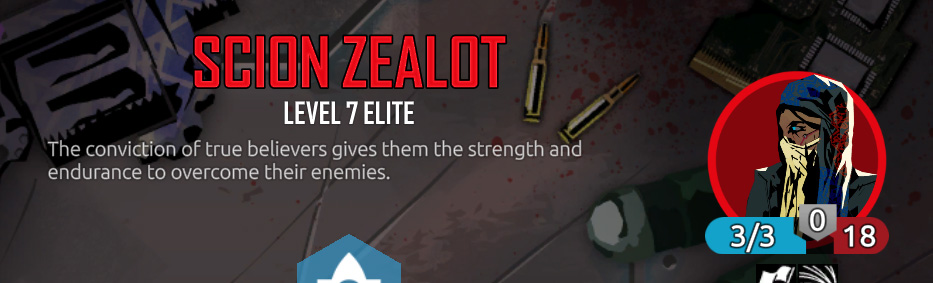 Scion Zealot
Likes to swarm field and use Inspired command to overwhelm the opponent. Uses a lot of buffing cards. Best clear the board to prevent them from running over you.
Constructs:
Fury Stone – 0/3 – At the start of your turn: All allied followers gain +1/-1.
Convoy:
Heretic (1) – 0/4 – Taunt
Initiate (2) – 2/3
Lookout (2) – 2/3 – Random follower gains +0/2.
Scouts (2) – 3/2
Trader (2) – 2/3 – Revenge: All convoy cards in your hand gain +1/1.
Wild Hand (2) – 2/1 – Fury: Spawn a 2/1 Beast.
Devoted Guard (3) – 3/3 – Taunt.
Shepared (3) – 3/4
Recruiter (3) – 3/3 – Draw a convoy when this follower attacks.
Linebreaker (3) – 3/4 – Fury: If the enemy has a unit with Taunt: Gain +2/0 and Overwhelming.
Reveler (4) – 3/6 – Fury: Gain +1/0 for every convoy card in hand.
Harpy (4) – 3/5 – Taunt. Fury: All undamaged allied followers gain +1/1.
Kennel Master (4) – 2/5 – Taunt. Revenge: Spawn a 1/2 beast with taunt.
Leader:
Inspired Command (1) – Units with 3 or less attack power gain +2/0
Blessed Strength (2) – Target follower gains +1/2.
Supply (3) – All followers in target column gain +2/0.
Mind Wipe (4) – Deal 5 damage to all units. (Lv +8 versions only?)
 Likes to get armour and put up taunts. Null drone may be useful for preventing the taunt setup. Beam gun is great for destroying most of his followers.
Constructs:
Stone Chakra (2) – Strain. When a follower enters battle as a neighbour: That follower gains 0/+2 and taunt.
Porcupine Prana (3) – 2/4 – Taunt. At the start of your turn if you have at least 1 armor, lose 1 armor and deal 2 damage to the enemy leader.
Convoy:
Scion Emissary (2) – 6/3 – At the end of your turn pay 1 energy or lose 2 health.
Cultist (3) – 2/2 – Charge.
Shepard (3) – 3/4
Union Sapper (3) – 2/4 – Whenever this follower attacks, leader gains 2 armor.
Zealot (3) – 5/2 – Destroy a random follower.
Fanatic (4) – 6/6 – When receiving damage: Deal 2 damage to your leader.
Revolutionary (4) – 4/5 – Revenge: Deal 1 damage to all enemy units.
Omen of the End (5) – Fury: Destroy all other followers and refill your Energy.
Leader:
Living Shield (0) – Sacrifice a follower to gain a shield equal to attack+health of the follower.
Guard (1) – Gain 4 armor.
Static Shock (1) – 1 damage to all followers and leaders
Armored Blow (2) – Deal 2 damage to target. If your leader has 4 or more armour: deal 4 damage instead.
Relentless (2) – Target follower gains +1/1. If damaged, gain +2/2 instead.
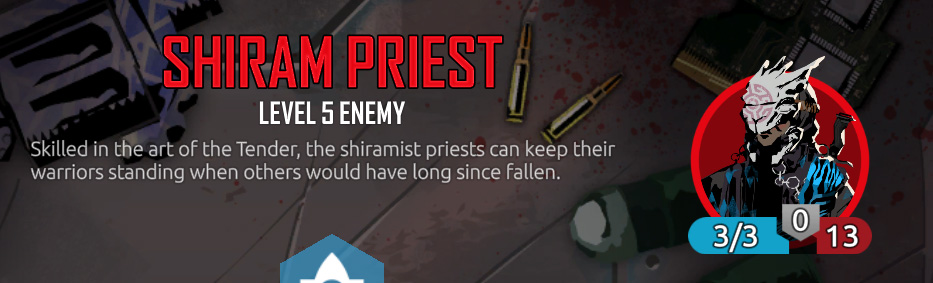 Shiram Priest
Construct:
Healing Station (2) – At the end of your turn: Heal all neighbours followers by 2.
Resilience Chant (2) – When a friendly follower is heal: that follower is refreshed.
Convoy:
Devoted Guard (3) – 3/3 – Taunt.
Pundit (3) – 5/4 – Fury: Discard a random leader card
Shiram Acolyte (3) – 2/5 – Shielded.
Crash Jacker (4) – 5/4
Warrior Monk (4) – 4/5 – Taunt
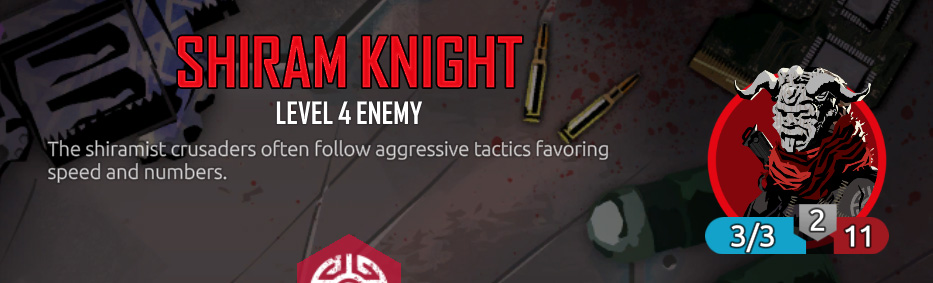 Shiram Kniight
Convoy:
Conscript (2) – 5/3 – Revenge: All enemy followers gain +1/1.
Cultist (3) – 2/2 – Charge
Ritualist (4) – 6/5 – Overwhelming. At the start of your turn: after drawing a card, discard a random card.
Leader:
Spark (0) – Gain 1 Energy.
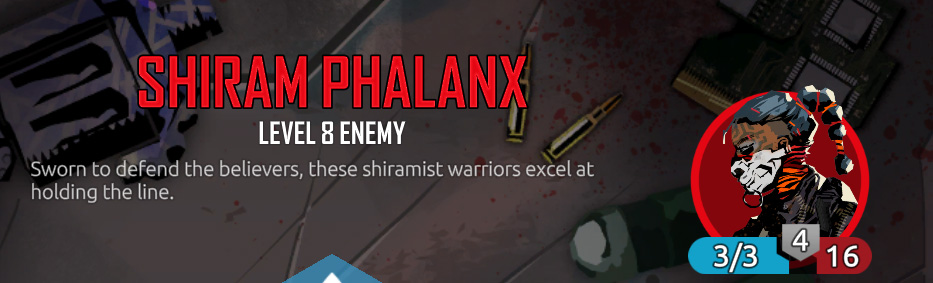 Shiram Phalanx
Construct:
Spike Trap (1) – 2/1 – Shielded. Strain. When an enemy follower enters battle: They take 2 damage.
Spark Thrower (3) – 0/3 – Incite: deal 1 damage to the enemy leader.
Convoy:
Heretic (1) – 0/4 – Taunt
Wanderer (1) – 1/2 – Taunt
Initiate (2) – 2/3
Warrior Monk (4) – 3/5 – Taunt.
Leader:
Push (0) – Move a target to the back row
Lure (0) – Target follower gains Taunt.
Bolster (1) – Target follower gains +1/1.
Provoke (1) – Target follower gains taunt. If target already has taunt it gains +0/3 instead.
Knockout (3) – Stun and push target follower.
Brain Drain (6) – Deal 6 damage to target, draw a leader card and target’s leader discards a leader card. (lvl +8 versions)
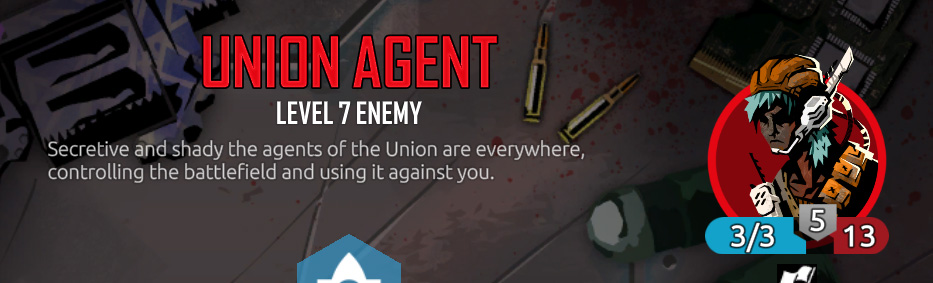 Union Agent
Convoy:
Curator (2) – 2/4 – Put a 0/2 obstacle card in hand (costs 0).
Expert Slinger (3) – 4/4 – Sniper. Blast.
Demolition Expert (4) – 1/4 – Blast: Fury:Set the health of all other followers to 1.
Leader:
Rend (3) – Deal 5 damage to enemy in the frontline position.
Light Blast (2) – Deal 2 damage to target tile and 1 damage to neighbouring tiles.
 Union Engineer
Construct:
Spike Trap (1) – 2/1 – Shielded. Strain. When an enemy follower enters battle: They take 2 damage.
Convoy:
Union Sapper (2) – 2/2 – When this follower attacks: Your leader gains 2 armor.
Warden (2) – 3/4 – Revenge: Enemy leader gains 5 armor.
Devoted Guard (3) – 3/3 – Taunt.
Prospector (3) – 4/3 – Blast. When this follower destroys an obstacle: gain +0/2
Sniper (4) – 5/3 – Sniper
Bruiser (4) – 5/4 – Overwhelming.
Revolutionary (4) – 4/5 – Revenge: Deal 1 damage to all enemy units.
Leader:
Defend (0) – Gain 2 armor.
Flanking Maneuver (1) – Destroy target obstacle and gain X armor, where X is the health of the obstacle.
Bolster (1) – Target follower gains +1/1.
 Union Fist Foreman
Construct:
Decoy (2) – 2/4 – Taunt.
Convoy:
Worker (1) – 1/1 – Gain armor.
Tribal Striker (2) – 4/2 – First Strike. When this follower attacks and destroyers a follower: Spawn a 2/1 Beast.
WIld Hand (2) – 2/3 – Fury: Spawn a 2/1 beast.
Devoted Guard (3) – 3/3 – taunt.
Kennel Master (4) – 2/5 – Taunt. Revenge: Spawn a 1/2 beast with taunt.
Leader:
Blessed Strength (2) – Target follower gains +1/2.
Mechanized Help (3) – Spawn two 2/2 Drones
Control Tower:
Enter Merchant Area – Requires Invitation or Official Clan Sigil to enter.
Enter Casino (gamble 10 or 20 batteries)Container City (Pick one only):
Explore Area – Gain 3 Scholar
Pray to the Gods – Gain Belief
Recruit Followers – Use belief (+8) to recruit additional members or by chance if not met.
Hard Market (Pick one only):
Hire Help
Shop for Rare Equipment – 12 battery for a random rare equipment.
Soft Market (pick one only):
Visit Slave Area – Buy a follower for 15 battery or sell a follower for 5 battery.
Buy some food –
Look for Work – Requires 50 followers.
Zigguraut
The Palace:
Leave follower with Raj – Gain 4 random items.
Ask about the job – Bandits allow sneak in. Gain 4 to 6 Altruism if you give weapons to the slaves.
The Cells:
Explore the Area-Gain +3 Scholar.
Hire Help – Hire Guards (40 battery, 20 if scholar is 12) – Gain 6 random followers, at least 1 legendary.
The City:
Visit the Gate-Watch People-Buy slaves (cost 20 battery for 3 recruits and 4 to 6 Altruism) or Track Slavers (Random if event occurs, requires a tracker type convoy, Fight and gain 3 random followers plus Altruism points)
Visit the Gate-Look for work-Tax Collection or Slave Collection quest added to map.
Visit the Gate-Sell Followers (cost: 20 followers)
Explore the City -Gain +2 Scholar.
Pit Nine
The Crane:
Control Centre – Union Legendary – Dedicated Miner – Fight, reward with 25 batteries.
Hang around – Nothing.
The Gallows:
Talk to the Locals – gain +2 Scholar
Hire Help – 40 Batteries. Discount to 30 batteries if Altruistic (15). If you just encourage you gain +5 Altruism. Gain 6 random followers, with at least 1 legendary if you recruit.
The Slopes:
Sell Some of your food – 10 food for 15 batteries. Discount to 6 if you have a blue devil follower.
Hang around – Gain 6 hope.
Recruit Followers – Preach Salvation (requires 9 Believer). Fight if you fail.
The Works:
Ask for work – Gain batteries at a risk.
Sneak around – Fight with beast.
Sneak in with Bandit Follower – Fight with beast.
Dome
Domes:
Harvest Plants – Will be trapped unless you can convince tower residences to let you take. Gain food and luxury items.
Houses:
Take food from the Alter: Believer -4. Gain food.
Leave food on alter (5) – Gain Believer +3.
Leave food on alter (10) – Gain Believer +4 and Blessed to follower.
> Climb Elevator – Leave food or Altruism 17 to gain trust for food or trade goods/equipment.
Union Dam
Pick one:
The Dam
Intervene – Fight. Gain 3 followers.
Watch – Nothing
or
The Powerhouse
Take on work for varying amounts of battery and food. Can steal for additional rewards.
Feral Camp
Teacher – Learn new leader card.
Camp – Chance of fight. Closes off other options except warchief hut.
Warchief Hut – Boss Fight with Feral Warchief. Gain legendary equipment. Can choose to have warchief join your side (Mythic follower) or force tribe to submit.
Bandit Fort
Fighting Pit – Place a bet or take a chance with a follower in winning a fight.
Fort – Boss fight.
Slums – Give total of 20 food to recruit some bandits.
Hermit Cave
The Village – Question faith can lead to wounds (risky) but can gain followers. Listen to beliefs – +6 Hope, +5 believers, +5 experience. Plunder gets food and luxury items, closes off Cave options and leads to plundering there too.
The Cave – Heal Spirit – +6 Hope, +5 believers, +5 experience. Donate gives bonus +2 believers. Heal body – heals leader and followers a random amount.
Automated Refinery
Worker Assembly – Gain followers at a cost of HP. Large followers = +4 energy cost. Small followers = 1-3 cost
Power Plant – Restart the power plant leads to fight or scavenge for batteries.
Control Center – Optional boss fight, requires starting up power plant.
Regenerate: When life is 15 or less, heal +10.Construct:
Madman’s Curse (3) – 0/3 – At the end of your turn: Deal 2 damage to both leaders.
Convoy:
Cutter (2) – 2/1 – Barrier.
Dozer (4) – 3/6
Sweeper (4) – 5/3 – Sniper. Can’t move.
Lancer (6) – 8/4 Rare – Fury: This unit fights a random enemy unit (and suffers retaliation damage).
Leader:
Improvised Drone (1) – Spawn a 2/2 Drone.
Conveniant Cover (1) – Spawn an obstacle 0/2 with Cover.
Scoch (1) – Deal 2 damage to enemy leader.
 Feral Javelin
Hit and Run: When a friendly follower enters battle: That unit gains charge.
Despite being a nerfed, he is very annoying boss to deal with. Constantly applies charge to his first follower every turn. This ability is very powerful and makes the fight very hard. Hunters with poison usually means leading with large followers is futile. Better to stagger a lot of low to mid cost followers (to avoid Burst Fire), preferably ones that can summon helpers. You will likely take a lot of damage (and wounded followers) from charging minions with rage and poison. Taunt would be useful, but the poison + charge combo plus his burst fire make it hard to field them. Rage can be a bit of a pain, especially if they have enough health to take out two of your 3 cost minions. Overall annoying fight. Watch your health as a Blind Rage + Charge combo can spell your death late in the rounds.
Construct:
Momentum Transfer (4) – 2/5 – When a friendly follower enters battle: That unit gains shielded and
deals 2 damage to first target in opposing row.
Convoy:
Hunter (2) – 1/2 – Poison.
Cut Throat (2) – 2/2 – Stealth.
Stranger (2) – 2/1 – Revenge: If this unit is destroyed by a follower, that follower suffers -2/1.
Forerunner (4) – 5/5 – Revenge: If this follower is destroyed by a follower, that follower is stunned.
Ranger (3) – 3/3 – Rage.
Rioter (4) – 4/3 – Rage.
Leader:
Blind Rage (3) – Target follower gains +4/-2.
Burst Fire (4) – Deal 4 damage to all tiles in target Column.
 King Lizard
Highly Venomous: After you take damage from a follower: If you have no armor, destroy that follower. Once per turn.
Due to his passive, this fight favours building up your board prior to attack. You will likely be fighting him before you have your Disintergrates. Try and control his board with weapons and leader cards until you have enough damage to kill the lizard.
Convoy:
Jaroon Climber (1) – 2/2
Black Scale Ghram (2) – 4/1
Kijat Youngling (3) – 3/2 – Poison
Pack Leader (6) – 6/4 – Overwhelming. Revenge: Add two Black Scale Ghram to your hand.
Leader:
Defend (0); Gain +2 armor.
Bolster (1): Target follower gains +1/1.
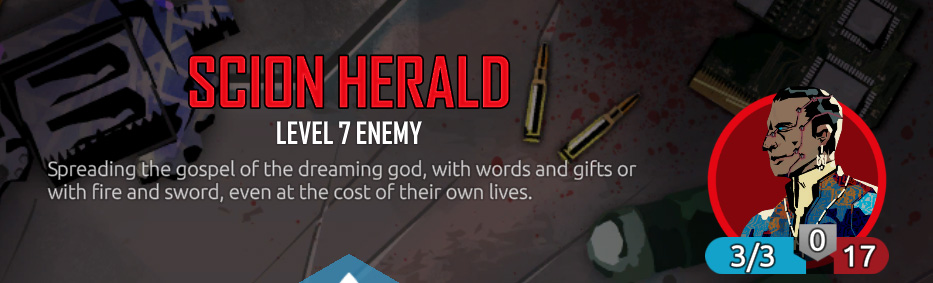
Shiram Torchbearer
Convoy:
Infect (1) – Target follower suffers -2/0.
Warrior Monk (4) – 3/5 – Taunt.
Leader:
Slice (2) – Deal 2 damage to enemy in the frontline position.
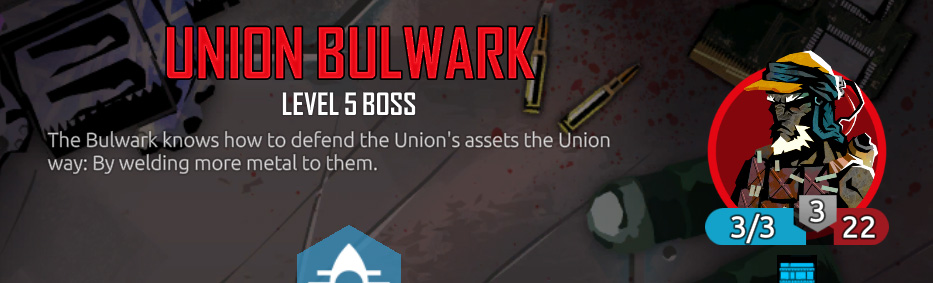 Union Bulwark
Building the Bulwark: When a follower is destroyed on the enemy’s turn, gain 3 armor.
He has a lot of taunts and his passive grants him a lot of armor. Try to build up a board and control his. Luckily most of his early cards don’t have much damage. Be mindful of his Mind Wipe leader card. Do not over commit your followers. Hopefully you have a head shot or disintegrate to help knock his health down a peg.
Construct:
Madman’s Curse (3) – 0/3 – At the end of your turn: Deal 2 damage to both leaders.
Convoy:
Deserter (1) – 1/1 – When a friendly follower is destroyed: draw a convoy card.
Worker (1) – 1/1 – Fury: Gain 1 armor.
Heretic (1) – 0/4 – Taunt
Wanderer (1) – 1/2 – Taunt.
Scout (2) – 3/2
Defender (3) – 2/3 – Barrier. Give a random friendly follower +0/3.
Crashjacker (4) – 5/4
Kennel Master (4) – 2/5 – Taunt. Revenge: Spawn a 1/2 Beast with taunt.
Leader:
Lure (0) – Target follower gains Taunt.
Scratch (0): deal 1 damage to frontline follower.
Reinforce (1): Draw a convoy card.
Armored Blow (2) – Deal 2 damage to target. If your leader has 4 or more armour: deal 4 damage instead.
Mind Wipe (3) – Deal 3 damage to all followers.
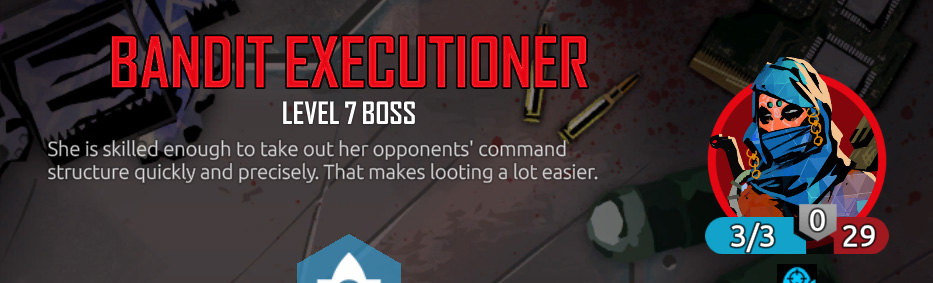 Bandit Executioner
Marksmanship: When you play an attack card: if the enemy leader has any Energy left, they loose 1 Energy. Otherwise deal 1 damage to them. Having Energy at the end of turn can prevent 2 damage.Tips: Having a follower with robust can be useful as she has a lot of leader cards that deal damage to a target, such as an elite blue devil. Heroes like Herder that grant shield or followers with barrier can be very useful this fight in preventing the boss from clearing your board with attack cards.
Construct:
Shrapnel Trap (3) – 4/1 – Shielded. Strain. When an enemy follower enters battle: They take 4 damage.
Convoy:
Worker (1) – 1/1 – Fury: Leader gains 1 armor.
Lookout (2) – 2/3 – Fury: A random friendly follower gains +0/2.
Initiate (2) – 2/3
Devoted Guard (3) – 3/3 – Taunt
Shepard (3) – 3/4
Crash Jacker (4) – 5/4
Marauder (5) – 5/6 – Stealth. Incite: Gain +0/1. If this follower is wounded, gain +1/1 instead.
Leader:
Defend (0): Leader gains +2 armor.
Scratch (0): Deal 1 damage to enemy unit in frontline position.
Bolster (1): Target follower gains +1/1.
Inspiration (1): Draw two leader cards.
Exploit Weakness (2) – Deal 2 damage to target follower. If that follower is destroyed: draw a leader card.
Slash (2) – Deal 3 damage to enemy target in the frontline position.
Headshot (5) – Deal 7 damage to target.
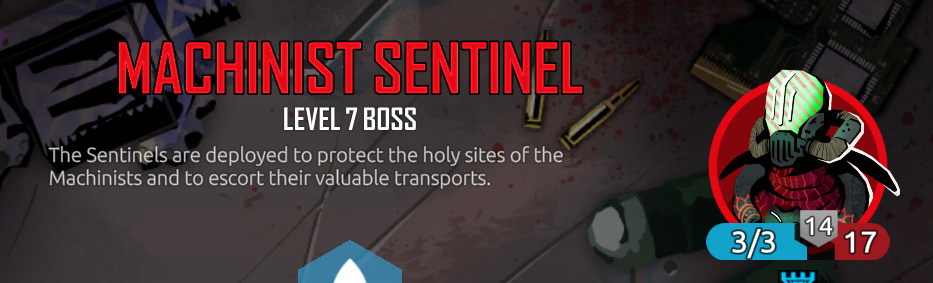 Machinist Sentinel
Protective Barrier: When a friendly follower enters combat: If the unit has taunt, gain barrier.
Construct:
Spike Trap (1) – 2/1 – Shielded. Strain. When an enemy follower enters battle: They take 2 damage.
Autocannon (2) – 0/3 – Strain. At the start of your turn: Deal 2 damage to the first target in the opposing row.
Convoy:
Heretic (1) – 0/4 – Taunt
Wanderer (1) – 1/2 – Taunt
Initiate (2) – 2/3
Devoted Guard (3) – 3/3 – Taunt
Leader:
Blackout (0) – Remove effects from target follower.
Guard (1) – Gain 4 armor.
Covering Fire (3) – Each follower with Taunt deals 3 damage to the first target in the opposing row.
Raj Guard Gloryseeker
Glory in Battle: When a friendly follower is reduced to 0 health: Return it to your hand with cost reduced by 1. Once per turn.
Due to his passive, it is a good idea to kill off one of his weaker vanilla followers first each turn. This prevents him from abusing the units with good fury effects.
Construct:
Spike Trap (1) – 2/1 – Shielded. Strain. When an enemy follower enters battle: They take 2 damage.
Convoy:
Hermit (1) – 1/2 – Draw a leader card.
Worker (1) – 1/2
Lookout (2) – 2/3 – Fury: A random friendly follower gains +0/2.
Scout (2) – 3/2
Archivist (3) – 3/3 – Fury: Copy a random enemy leader card and add it to your hand.
Bandit Raider (3) – 4/3
Black Star Hitman (3) – 3/3 – Stealth.
Linebreaker (3) – 3/4 – Fury: If the enemy has a unit with Taunt: Gain +2/0 and Overwhelming.
Roaring Janwar (3) – 5/3 – Fury: Push the first enemy follower in the opposing row.
Scavenger Savant (5) – 5/6
Company Agent (6) – 4/7 – Fury: A random convoy card in your hand gains +2/2.
Phalanx (6) – 7/7 – Fury: Reduce the cost of a random convoy card in your hand by 1.
Leader:
Pull (0) – Pull target unit.
Push (0) – Push target unit.
Challenge (1) – Target friendly follower gains taunt and is pulled.
Guard (1) – Gain 4 armor.
Shatter (1) – Destroy target Construct or Obstacle.
Scorch (1) – Deal 2 damage to enemy leader.
Wild Shot (1) – Deal 3 damage to a random enemy target.
Mind Seize (3) – Deal 3 damage to all units.
Slap (3) – Deal 3 damage to target follower. If they survive they gain Rage.
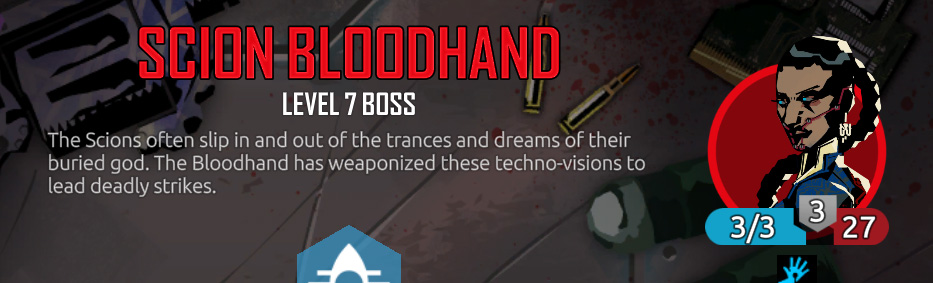 Scion Bloodhand
Vision Strikes: When a friendly follower deals damage to the enemy leader: Deal 2 damage to the enemy leader.
Try to keep her board clear. She likes to send out cheap units and buff them. Slash can be annoying to deal with.
Convoy:
Untouchable (1) – 1/2 – Revenge: Deal damage to a random enemy equal to the Untouchable’s attack.
Buzzer (2) – 3/1 – Sniper
Stranger (2) – 2/1 – If this unit is destroyed by a follower, that follower sufferes -2/1.
WIld Hand (2) – 2/3 – Fury: Spawn a 2/1 beast.
Cultist (3) – 2/2 – Charge.
Bleakrider (5) – 6/4 – Rage.
Leader:
Slash (2) – Deal 3 damage to enemy in frontline position.
Reserves (3) – Draw a convoy card and reduce its cost by 2.
Resupply (3) – All followers in target column tile gains +0/2.
 Union Fist Supervisor
Mirror Protocol – When an enemy follower enters combat: Put a copy of that follower in your hand and reduce its cost by 1. Has little convoy in deck.
Construct:
Autocannon (2) – 0/3 – At start of your turn: Deal 2 damage to the first target in the opposing row.
Decoy (2) – 2/4 – Taunt.
Leader:
Flanking Maneuver (1) – Destroy target obstacle and gain X armor, where X is the health of the obstacle.
Steel Breath (5) – Deal X damage to all enemy units. Where X is the amount of armor on your leader but at least 1. Remove all armor.
 Kaalrati
Hardened Construct: When a friendly construct enters battle: That construct gains shielded. Permanent.Mostly focuses on swarming the field with convoys and using constructs to buff. His removal cards can really counter barrier/robust deck types. Can counter with swarm of your own and not worry as much on enemy removal.
Construct:
Aggression Protocol (3) – 0/2 – When a drone with cost 3 or less enters battle: That drone gains +2/0.
Gatekeeper Protocol (4) – 0/3 – When a drone with cost 3 or less enters battle: That drone gains Taunt.
Fortress Protocol (5) – 0/5 – When a drone with cost 3 or less enters battle: That drone gains Barrier.
Convoy:
Razor (1) – 2/1
Buzzer (2) – 3/1 – Sniper.
Cutter (2) – 2/1 – Barrier.
Shaper (2) – 2/2 – Fury: Add a copy of a random friendly follower to your hand and reduce its cost by 1.
Shrieker (2) – 1/4 – Reduce the cost of a random convoy card in your hand by 1.
Scanner (3) – 2/3 – Stealth. Fury: Regain 1 Energy for each enemy in the opposing row.
Herder (4) – 5/5 – Fury: All friendly followers gain Shielded until your next turn.
Overseer (4) – 4/5 – Revenge: All drones gain +1/1.
Ruster (4) – 5/3
Ender (7) – 7/5 – Overwhelming. Robust.
Leader:
Disassembler Swarm (1) – Deal 1 damage to target. If it’s a drone it gains +1/1 instead.
Drone Improvement (2) – Replace target drone with a 5/3 drone.
Exploit Weakness (2) – Deal 2 damage to target follower. If that follower is destroyed: draw a leader card.
Rally (3) – Select a tile. All followers in it or neighbor tiles gain +0/2.
Bury (4) – Destroy target follower and replace them with an obstacle.
Boxed In (4) – Enemy followers gain -2/0 and allied followers gain +2/0.
Drone Avatar (4) – Spawn a drone (x/x), where X is the number of drones on your side.
Coordinated Fire (5) – Deal 2 damage to all enemy followers for every refreshed follower on your side. Exhaust all your followers.
 Kallrati Broken
Potential Abilities:
Backup Systems: At the start of your turn: If no protective status effect or FLINT-SPAWN exists, gain ECHO-RED.
ECHO-RED: When Kaalrati takes damage from the enemy: FLINT-SPAWN 4/4 enters battle. Deal 1 damage to 2 random enemy targets. Once per turn.
ECHO-WHITE: When Kaalrati takes damage from the enemy: FLINT-SPAWN 4/4 enters battle. Once per turn. Uses 1. FLINT-SPAWN – 4/4 – Shielded. Revenge: Leader gains ECHO-WHITE. FLINT-SPAWN gains +2/2 each time it is summoned again by any ECHO ability.
Due to the nature of this fight, it is best to build up some board presence before you trigger his ECHO effect by damaging him. Careful he has Shrapnel Rain as his board clear so it is best not to use wounded followers except for Hermits and Sappers as their fury effect is very good.
Convoy:
Shrieker (2) – 1/4 – Reduce the cost of a random convoy card in your hand by 1.
Scanner (3) – 2/3 – Stealth. Fury: Regain 1 Energy for each enemy in the opposing row.
Worker Drone (3) – 2/2 – Robust.
Cleanser (4) – 2/2 – First Strike. Robust.
Shredder (6) – Fury: Deal 6×1 damage to random enemy units or obstacles.
Ender (7) – 7/5 – Overwhelming. Robust.
Leader:
Sutbbon (1) – All your damaged or exhausted followers gain +0/2.
Colossus (2) – Target a refreshed follower. Double that unit’s attack. It gains overwhelming and is exhausted.
Mercy Kill (2) – Destroy target damaged follower.
Mechanized Help (2) – Spawn two 2/2 drones.
Shrapnel Rain (5) – Destroy all damaged enemy followers.
 Feral Warchief
Poison Transfer: When a follower with Poison is destroyed; another random friendly follower without Poison gains Poison.Convoy:
Wanderer (1) – 1/2 – Taunt.
Wild Hand (2) – 2/3 – Fury: Spawn a 2/1 beast.
Tinkerer (4) – 4/4 – Revenge: Spawn a drone.
Leader:
Living Battery (0) – Sacrifice target follower and gain X Energy, where X is the target’s health.
Reinforce (1) – Draw a convoy card.
 Bandit Warlord
Deep Shadows – At the end of your turn: A random friendly follower gains stealth.
Pitch Black – When a follower enters battle: that follower gains stealth.
His special ability is a double edged sword. While he has stealth you have Burst Fire, Beam Rifle (hopefully) and Static Charge if you really need to take out his guys. You will also gain Stealth and his only response is to Slash so try to position your men for it. Build up a board and control with your leader cards and equipment and this fight should go down easy enough.
Construct:
Spike Trap (1) – 2/1 – Shielded. Strain. When an enemy follower enters battle: They take 2 damage.
Convoy:
Blue Devil Recruit (1) – 1/1 – Robust.
Sapper (2) – 2/2 – Fury: deal 2 damage to enemy leader.
Linebreaker (3) – 3/4 – Fury: If the enemy unit has Taunt: gain +2/0 and overwhelming.
Dacoit (4) – 4/4 – Fury: Deal 3 damage to the first target in the opposing row.
Infiltrator (4) – 5/3 – Sniper.
Leader:
Slash (2) – Deal 3 damage to enemy target in the frontline position.
 Tormented Leper
Spiteful Will – When you take damage: All convoy cards in your hand gain +1/0.Passive will punish attacking him with small chip damage as it will buff his followers. Careful of the overwhelming when lining guys up in rows and salvo for columns. Careful of the board wipes, spread your men around. The battle favours a board of a couple of powerful followers rather than lots of small followers.
Convoy:
Worker (1) – 1/1 – Gain 1 armor.
Scout (2) – 3/2
Raider (3) – 4/3
Martyr (5) – 5/3 – Overwhelming. Revenge: All friendly followers gain +2/0.
Mercenary Captain (5) – 6/5 – Overwhelming.
Leader:
Mind Sieze (3) – Deal 3 damage to all units.
Salvo (3) – Deal 2 damage to all tiles at target column.
Blast (4) – Deal 5 damge to target and 2 damage to its neighbours.