Phasmophobia can be played on controller, with some caveats. This guide will get you started in configuring your controller for playing.
Introduction/Warnings
Before embarking on this guide, note the following warnings. These are based on my experiences:
- Running is currently bugged. As of now, using the controller to run while moving ends up stopping the hunter from moving. It is possible to have the run button pressed and have the hunter move, but there is no way to run.
- Opening doors is bugged. For some reason, pressing and holding a button equivalent to mouse left click does not equate to holding left click on an actual mouse. This means you cannot open or close doors with a controller.
- The DPad directional for menu navigation does not work. The game seems to be coded only for mouse movement for menu navigation. Using the left joystick does work but there is no way to select a menu navigation item without some work.
Controller to Steam Setup
- From Steam, enter Big Picture Mode. The icon can be found in the top right corner between your name and Minimize Window. It looks like a rectangle with two arrows pointing at opposite corners. Alternatively, you go to the upper left menus and go to View > Big Picture Mode.
- Click on the gear icon in the top right (Settings), then Controller Settings. Check the PS4 Support box or the XBox Support box, depending on your controller.
- Plug in your controller. Steam should recognize it and register it to your account. It just means whenever you plug in a PS4/XB controller it loads its settings. For the PS4 controller, you can mess around with the light bar brightness, color, etc.
Configuring Controller for Phasmophobia
- While in Big Picture Mode, navigate to Phasmophobia. Find it in your library.
- Enter/click Phasmophobia > Manage Game > Controller Configuration. You’ll be presented with your controller.
- At the bottom of the screen, go to Browse Configs. Left side of screen, go to Templates. Highlight Gamepad with High Precision Camera/Aim then Import Config.
- You’ll be sent back to your controller and see a blank template with the word Preview across the screen. Apply Config. You can now edit the buttons to your liking.
- To edit a button/bumper, select it and give it a name for easier identification. Use its function l when in-game. For example, I have Run as R2 (right trigger) so I named it Run. Then select the key on the keyboard that corresponds to the mapping in-game.
- To edit a trigger, edit either the Full Pull Action or Soft Pull Action, then proceed as before. These actions will be discussed in the next section (Intermediate: Customizing Your Settings).
Here are the default keyboard controls for Phasmophobia:
Movement: WASD
Run: Shift
Crouch: C
Local Push To Talk: V
Global Push To Talk: B
Inventory Swap: Q
Journal: J
Pickup: E
Drop Item: G
Primary Use: Mouse Right Click
Secondary Use: F
Flashlight: T
I changed a few functions: crouch is CTRL, local PTT is C, and global PTT is V
IMPORTANT: there is a serious issue with not being able to run while moving, grabbing and holding onto objects, and swapping objects (left trigger). It is impossible to open/close doors since the grab button, left mouse, does not hold.
When you’re done, your configuration should look something like this:
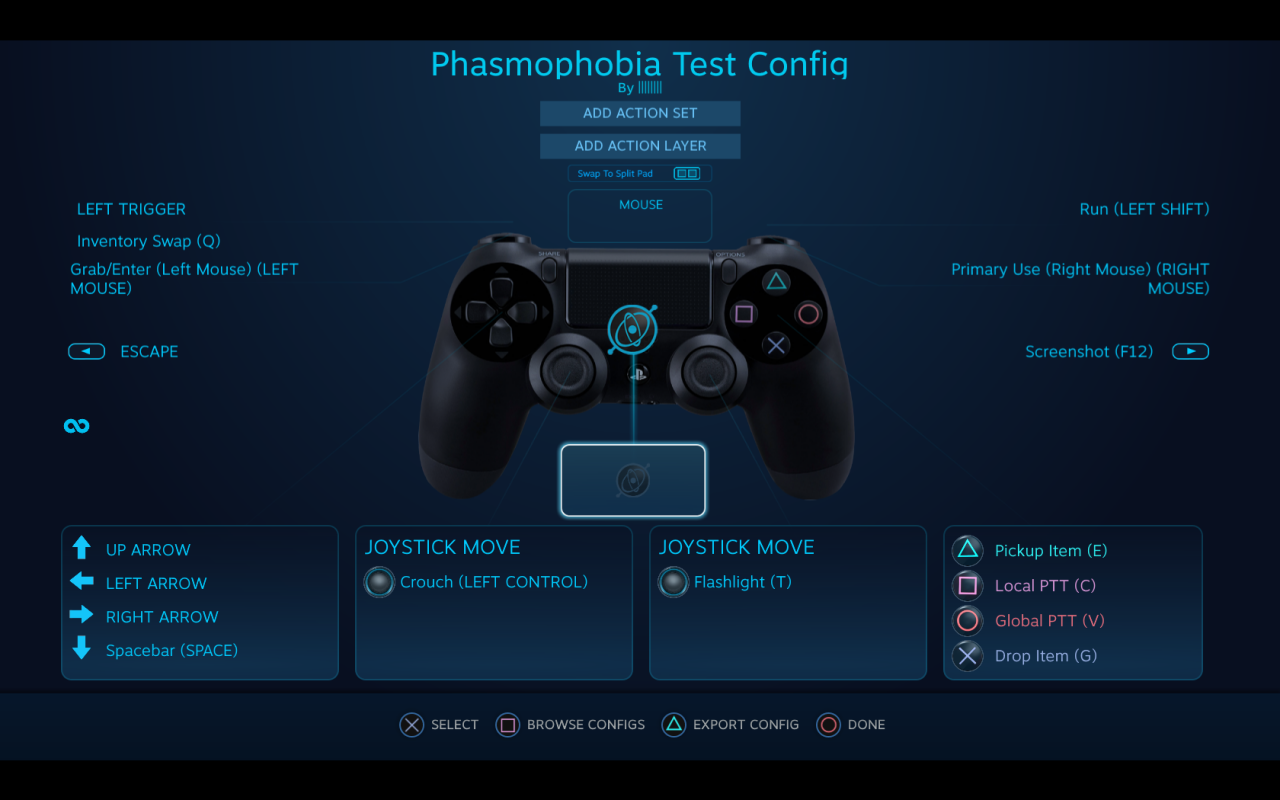
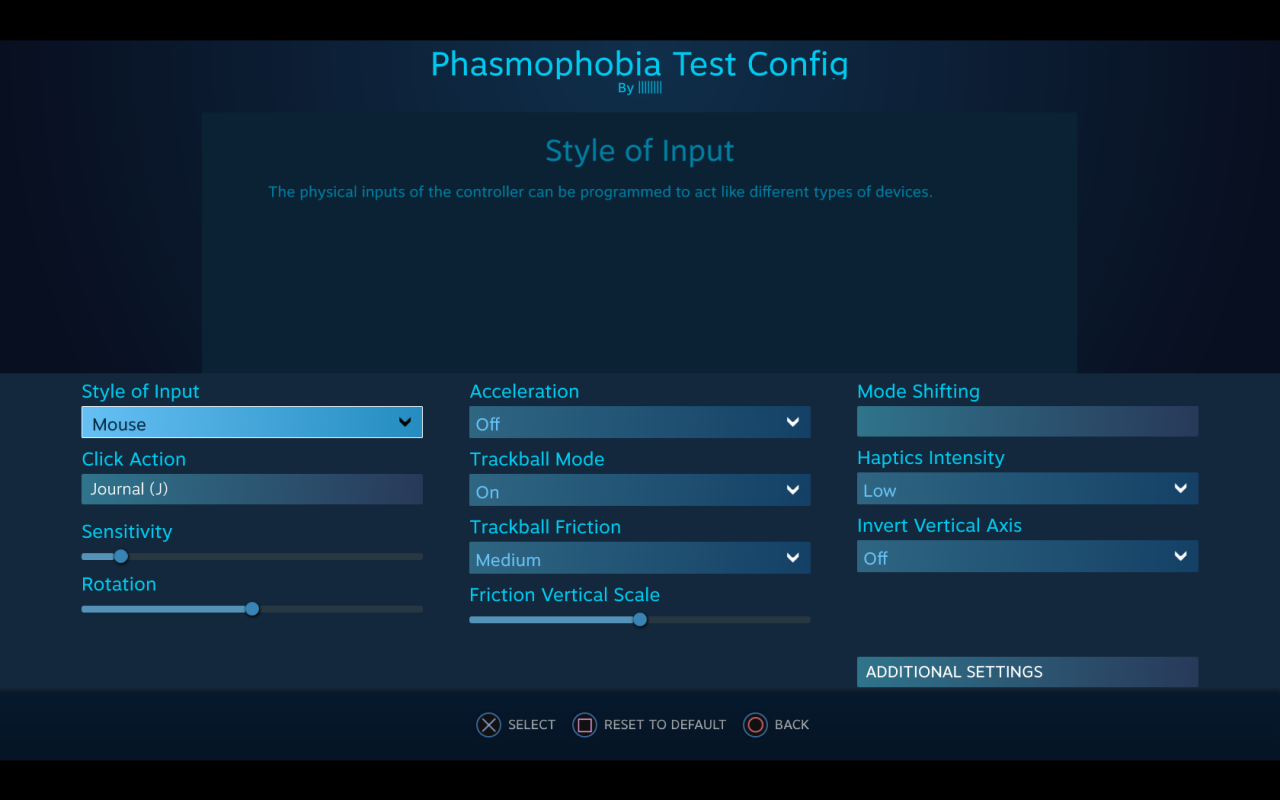
The PS4 trackpad is used as the in-game mouse. I also have Journal assigned to it as a click function, although you could assign Journal to something else.
I’m not sure what the settings do for the trackpad.
Intermediate: Customizing Your Settings
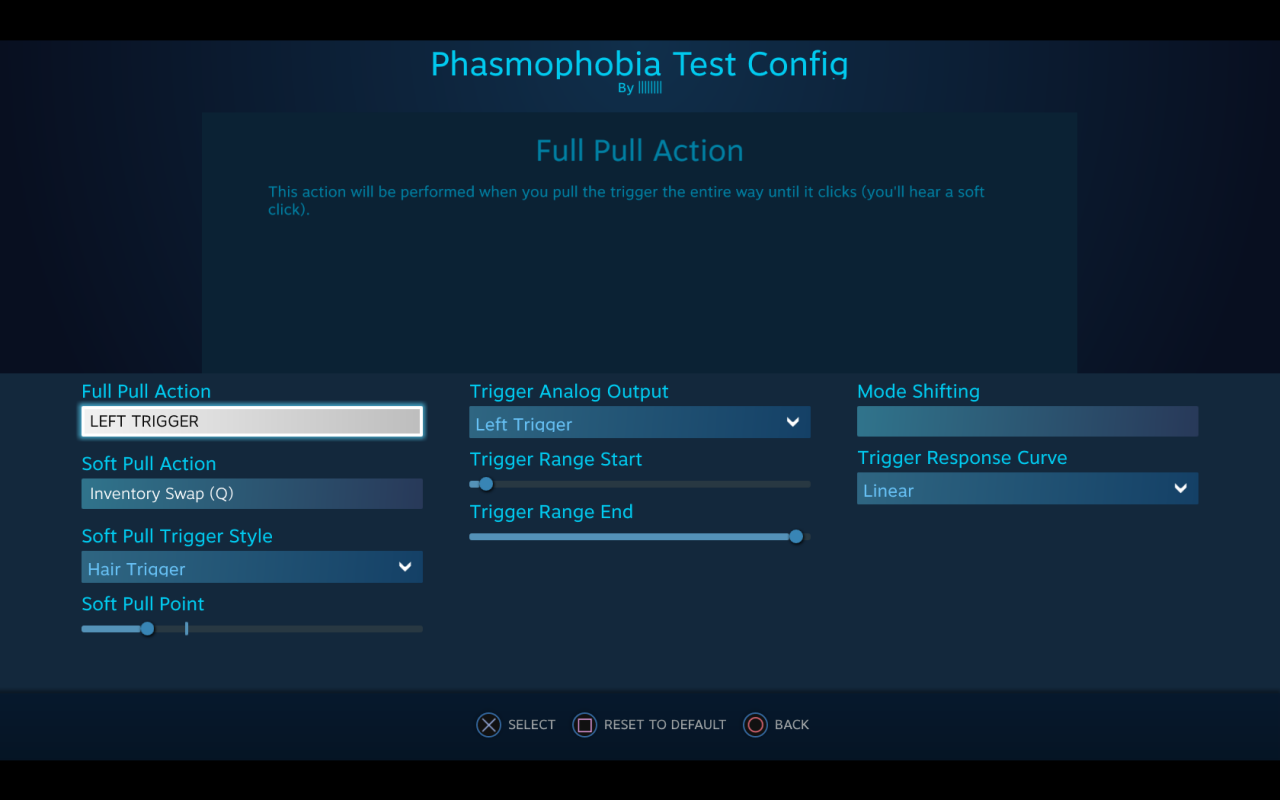
TRIGGER
A trigger has two actions: a full pull and a soft pull. A full pull is as it sounds: when you pull the trigger all the way it does a certain action. A soft pull is somewhere between not pulling and fully pulling.
- The Trigger Range Start/End tell you how far you need to pull for it to take effect. A Trigger Range Start further to the left means you won’t need to pull as much for it to activate, and a Trigger Range End further to the right means you will have to pull farther for the Full Pull Action to activate.
- The Soft Pull Point tells you how much you need to pull for the Soft Pull Action to take effect. The further to the left the point is placed the less you need to pull for the Soft Pull Action to activate.
- Mode Shift will be discussed in the next section.
- Trigger Response Curve: I haven’t messed with this setting so it is kept as Linear.
JOYSTICK
My knowledge is very limited about joysticks but these should help you get going.
Left Joystick
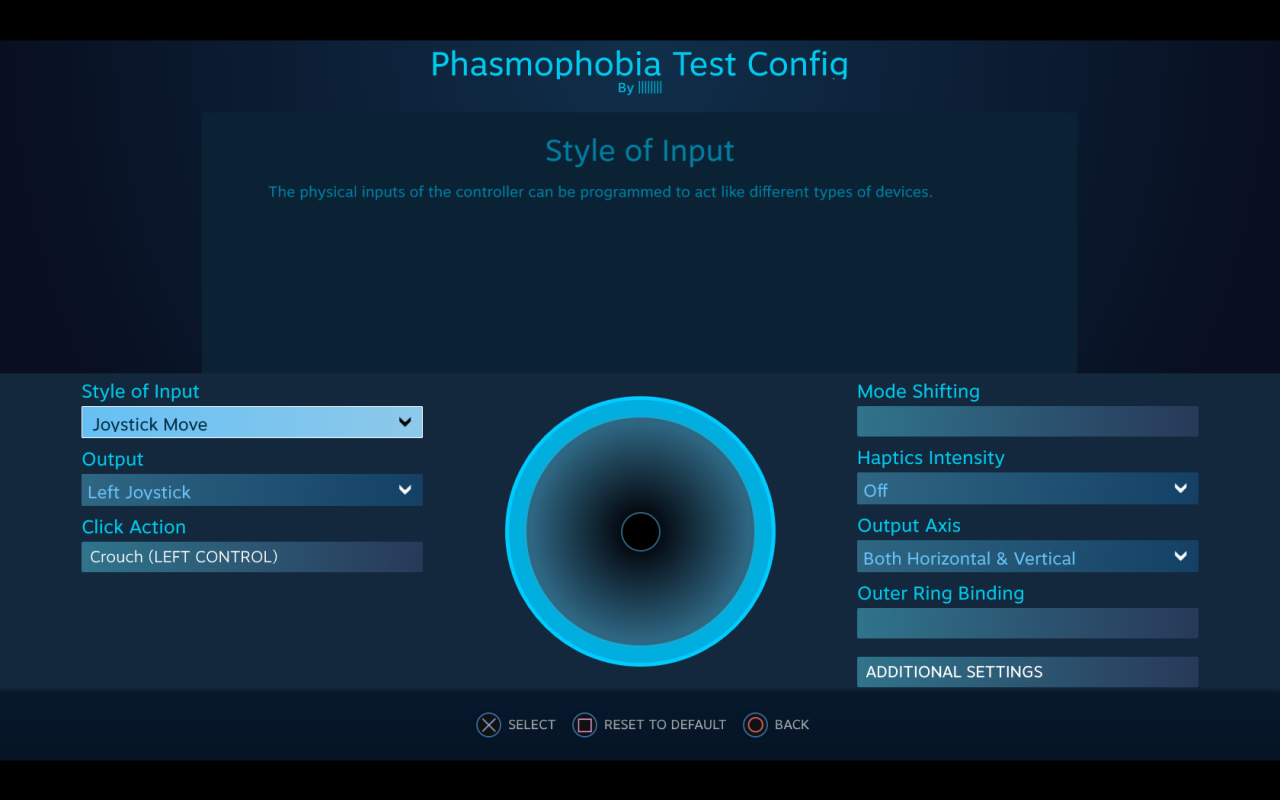
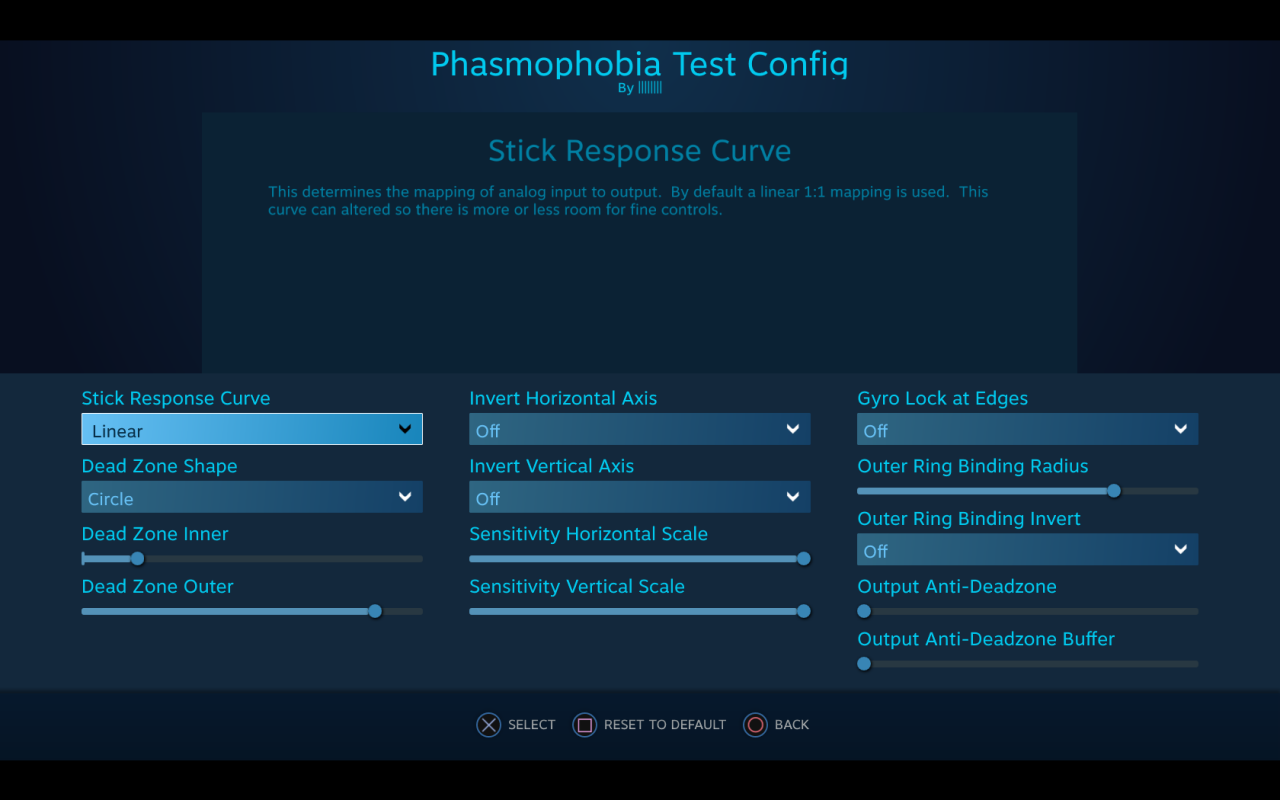
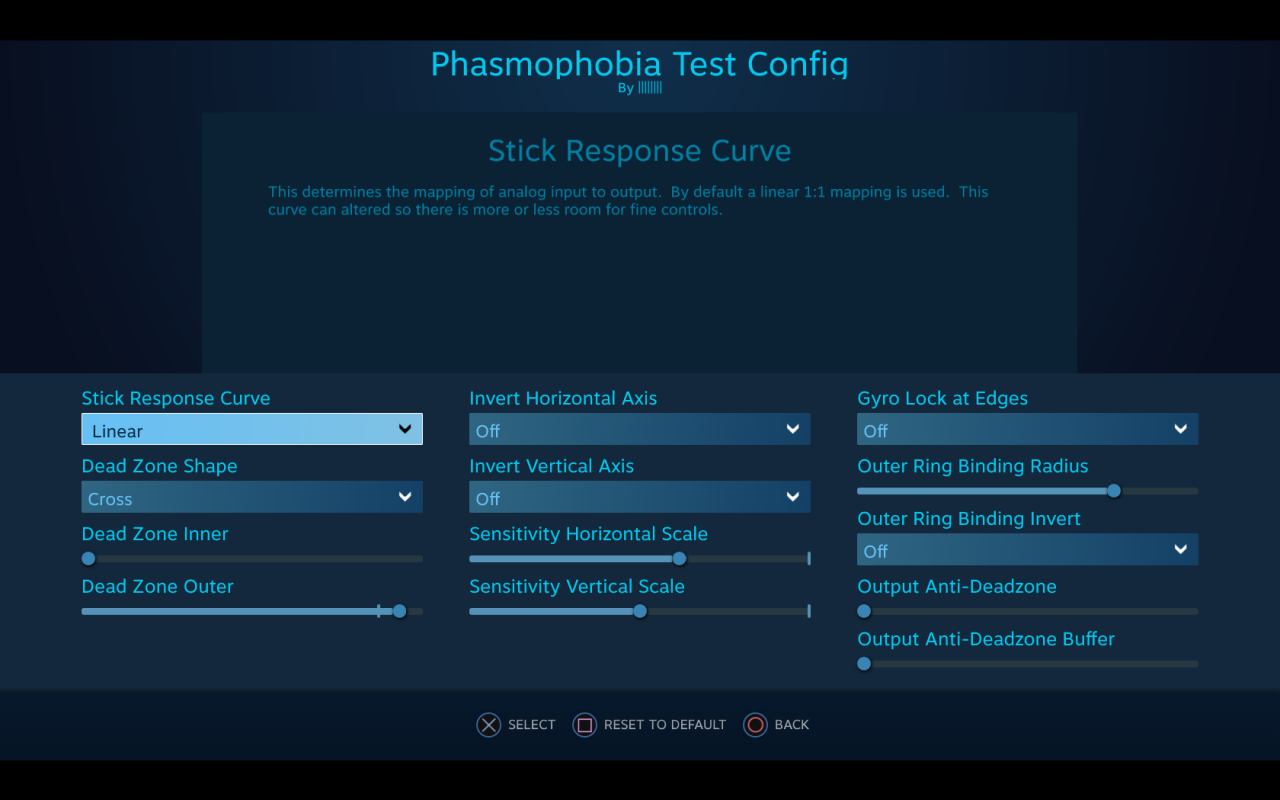
The Dead Zone Inner determines the area from the center that any movement in the joystick will not have an effect in-game. The Dead Zone Outer changes how far away from the center that you will achieve maximum input. Sliding the point to the right means you need to move the joystick further to the edge for maximum input.
I chose to move the Dead Zone Outer a little to the right of default. I find it useful to have an inner deadzone. Warning: without an inner deadzone you may encounter an issue with being unable to control movement. Also, movement in Phasmophobia is either on or off. It does not matter if you move the stick a little or at maximum, you move the same speed throughout.
I changed the Dead Zone Shape from cross to circle.
I don’t know what everything else does.
Right Joystick
Click on Additional Settings for more fine tuning of the joysticks. I find the game’s default look sensitivity too much so I turned it down. I also have the vertical sensitivity lower than the horizontal. Adjust to your preference.
Mode Shift
A Mode Shift gives a second function to a control (button, bumper, trigger, etc.) when another button is pressed and held. For example, pressing and holding Triangle (the mode shift button) allows me to map another control to anything else on the controller. This is only in use while the mode shift button is pressed!
Left Joystick
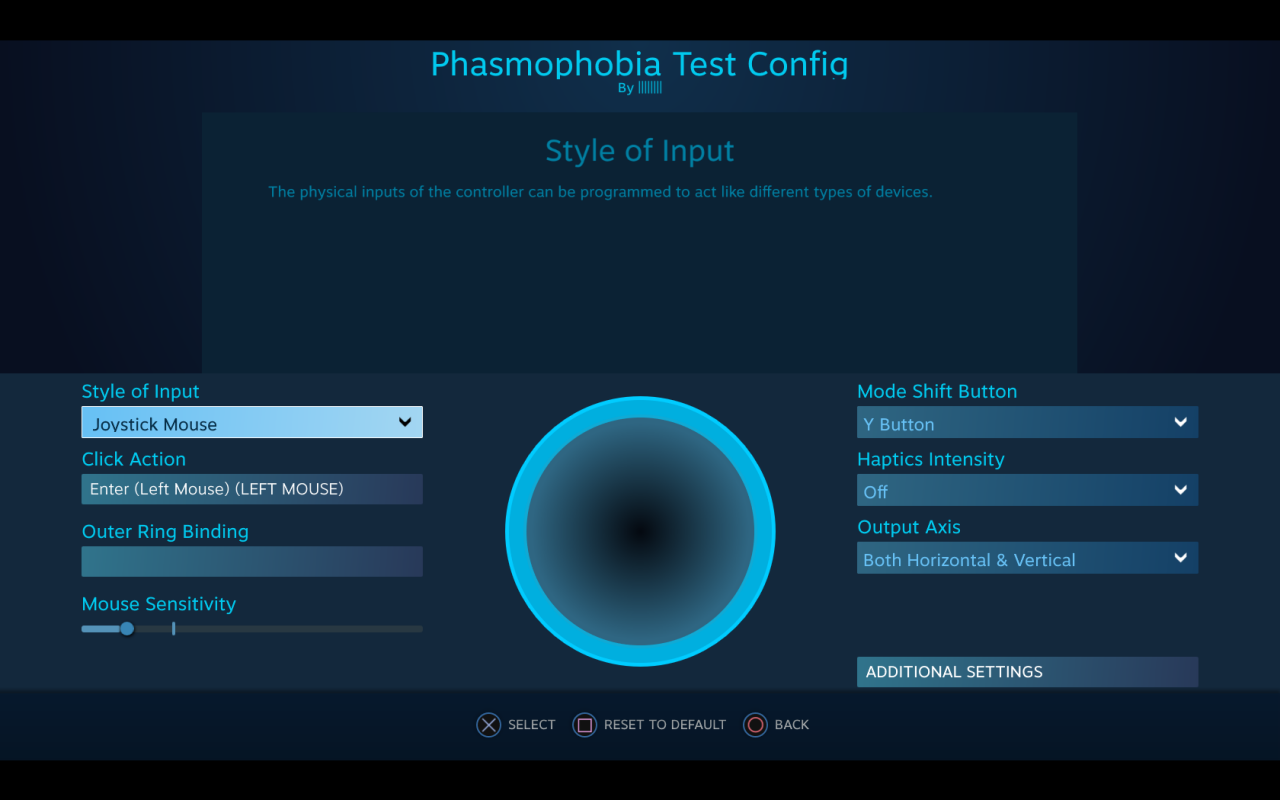
As far as I know, XB controllers do not have a trackpad like the PS4 controller. This would make menu navigation impossible. With a Mode Shift, we make menu navigation possible!
When changing the setting on the left joystick, go into Mode Shift. Do the following actions:
- Style of Input to Joystick Mouse.
- Mode Shift Button: use whatever you want. For example, I have mine set to Triangle on the PS4 controller (Y Button in Steam).
- Click Action: only necessary if you don’t already have a Left Mouse function anywhere else on the controller.
- Mouse Sensitivity: I prefer my mouse to not be super sensitive so I turned it down from default.
Related Posts:
- Phasmophobia: More Than 4 Player Coop (Game Modification)
- Phasmophobia: Sunny Meadows Mental Institution Map
- Phasmophobia: Ghost Types (Traits, Strengths and Weaknesses)
- Phasmophobia: How to Fix VR Crashing
- Phasmophobia: All Cookies Guide (Holiday 2022 Event)