A guide that points out strengths and weaknesses of all the weapons in-game, as well as any useful tactics for and against weapons, so that you don’t waste money on a weapon you do not like.
I. Cannons
Cannons are the first weapons you use in the game. They are generally well balanced, offering good firepower with short reload times and low/medium power consumption.
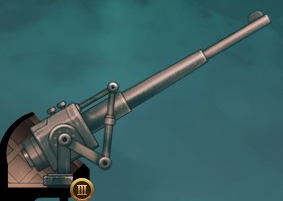
- BASILISK Cannon
 MK I – (80 HP 2 PWR 4 AMMO 12 DMG)
MK II – Same as above, faster reload
MK III – Same as above, even faster reload
[Doubleshot] [Flashbang]
[1 Structure DMG]
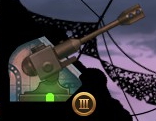
While they may look relatively weak compared to other weapons, they offer great utility in that they can chip down rooms, bait defense turrets, and disrupt enemy infantry from repairing rooms with flashbangs or doubleshot. All of this is given for a very low price as well as low ammo and power consumption. Do be careful, as they are the most fragile weapon and are easily taken out by a well timed volley or by a high-damage explosive. As such, they are great cheap support weapons. - HYDRA Assault Cannon
 MK I – (90 HP 3 PWR 6 AMMO 9 DMG)
MK II – Same as above, faster reload
MK III – Same as above, even faster reload
[9/10/12 Round Volley]
[0/1 Structure DMG]
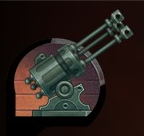
These greatly improve upon the BASILISK’s capabilities of chipping, baiting, and disrupting at the cost of increased ammo cost. 6/9/12 Round Volley improves this even further at the greater cost of ammo consumption. If you have the ammo to spare, they can be better than the BASILISK. - ALASTOR Siege Cannon
 MK I – (100 HP 3 PWR 5 AMMO 36 DMG)
MK II – (110 HP 3 PWR 5 AMMO 42 DMG)
MK III – (125 HP 3 PWR 5 AMMO 48 DMG)
[Incendiary] [Toxin] [Flashbang]
[10 Structure DMG]
Things start to ramp up when these come into play. Their strength is their versatile payloads; they can fire normal, incendiary, toxin, or flashbang rounds. This makes them a powerful combo starter for anti-infantry or anti-room attacks. You could also opt for normal shells, which offer great damage for their reload and ammo consumption. Their higher HP pool lets them dish out more damage and protect rooms in the early game. They do eat up a lot of ammo when using specialized rounds, but are otherwise a very solid gun. - ARCHON Precision Cannon
 MK I – (100 HP 4 PWR 5 AMMO 50 DMG)
MK II – (110 HP 4 PWR 5 AMMO 55 DMG), -12% faster reload, higher accuracy
MK III – (125 HP 4 PWR 5 AMMO 60 DMG), -8% faster reload, even higher accuracy
[Flashbang]
[15 Structure DMG]
Just like the name implies, these are sniper cannons, made for surgical strikes against vital rooms hiding deep within the fortress. High damage and fast bullet speed is compensated with slow reload times with medium ammo costs. Got a juicy target of multiple infantry in one room? Send a flashbang, which will most likely get them with its incredibly fast bullet speed. Need to finish off a room quickly through defences? This gun gets the job done. Can be used to break a Kinetic Shield in a pinch, but the window offered to follow up with other guns is small. - TYPHON Heavy Cannon
 MK I – (250 HP 5 PWR 9 AMMO 80 DMG)
MK II – (275 HP 5 PWR 9 AMMO 90 DMG), +5% accuracy
MK III – (300 HP 5 PWR 9 AMMO 100 DMG), +5% accuracy
[25 Structure DMG]
[Incendiary] [Toxin]
These bad boys mean business. High HP, high damage, and fast reload times makes these guns intimidating, especially for the first time encountering them. The first 2-room gun. This power is compensated with their higher ammo costs, but is nevertheless very threatening. MK I instantly destroys BASILISKs while MK II instantly destroys HYDRAs. MK III can one-shot a MK I TALOS as well as a MK II SOLARIS and after that it generally 2-shot-kills, with the exception of late game rooms. Higher damage means that their fires made by incendiary shells start off stronger and harder to put out. If you go up against these, bring either shields, Flaks, EMPs or Scrambler. It’s generally a good idea to take these out first. Can be used to break a Kinetic Shield, with a moderate amount of time to follow up with a volley. - OMEGA Capital Destroyer
 OMEGA – (800 HP 10 PWR 14 AMMO 200 DMG)
Type X – (880 HP 10 PWR 14 AMMO 220 DMG), -4% faster reload
Type Z – (1000 HP 10 PWR 14 AMMO 240 DMG), -8% faster reload
[Incendiary] [Toxin]
[50 Structure DMG]
The awe-inspiring supergun. It is unique in that it takes up 4 rooms to house it. Absurd damage and HP is countered by its high reload, ammo, and power costs. If it can’t one-shot a room, it will definitely two-shot (except other OMEGA Cannons, of course). A fully staffed OMEGA TYPE-Z can land a shot before an unstaffed MK II Scrambler can scramble. Incendiary and neurotoxin shells also affect any rooms adjacent to the target, majorly disrupting or flat out killing enemy infantry. Just like the TYPHON, its counters are the Flak, Kinetic Shield, EMPs and Scrambler. Keep in mind that a shield that just took an OMEGA bullet will take a long time to re-materialize. Never let this get a shot on your fortress.
II. Mortars
Mortars focus on damage and anti-personnel abilities. Their higher damage comes at a higher ammo cost than most cannons. Since they fire their bombs in an arc, you can distract defense turrets with either bullets or shells first since they have different flight paths. Due to this nature, mortars can target exposed deep rooms at the back of the fortress with higher accuracy than cannons, but they can also be inflicted with reduced accuracy due to some fortresses being situated in caves or using camouflage.
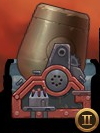
- TALOS Siege Mortar
 MK I – (100 HP 3 PWR 8 AMMO 28 DMG)
MK II – (110HP 3 PWR 8 AMMO 35 DMG)
[Flashbang] [Shredder]
This will be your first anti-personnel weapon. Killing all enemy personnel in a level awards you more XP, which lets you level up faster – to the point where you can unlock certain guns and utilities before the enemy can introduce it! Early game-wise, these deal the most damage until the ALASTOR cannon comes in. Useful for focusing down a target or infantry. Flashbanging soldiers and then trying to shred them with the same mortar almost never works, since there’s a small window of time where the soldier snaps out of it before it can get shredded. - TARTARUS Heavy Mortar
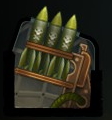
 MK I – (150 HP 4 PWR 8 AMMO 60 DMG)
MK II – (175HP 4 PWR 8 AMMO 70 DMG)
[Incendiary] [Shredder]
[35 Structure DMG]
By the time you unlock the TALOS MK II, you’ll also unlock the TARTARUS. It’s generally better to replace your TALOS mortars with TARTARUS mortars since these boast significantly higher damage, damaging abilities, and ability to tank a lot of incoming fire. They can also gain more accuracy since they can have 2 operators stationed, giving it an extra 10% aim, along with faster reload times. Whenever these bombs hit, they stun any infantry in the target room for a second, which gives enough time to follow up with any other anti-personnel tactics if timed correctly. Their Shredder bombs also deal more damage, enough to kill a soldier at roughly 80% HP. Incendiary bombs also start out with stronger fires, making it hard to put out. Can be used to break Kinetic Shields, giving a moderate amount of time to follow up. Enemy AI tends to Scramble these bombs first, unless you have bigger guns already prepared to fire. An all-around great weapon, but be mindful of their ammo costs.
III. Missiles
Missiles are quite different in that they always have 100% accuracy, use very little power, and pass through Kinetic Shields, but are offset with their long reload times, very high ammo costs, slow projectile speed, and vulnerability to defense turrets as well as Scrambler. If you plan to use missiles, you’ll need to heavily distract any defense turrets or take out any Scramblers. Damaging Active Defense Control rooms are enough, as without them turrets have decreased firepower and/or fire rate. When defending against missiles, especially ICBMs, 2 Lasers/Autocannons and 1 Flak turret is the bare minimum to make sure they don’t land.
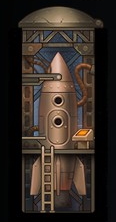
- PYTHON Missiles
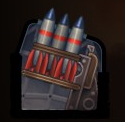 MK I – (100 HP 2 PWR 11 AMMO 50 DMG)
MK II – (110 HP 2 PWR 10 AMMO 58 DMG)
MK III – (125 HP 2 PWR 9 AMMO 66 DMG)
[0 Structure DMG]
Boasting high damage in the early game, they essentially force you to use an Active Defense Control room to stop them from wreaking havoc on your fort. Best fired right after a coordinated volley so that defense turrets don’t shoot it down immediately. - VIPER Fire Missiles
 MK I – (100 HP 3 PWR 15 AMMO)
MK II – (110 HP 3 PWR 14 AMMO)
MK III – (125 HP 3 PWR 13 AMMO)
[0 Structure DMG]
These missiles trade firepower and ammo costs for a deadly payload that lasts for 30 seconds at the target room. Although its actual firepower stat is not listed, it does anywhere from 12-30 damage on top of making the target room inoperable. Its strong fire when unleashed requires at least 2 soldiers to put it out safely, and does about 50% accumulated damage to said soldiers when the fire is finally put out. - TAIPAN Toxin Missiles
 MK I – (100 HP 3 PWR 15 AMMO)
MK II – (110 HP 3 PWR 14 AMMO)
MK III – (125 HP 3 PWR 13 AMMO)
[0 Structure DMG]
Just like that VIPER missiles, these also trade firepower and ammo costs for a specialized payload. Likewise, it does anywhere from 12-30 damage to the target even though it’s not actually listed as a stat. The difference with toxin and fire is that soldiers cannot do anything when in toxin. Even with the extremely rare Microfiltration perk, soldiers will just stand there and do nothing. This means that if a room is filled with toxin, it is ripe for unhindered destruction. - CHARON Impact-Landing ICBM
 CHARON – (250 HP 6 PWR 19 AMMO)
Type X – (275 HP 6 PWR 17 AMMO)
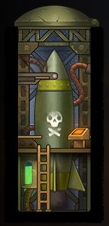
This ICBM offers a different way to invade fortress via overhead crash-landing. Once it is prepared, you can send up to 2 soldiers to fly over to the target room. Once they get off from the crash-landing, they’ll have up to 7 seconds to kill any nearby soldiers in adjacent rooms. This is more safe than using a blimp since it can take more punishment from defense turrets, as well as stunning nearby enemy soldiers, but trades safety for less invading troops, increased ammo costs, and vulnerability to Scrambler. - NYX Neurotoxin ICBM
 NYX – (250 HP 6 PWR 22 AMMO)
Type X – (275 HP 6 PWR 20 AMMO)
[40 Structure DMG]
Similar to CHARON’s impact affecting adjacent rooms from the target, this ICBM dumps neurotoxin in all neighboring zones, lasting anywhere from 32 to 60 seconds. The great thing about this is that the AI does not take into account of neighboring zones when defending against it. This lets you get a lot of kills rather easily, effectively winning the battle since they will most likely not have any soldiers left to repair or man the guns. Of course, you must take into consideration the ammo costs as well as the housing for this monstrosity. Prepares slower than CHARON, but faster than NEMESIS. If you don’t have a Scrambler ready, destroy/disable this quickly. If you have Ballistic Radar & Early Warning Signal in your fort, you can pretty much ignore this thing if you have the extra fort space to clump up your soldiers. Beware of any cheeky mortar shredder bombs though. - NEMESIS Tactical Nuke ICBM
 NEMESIS – (250 HP 7 PWR 24 AMMO 300 DMG)
Type X – (275 HP 7 PWR 22 AMMO 320 DMG)
[200 Structure DMG]
Nuking is fun. Impractical, but fun. The only thing that will survive a nuke would be the OMEGA Cannon, which can potentially take 3 nukes to the face before finally blowing up. Staggering ammo costs and extremely long reload times is what makes this impractical, but the fireworks that go off when it does land is extremely satisfying. It takes several fully-functioning defensive turrets to shoot it down before it lands, and the Scrambler will send it back to sender…unless they too have a Scrambler. Destroy/disable at all costs, unless you have a Scrambler.
IV. Energy Weapons
These are the opposites of missiles; they consume lots of power but very little ammo, while also offering unique advantages in a battle.
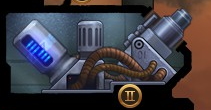
- ORION EMP Blaster
 MK I – (100 HP 6 PWR 2 AMMO)
MK II – (110 HP 6 PWR 2 AMMO)
[0 Structure DMG]
EMP Blasters can potentially give you a high advantage by completely shutting down enemy rooms – even big weapons like NEMESIS or the OMEGA can be shut down, buying you lots of time to take it down. The problem is that if the enemy fortress has a surplus of energy, you’ll need to neutralize that before you can start shutting down rooms. As such, it may take several EMP blasts before you can actually shut down the target. For this reason I recommend having a soldier stationed at this weapon since the reload buff it gets lets it slowly drain the enemy’s power by itself. If you notice your enemy has no power to spare at the beginning of a battle, consider taking this if you’re low on cash. ORION MK II gets a good buff since its EMP projectiles now deal damage to infantry – about 30% HP, and deals 2x damage to Kinetic Shields. - HYPERION EMP Blaster
 MK I – (220 HP 10 PWR 4 AMMO)
MK II – (260 HP 10 PWR 4 AMMO)
[0 Structure DMG]
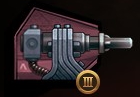
It functions mostly like its smaller counterpart, with differences in that HYPERION takes up 2 rooms, drains 6 power instead of 3, and can fire ridiculously fast (10 seconds!) with 2 operators stationed. The insane ability to rapidly drain extra fortress power within a couple of minutes is offset by it taking up 33% more power than its predecessor. You can even shut down 2 different rooms by alternating between them once there is no extra power remaining. MK II deals ~40% HP to infantry and deals 2x damage to Shields, making this a very powerful weapon if you have the room and power for it. - SOLARIS Heat Ray
 MK I – (100 HP 6 PWR 2 AMMO 24 DMG)
MK II – (100 HP 5 PWR 2 AMMO 26 DMG)
MK III – (110 HP 5 PWR 2 AMMO 30 DMG)
[0 Structure DMG]
An alternative to the BASILISK in terms of disruptive potential, the SOLARIS always fires at 100% accuracy while also highly discouraging enemy infantry from repairing the targeted room. While it has similar damage to the BASILISK, it also comes with the added bonus of a 25% to light the room on fire. It’s worth considering if your fortress layout has little ammo to spare. Cannot be stopped by any defenses. If you find your important rooms under attack by these and don’t want them to be destroyed, you can send soldiers to repair the damage in a pinch – it takes 2 soldiers to offset the damage of a SOLARIS when firing. - SIRIUS Scorcher Beam
 MK I – (220 HP 10 PWR 3 AMMO 72 DMG), 75% chance to light room on fire
MK II – (240 HP 9 PWR 3 AMMO 76 DMG), 80% chance to light room on fire
MK III – (260 HP 8 PWR 3 AMMO 81 DMG), 85% chance to light room on fire
[0 Structure DMG]
It acts exactly like the SOLARIS, but also improves on its abilities; it fires for longer, resulting in more damage and severely discourages enemy infantry from staying in the targeted room. Comes with a significantly higher chance to light the room on fire at 75% instead of 25%. Its drawbacks are that it consumes 50% more power and normally has a mediocre reload time, which can be remedied into a fast reload time with 2 operators. Excellent for disrupting Active Defense Control rooms or Kinetic Shields. If you have an important room under attack by a SIRIUS and need to keep it operational, 2 soldiers won’t be enough to offset the damage – you’ll need at least 3 soldiers, but that’s only possible if the targeted room takes up at least 2 rooms.
V. Operator Weapon Bonus
This is a list of what bonuses a specific weapon gets when fully staffed or partially staffed by operators.
FORMAT
WEAPON: 1st OPERATOR BUFF; 2nd OPERATOR BUFF; 3rd OPERATOR BUFF; 4th OPERATOR BUFF
For weapons with more than 1 potential operators, the individual buffs given by each operator is added.
- ALASTOR: -40% reload time
- ARCHON: -40% reload time, +5% aim
- BASILISK: +10% aim
- CHARON: -18% reload time; -36% reload time
- HYDRA: +10% aim
- HYPERION: +5% aim, -30% reload time; +10% aim, -61% reload time
- NEMESIS: -18% reload time; -36% reload time
- NYX: -18% reload time; -36% reload time
- OMEGA: -9.5% reload time; -19% reload time; -28.5% reload time; -38% reload time
Type X: -10.5% reload time; -21% reload time; -31.5% reload time; -42% reload time
Type Z: -12.5% reload time; -25% reload time; -37.5% reload time; -50% reload time - ORION: +5% aim, -38% reload time
- PYTHON: -40% reload time
- SIRIUS: -25% reload time; -50% reload time
- SOLARIS: -33% reload time
- TAIPAN: -40% reload time
- TALOS: +5% aim, -25% reload time
- TARTARUS: +5% aim, -16% reload time; +10% aim, -33% reload time
- TYPHON: +5% aim, -16% reload time; +10% aim, -33% reload time
- VIPER: -40% reload time
VI. End
Thanks for reading my first guide! I will try to update this guide with any new info regarding hidden stats, but it may take a while since they require some testing to confirm. Feel free to add anymore hidden information in the comments.
 Knowledge is power. Good luck, Commander!
By Pizza Time