
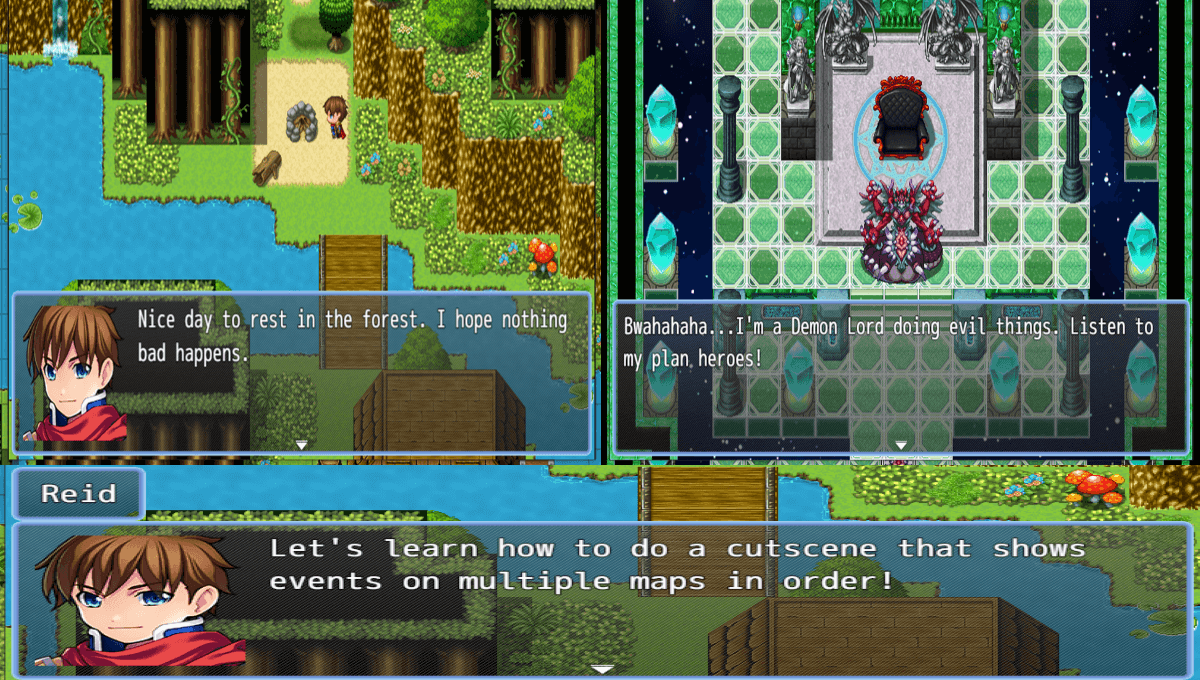
In this Official RPG Maker MZ Guide, we are going to teach you how to make a cutscene that spreads across multiple maps. The evil lord is plotting, so let’s flash over to his castle to see what he is doing!
Intro
Official Guide by bgillisp
Sometimes in an RPG we wish to have a cutscene that starts on one map, then changes over to another map. In this tutorial we will show how one can do that using the event commands present in RPGMaker.
Map 1
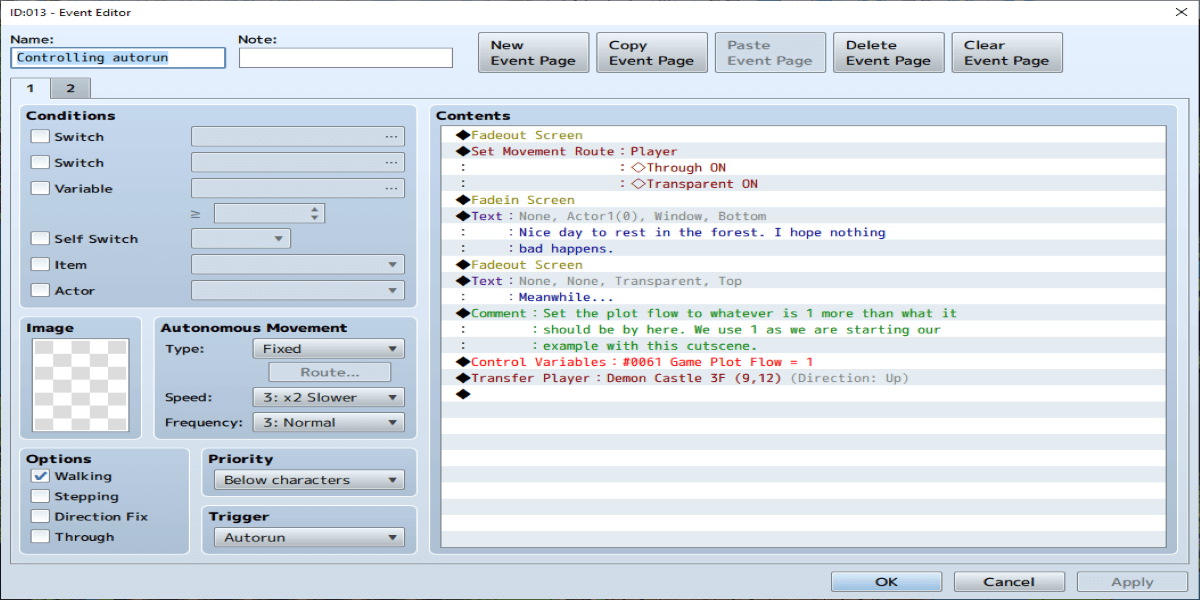
Notice that we did a set movement route player -> Through ON transparent ON too at the start of the cutscene. This is so that the player does not show up for this cutscene. If you want the player visible for the first cutscene, but not for the second, you will call the through ON transparent ON command after the fade out at the end of the cutscene instead.
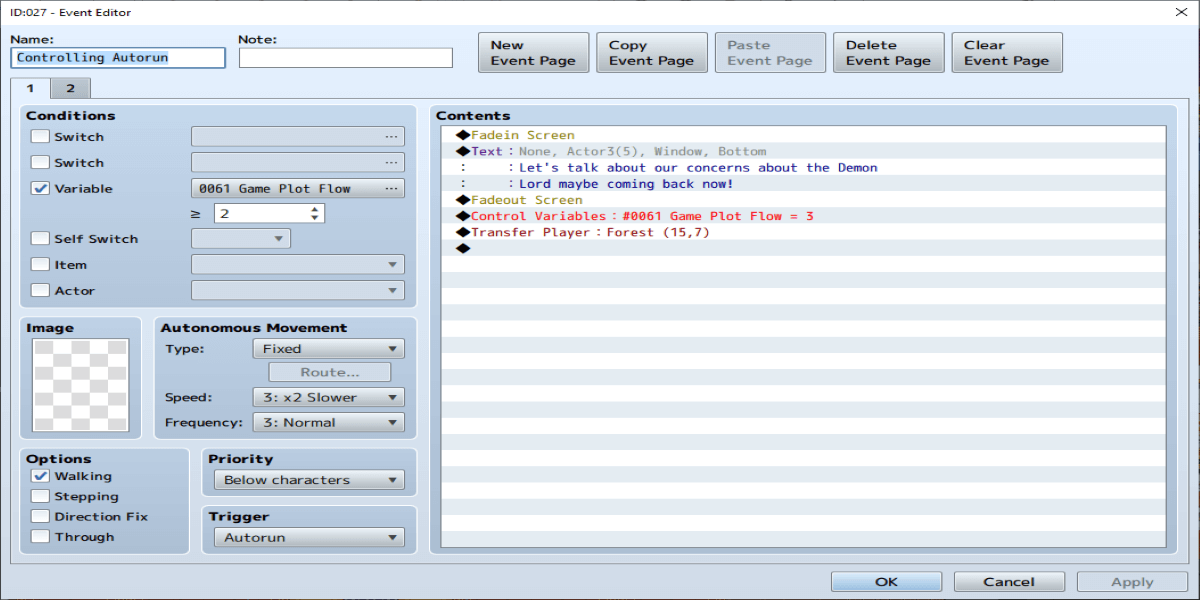
Also before going to map two, add a page 2 that is set as follows:
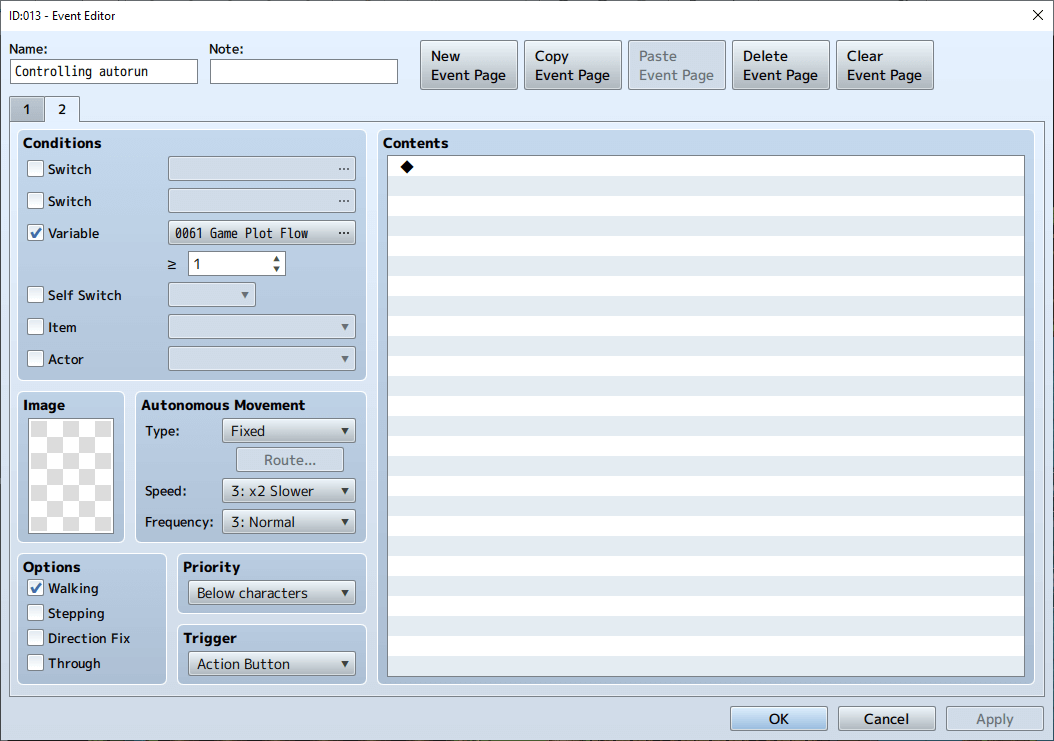
This page 2 is so when we come back our autorun doesn’t run again.
Map 2
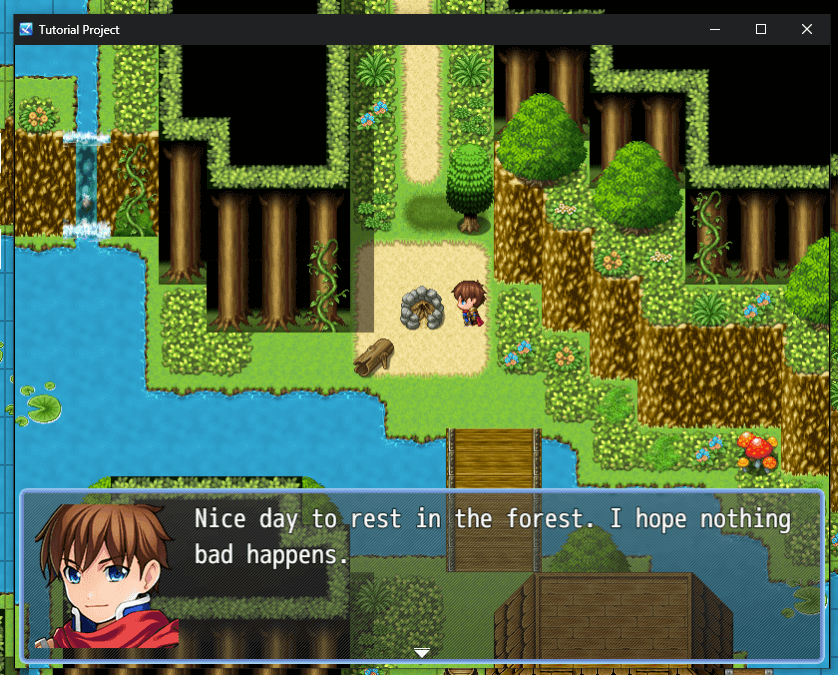
So far we have a cutscene that does this on the sample map Forest Map. The Reid you see on that map is from an event with the Reid sprite instead due to our use of Through ON Transparent ON.
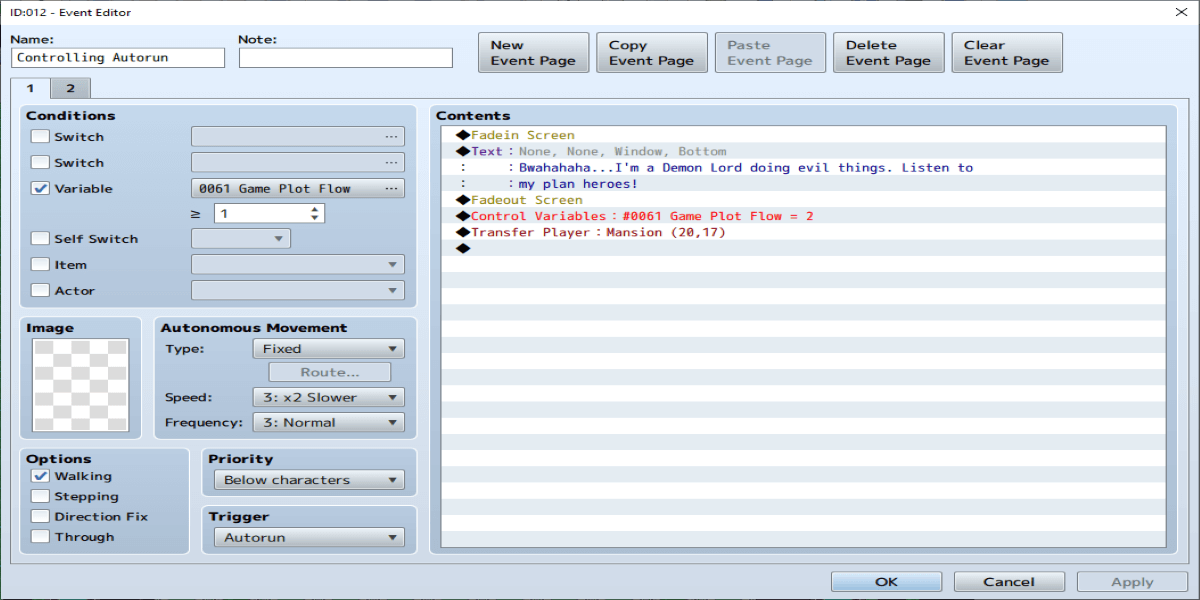
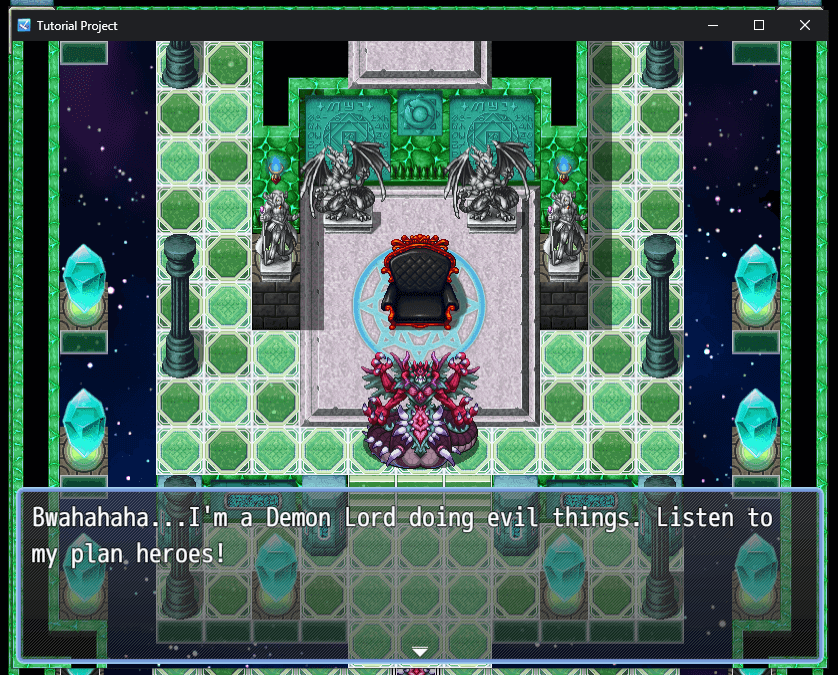
Then transfers to the sample map Demon Castle to show this:
Now let’s wrap up work on map 2. First be sure to put a page 2 that is set to trigger when our variable is set to 2. Remember we set our variable to 2 when we changed maps. The reason for this page though is in case you wish to use this map for more cutscenes later, the event is already set up to not run this one again.
Reminder: Exact values of the variable setting for plot will depend on your game. We are using 2 here as we have 2 events so far in our plot, but if this is later in the game you will probably need to use other numbers.
Map 3
Since this is our last map for this cutscene before returning to our original map we end with a transfer event to transfer back to the first map. Also be sure to put a page 2 set to the condition to run when the variable is greater than or equal to the same value we just set the variable at, which is 3 in this case.
Back to Map 1
However, we need a way to run a new part of the cutscene too. The solution is to make a page 3 that is set to activate when the plot variable is greater than or equal to the value we set it at earlier, which is 3 in this example. On that page 3 we will fade in, do anything more we wish to show for our cutscene, then we will wrap it up with a set move route event command -> Player -> Through OFF -> Transparent OFF. That last command is important as we hid the player earlier in our cutscene and without this command here the player will not be visible at all, and will walk through walls and events.
With all of this in mind, our page 3 on our controlling autorun event on the first map looks like this:
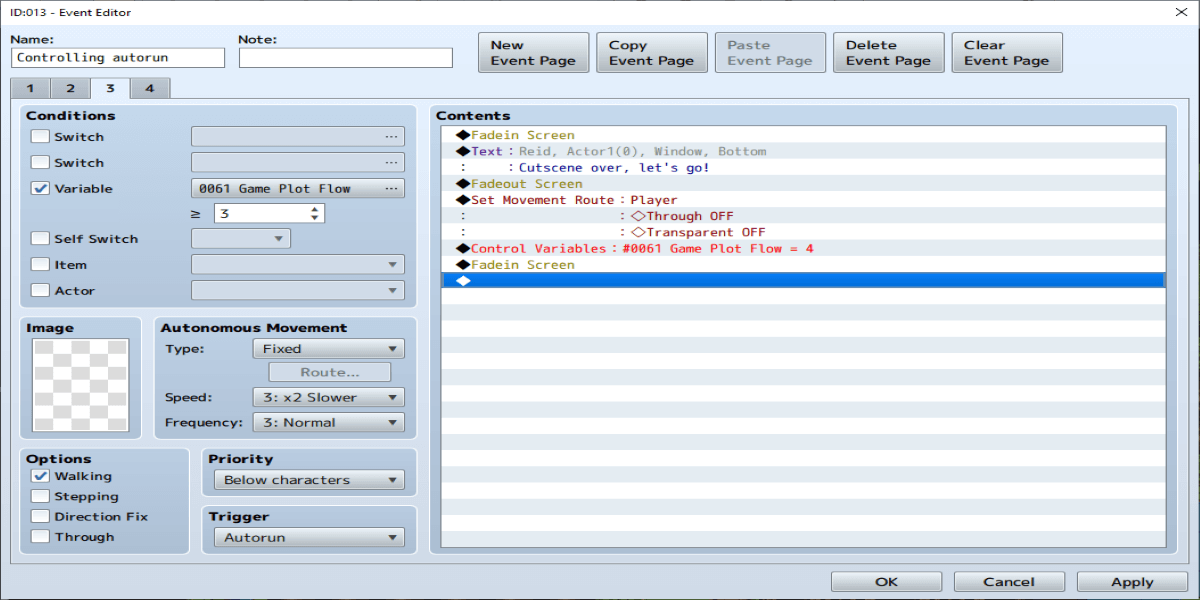
In this example we only had a single text box between the fade in then the fade out to make the player visible again. In that spot you would show any other parts of the cutscene you wish to show though. Also notice we end by setting the plot variable to one higher than it was before, which since it was 3 before we set it to 4.
Also notice there is a page 4 now. Page 4 is set as follows:

This is so our cutscene never runs again, and since our variable is now set to 4 it will never run again unless we for some reason set this variable to a number below 4.
Closing
Thanks to degicagames for his great guide, all credit to his effort. you can also read the original guide from Steam Community. enjoy the game.