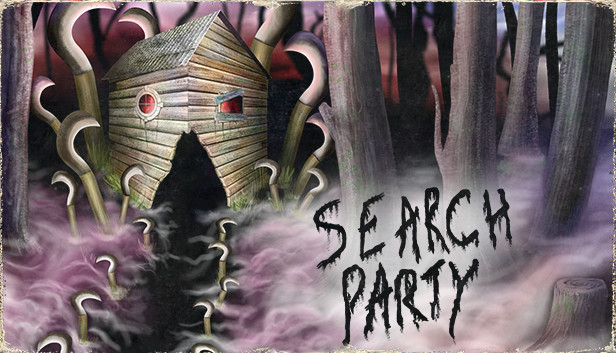
A guide for how to get all achievements and endings in Search Party
Introduction
Get Away!
To knock him down, you will need to land five successful shots on him in a single room – damage you do to him doesn’t carry over into other parts of the house, and depending on if you have any special weapons unlocked from the shop, most of the weapons in the game have about 10 to 15 shots before they break, so it’s prudent to get your licks in when possible.
It’s important to mention, also, that there is no way to kill the killer permanently, so the best course of action once he’s down is to leave and continue to another room while he’s no longer aware of your presence.
*Because of how hitboxes work in this game, this tactic is only useful for standing to the left or right of the killer – standing above or below him and trying to dodge isn’t quite as ideal, in my experience.
Once you enter the house and unlock the first door with the living room key, head up the floors to the attic and get the House Key once you see Daniel. Make a note of the strange blue painting on the third floor.
From there, unlock the door on the second floor with the House Key, enter the room connecting to it, and push the statue in that room across the floor to the damaged part of the floor.
Jump down the resulting hole in the floor to pick up the Attic Key, head back up to the Attic, and unlock the door to the bottom left of the ladder. Inside that room will be the Bolt Cutters.
Head back down to the first floor, and use the Bolt Cutters on the locked trapdoor in the room where you found the Living Room key.
Destroy the damaged wall north of where you entered, follow the new pathway to the triptych made to look like a face, and attack the wall to the right of it to enter the dream place.
Head to the far left of the checkerboard floor until you reach a grassy area. Directly to the left will be two floating pictures. To the bottom left will be a grieving woman next to an open grave, and a headless attacker with a knife. The end of this path will have a Fence Key.
Taking the fence key will unlock both gates to the north and south of where you first entered the grassy area. Inside will be a coffin and a doll house. Interact with both, and the items will switch places with the pictures from earlier.
Once this is done, there will be a Mystery Key between where the two pictures were. Take this, and head back to the checkerboard area. Head straight and there will be a door you can unlock.
Going in this door will lead to an arena with a blue door. Interacting with the blue door will spawn the killer, and the giant head enemy. Your goal here is to follow the instructions in the earlier cutscenes, and attack the killer until they fall down, making them easy prey for the giant head. It’s crucial to knock down the killer during this stage because without that, the giant head will attack you instead. The fight ends when the killer is beheaded.
If you haven’t done so already, after this fight you’ll want to go to the hand in the shed and pay them 15 coins to get the Blue Key. With this in hand, all you have to do is unlock the blue door that’s where the painting was on the third floor and the ending is complete.
Unlock the key in the statue room and you will enter a room full of beheaded Daniels. Entering the room up north of here will lead to a room with a coin and a Fire Axe. A beheaded enemy will attack you as you try to leave. Upon dealing with them, you’ll find the statues in the preceding room have been formed on the ground to look like a smile. This will be important for a puzzle later.
Going to the bottom of the Daniel room will lead to a dark room filled with cages, and one beheaded enemy. Walking through this area leads to a room with a Head Key and an inventory box. Upon leaving this room, your next destination is the room to the north of the one you exited, next to the giant water heater.
There will be a 4 x 4 grid on the ground, surrounded by statues. Push the statues into the same smile formation in the earlier room and the Head Key will appear.
With both Head Keys in your possession, there are two headless statues in the pathway you opened earlier, next to a ladder leading to the shed. Interacting with both statues with both Head Keys will open a new area.
Upon entering, you will be attacked by the giant head enemy. Your only recourse is to run through the hallways looking for an exit. Inside these hallways are a plethora of statues you will need to dodge and avoid to prevent getting bitten to death.
Once you reach a certain point, you will find a growing light leading to a ladder. Upon leaving, you find yourself next to a trapdoor and a photograph, with no path in sight. Ending B is now complete.
Starting with when you get the Bolt Cutters, you will want to open the door locked by chains on the third floor. There, you will find the Car Key on the floor. Heading back outside, you can now use the Bolt Cutters on the gate to the far left of the fence, and head back to the garage where you first found the Old Axe. Interact with the car with the Car Key and you hop in and drive off.
You then find yourself stranded without any gas. Waiting for a little under a minute, you discover an entity that’s decided you’re not going anywhere. Thus ends Ending C.
The only thing you can do with the coins is give them to the hand in the shed. It works like this – every five coins, you will get a new boon to help you in the game (health upgrade, inventory upgrade, Blue Key, second health ugrade, second inventory upgrade, Sickle)
After the seventh payment, the hand retreats inside their hole, and you can now enter yourself. Once you enter the Hand’s Hideout, you can treat yourself to a little vacation. That’s Ending D.
If you manage to get one playthrough done in 10 minutes time, all three achievements will unlock at once. As mentioned earlier, i personally did it with ending C, but either endings C or E can be reasonably done within that time-frame.