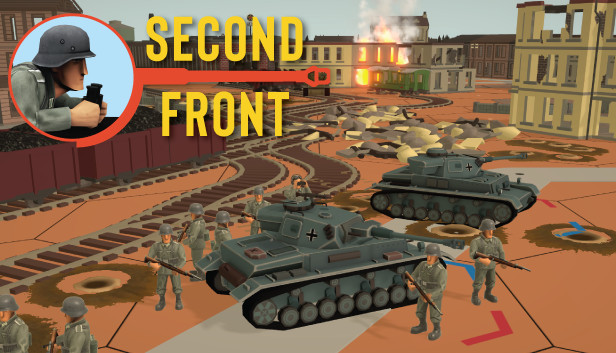
An introduction to the Map Editor included in Second Front.
This will get you familiar with the tools and controls available to you.
Second Front Map Editor Overview
Getting Started
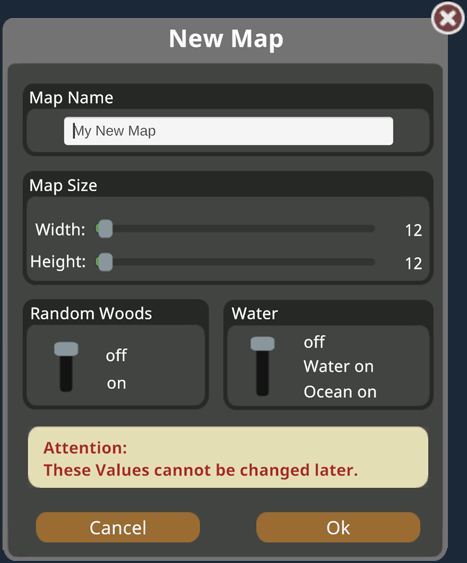
The information you enter on this dialog cannot be changed – it is fixed for the map.
The map you are creating needs a name. This will be displayed at the top of the editor, and when choosing a map for a scenario. It also must be unique. Usually, you will want to name the map the same as the scenario – it will make it easier to remember which map is for which scenario.
Map size is the number of hexes you want in each dimension, with 12 being the minimum, and the maximum is 50.
The Random Woods option if turned on will place woods at random on the map in clusters of hexes.
The last option lets you choose the water setting. At off, there is no water filling any hexes. With water On, level -1 hexes will be filled with water. If Ocean on is selected, then level -1 hexes will be filled with water, while level 0 hexes will be filled with sand.
When you click OK, the map will be generated and ready for you to edit.
The Editor interface
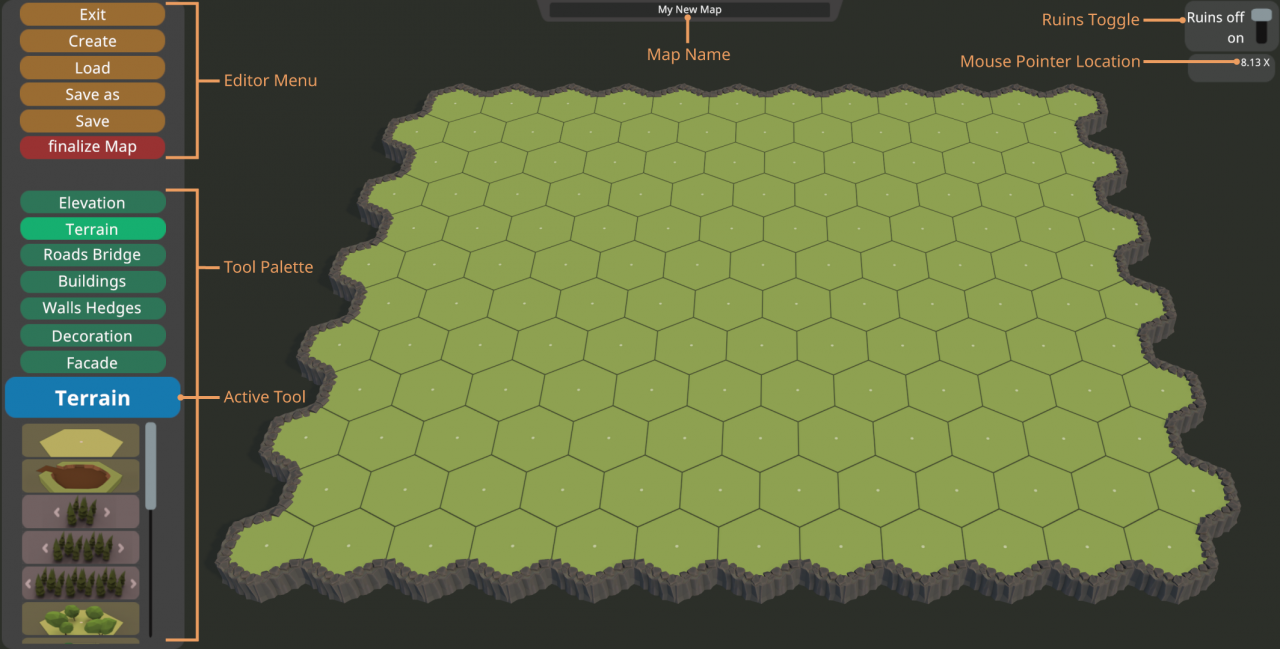
There are several important areas on the screen. At the top center you will see the name you entered for your map.
The top right corner has a toggle to turn ruins on or off. This will affect the appearance of all buildings and some other terrain. Under this is the location the mouse pointer is currently over and some information about the terrain in that hex. One corner of the map is 1,1 and it extends to the numbers you entered on the create screen.
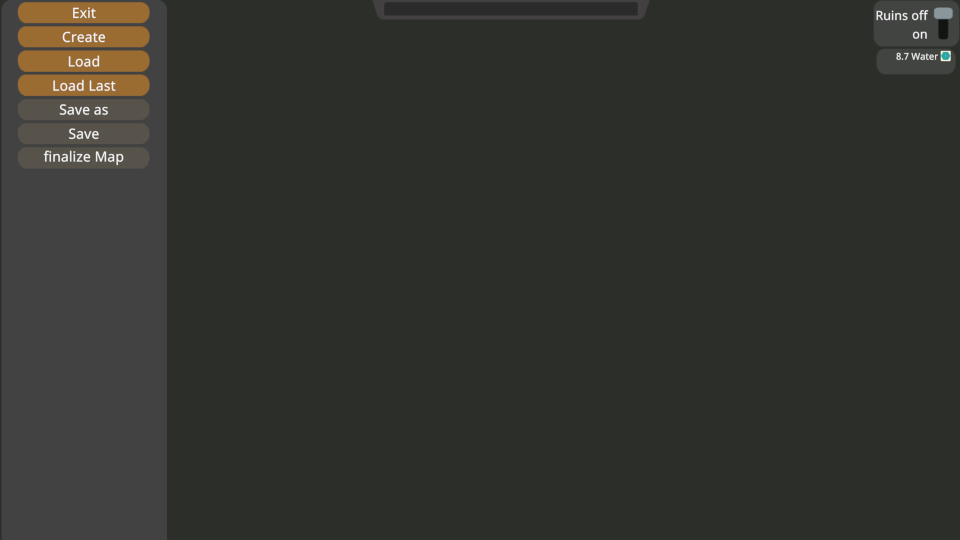
On the top left are the editor menu controls to exit, create a new map, load an existing map, save the current map under a new name or the existing name. And the last item we will discuss later – currently it will be red to remind you that you have not finalized the map yet.
And then the rest of the left column are the various tool menus. These are what you will use to edit the map – add terrain, change the elevation, or add decorations.
In almost all cases with the tools menus, a left click will add the item, and with the same tool selected, you can delete an item by right clicking. For example use the forest terrain control to add forest with a left click, or remove forest with a right click.
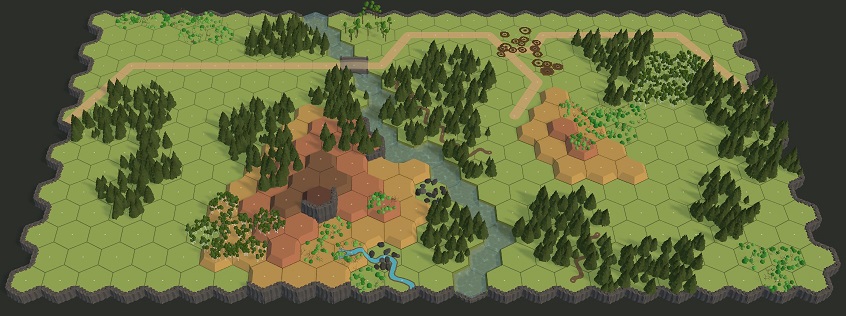
As an example, we will work through a map. Settings were 15 x 24 size with random trees and water on. This is the map after the creation step:
Elevation
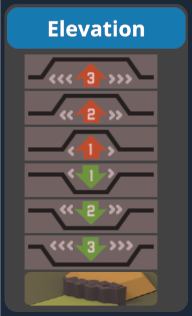
Building the hills and valleys is normally the first thing to do when editing a map as everything else goes on top of the ground.
The tools on this menu let you edit the height of the ground in the hexes.
The land elevation goes from -1 (or depression) to level 4. If you have water or ocean turned on when creating the map, all level -1 hexes will be filled with water. Water hexes can only be entered by boats or floating tanks. Shallow water (made by adding shore or fords to water) can be walked in and entered by some units.
Higher level hill hexes require the lower level beneath them – in the hex you want to raise, as well as all surrounding hexes. So to place a level 2 hill hex, you need 7 level 1 hill hexes in a circle.
Each of the elevation controls affects an area in radius equal to the number -1 on them around the target hex. So the size 1 affects only the target hex, while the size 3 affects the target hex and those up to 2 hexes away from the target hex.
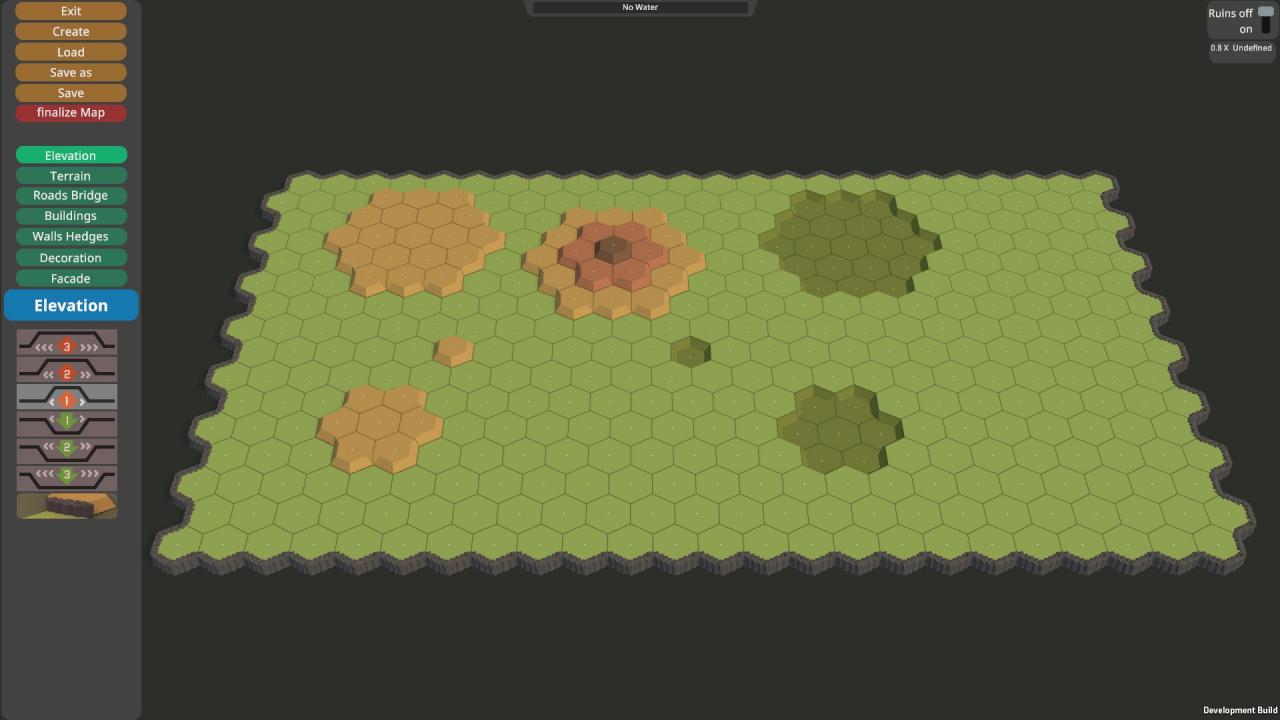
In the image above, the large depression and large single level hills are from the “3” control. The medium size hill and depression are from the 2 control, while the single hex hill and depression are from the 1 control.
The multilevel hill shown is the smallest you can have to create a level 3 hill hex.
Note that you can create cliffs by deleting lower level ground after adding the higher level ground.
Our map after we have adjusted the elevations to create a small stream and some hills:
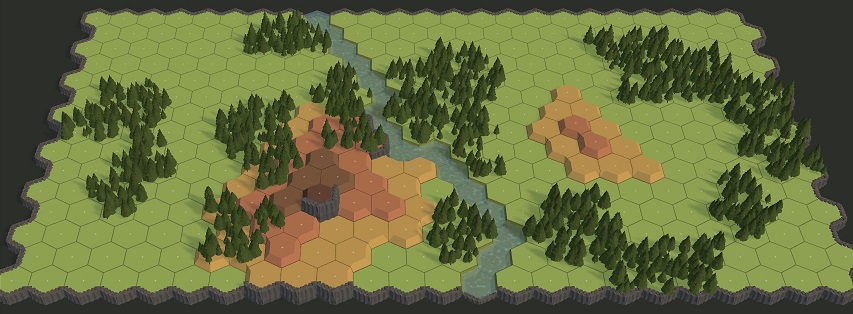
Adding Terrain
The terrain tool lets you add various terrain features including clear (the top icon), shallow water (second icon – but only if water or ocean are turned on, otherwise not available), several kinds of trees and other items.
The Pine trees give 2-level forests, while the Birch trees give a level 1 forest. Both of these have size selectors that work on similar area as the elevation tools do – size 1, 2 or 3.
The trench hexes will connect to adjacent trenches – even across a hill hex side. A trench placed on a hill hex can only be entered from another trench hex, or from a same-level ground hex.
Fields and grain fields can be oriented in the direction you want when placed by just selecting the hex vertex that gives you the desired look.
For most terrain types, the individual items in them are placed somewhat randomly. If you want a different arrangement, just left click again in the hex (while the matching terrain tool is selected) until you get an arrangement you like.
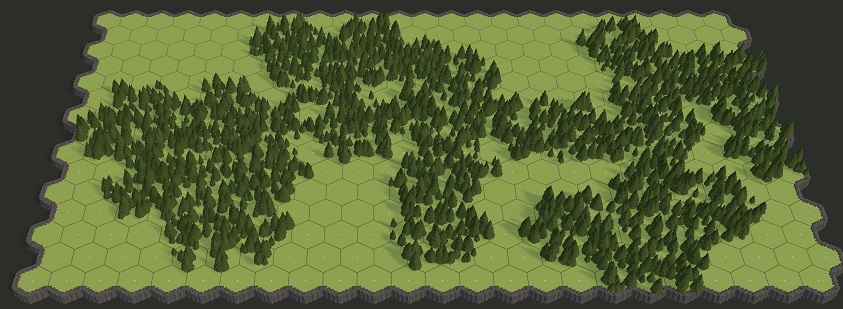
Our map after adding some more terrain features including some shell holes, birch forest, brush and rocks:
Roads, Rails and Bridges
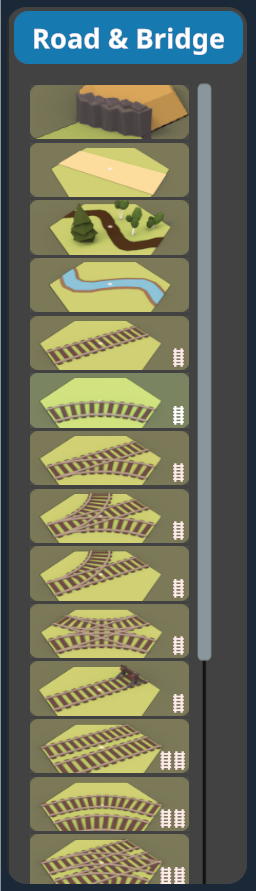
When editing the map you use the road tool to place the roads. Placing a road adjacent to another will automatically connect them if they would touch. When placing road you are picking which hex and then which hexside it should cross. You point at a hex and then move towards the hexside you want the road to cross from that hex. It will be shown where the road will be placed while you move the mouse, and will place it when you left click (or remove with a right click).
If the preview road is pink, you cannot place a road in that location. If the road goes into an edge hex from a hexside opposite a map edge hexside, the road will also connect to the map edge.
The type of road (paved or unpaved) is set when designing your scenario. And when placing roads, avoid having too many hexsides in a single hex crossed by roads. There is a “square” terrain to be used in such places – it looks much better.
Bridges are only possible on maps with water, and will include a road connection on both ends. They are positioned similarly to roads, where they are rotated in the hex depending on which hex vertex you point at (or using the R and T keys).
For rail placement, there are single track and dual track items. This applies to the various rail pieces as well as the rail bridges. Most track segments can only connect single track segments together or double track segments together. There are four special track sections that will let you transition between single and double tracks.
When placing pieces, you can again set the orientation of the track by selecting the vertex that gives you the track in the orientation you want or using the R and T keys. And while its okay to have roads going up and down hills, tracks should always be placed level – they only can connect to other tracks at the same elevation.
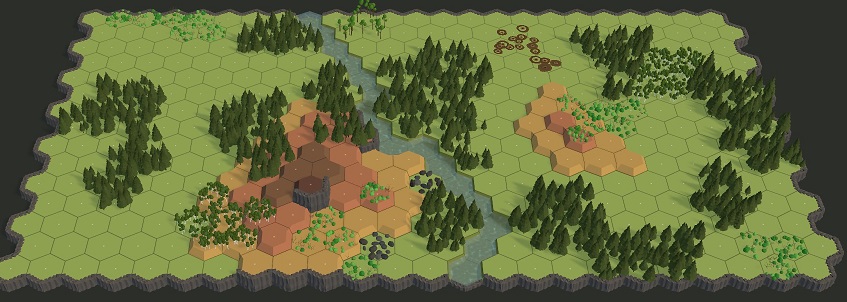
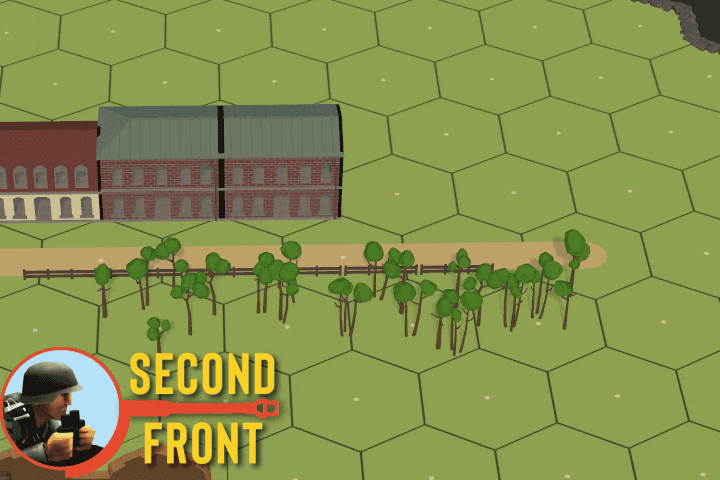
Now we add some roads, a bridge, some paths through the trees and a small stream:
Buildings
Second Front provides many options for buildings. There are both those based on wood and stone construction.
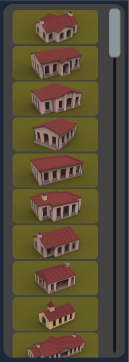
The ones in the left picture are Stone, while those on the right are wooden:
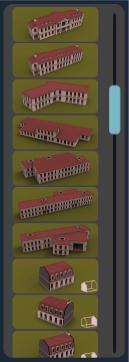
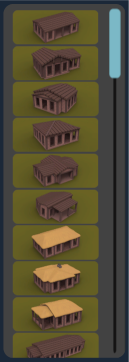
Buildings range in size from single hex structures to large multi-hex structures covering 5 or 6 hexes.
Stone buildings provide better cover than wood buildings do. And bunkers provide even better protection.
Placing buildings involves selecting the building you want from one of the lists, and then pointing at the hex you want it in. Again, you can change the facing by pointing closer to the hex vertices or using the R and T keys. For multi-hex buildings, the building rotates around one hex of the structure, which stays in the hex your mouse pointer is in, while the rest of the building rotates around that hex.
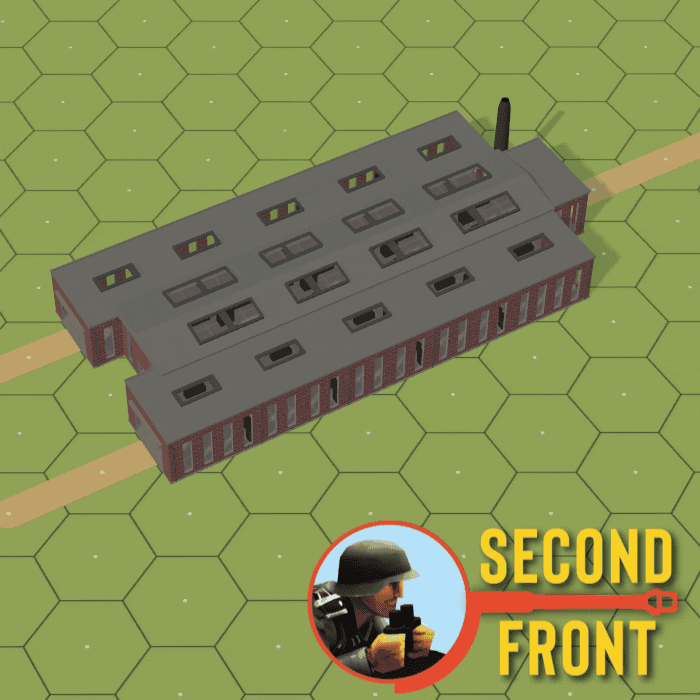
There are some buildings that are put together in pieces – such as row houses, train stations and factories. For these buildings there are small sections that can be placed to form a larger structure. You can see some examples at the bottom of the Stone buildings to the left. The small white diagram indicates if the building part is an end piece (has only 1 white wall) or an internal piece (2 white walls). Always form complete buildings so that no structure is left with a black wall at the end of a building – they must always be internal.
Factories and train stations don’t have the black wall components, but must instead be assembled so that all of the exterior walls are actual walls, not simply open areas. Note that some pieces have vehicle sized doors on them that might look like open walls.
Here are some examples of building a factory or rowhouse:
With building placement, it is better to use a 2-hex (or larger) building instead of placing 2 (or more) one hex buildings side by side. This is because if the buildings are are single hex, players and the AI will have issues with perceiving them as not connected. Also, don’t make huge clusters of buildings – there should be space between rows of buildings. Plan to have them in a pattern of something like building – road – building or have 2 hexes between buildings.
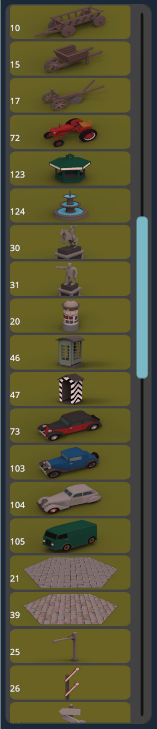
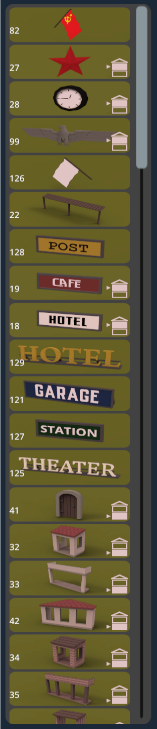
Below are some more examples of the building types included (and this is far from all of them):


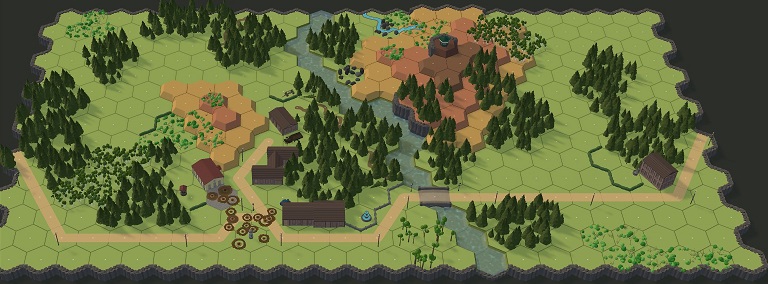
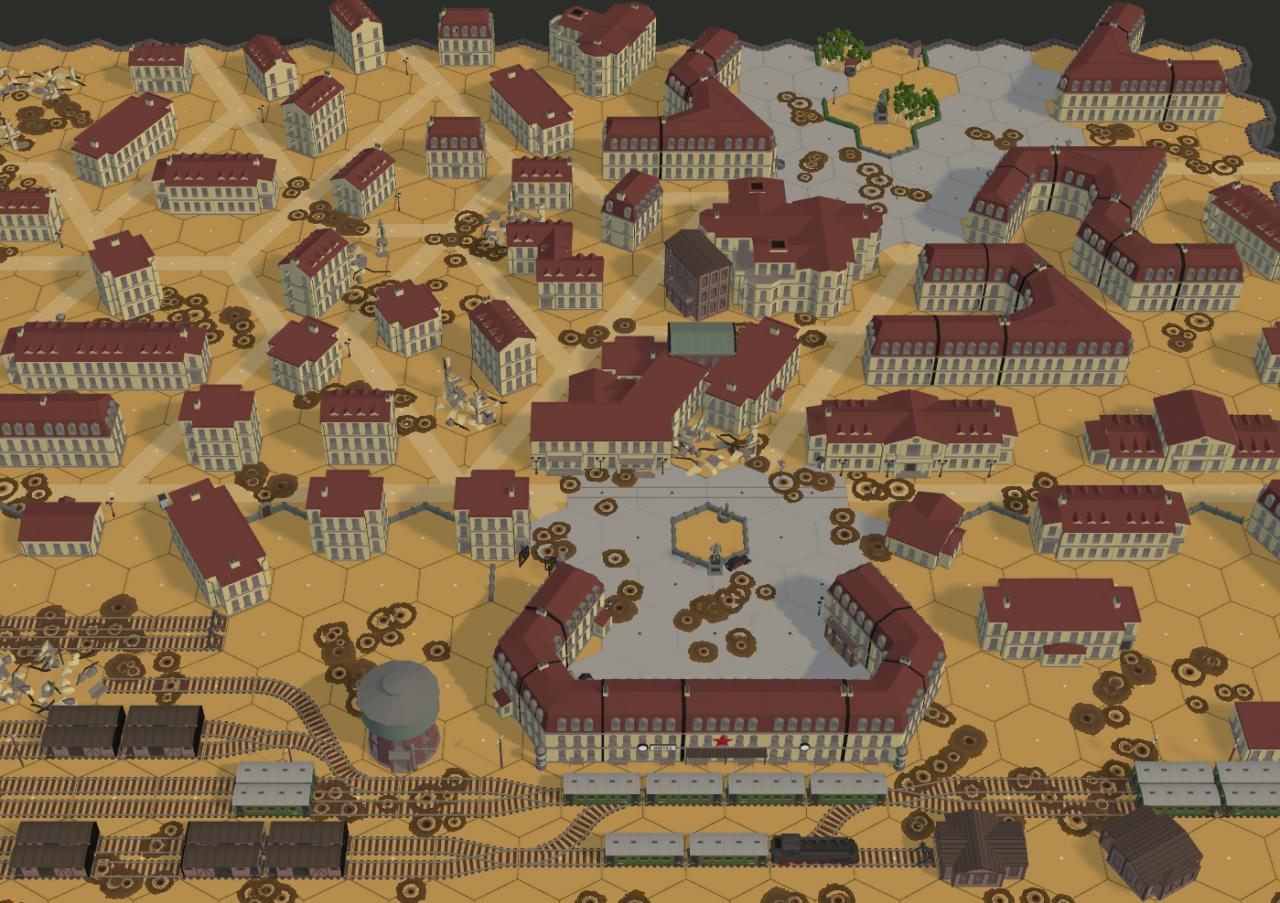
And here is our map (rotated 180 degrees) after adding a few buildings to make it look like a small village:
Walls and Hedges

In the image to the left, from top to bottom they are wall, hedge, cliff and bocage.
Walls are considered piles of stone and provide good coverage against fire. Tracked vehicles can cross them, and infantry can climb over. They will block line of sight that doesn’t start or end in a hex adjacent to them.
Hedges are considered plants forming a divider between areas. They block line of sight like walls, but don’t provide as much cover.
Cliffs don’t provide any protection, and can’t be crossed.
Bocage are large hedges that act like walls except that vehicles can’t cross them.
Next we add some walls and hedges to our map:
Decorations and Facades
The main difference between them is that Facades (examples to the right) are intended to be used on buildings, while decorations (examples to left) are used basically anywhere else.
When placing these items, you can use the R and T keys to rotate the item clockwise (R) or counter-clockwise (T). A left click will place the currently selected item where you are currently pointing. A right click will delete all facades and decorations in a hex.
Facades allow you to alter the appearance of each building to make them look distinct from the others on your map. When you look at the items in the list, you can see some of them also have a small white building in the corner. This indicates the facade is to be placed on a building at that level of floor (ground or 1st floor, second floor or third floor). So an item set for third floor will have its base set up to appear at the floor level of the third floor.
Decorations are all designed to be placed at ground level (whatever the ground level is due to hills and depressions). All decorations and facades affect the appearance only, with the exception of wire (decorations 154 to 161), hedgehogs (153), and hemmbalken (152).
With wire, placing 5 or more wire decorations in a single hex makes the hex function as a wire hex, causing infantry units which enter the hex to be come pinned. Three hedgehogs are needed to make a hex impassable to vehicles. A single hemmbalken will make it so boats can’t enter the hex.
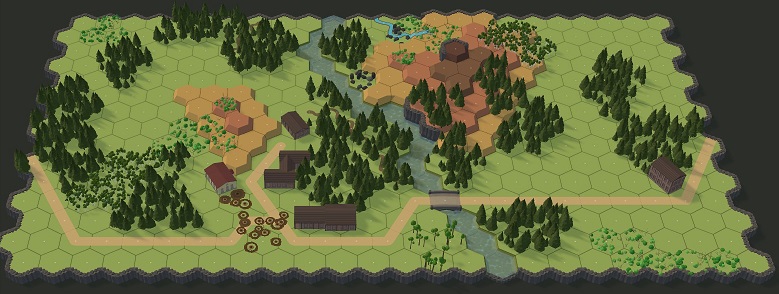
And now we have added some decorations to finish off our map:
Finishing Up Your Map
First, you will want to generate a snap shot of your map to display in the menus when looking at maps. Press “H” and adjust position and zoom of the map so that the area you want a picture of is in the rectangle.
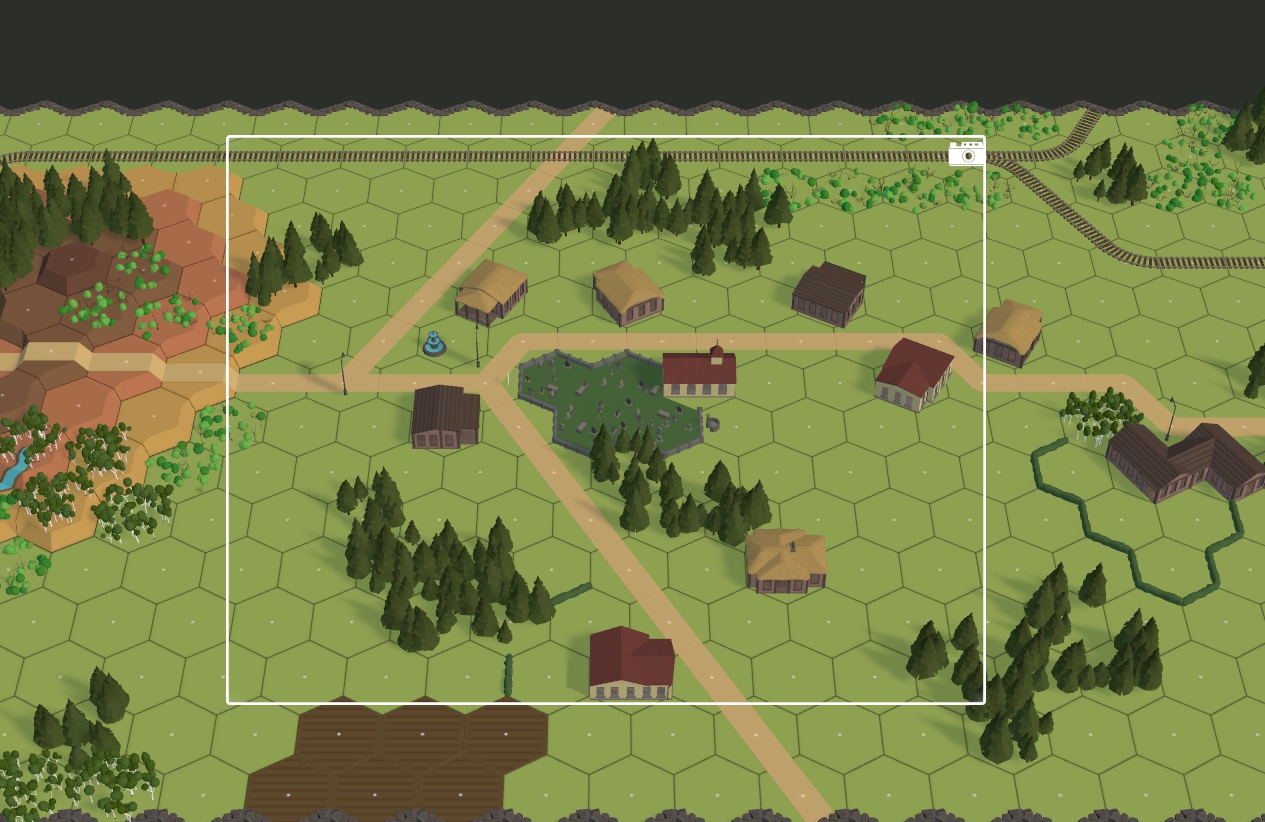
Then press H again, and this will save the image of your map.
At this point, your map editor screen should look something like this:

Notice that “Finalize Map” is currently red. This is to remind you that the map has not been finalized. What is finalization? This is the process where Second Front analyzes the map you have created and calculates the LOS for all hexes in the map and saves this information to be used when playing a scenario on the map. The reason this is done is to make game play run a lot faster.
Clicking on the Finalize Map button will start the calculation process and show a progress dialog as this can take a long time (10 minutes is possible on a large map).
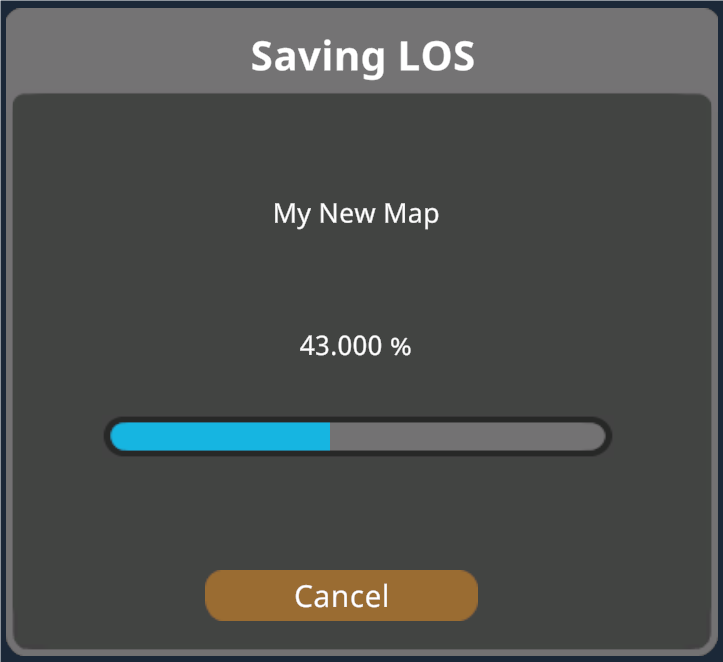
Once this is completed, you can save your map and it is ready to use, and the Finalize Map button will change color.

Your map is now ready to use in making a scenario.
Tips and tricks to get better maps
- Don’t create large, mostly empty maps with huge lines of sight. It may look realistic, but causes a few problems playing the game. Generating the LOS will take a very long time and result in a huge file (250MB+). This file will take a long time to load, and will slow play due to the resources consumed.
Having long LOS also makes it very difficult for the attacker to approach his target, and can lead to player frustration with the situation. Avoid doing this!
- Place terain for broken units to route to. The game mechanics require terrain that a broken unit can route to. This includes terrain like woods, birches, trenches and buildings. Place some of these to allow for routing destinations.
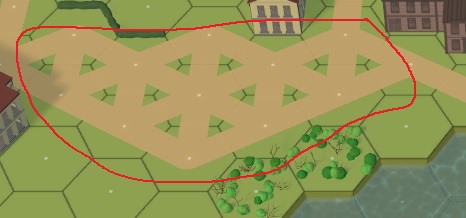
- Design areas for reinforcements to enter the map out of LOS. Keep reinforcement entry locations either out of LOS or out of range of opposing forces. The AI needs some time to get its units ready for the battle. Players will find it frustrating to have their new units eliminated with no chance.
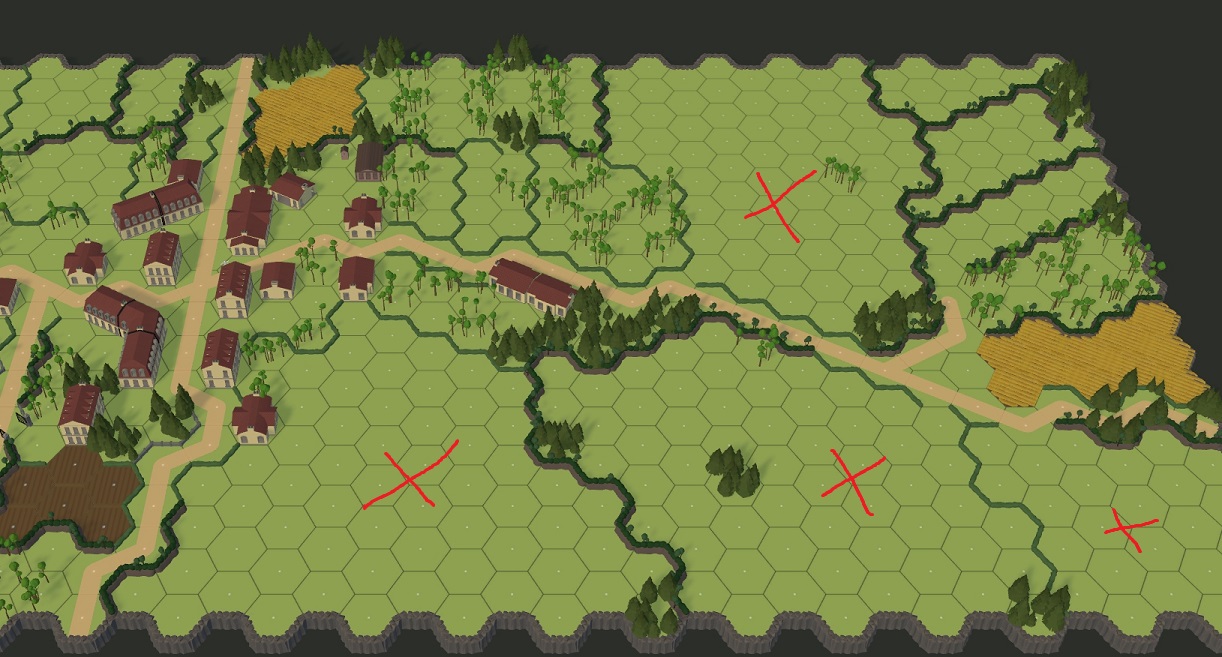
Hide the reinforcement hexes behind some trees or make the map bigger and place them far from the front so that units can safely get on the map. The green circles indicate areas with good coverage. The orange ones are bad unless a long way from where the fighting is at.
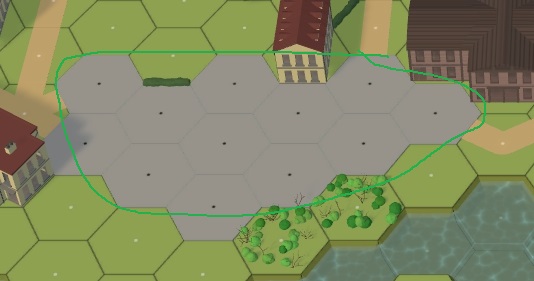
- Minimize placement of buildings (and bridges) next to each other. Avoid placing buildings (other than factory, train station, and row house sections) adjacent to each other. It might look good, but it causes problems for mechanics and players.

For example, players may be left wondering why they can’t move from the upper floor of one building hex to an adjacent upper floor in another building hex. And LOS doesn’t work as expected in these situations as you can’t shoot through the roof – up or down. In the above, the green buildings are much better placement than the red circle.
Ideally, you should have buildings in the pattern of:
Building hex – other or open terrain – Building hex. Similarly with bridges.Note that some terrain that doesn’t look like buildings is treated as a building by the engine, and should be treated the same as buildings when designing your map. This includes anything in the Buildings menu such as Street Cars and Train cars.
- Avoid using many three-level buildings on your map. These buildings can be a bit of a challenge to handle units in. Use mostly two or one story buildings on your maps.
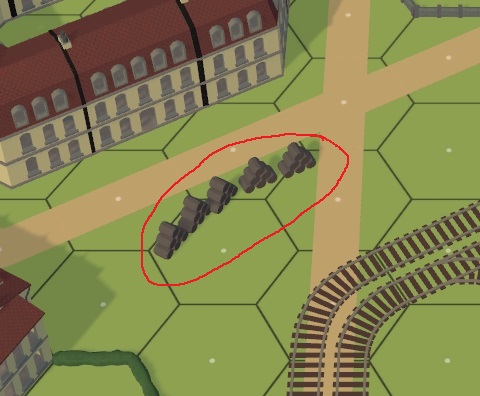
While this map has the buildings spaced out, there are many 3 level buildings making it a challenge to play on. Also, the row houses adjacent to the trains will have problems as the train cars are treated as level 1 buildings.
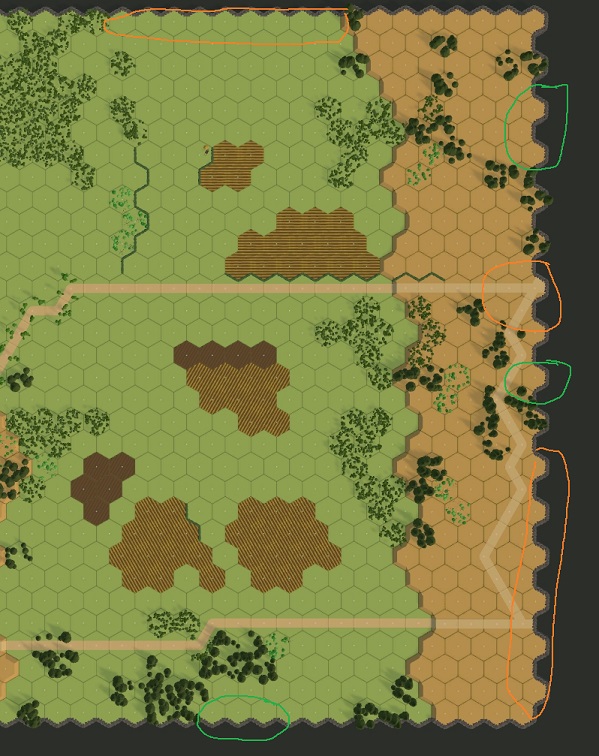
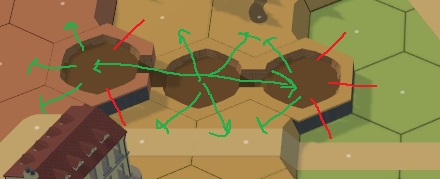
- Don’t make road cluster hexes. Don’t make road clusters where you have hexes with a road on every hex side. Use the “square” terrain in these situations instead – it looks much better. You can also use the square terrain to represent bigger roads.
The top image shows how bad clusters look – you can use square instead as in the bottom picture.
- Be careful with Decoration placement. Don’t place them so that it looks like LOS may be blocked, or that there might be hinderance due to them when they do not actually provide any. For example, placing a row of barrel stacks along a hex side – it may look like they might be a hinderance to LOS, when in reality they have no effect and are just for appearance.
These barrels might make the player think that LOS is blocked, when in reality it is treated as nothing there.
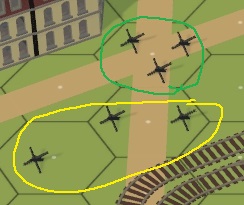
- It takes 5 wire decorations to make them have an effect. When placing wire, remember that it takes 5 or more wire decorations in one hex to be treated as wire terrain. Otherwise it is just for looks and has no effect on anything. The green circle is treated as wire, the yellows as clear.

- Anti-tank devices are effective with three. Hedgehog anti-tank devices require 3 in a hex to be effective at keeping vehicles out of the hex. The green one will block vehicles, the yellow ones will not.
- Anti-ship devices are effective with one. Hemmbalken only need one in a water hex to prevent ships from entering the hex.
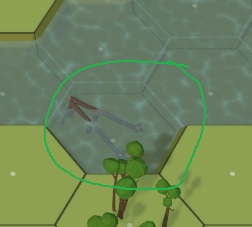
- Trenches have limited access. When placing trenches on hills, be aware that they can only be entered from a same level ground hex, or via other adjacent trench hexes which may be at a different level. The green lines indicate where movement is possible, the red ones are blocked.
- Plan for map re-use. If you want to use your map for more than one scenario, consider saving it under a different name if you need to make terrain changes such as adding trenches or shell holes. Build the base map without these items then save a copy to edit for the specific scenario.
Thanks to Axeking and jo.bader for their excellent guide, all credit to his effort. you can also read the original guide from Steam Community. enjoy the game.