
A guide covering how to set up SGDK for Visual Studio on Windows
0. Introduction
1. Installing SGDK on Windows
The first step is to download the latest release of SGDK, as of the writing the latest release is SGDK 1.60, however if you want to take the master branch for the latest features before they make it to release then feel free.
To get the latest release, click on this link[github.com], and at the bottom of the most recent release, you’ll see a .7z file.
 Download the file and extract it somewhere you’ll remember. In this example I’m gonna be installing it on my F:\ drive in Windows.
Now that it’s been downloaded and extracted somewhere (in my case to F:\Genesis\SDK), we need to setup the environment variables in Windows. We will need to create two new variables, GDK and GDK_WIN. The first step is to open the System Properties window. Just search “environment variables” into Windows search and it’ll open it up.
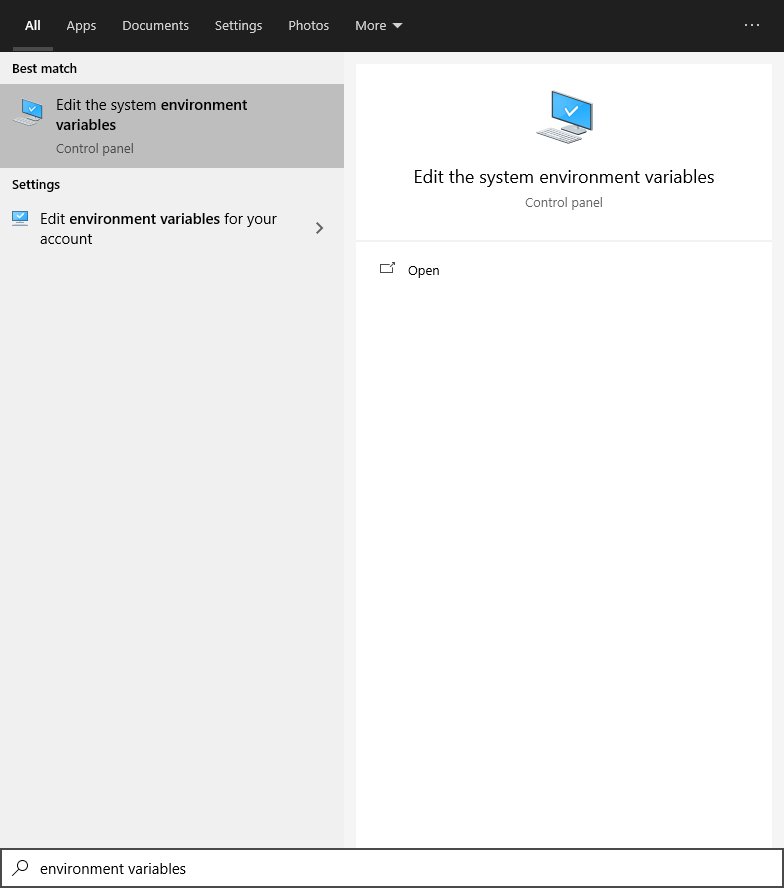 In the window, simply click “Environment Variables…” to open the window. Now you’ll need to make the variables. These variables will be System variables, not User variables. For GDK_WIN, simply copy the path you extracted it to, i.e. F:\Genesis\SDK. As for the GDK variable, this is setup the same way, however the difference is that this needs to be a UNIX path. Luckily, all you need to do to convert it is to replace every backslash ( \ ) with a forward-slash ( / ) like in the screenshot below

That’s it! You’ve now setup the environment for SGDK. Simply restart your PC when prompted to get the environment variables to take effect and you’re ready to move on to the next step.
2. Creating a new Visual Studio project
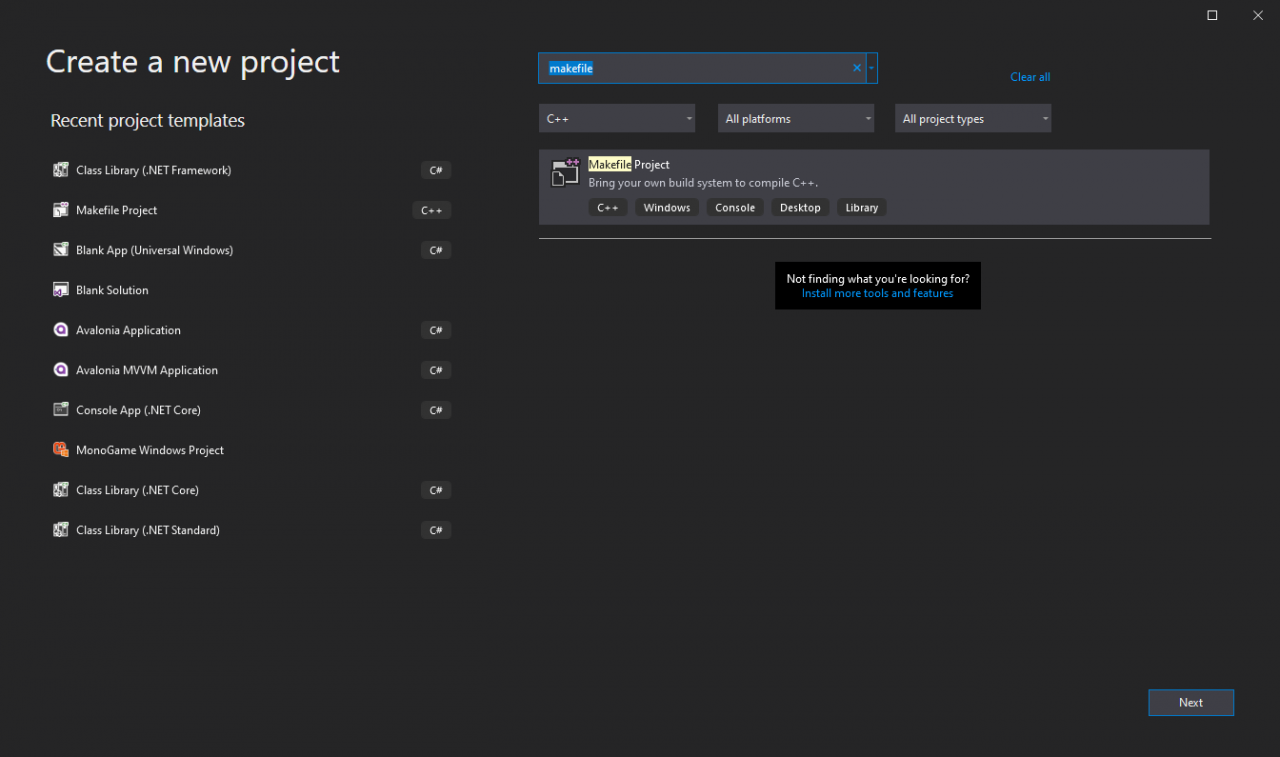
Make sure that your Visual Studio install has Makefile support installed (this can be done through the Visual Studio installer). Open Visual Studio and go to “Create a new project”. In the options, filter down to C++ (I know it sounds weird using C++ projects for C code but trust me on this one). Look/search for Makefile Project, and double-click it to move on to the configuration.
 Give the project a name and location, and create a new solution (if you want, I don’t think it’s necessary), and click Create.
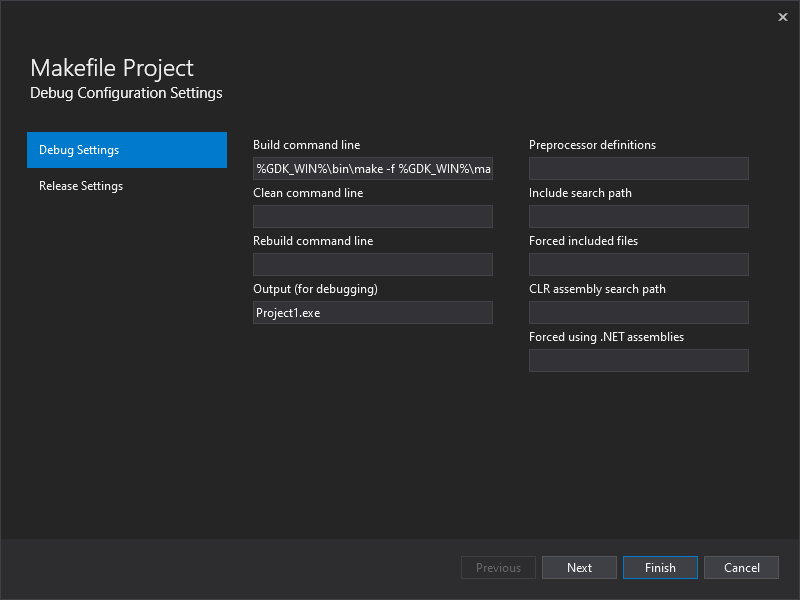
This will open the Makefile Project configuration settings window. In here you’re going to use those environment variables you just set up. Simply set the Build command line to the following line, and then click Next. On the Release Settings tab, check the box saying “Same as debug configuration” and then click Finish.
%GDK_WIN%\bin\make -f %GDK_WIN%\makefile.gen
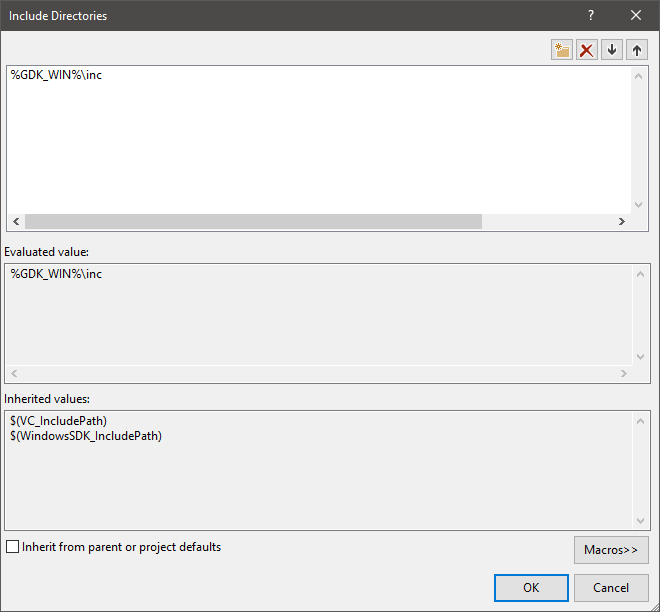
Once the VS Solution is ready, right-click on your Project, and click Properties. In the properties window, navigate to VC++ Directories -> Include Directories -> <Edit…> and add the %GDK_WIN%\inc folder. If this doesn’t work, simply add the full path to the inc folder, however do note that if you’re going to use source control, or use this on multiple PC’s you’ll have to be careful with specifying a path here instead of using the environment variable.
3. A Basic “Hello, World!” to Test
This is the easiest step now. Simply add a new source file “main.c” to your project, and fill it with this.
#include <genesis.h>

int main()
{
    VDP_drawText("Hello, World!", 10, 13);
    return(0);
}
Navigate there and you’ll see a few different files, but the only one you need to care about is rom.bin. Open rom.bin in an emulator, or go through the Steam Workshop tool to test your game. If everything was done correctly, you should see some white text on a black screen saying “Hello, World!”
4. Finishing Words
Well, that’s pretty much everything. Thanks for reading, good luck, and happy coding!