This official guide is intended as an introduction to the basics of making maps with the Stronghold: Warlords Map Editor.
Getting Started
This guide is intended as an introduction to the basics of making maps with the Stronghold Warlords Map Editor. It is worth looking through before you begin creating maps as it will help you avoid common pitfalls people encounter. In particular, the Landscape section contains information that will save a lot of trial and error when testing out your maps.
To open the Stronghold Warlords Map Editor, open your Steam client, click on Library and then Tools from the dropdown list. The map editor will appear in the list there. When you open the editor, click File then New in the dropdown.
You will be prompted to pick a map size. Small is best to start with, as larger maps take exponentially longer to finish.
You can move the camera around by:
- Left clicking and dragging, to “pull” the map in different directions
- Right clicking and dragging, to rotate the camera around the point it’s aiming at on the ground
- Scrolling the mouse wheel, to zoom the camera in and out.

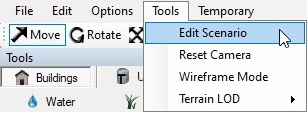
If you ever lose track of where the camera is you can reset its location by selecting Tools, then Reset Camera.
All the different tabs used to shape and edit the map that you see on the left (e.g. Buildings, Texture, Resources) are contained in the overarching Tools tab. Next to it in the bottom left corner of the window is the Objects tab. This is empty at the start, but once you begin to populate the map it will show a list of all the entities in it. This can be helpful when you want to select a particular object without searching through the whole map for it.
On the right edge of the main window there is a collapsed Object Properties tab. This can be ignored most of the time but for some particular objects, such as Sound Emitters, you will need it.
Editing the map or placing any kind of entity in it is done with a left click. With the Units or Buildings tab opened, multiple entities can be selected by Shift + left click (and hold) and dragging the mouse to create a selection box.
Once you’ve started editing a map, you will need to close the map editor and reopen it if you want to work on a different map.
Landscape
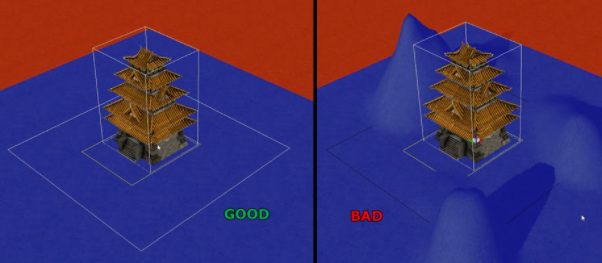
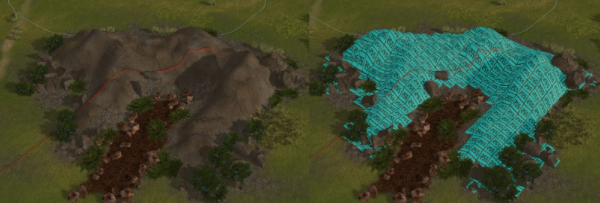
The heights in Stronghold Warlords are based around a “plateau” system of several fixed landscape heights. In Warlords, walls can be placed along slopes allowing them to follow the dips and rises in the landscape. However, range bonuses are still calculated based on how many plateaus up a unit is compared to its target (rounded down to the nearest half plateau). Terrain in playable areas is best kept generally flat because building placement requires almost perfectly flat ground.
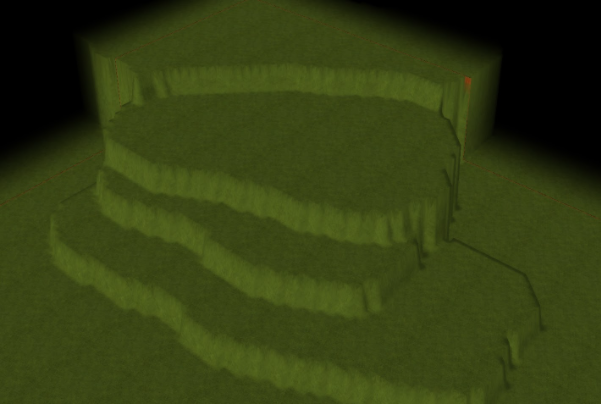
Leaving your map completely flat is absolutely an option, but if you plan to include any raised playable terrain at all then you should use the Plateau tab to mark out the different heights before adding more detail with the Freestyle tab. Plateau heights are painted with a left click, the same way as landscaping freestyle.
Be careful with rivers inside player estates: if your terrain slopes down into a river it may be impossible to completely wall it off. The land below stone, iron and saltpetre deposits should also be kept flat, to ensure buildings can be easily placed atop them.
It’s worthwhile experimenting with the different brushes when it comes to finding a landscape style you like. The Circle brush is very useful with freestyle editing. It helps you get the sharper, more defined edges you’d expect to see on cliffs. Noise brushes help to roughen up rocky areas. Smooth brushes work well for hills and slopes, etc.
Get Started: To help new map makers get started, we’ve included a set of 4 landscapes, which are the base of the official campaign maps, to download via the Steam Workshop. You can subscribe to them all here
Factions
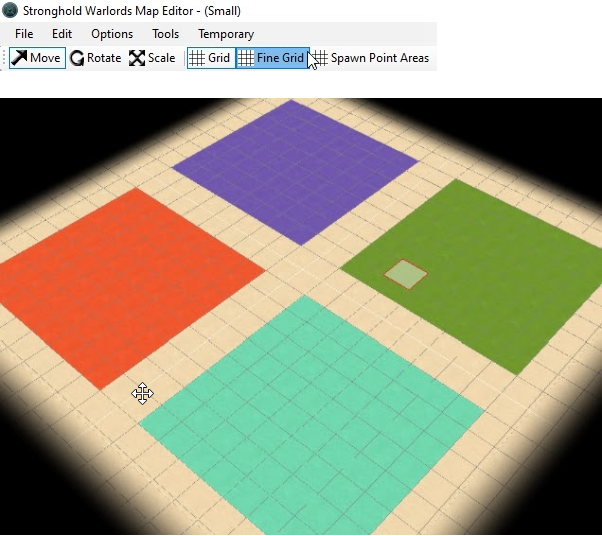
How you draw the estate areas will have a big impact on how the game plays out. Simple shapes work best for player estates. Remember, players will try to build their walls right up the edge and a squiggly estate boundary will be a pain to build walls along. Ideally keep to 90 or 45 degree angles where possible.
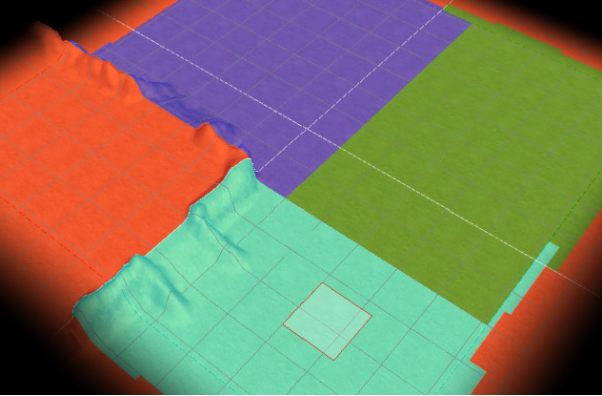
Don’t end estate boundaries just before cliffs – players will get annoyed they can’t build walls up to the cliff!
Note: Be sure to paint estates fully, and not leave small tiles dotted around the map as this can create issues!
Think about how much wall players will have to build to enclose their keep. If you give them a whole corner of the map, they’ll only need to build walls along two sides of it. If they’re connected to the other estates by just one or two small chokepoints, they’ll be able to build up thick layers of wall and it’ll be a very defensive map.
Also consider rectangular estates surrounded by warlords on all sides. This map style forces players to wall off their keep on all four sides (and build something that actually looks like a castle!). It makes defending more challenging but estates can still be large. If your map is balanced, estates should be the same size. Turning on grid or fine grid lines makes it easier to measure them.
Spawn Points
Pathing tiles, changes in height and trees will all block off AI castles. Generally you want as much space around spawn points as possible, as this increases the variety of castles the AI can build there.
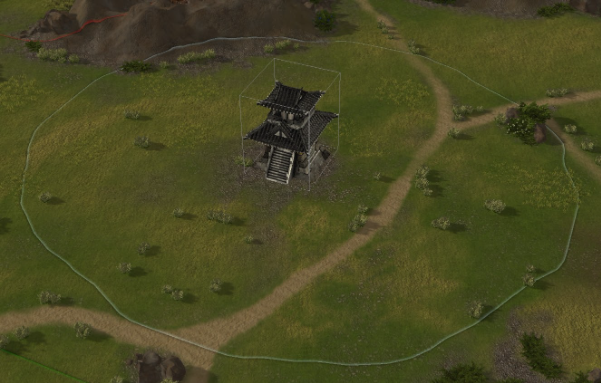
When placing the spawn point make sure that, as with player estates, the box around the Warlord spawn point is white. This will allow the Warlord to upgrade their castle correctly. If the box is black, the Warlord will not be able to build their town correctly.
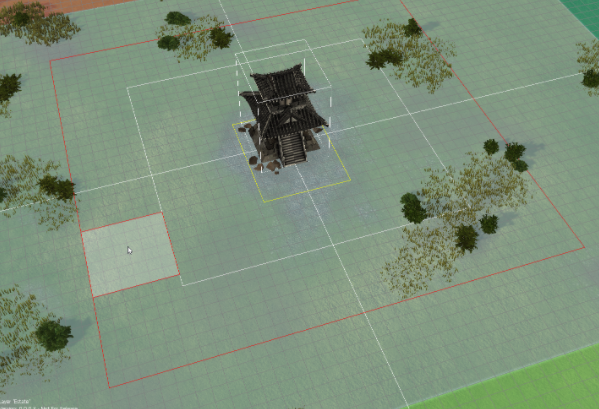
The second red box around Warlord spawn points is used to show the radius needed for Tiger Warlords to place a siege camp using their “Build Siege Camp” edict. All that is required is a 6×6 space between the white and red boxes to be free so that this edict can be used.
If you want to place town buildings for the Warlord (such as houses and work buildings) rather than have the warlord place them automatically, you should uncheck the “Builds Town” checkbox in the Factions tab. This will turn off any town building for that Warlord.
If you want to give the Warlord a pre-built castle, you should place down a warlord keep in their estate instead of a spawn point. However, this will mean that certain edicts, namely Upgrade Castle, will not be available to this Warlord.
If you want Warlords to start with a keep, build their own towns and have upgradable castles, you should make sure the ‘Builds Town’ checkbox is checked, use a spawn point instead of a keep and make sure there are no buildings or other obstacles within the white/black box around the spawn point.
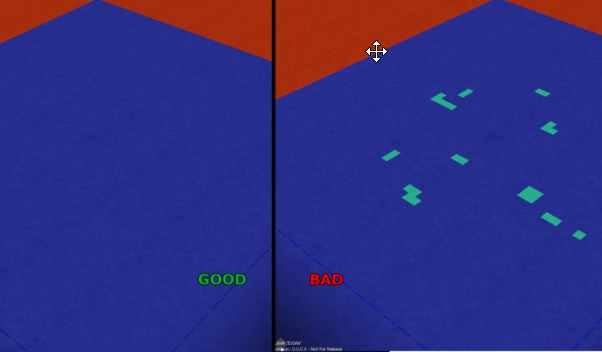
Texture
While painting textures with the grid turned on, you will notice lines dividing the map up into segments. These segments are important to keep in mind while texturing, because you cannot have more than eight textures in a single segment. Any more will not be visible in the final game. You’ll notice when too many textures are in a segment because the smallest type of texture will only appear while you’re painting and vanish once you release the button.
Resources
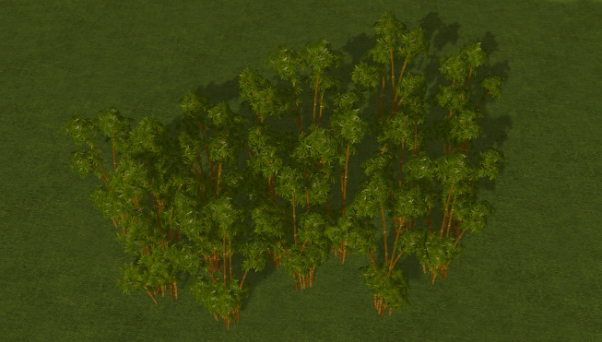
Trees: Bamboo trees are found under the Wood sub tab.
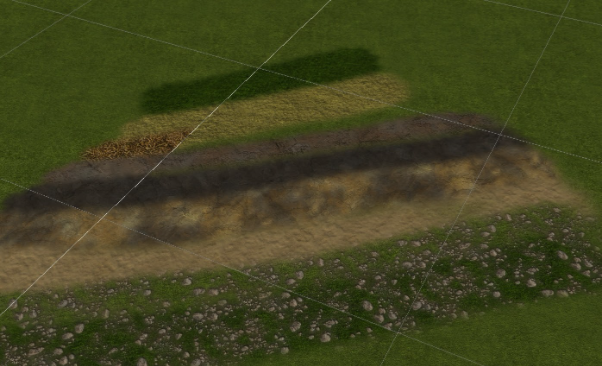
Iron, Stone and Saltpetre: All of these can go just about anywhere. Surrounding them with stone, rock or dirt textures helps give them some context. Always keep the ground underneath them completely flat, otherwise it may be difficult to place mines and quarries on them.
Tip: When saving your map, the save dialog will tell you how much harvestable wood, iron, stone and saltepetre are available in each estate, so you can balance the map without having to count it all yourself!
Water
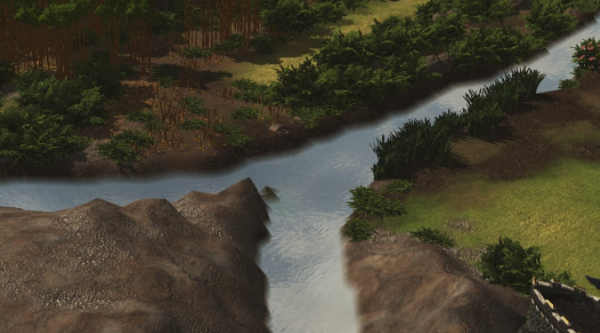
Water is an excellent way to bring colour and a hint of life into your landscapes. Under the Water tab there are sub tabs for Sea, Rivers and Ponds. Ponds and rivers are both painted on to the landscape, while seas cover the whole map at the height you specify.
Be careful when adding water inside player estates. You may make it impossible to enclose walls if the land sloping up from the water is left pathable, resulting in a frustrating experience for the player.
Decoration
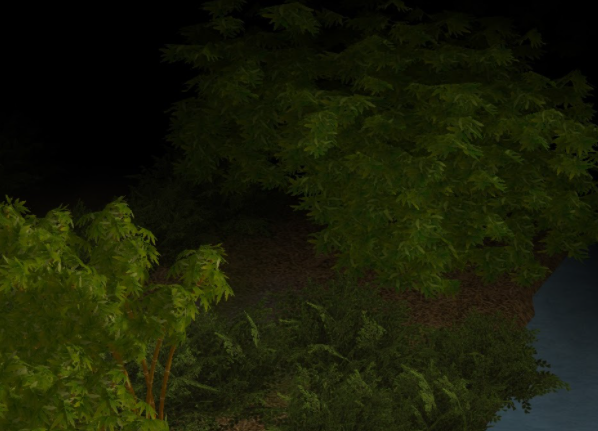
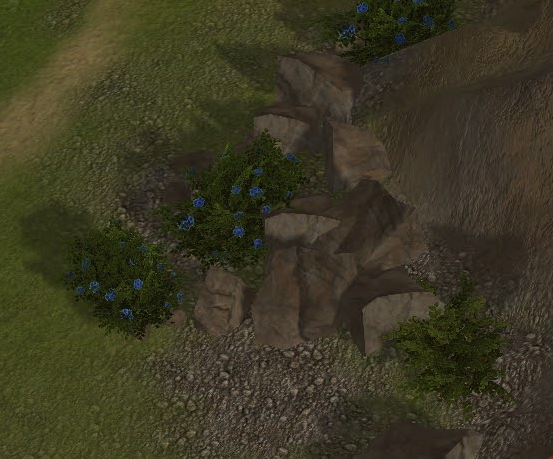
Stones and boulders found under the Rocks tab. Like other decorations they work well in clumps. Beware that just placing them does not give them a pathing footprint. This means if you don’t want buildings placed on them, or units walking through them, you’ll need to manually add pathing tiles underneath them.
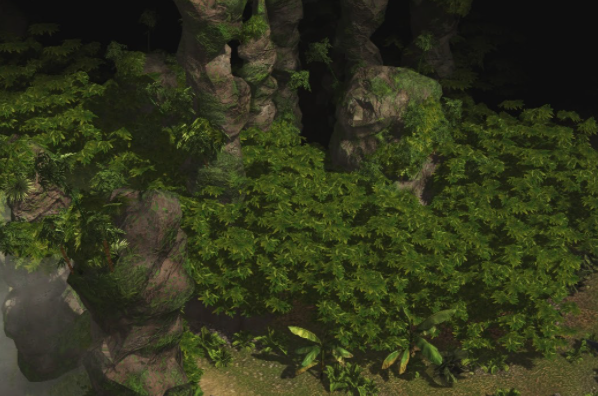
Underneath the main Buildings tab there is an Editor-Only Objects sub tab with a Cliffs category listed. Here you will find a selection of columns inspired by the breathtaking landscape of Zhangjiajie, China.
Units and Buildings
Decorative buildings such as ruins and signs are listed in the Editor-Only Objects sub tab.
Camera Grid
You can also add a starting camera sequence if making a custom mission by adding several nodes for the camera to move between. To add each node click Add Node when the camera is in the desired position and setting a pan duration (from the previous node to that node) and a duration to hold the camera on that position. When the map is played the camera will move through each of the nodes you have added in order.
Scenario Editor
Click on Tools, then Edit Scenario to open the Scenario Editor. Here you can control map type, starting goods, availability of buildings and units, events, mission briefing and warlord settings.
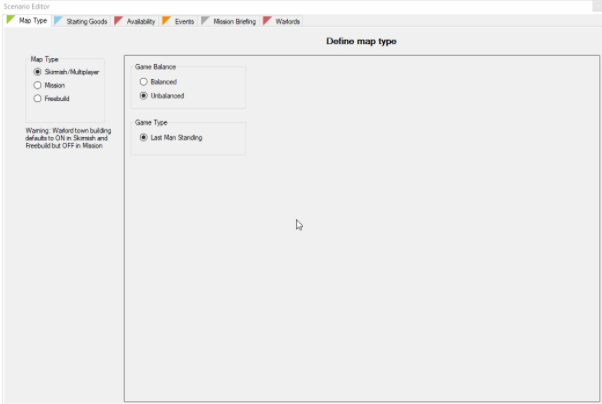
Map Type: Here you can select the kind of map you are building. This will affect where the map appears in the game.
Starting Goods: Specify the amount of resources for the player to start with. These will be overridden in skirmish and multiplayer games.
Availability: Select which units, buildings, tradeable goods and tools are available in the map. These will not be overridden in any game mode.
Events: This is where you can add all of the various triggers and effects that make missions interesting. Click Create New Event to open the event editor. There are boxes both for Conditions and Actions. You can leave the condition box empty to make the action occur in all circumstances on the day specified.
Both sections have long dropdown lists to use in your missions. Some of these use map markers, which you can add separately from the main Markers tab. Note that the Game Event action contains all of the occurrences in the game. These have an effect on the popularity of the estate selected as well as other effects.
Closing the Scenario Editor and Event Editor with the x buttons in the corners will save your changes.
Pathing
The Pathing tab controls all of the pathing tiles that get painted on the map. Painted tiles cannot be walking on by units, nor can buildings be placed on them.
Use the auto generation to make a rough outline of the pathing area, but take a manual pass as well. The tiles generated by height and inclination may cover over slopes you want to be pathable.
As mentioned before, be careful with slopes and cliffs inside player estates. If pathing tiles do not sufficiently cover the edge of a cliff or hill, players may leave gaps at the edge of their wall, thinking they have completed it. Also be sure to cover any large rocks and boulders with pathing tiles.
Sounds
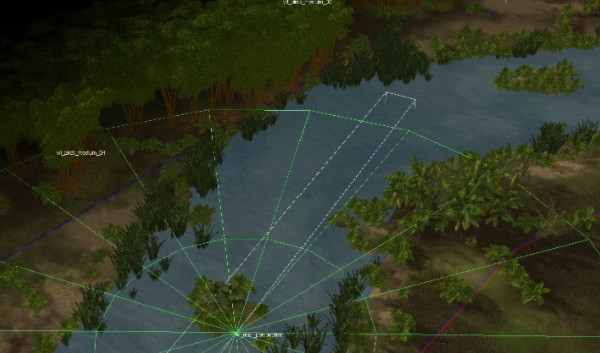
Under the Sounds tab is a list of all the sound effects you can add to your maps. These can be selected and placed in the map like any other object. The volume of each sound emitter at a given distance is represented by the two green circles surrounding it when it is selected. The inner circle is the area inside which the sound is at full volume. The outer circle marks the point at which the sound is no longer audible. Different emitters fade away at different rates as you move the camera away.
By default each sound emitter you place will emit from a single point. To make it emit across a wider area, go to its Object Properties and set Emit from region to True. You will now see a white box around the emitter and the green circles will move as you move the camera. The sound effect will now be heard everywhere that can be covered by the green circles.
You can change the size of the emitter region by editing the x and y Scale values under Object Properties. You can also rotate it using the Rotate tool or with ctrl + mouse wheel.
The emitter radius is 3D, which means the height of the emitter will affect how loud it sounds in game. Generally, river and sea emitters should be placed at the water surface level while wind emitters should be about camera level. Most of the map should be covered with at least one emitter.
Balancing Skirmish Maps
Publishing to Steam Workshop
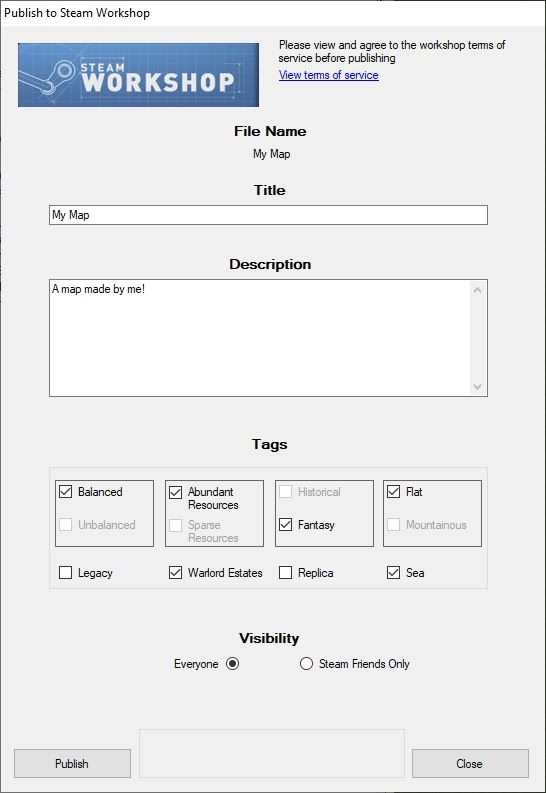
You can share your map with the other players using the Steam Workshop. Once you’re happy with your map, and have saved it (it will always publish the last saved version of the map), click on the Publish to Steam Workshop option in the File menu. This will open the publishing window. Before publishing for the first time, you should view the Workshop terms of service. If these have not been accepted using your Steam account, your items will not be visible to other players.
The next step is to enter a name and description for the map. These will appear to any players looking at your item in the Workshop, and also the title will be used to identify the map in the game itself. Then you should select whichever tags (if any) you feel apply to your map. Players can use these tags when browsing the Workshop to filter the items shown to just those they are interested in. It’s a good idea to just stick to appropriate tags (rather than ticking them all). It should be noted that the size and type of your map (freebuild, mission or skirmish/multiplayer) will automatically be added as tags.
Finally you can set whether the items will be visible to everyone, or just to people on your Steam friends list.
Once you are happy with all of the details of your map, click the Publish button to start the publishing process. This will upload your map to the Steam cloud, and then publish it in the Workshop, which can be accessed either through the Steam client or an internet browser. Once the process is complete, the item’s page will open in a browser window and you can check whether you are happy with it. If you need to change any of the details you entered in the publishing window, you can do this here (or through the Steam client) at any time.
You will be able to use your map using the .shmap file like any other, but if you wish to access it via the Workshop, you can do so by subscribing to it. You can get more information on the Workshop by visiting http://steamcommunity.com/workshop/
Related Posts:
- Stronghold Warlords: How to Fix Black Screen on Startup
- Stronghold Warlords: Shortcut Keys & HotKeys