Thermo Sudoku is a puzzle game published by Studio Goya on Steam. here is a guide to all aspects of settings, menus and gameplay.
Main Menu
Play
- Play the game.
How to Play
- Basic Instructions on how to play the game. This is covered in more depth later in this guide.
Settings
- Change the settings for the game.
Quit
- Quit the game.
Keyboard Shortcuts
- Use “up” and “down” arrows to highlight menu items then press “enter”.
- Press “Esc” while on the main menu to quit the game.
“Play” menu grid
The “play” screen shows a grid of the available sudoku puzzles to play.
To see more of the grid:
- Use middle mouse button to scroll up or down the grid, or,
- Place mouse somewhere in the grid, hold Left Click and drag up or down.
Grid colours.
- Played games that have been solved are coloured according to your chosen colour theme. They are always available to replay.
- Unplayed or half-played games that remain unsolved but are available to play will be Light Grey.
- Games that are currently locked and unavailable will be Dark Grey. They should become available to play as you progress through the game.
Choosing a game.
Click on an available number and a small pop-up will appear showing the following information.
- The level number.
- Difficulty rating shown by number of stars: 1 star (easiest) to 10 stars (most difficult).
- Best time: Once a level is completed, this shows how long it took to play. You can try and beat your time as it should always show the best time it took for you to complete the puzzle.
- “Continue” button (with elapsed time in brackets). This button only appears on games that you have started but not yet completed. Games are autosaved. Click on this button to continue your game.
- “New” Button: Click on this to begin a new game. Nb. If you click this by accident, this will delete any previously autosaved game and show a fresh empty grid – even if you exit the puzzle immediately without inputting anything you will see that the “continue” button has disappeared and you will no longer be able to play your previous save.
- “Cancel” button. Click this to return to the grid.
Stars
- A star appears in the top right of the grid. The top number shows the amount of stars you have earned so far from playing the puzzles. The lower number shows the total number of stars that could possibly be earned in the entire game.
- Stars are earned from completing puzzles, from 1 star (easiest) to 10 stars (most difficult).
- Locked puzzles will remain locked until a certain amount of stars are earned, and then they will unlock and become available for you to play.
Exiting the “Play” grid
- Click the Left Arrow in the top left corner
- Keyboard Shortcut: Press “Esc”
“How to Play” Menu
Rules
- Text giving brief instructions on the aim of the game and how to play.
Tips & Tricks
- Text giving ideas and tips for how to successfully play the game. [Use middle mouse button to scroll up or down, or place mouse somewhere in the text, hold Left Click and drag up or down.]
Tools
- Brief Explanation of the tools available during gameplay and a list of some keyboard shortcuts. [Use middle mouse button to scroll up or down, or place mouse somewhere in the text, hold Left Click and drag up or down.] This guide will cover these tools in more depth in the Playing a Puzzle section.
Back
- back to main menu.
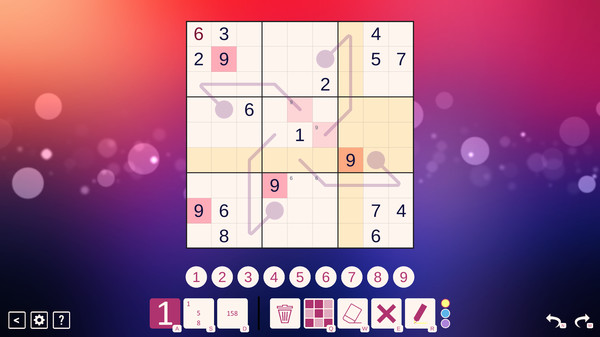
Playing a Puzzle: Tools and shortcuts, Part 1.
Upon entering a puzzle you will see a Sudoku grid with various tools and options, so I shall look at these in this section. Note that changing your Gameplay Settings can drastically change the way some of these tools function and how the game behaves and looks.
Mouse:
- Left Click = Select Cell
- “Shift + Left click” or “Ctrl + Left Click” = Select additional cells anywhere in the grid
- Drag & hold left mouse button = Select multiple cells [but see Settings: Cell Selection when dragging]
Keyboard:
- Arrows = Move position of Selected Cell
Multiple Selection Tool
- Keyboard Shortcut “Q” to select tool.
- Once tool is active, you can select multiple cells at once. Click on any cell to select or deselect it. Once you have chosen all the cells you wish to add to your selection, then choose another tool to add numbers, colours etc. to your selected cells [This tool cannot be selected if you are using Setting: Control Method: Tool]
Number Entry Tool:
- Keyboard Shortcut “A” to select tool.
- Select this tool to add a large number to a single cell
- While this tool is selected, pressing “Ctrl + Number” or “Shift + Number” will add a note (either Corner or Centre depending on Setting: Default Note Style)
- When multiple cells are selected, inputting a number will automatically add notes to each cell (based on your chosen settings).
Corner Note Entry Tool
- Keyboard Shortcut “S”
- This adds/removes a number as a Corner Note to all selected cells (or changes the note style of all selected cells).
Centre Note Entry Tool
- Keyboard Shortcut “D” to select tool.
- This adds/removes a number as a Centre Note to all selected cells (or changes the note style of all selected cells).
Toggle Number Tools
- Keyboard Shortcut “Space” toggles between the three tools in order.
Number Row
- You can click on the numbers that are situated in the row of numbers (situated directly below the grid) to input numbers and notes.
- Your selected number will be highlighted Black when using Setting: Control Method: Tool.
- Numbers can sometimes fade to grey once all nine instances of a number are in the correct place (when using Setting: Highlight Errors: All Errors)
Keyboard
- You can input numbers using the keyboard.
- Keyboard Shortcut “Z” will add/remove a “19” Centre Note in all selected cells [introduced for the Sandwich Sudoku app, but not so helpful for regular Sudoku.]
Playing a Puzzle: Tools and shortcuts, Part 2.
X Tool
- Keyboard Shortcut “E” to select tool.
- Keyboard Shortcut “X” will add/remove an “x” to/from all selected cells
Highlighter Tool
- Keyboard Shortcut “R” to select tool.
- Keyboard Shortcut “C” will add/remove a colour highlight to all selected cells
- Clicking on tool may toggle through colours, or you may have to select the colour by clicking on the small colour icon (depending on which Setting: Control Method you have chosen to use)
Trash Tool (Bin)
Clicking on the trash tool will open a box with further options:
- 1. Trashing Notes will remove all Corner and Centre Notes in the entire grid.
- 2. Trashing the Highlight Pen will remove all Highlight Colours in the entire grid.
- 3. Trashing the X will remove all Xs in the entire grid.
- 4. Trashing the Trash Bin will remove everything you have done, effectively starting the game again (but your timer will not reset to zero)
Eraser
- Keyboard Shortcut “W” selects this tool, which erases numbers and notes
- Mouse Right Click will also erase numbers and notes from a cell
- “Delete” key will also erase numbers and notes from all selected cells
Undo
- You can undo multiple moves
- Keyboard shortcut “N” or “Backspace”
- Mouse: click on arrow facing Left [Lower right corner of screen]
Redo
- You can redo multiple moves if you pressed undo too many times
- Keyboard shortcut “M”
- Mouse: Click on arrow facing Right [Lower right corner of screen]
Exit Game
- Click on arrow “<” (bottom left of screen)
- Press “Esc” (Games should be autosaved)
Enter Settings
- Click on Cog wheel (bottom left of screen)
- Ensure you click on BACK to return to the game.
Hint System
- Click on Question Mark “?” (bottom left of screen) and you will be given hints for how to solve the current puzzle.
“Settings” Menu
Video
- Change Screen Resolution
- Toggle between Fullscreen and Windowed.
Themes
- Change colour settings of game.
Gameplay
- Change gameplay settings [This will be covered in more depth later in this guide]
Back
- Back to main menu (or back to the puzzle you were playing if settings were accessed from a puzzle)
NB. Keyboard shortcut “Esc” will always take you back to the Main Menu. If you accessed the settings menu from a puzzle, Esc will NOT return you to the puzzle.
Gameplay Settings (Page 1)
These settings can entirely change your experience within the game, so it is worth tweaking them and trying them out to see what suits you best.
Selection Default
- First, select the cell that you want to work with (so it turns dark grey), then input a Number, Note, X, or Highlight Colour by clicking on the appropriate tool (or shortcut key).
- Choose highlight colours by clicking on the appropriate colour.
Tool
- First, select the tool that you want to work with (Number, Note, Eraser, X, or Highlight Colour) by clicking on the appropriate tool (or shortcut key). Remember also to choose a specific number from the number list above the tools.
- Whichever cell you click on will automatically be filled based on the tool you have chosen.
- The Multiple Selection Tool is disabled, as clicking and dragging the mouse across multiple cells will automatically add notes, numbers etc. to any cells that the cursor touches.
- Highlight colours can be cycled through by clicking on the Highlight Colour tool multiple times.
Classic
- A hybrid of the two Control Methods listed above.
- For inputting Numbers and notes: Select the Cell first, and then input the number.
- For using the Eraser, X and Highlight Colour Tools: Select the Tool first, then choose a cell where the tool will be used.
- Highlight colours can be cycled through by clicking on the Highlight Colour tool multiple times.
Display Timer
On Default
- A timer appears in the top right corner of the screen showing the time taken to solve the puzzle.
Off
- The timer is not shown, but the time taken to solve a puzzle will still be recorded in the background and your best time will be shown in the play menu screen when you click on a puzzle.
Always Default
- When selecting a single cell (dark grey), any cells that see that cell (dark grey) within its column, row or 9×9 box will automatically be highlighted (light grey).
- When selecting multiple cells (dark grey), any cells that see both or all those cells (dark grey) will be highlighted (light grey).
Single Selection Only
- When selecting a single cell (dark grey), any cells that see that cell (dark grey) within its column, row or 9×9 box will automatically be highlighted (light grey).
Off
- Turns this option off
Filled Cells and notes Default
- Click on any cell that contains a filled large Number, and all cells that contain that same filled Number will be temporarily highlighted as Dark Grey. Any cells that contain Corner Notes or Centre Notes that share that number will also be highlighted with a dark grey colour.
- NB if you have “Highlight Restricted Cells” turned on in settings, then any matching numbers within restricted cells will be highlighted light grey as per Restricted Cell settings.
Filled Cells Only
- Click on any cell that contains a filled large Number, and all cells that contain that same filled number will be temporarily highlighted as Dark Grey.
Off
- Turns this option off
Select Multiple Cells Default
- When clicking and dragging the mouse, all cells that are pointed to by the mouse will be selected and turn dark grey. (Useful for inputting notes in multiple cells at a time). NB. Cells that contain Large completed Numbers can safely be highlighted as they will not be affected when inputting notes to the other cells.
Select First Cell Only
- When clicking and dragging the mouse, the highlighted cell (dark grey) will always be the first cell that the mouse pointed to. Dragging the mouse will not highlight any other cells. [NB. When this option is selected, it is still be possible to select multiple cells but only by using the Multiple Selection Tool].
Select Last Cell Only
- When clicking and dragging the mouse, the selected cell (dark grey) will always be the final cell (or current cell) that the mouse is pointing to (until you let go of the mouse button). So you can highlight one cell (dark grey) then drag the mouse around to highlight other cells (as dark grey), but only ONE cell will be selected (as dark grey) at a time.
Fill Cell Default
- Choose the Number Entry Tool, choose any cell, and add a Number. The Number will automatically be filled into that cell, no matter what notes are in the cell.
Remove the Note
- Choose the Number Entry Tool, choose a cell that contains Corner Notes or Centre Notes, and try adding a Number that is already noted. The note will disappear. Press again to fill the Number into the grid. [For example, a cell may contain the corner notes 135. Pressing 1 will remove the 1 note so the cell now shows 35. Pressing 1 again will now fill that large Number into the cell]. Pressing the number will always remove the note on the first press and only add the main large number on the second press.
Fill Cell If Last Note
- As above (see Remove the Note), but if there is only one note left in the cell (let’s say a 9 corner note), then inputting 9 will automatically change it to a large number without having to press twice to remove the note and then input the main number.
All Errors Default
- All wrong Numbers will be highlighted Red. For example if a cell should contain the Number 6 in its intended solution, then inputting any other Number into that cell will result in that cell turning Red. NB. This does not apply to small notes, but only large finished Numbers
- Once all nine instances of a certain number have been correctly placed in the grid, the number will turn grey in the number row (situated above the tools and below the grid) to show that the number no longer needs to be placed anywhere.
Duplicates Only
- Duplicate numbers in a row, column, or 9×9 box will be highlighted Red. For example, if you have two Number 8s in the same column then both 8s will be highlighted Red until you remove one of them.
Off
- Turns this option off
Noted and empty cells only Default
- Light grey “X”s can only be placed in cells that contain Corner Notes, Centre Notes, or are Empty.
Empty Cells only
- Light grey “X”s can only be placed in cells that are Empty.
Always
- Light grey “X”s can be placed in any cell, whether they contain Numbers, Corner Notes, Centre Notes, or are Empty.
Gameplay Settings (Page 2)
High Quality Default
- Best performance.
Battery Saver
- Lower performance to save laptop battery.
Single Notation Default
- Each cell can only contain EITHER Corner Notes OR Centre Notes. The style of notes will switch automatically depending on what you choose to add. For example, if you attempt to add a Corner Note to a cell (that currently contains only Centre Notes) then ALL the notes in that cell will change to Corner Notes. Likewise if a cell contains only Corner Notes, you can switch all the numbers to Centre Notes by adding a centre note.
Double Notation
- A cell can contain BOTH Corner Notes AND Centre Notes.
Corner Default
- it is not possible to put large completed Numbers into multiple cells at once. If multiple cells are selected (dark grey) with the Number Entry Tool selected, then inputting any number will add (or remove) Corner Notes into those chosen cells.
- Shift+number will add corner notes / Ctrl+number will add centre notes. Ensure double notation is switched on if you want both at the same time.
Centre
- If multiple cells are selected (dark grey) with the Number Entry Tool selected, then inputting any number will add (or remove) Centre Notes into those chosen cells.
- Shift+number will add centre notes / Ctrl+number will add corner notes. Ensure double notation is switched on if you want both at the same time.
- NB. When dragging across multiple cells, any cells that already contain a large Number will not be affected in any way; only unfinished cells will receive the notes.
Standard Default
- The Corner Notes and Centre Notes will be the standard small size.
Large
- Corner Notes and Centre Notes will be significantly larger.
Nb: Adding too many Centre Notes to a cell will cause all notes within that cell to automatically shrink so that they always fit within the cell; deleting any of those numbers within a cell will cause the remaining notes to expand again either to Standard or Large size depending on the option you have chosen.
On Default
- When you input a large Number into a cell, then Corner and Centre notes that match that number will automatically be removed from that Number’s column, row or 9×9 box.
- NB. If you accidentally input a wrong large Number somewhere in the grid, then you may also find that some of your small notes have disappeared too! Instead of deleting the wrong number, then trying to work out what notes may have disappeared, you can simply undo the previous move which will restore deleted notes and remove the wrongly input Number. You can undo a move by using “Backspace” or Shortcut key “N”.
Off
- Turns this option off
Click on the word “Default” to revert all settings to their defaults.
Reset entire game
WARNING: This will delete all saved puzzles and reset the game entirely.
There should, in theory, be no way to accidentally delete your data from within the game itself, however if for any reason you wanted to reset the entire game…
Windows:
You can find and delete the save data at
C:\Users\[USER]\AppData\LocalLow\Studio Goya\Thermo Sudoku
Just delete thermoSaveData.txt to start fresh.
Make sure game is closed when you do this
Nb. Trying to perform a reset by changing values within the text file might crash the game, so simply delete the file to reset and a new text file will be created when you restart the game.
Sorry, I don’t have info for other operating systems, but you may be able to search for a similar file on your system.