This guide will show you how to use Energy Exchangers for balancing your local power network, despite not being optimally designed for that.
And, following that guide, you will understand exactly how it works and why it works, and you learn something about the game.
Introduction
Please use the Table of Contents to find the information necessary for you.
The problem
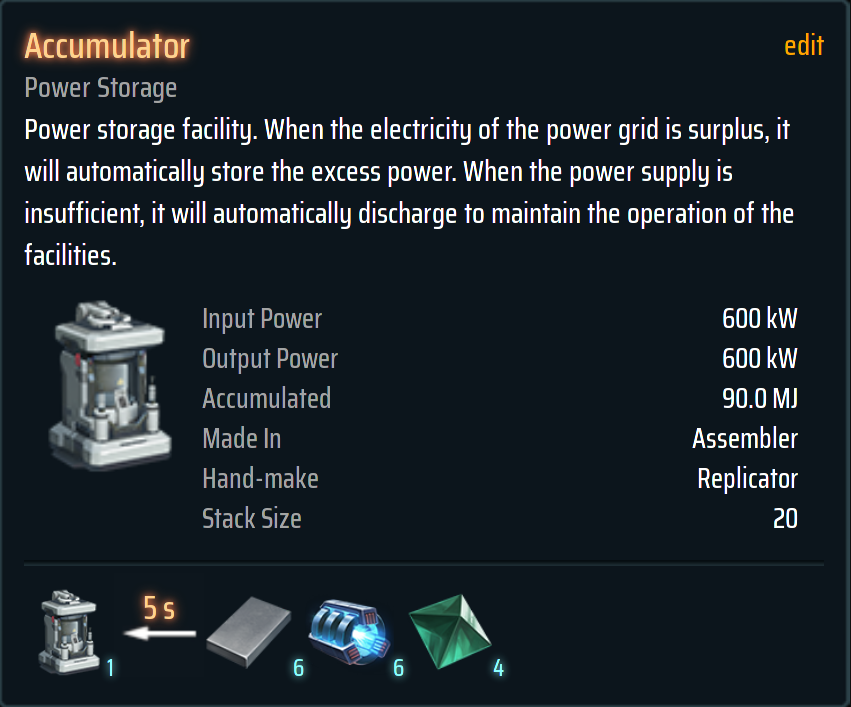 The game has buildings called Accumulators.
When fully charged, they contain 90MJ energy. When you build it as a regular building, it can release those 90MJ in 54 seconds with a rate of 600kW. When there is surplus energy, an empty accumulator can charge within 54 seconds with 600kW until full.
The developer’s idea is that you build a huge farm of accumulator buildings if you want to use them for stabilizing your power network, for example, if you have a strong difference between day and night.
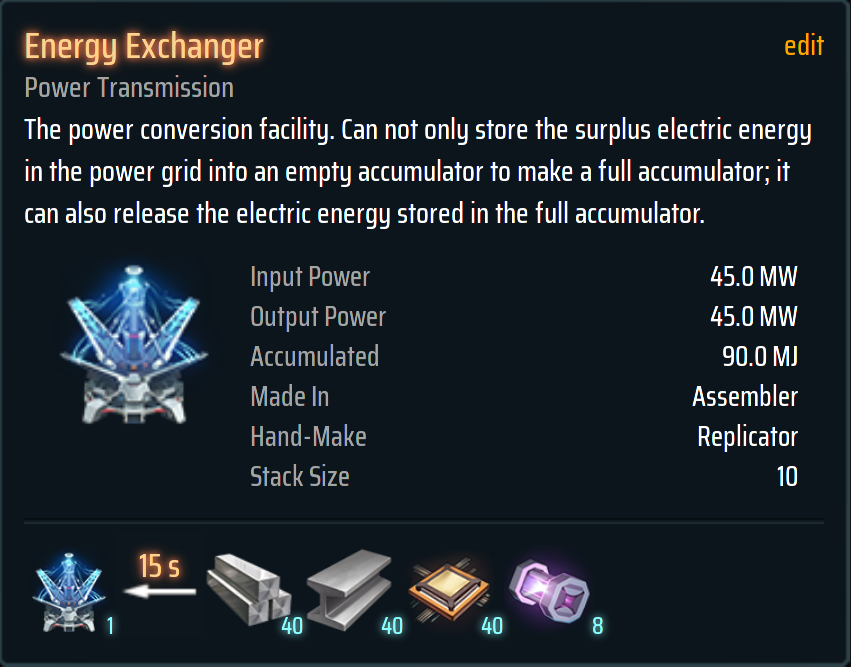 And then there are the Energy Exchangers. They are a separate building, which can use Accumulators in their item state (when not built). It is a bit unintuitive, but great.
But Energy Exchangers are different. If you put an Energy Exchanger into Charge mode, and insert empty Accumulators, they charge up to 45MW, depending on the available energy in your network, thus, ideally only taking 2 seconds, but possibly more. But they discharge differently: if you put the Energy Exchanger into Discharge mode, and insert full Accumulators, they do not discharge only in the rate of necessary energy – they discharge completely, and at the full rate of 45MW.
Accumulators as buildings are used for network balancing. They charge only with surplus energy, and discharge only as much as necessary to fit the demand.
Energy Exchangers are meant to be facilities to charge shipable batteries for transport to other planets or stars. They charge only with surplus energy, but discharge fully, behaving like a regular power generation source.
The question
The answer is of course:
It is just not immediately visible how, as the developers didn’t want you to use them this way.
(If the answer were no, there’d be no reason for this guide anyway!)
How it works (Preliminary Basics)
The naive attempt would be hooking two Energy Exchangers together, one in Charge mode, one in Discharge mode, like this:
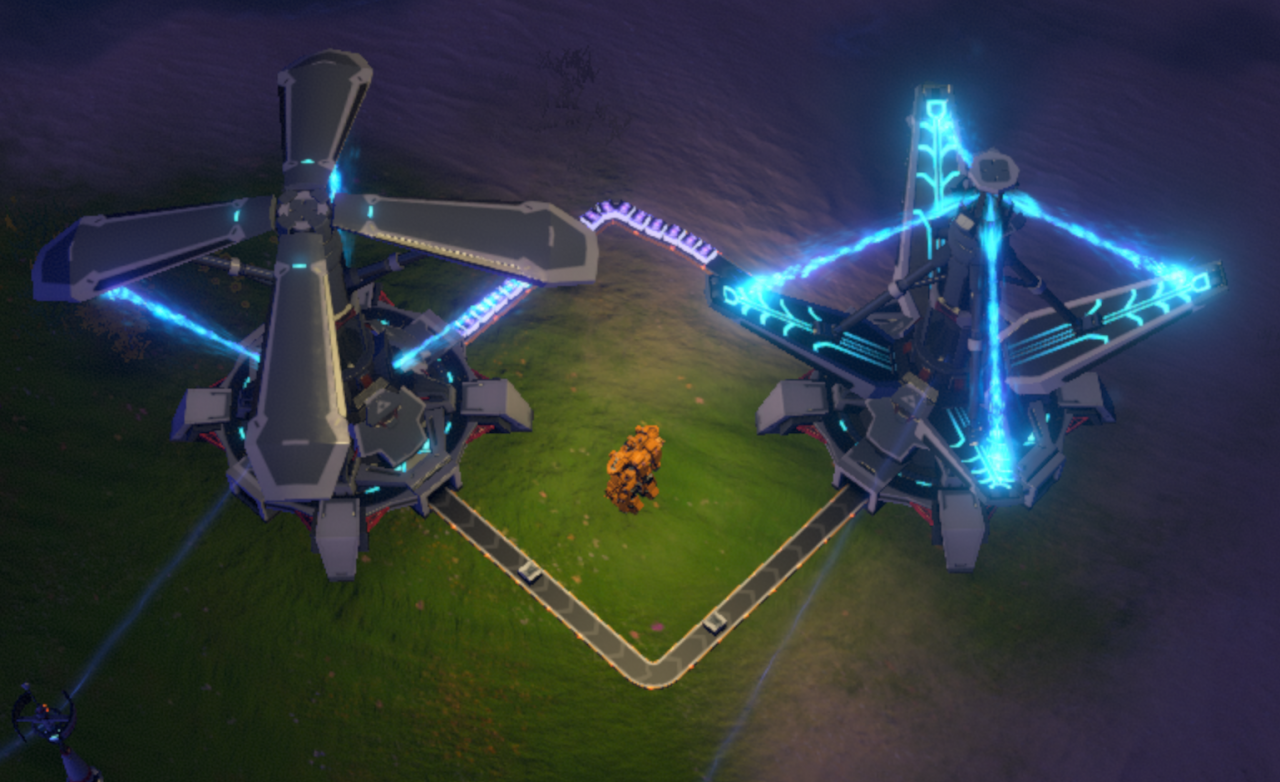
If your available power levels are lower than the demand, you’ll see that your charge rate is lower than your discharge rate, which is in fact a low cost network balancing. The difference between discharge and charge rate is about the same as the difference between power generation capacity and demand.
The problem is, that this way, while in bad times, your network is being helped by discharging accumulators, in good times, the charge and discharge ratio is equal. This means, you will run out of full accumulators over time. And that’s not what we want from network balancing.
The second naive attempt would be: ok, well, then let’s hook up *two* chargers for one discharger. This way, in good times, more accumulators get charged than discharged.
But this is also problematic: over time we will end up with all accumulators charged, and running out of empty accumulators, which isn’t bad in itself, but that means accumulators are discharging uselessly while no empty accumulator is charging.
That’s why we need to find a more sophisticated way than just hooking Energy Exchangers together.
The whole energy network is homogenious. When there is energy shortage (meaning demand surpasses generation capacity plus eventual accumulators discharge capacity), all buildings demanding energy get the same percentage of energy. If your network needs 50MW energy, but your generation capacity is only 40MW, you are 10MW short, which is 20% of your demand, and you are only meeting 80% of your demand. That means, all buildings work at 80% energy/capacity. For most (if not all?) buildings this simply means, they are working at reduced speed, and the less demand is met, the slower the building works.
Energy shortage also means, wireless towers are charging the Mecha at a slower speed.
However, there are also a few things which are not affected by energy shortage.
Your Mecha is not affected by Energy shortage in your network, as it has it’s own power system. Most importantly, belts are not affected. The transmission range of towers is not affected. The working speed of splitters is also not affected. Generation capacity of electrical plants is not affected, but Mining equipment works slower, and the loading capacity for fuel into the electrical plant is affected, as sorters work slower. That means, having not enough energy to mine fuel might starve your electrical generation further, creating a cascade effect.
Splitters are nice buildings, and absolutely important for efficient layout of distribution networks. The basic property of Splitters is having 4 ports, which you can hook up incoming and outgoing ports to as you like (of course you’ll need at least one incoming and one outgoing), and the Splitter will distribute incoming items evenly to outgoing ports. Additionally to that, Splitters can have maximum one priority output port, and one priority input port. Priority input means, as long as that port has items incoming, they are taken from this port, otherwise from other input ports, and if no input port has any items, the splitter runs idle. Priority output means, as long as that port is free, items are sent out this port, otherwise through other output ports, and if no output ports are free, the belts are stuck. Priority output can have another property: a filter for one item type. If the filter is set, the Splitter behaviour changes: only this item type is put into this output port, and this item type will never come out of the other output ports. This leads to stuck belt if for example the next item in the Splitter is the filtered item, but the filter port is blocked, regardless of the state of the other output ports.
Conveyor belts follow a simple pattern. It is important to understand the rules.
A belt can only have 1 output, but multiple inputs.
A belt with one input is easy.
A belt with two inputs will behave differently depending on the input location of the inputs. If one input of the belt goes straight to the output, the other input becomes lower priority – items from the non-straight belt input are only put into the output when there is no item from the straight belt input. If both inputs are not straight, the items are merged from both inputs.
A belt with three inputs will have priority on the straight belt, while using alternating inputs when the straight belt is empty.
The most important belt merge to remember is the two inputs belt with one straight input, giving priority to one of them.
Two very important things to learn are Belt speeds and sorter speeds.
Belts come in three variants with different speeds – 6 items/s, 12 items/s and 30 items/s. Belts hold one item per grid.
Sorters also come in three variants – 1.5 items/s/grid, 3 items/s/grid and 6 items/s/grid – which basically means, the further away they have to go, the longer it takes.
The math is very easy. To saturate a belt, you need to add sorters adding up to at least the same number. For example, to saturate a 6 items/s belt, you need to use 1 Mk3 sorter on range 1, or 4 Mk1 sorters on range 1, or 4 Mk2 sorters on range 2.
The solution
Basically, what we need, is a regulatory circuit. We need to create a self-regulating system.
Simple self-regulating systems use the resource they produce for regulation. We are doing the same, we regulate using energy.
Remember what is affected from energy shortage, and what is not. Belt speeds are not affected by energy shortage, Sorter speeds are affected. The less energy demand is met, the more regulation is necessary, and the more energy becomes available due to regulation, the system gets inhibited again. Once there is enough energy available from outside, the system stabilizes itself.
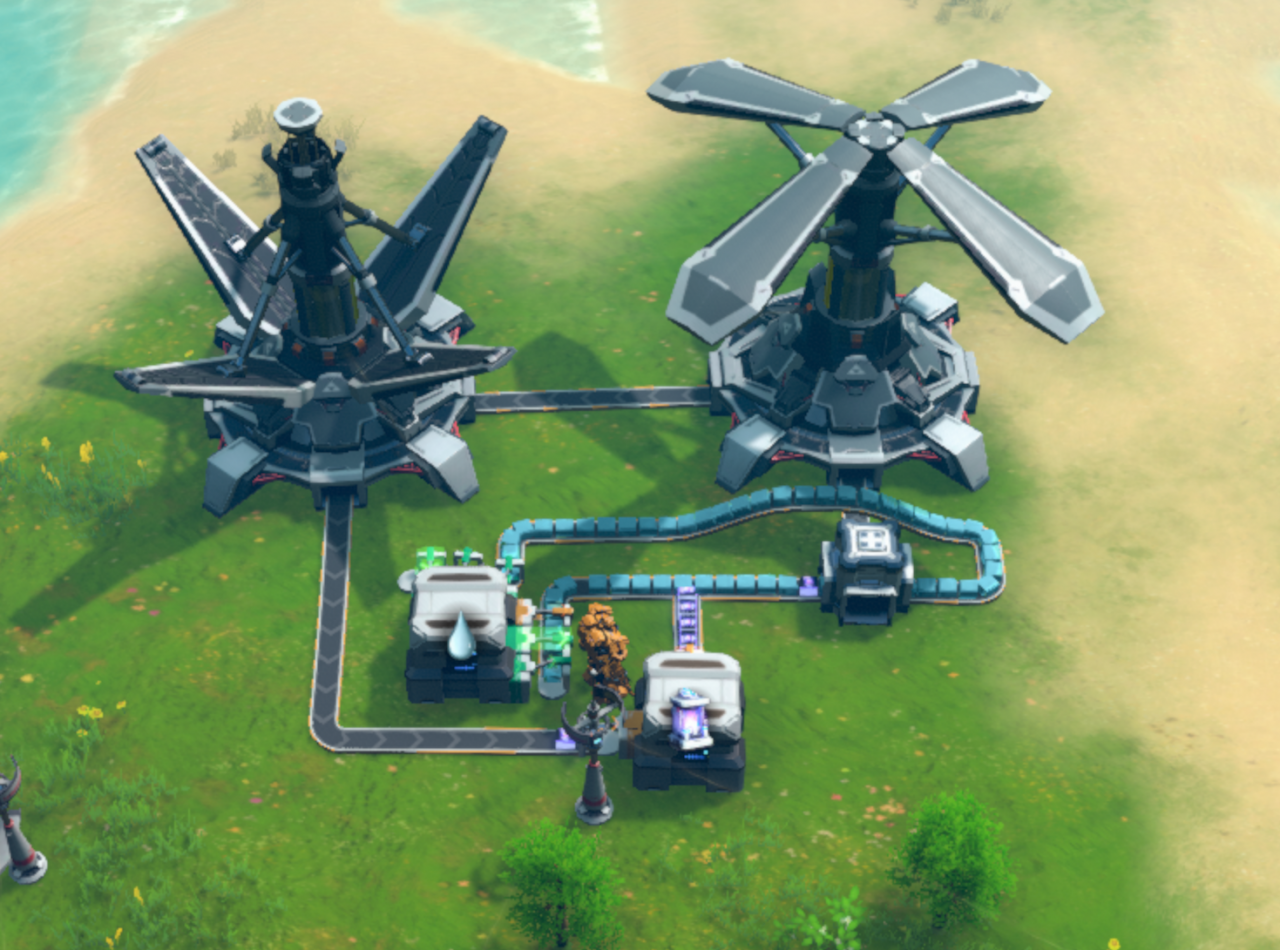
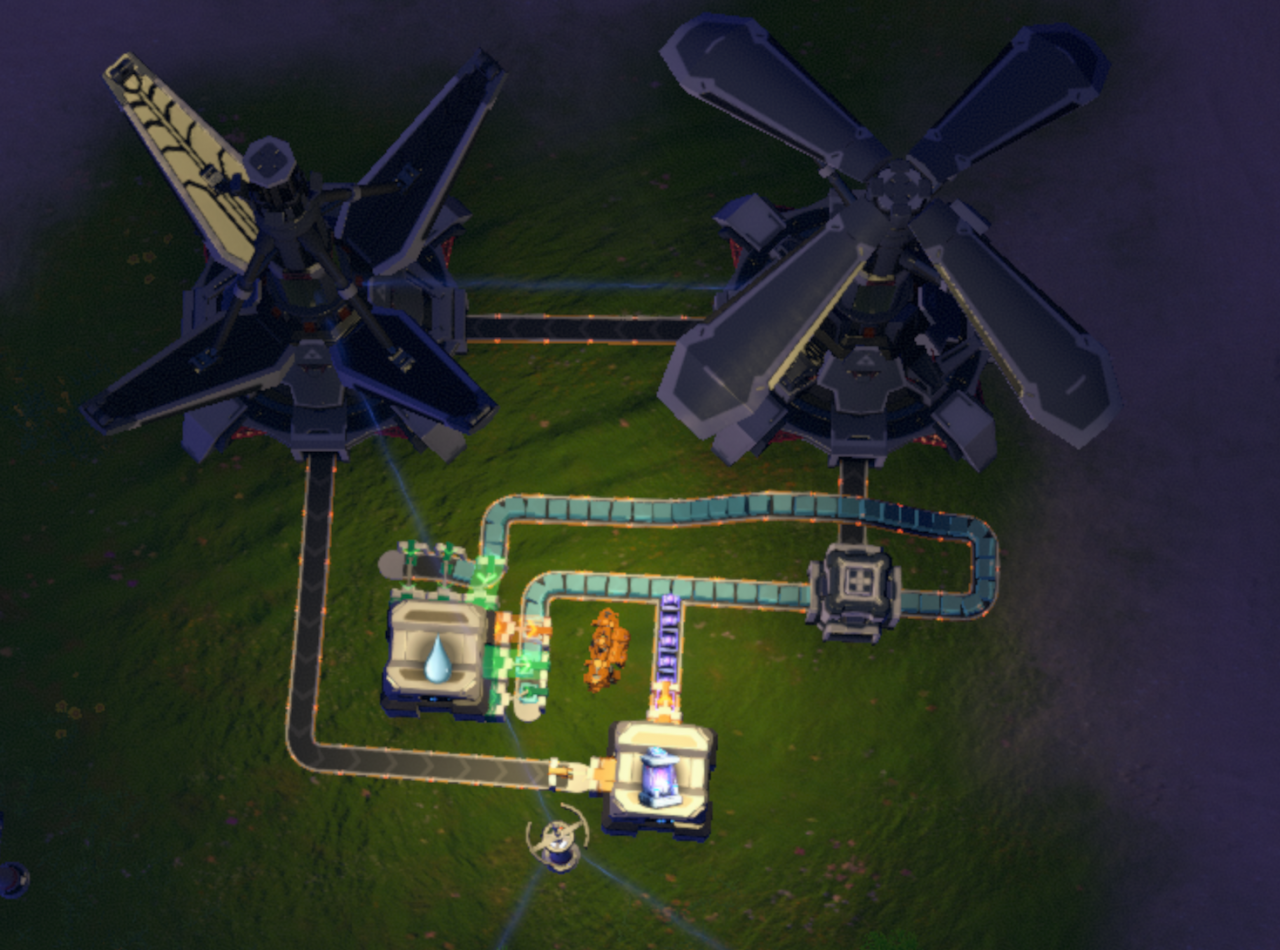
- A Conveyor belt Mk1 system (speed 6) for the regulatory circuit, saturated with water by two Sorters Mk2 on range 1 (speed 6), oversaturated by another Sorter Mk1 (speed 1.5). The oversaturation makes the system less sensitive to fluctuations, but you can also work with just speed 6. The closer you get your sorter speed to the speed of the belt, the more sensitive the regulatory circuit will become. Important is: the sorters putting the water back into the storage should be a bit faster than those putting it on the belt, to make sure there is no belt stutter.
- A Charger/Discharger line of two Energy Exchangers, and a storage for charged accumulators. You can also add a storage for discharged accumulators between the Energy Exchangers. The splitter has a filter for only allowing charged accumulators into the Energy Exchanger.

 As long as the network has enough energy, the Sorters will keep the pace of the belts, and keep the water flowing, closing the regulatory circuit by keeping the belt saturated. As long as the belt is saturated, the lower priority merging rule for the charged accumulators from the storage will not enter the belt.
As soon as the energy level drops enough to slow the Sorters down, there will be holes on the belt. Those will be filled by charged accumulators.
In the splitter, the charged accumulators get filtered out and enter the Discharger, aiding the network.
The discharged accumulator then enters the Charger and waits to be charged.
When it’s charged, it gets charged slower than the next accumulator gets discharged, due to the shortage. While discharging, there is enough energy for the Sorters to close the gaps again, so no more accumulators enter the belt.
When there is enough energy from power generators again to satisfy the needs, there will be no discharging anymore, and the spent empty accumulators are charged as the energy network allows.
At the end, all your accumulators end up charged in your storage again.
Step 1: Accumulator circuit
It consists of:
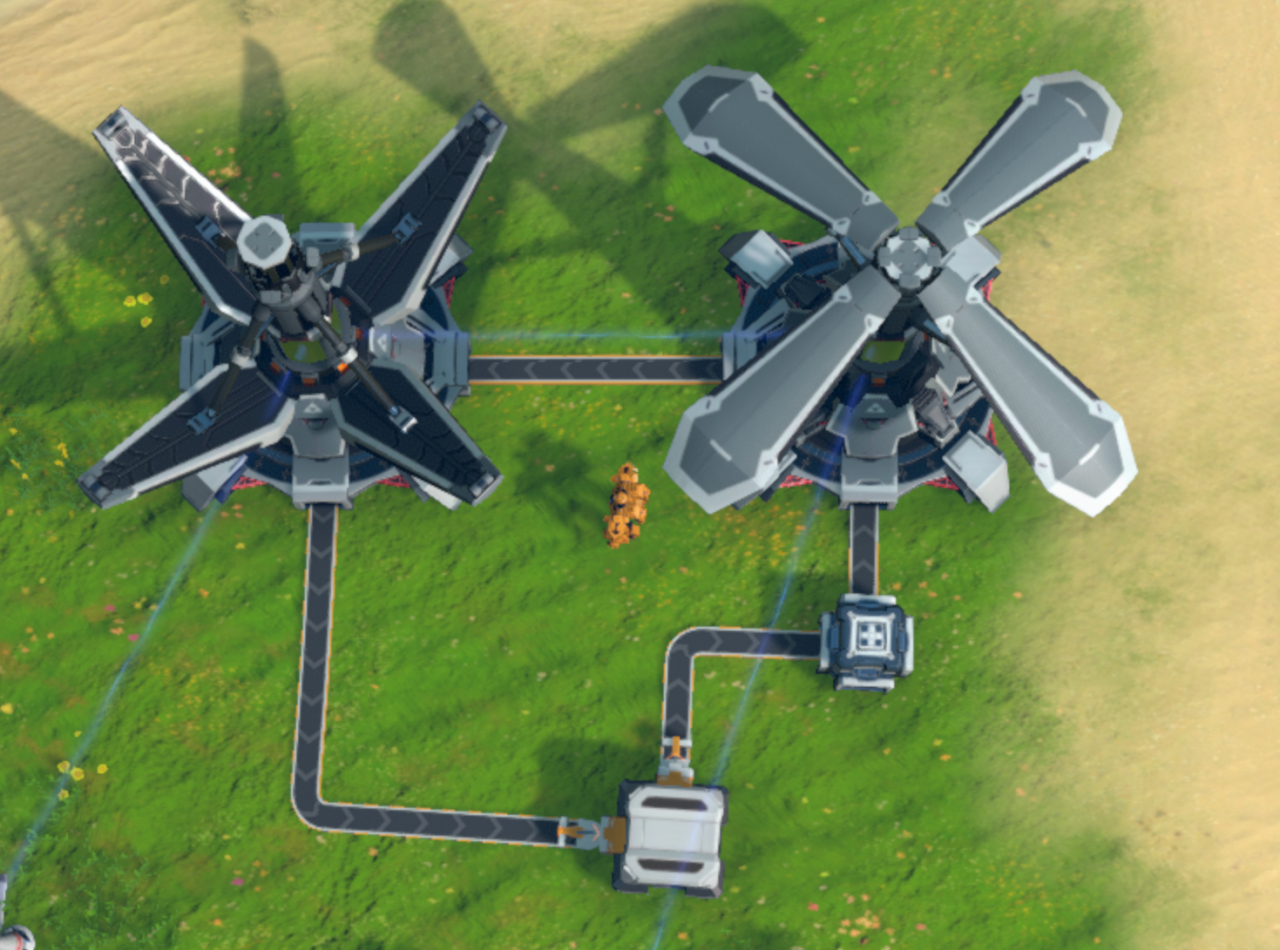
- Two Energy Exchangers, one set to Charge, one set to Discharge. Conveyor Belt from the Discharger to Charger.
- A Splitter close to the Discharger, feeding into the Discharger. The Splitter’s output filters full Accumulators only.
- A Storage with a Sorter into, and a Sorter out of it. Closing the circuit.
At the end you should have a closed circuit of belts.
Step 2: Regulatory circuit
It consists of:
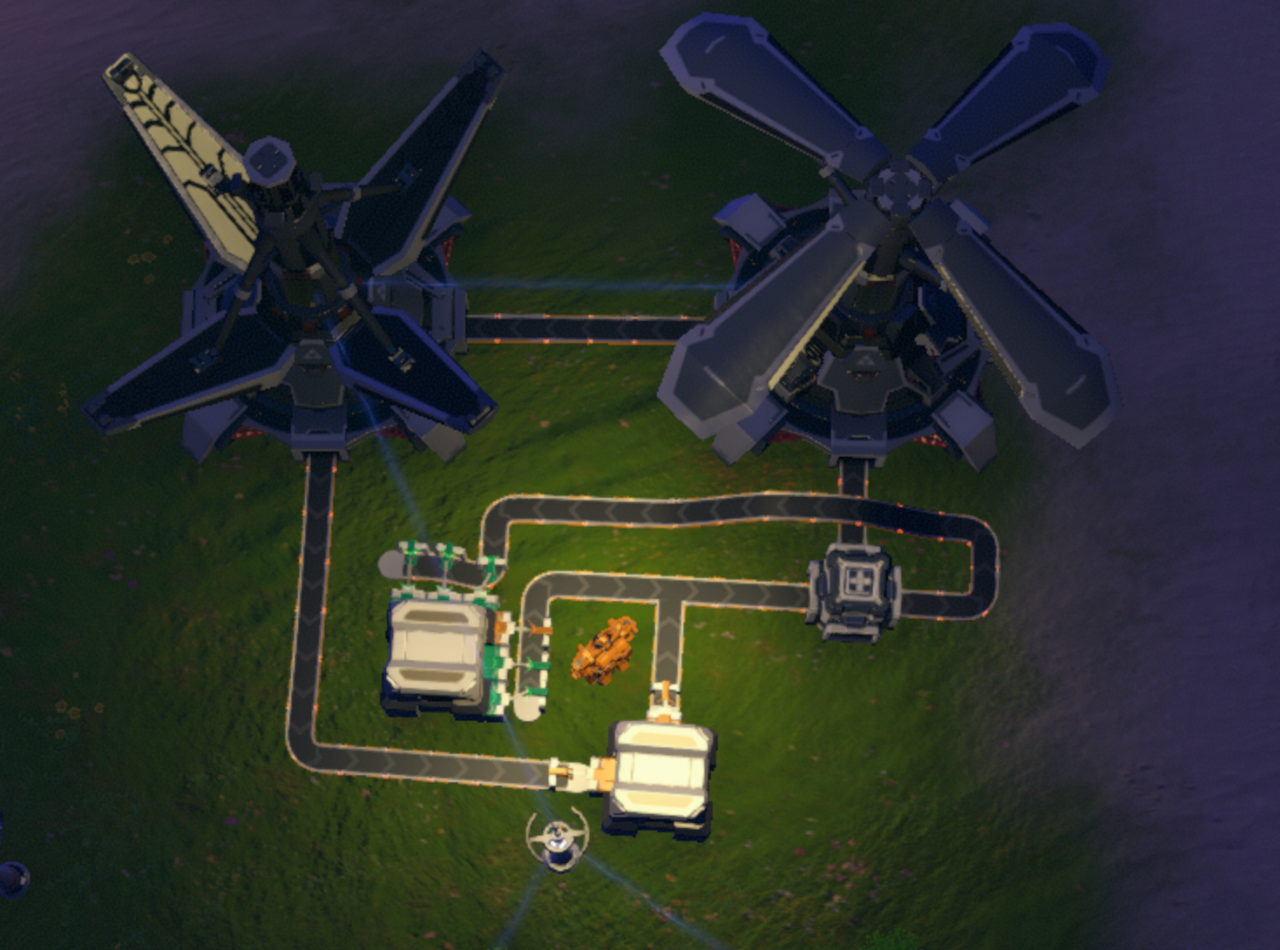
- A storage for the regulatory items. I’m using water, it’s well visible, but you can also use oil, or any other item except accumulators.
- The storage should have enough Sorters to keep the Conveyor belt saturated. For example, for a 6* Belt use two 3* Sorters at distance 1. Then optionally add a bit more Sorter capacity to adjust the sensitivity of the regulatory circuit to fluctuations. Remember: The closer you come to the Belt number, the more sensitive it is. In my example, I used a 6* belt and 7.5* Sorters.
- Add Sorters to put the regulatory items back into the storage. Use a little more capacity than for putting it on the belt. In my example, I used 9* Sorters.
- Connect the belt from the regulatory storage to the belt leading from the accumulator storage in a way that the belt from the regulatory storage is straight. This is important to give this belt priority.
- Connect one free port from the splitter back to the belt to put the items back into regulatory storage.
You now have a second circuit leading from the regulatory storage, past the side belt from the accumulator storage through the splitter back to the regulatory storage.
Result
First, put enough regulatory items into the regulatory storage. I used water.
Wait and see how the regulatory circuit fills.
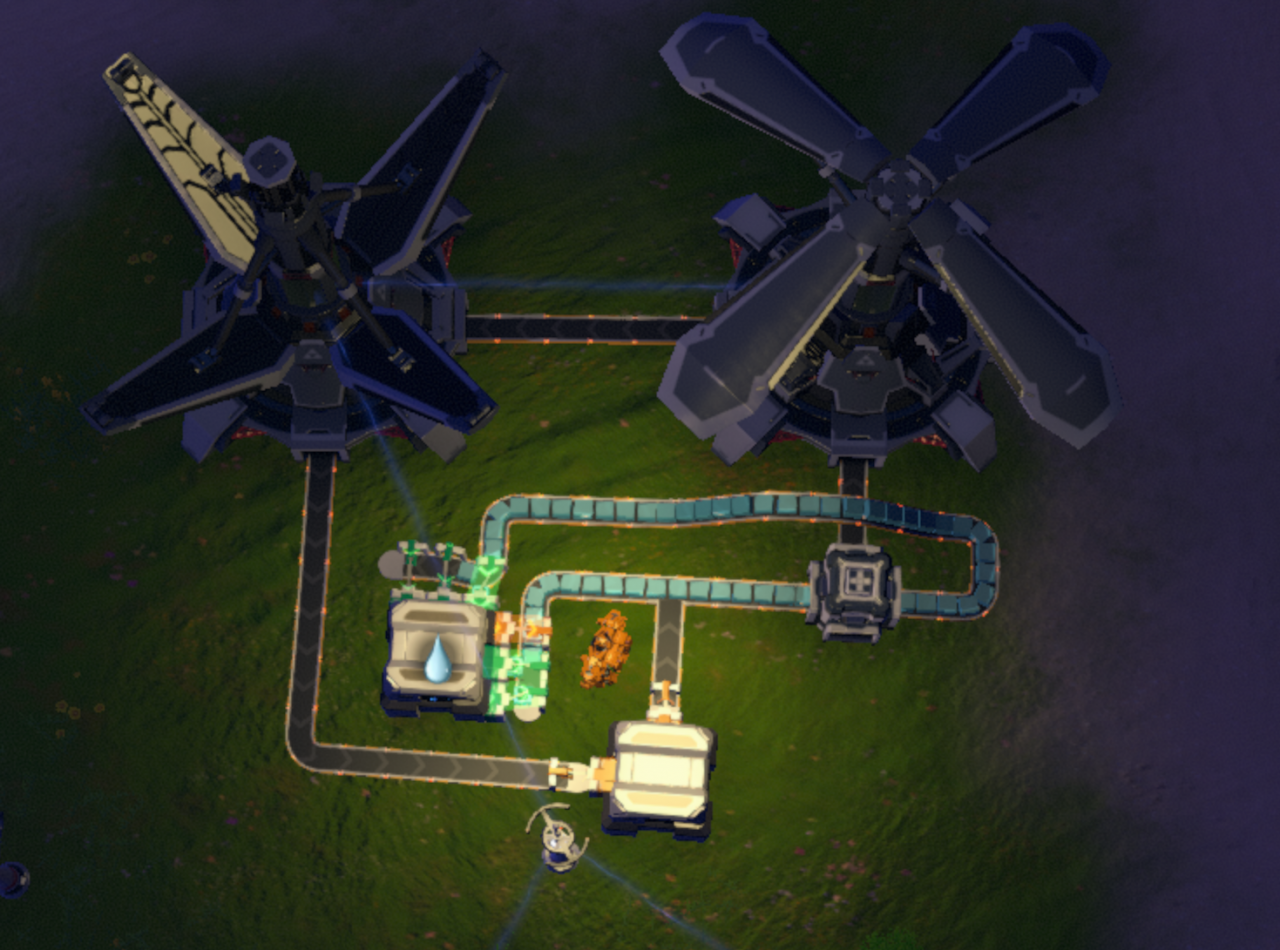
Then, put full accumulators into the accumulator storage. See how the first accumulators end at the water belt.
Related Posts:
- Dyson Sphere Program: Energy Exchange Examples 2022
- Dyson Sphere Program: Power & Production Math Stuff Guide
- Dyson Sphere Program: Basic Guide (Early Access)
- Dyson Sphere Program: How to Design Your Bus
- Dyson Sphere Program: Production Chain Layouts