A simple guide for earning a 5-star rating on all champions in Monster Sanctuary.
There will be SPOILERS ahead! Tons of them! Do not read further if you do not want numerous spoilers on the monsters and various challenges in the game, because there are many and they are not censored.
This guide focuses on the use of a single team, of only 3 monster (with one swap at the very end), to defeat and 5-star all champions in Monster Sanctuary. What are stars, you say? Well, let me recommend not reading this guide any further if you don’t know what stars are. You’ll enjoy yourself more, I think, playing the game blind and coming back when you’re stuck.
Oh, you’re still here? Perfect. Proceed, most welcome Keeper, and let us begin the hunt.
This guide shows how to 5-star every champion in Monster Sanctuary. As a bonus, it also shows where they are, and specific challenges they might present to our team, if any. All champions will be listed in the order they appear in the Monster Journal, with corresponding numbers before each champion’s name.
Defeating every champion awards the Keeper Master rank. We’ll be getting that in due course, if you’re not already a Master.
There is an associated achievement for this, Champion of Champions, awarded for defeating every champion with at least 5 stars. There are plenty of other teams that can defeat each respective boss, but with a total of four specific monsters on your team, you can earn that achievement by following this guide.
A note on the fights and levels; unless specified, all monster challenges were done at level 40 and include ultimate abilities, which are shown in the respective load-out sections. It is certainly possible to 5 or 6 star these fights at different levels, with different teams. I encourage you to try if you think you can do it. I also encourage you to try if you think you can’t! You might surprise yourself.
A specific goal I had with this guide was to create a team that did not include a starter, as not everyone picked the same starter. These monsters are very accessible, even early in the game, and are not dependent on what starter choice you made.
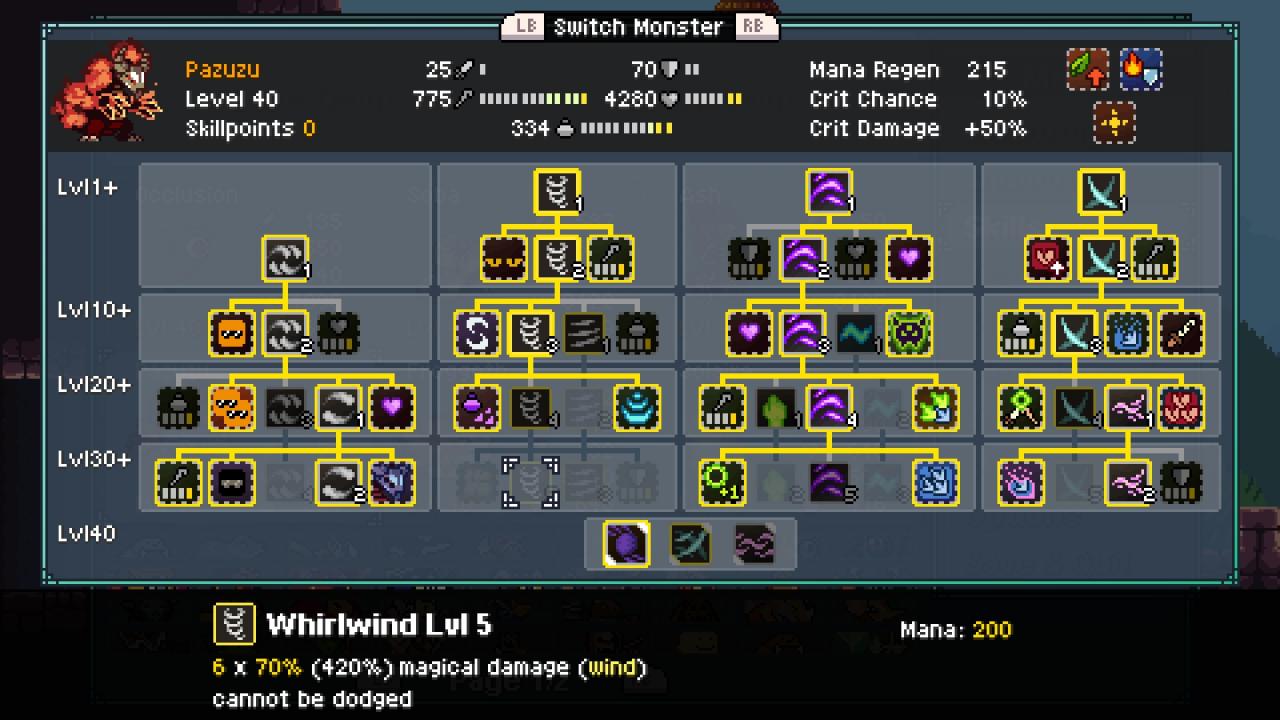
With the sole exception of Vertraag, I was able to 5-star the entire champion roster with a single set of 3 monsters: (Dark Shift) Specter + (Light Shift) Vasuki + (Dark Shift) Mad Eye. Unless you’re fighting the AOE champions (Goblin King, Dracozul), this is the load-out I used:
When fighting Goblin King or Dracozul, I switched to:
Specifically for Vertraag:
Swap Vasuki for Aazerach. I used Dark Shift Aazerach, but I think any of the three forms is viable for this, though I haven’t tested the other two. The process is simple, if lengthy–proceed along the game until you’re ready to face the elite champions. Once you’ve defeated Dark Lord, you can find a friendly Alchemist at the Stronghold Dungeon crystal waypoint. Speak to him, get the item, and go west. Defeat Aazerach, and if you fail to 5-star in the first encounter, try again a few times and you’ll get the 5-Star and the egg. I specced Aazerach like this:

Champions are strong, yes… but what makes them strong? They get extra actions for one. Normal champions have two actions–elites, three. Champion stats are also quite high. This is especially true for HP, and that, friends, is where we find their vulnerability. How can high hp reveal a weakness? Normally, having such a huge HP total presents an awkward challenge when you need to kill them quickly to get bonus stars at the end. Even your best attacks might not get 10-20% of their health, if you’re lucky. So how can we build a team to bump that 10-20% damage per turn closer to 30-50%?
The answer is debuffs.
The team I used is centered around using the tremendous HP pool of the champions against themselves by applying DoT debuffs that do percentage based damage and boosting that damage with synergetic passives. These include Congeal (Chill becomes a dot), Fatal Upkeep (20% extra damage for Burn, Poison, Chill), and Debuff Mastery (monster can apply an additional stack of any debuff). If you look carefully, you might notice that all 3 of our main guys have Fatal Upkeep, and two have Debuff Mastery. This, along with plenty of ways to slather on copious numbers of debuffs in short order, leads to very short-lived champions.
Target elemental weaknesses, apply debuffs, clear enemy buffs, and build the combo count with Mad Eye. Keep yourself alive with Vasuki, either using Fireshield or Mass Restore. Finish with Specter, either pelting with Arcane Bolt to apply more debuffs or, if your stacks are maxed on all dots, hit ’em with a Spectral Cannon to add some extra punch. That’s the basic strategy, and you’ll watch them melt.
You might say, don’t some champions resist some or all debuffs? Yes, they do, and it didn’t matter. Even Elderjel, whom I was worried about, fell to this strategy. It and Vertraag were the worst, and I wrote a special section for Vertraag.
As a special note, if you have Spectral Toad, and prefer it to Vasuki, feel free to swap them. They should both work, and Toad is a better healer at the cost of less DoT damage.
Mad Eye is easily obtained in the Stronghold Dungeon. It may be worth re-visiting later, after the shift event at Sun Sanctuary, as you can obtain Light or Dark shifted variations without using consumables.
Likewise, Vasuki is also easily obtainable. Simply go to the Sun Sanctuary and peruse the areas in the NE of the map. You’ll find snakes aplenty. Again, it may be worth coming here after shifted variants begin appearing in the wild to save items.
An early 5-star for Specter is one of two ways to get a Specter. While it is a champion monster, it also appears in the wild. The champion variant appears early in the game in Blue Caves, while the wild one appears near the end in the Abandoned Tower. Either location is fine for collecting the egg.
If you want it earlier rather than later, refer to the next section.
If you’d prefer to catch Specter wild, just keep playing the game until you hit Abandoned Tower. One advantage to catching it wild is that it can occur Light or Dark shifted–that saves you Shift or Switch stones. When hunting it wild, just use normal team tactics to score as well as possible and you will get a Specter egg eventually. If you can reach the Abandoned Tower, your Keeper skills should be more than sufficient to obtain wild monster eggs.
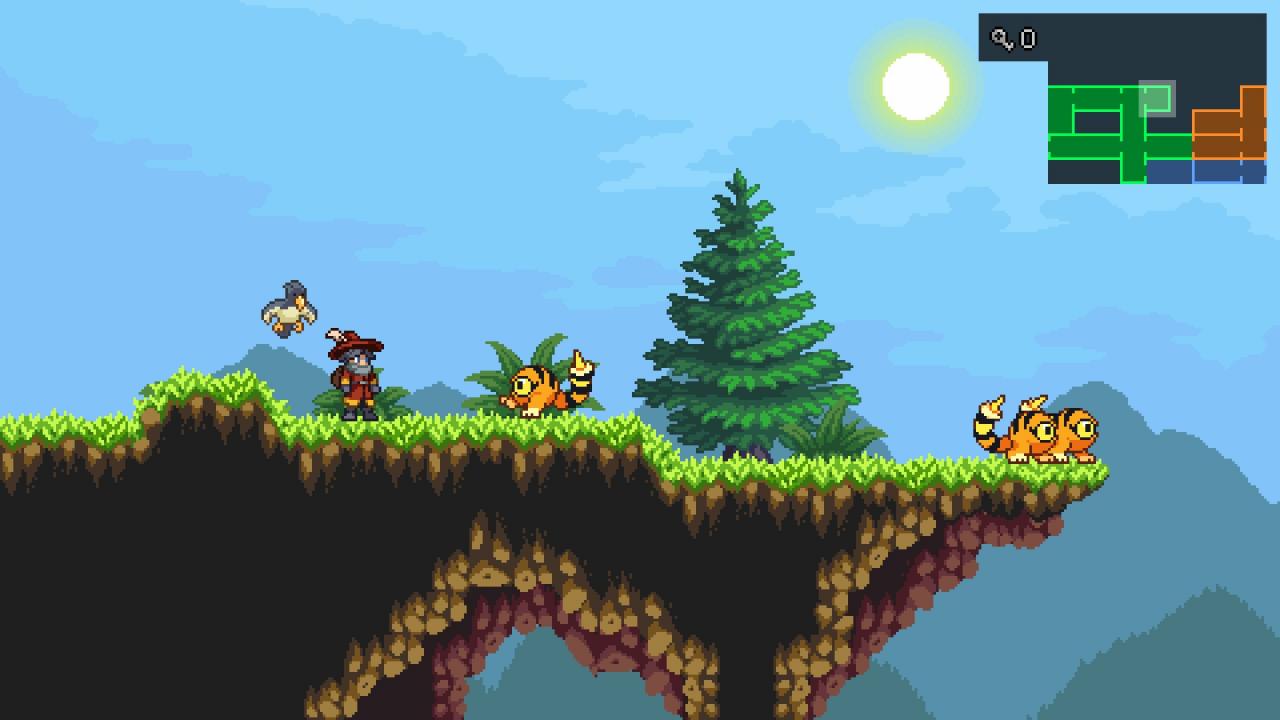
If you would rather get Specter early for our 5-star strategy, grab yourself a Manticorb, a Blob, and a Yowie. While all three of these are obtainable in Mountain Path, you’ll need double-jump and a monster with flight (Vaero will do) to get to where the Manticorbs live. See these screenshots for the ledge you must jump to and, to the right, a small room with 3 Manticorbs and a chest:

The setup is pretty rudimentary, as I did this at level 14. Build Yowie for health and buffs, Blob for combo building and damage, and Manticorb to finish with damage. My team build:
And the fight:
Found in: Mountain Path
Notes: Hard to miss, easy to 5-star.
Battle video:
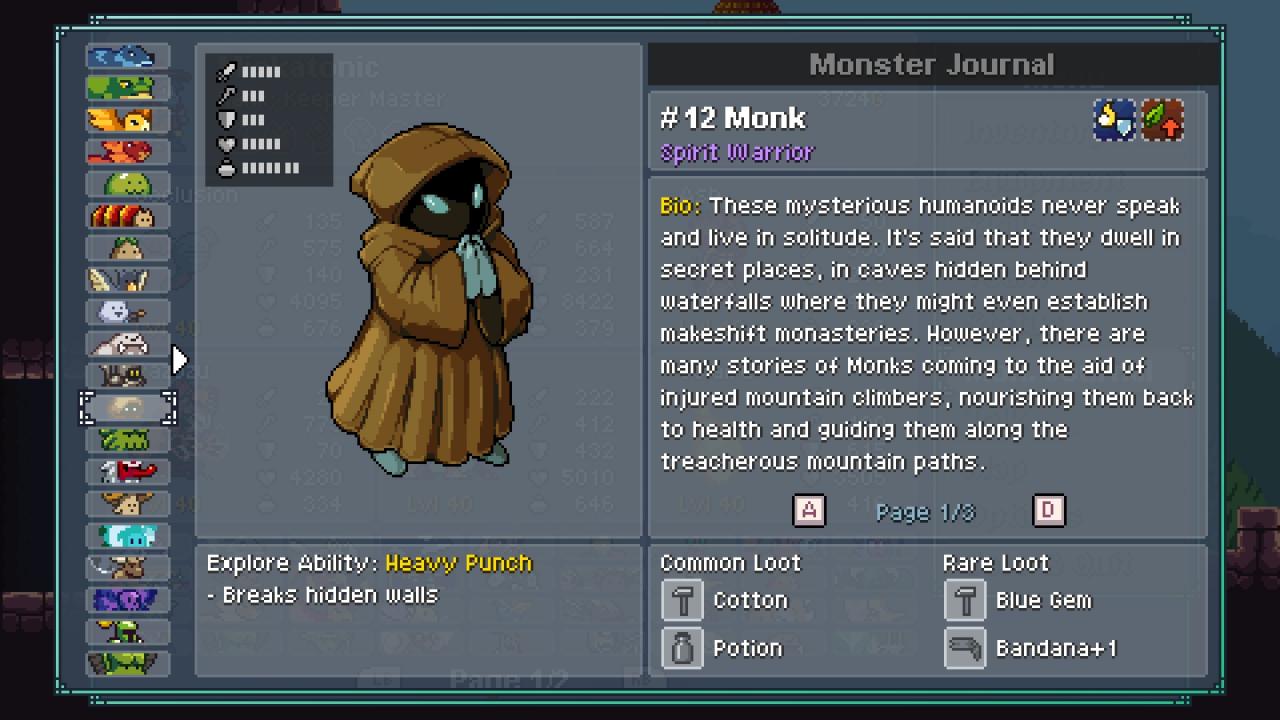
Found in: Mountain Path
Notes: Don’t pull your punches; poison stacks will put Monk down for the count.
Battle video:
Found in: Blue Caves
Notes: It’s weak to burn, to get those stacks up and it’ll be roast beast.
Battle video:

Found in: Blue Caves
Notes: A somewhat hidden champion, on the west side of Blue Caves. Resists debuffs, but is weak to magic. Specter vs Specter time! Just follow the usual strategy and it’ll be ghost toast.
Battle video:
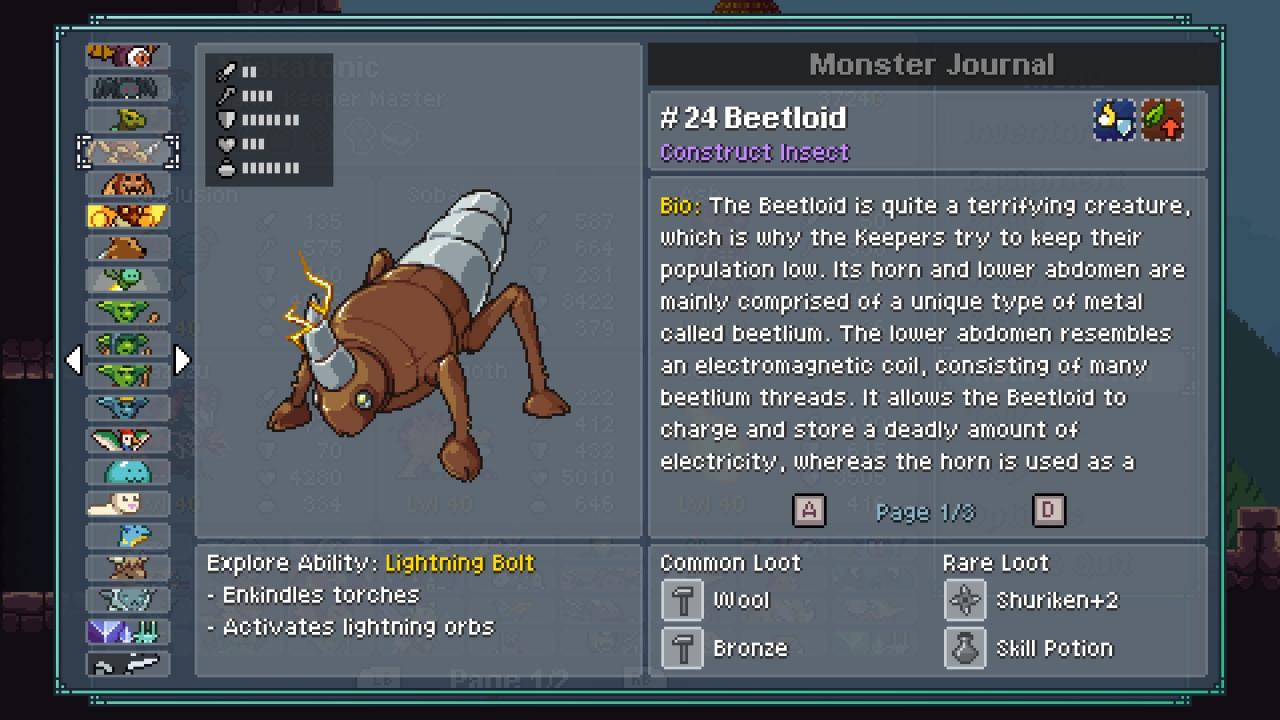
Found in: Stronghold Dungeon
Notes: Beetloid can surprise you with damage sometimes, but it should be a 1-shot 5-star. If he blasts one of your guys down, just forfeit and try again.
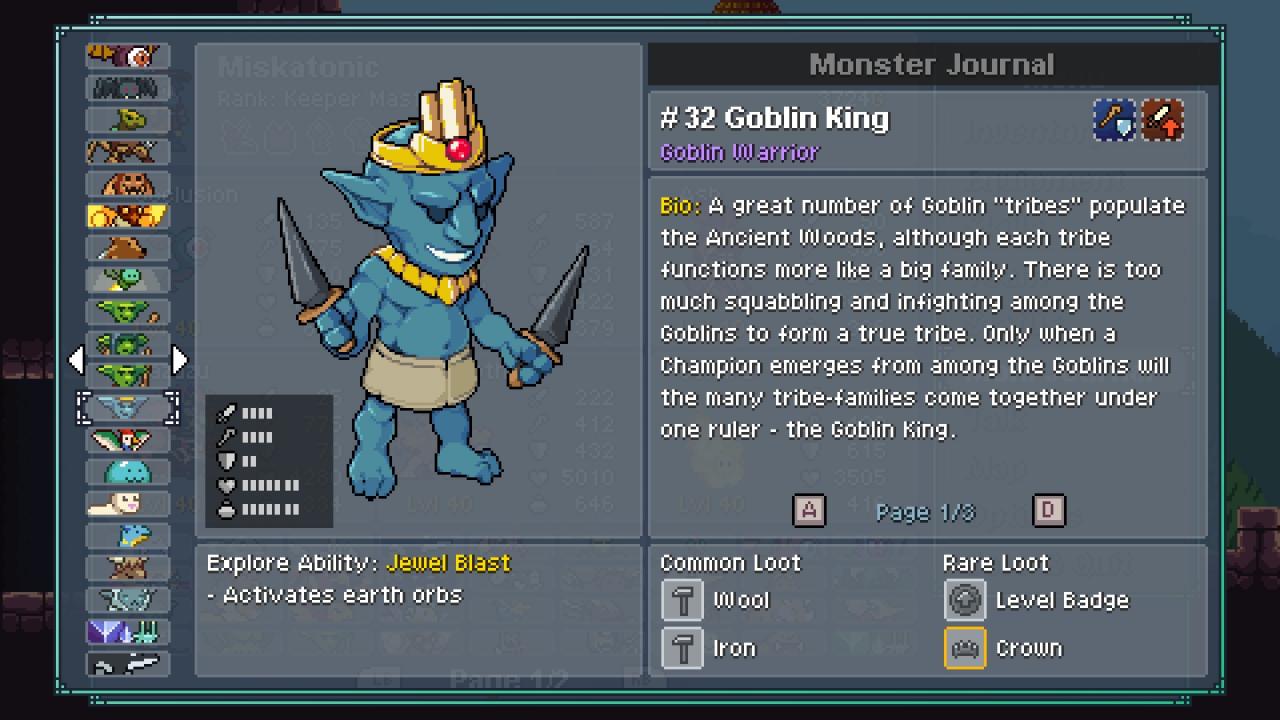
Found in: Ancient Woods
Notes: The king! And he comes with friends. Time to pull out the aoe and watch them melt.

Found in: Ancient Woods
Notes: It will change it’s resistances, but Mad Eye can hit 4 elements and Specter can do neutral. Nothing special required here.
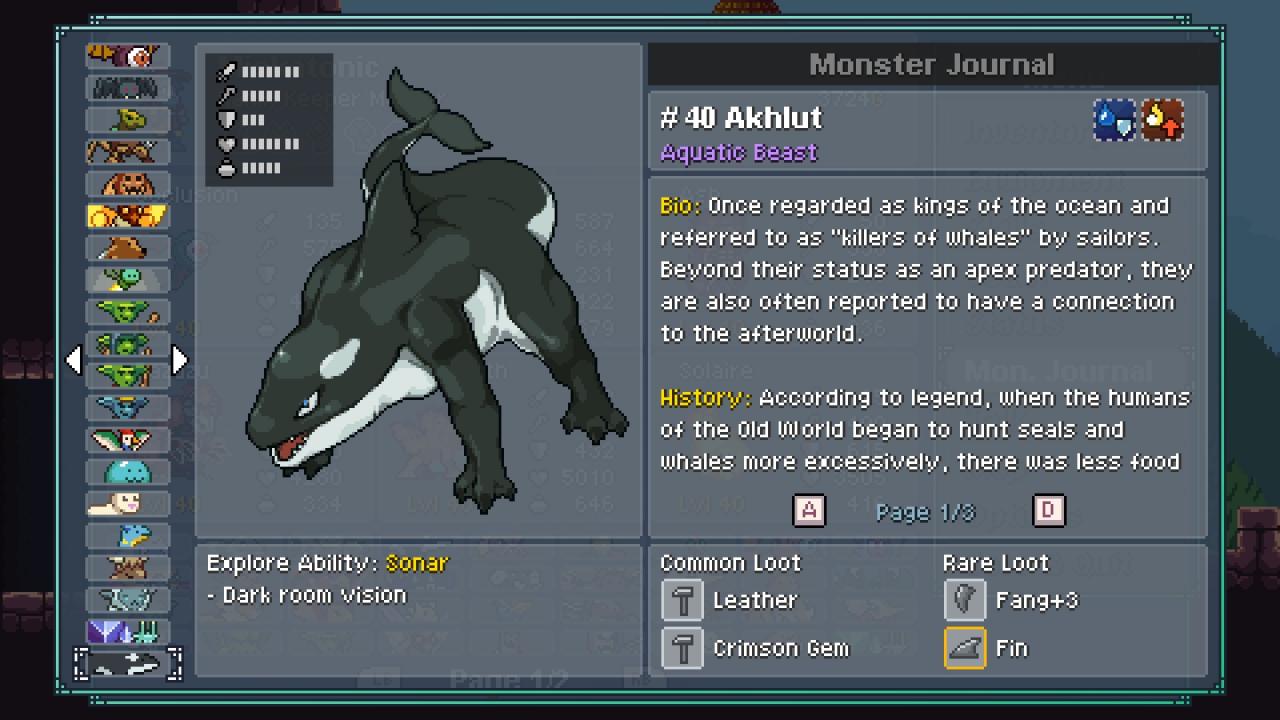
Found in: Snowy Peaks
Notes: Akhlut can hit Vasuki very hard, so beware. If Vasuki goes down too early, just forfeit and try again. Mad Eye and Specter both resist physical so they prove very sturdy here.
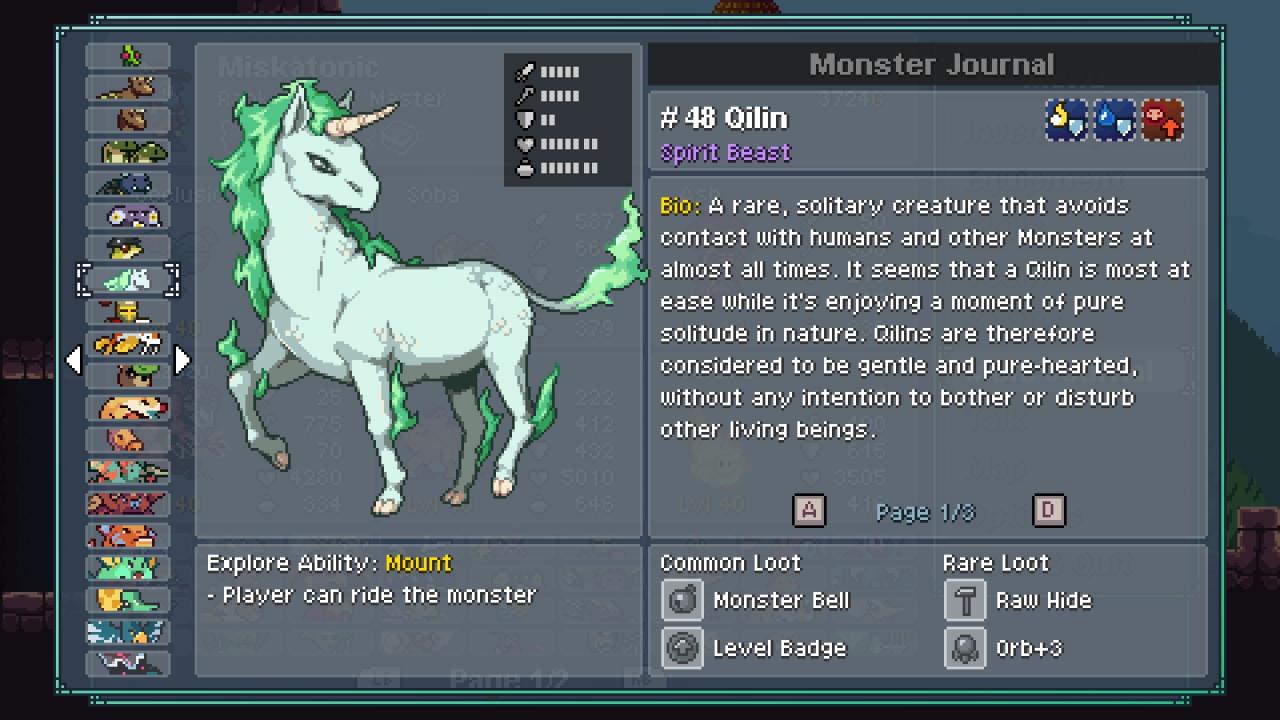
Found in: Sun Palace
Notes: Weak to debuffs! Ha! Enjoy this one–it will be hard to miss a 5-star on the first try.
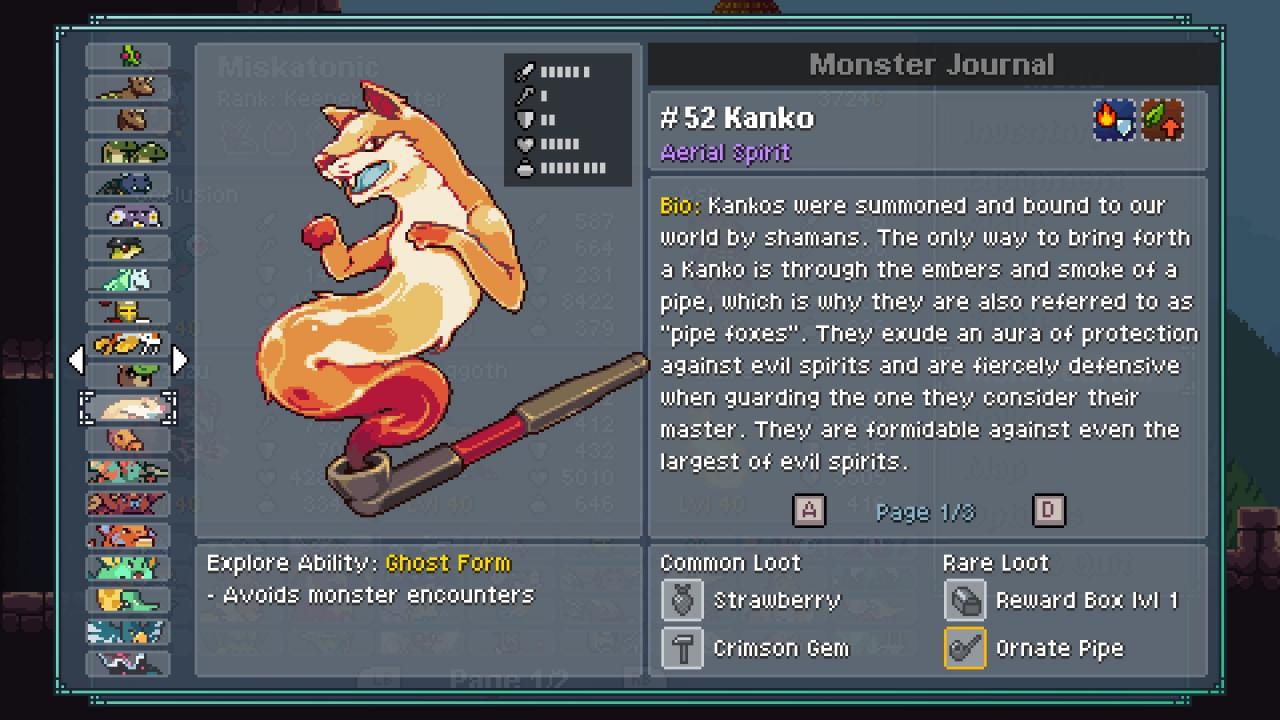
Found in: Sun Palace
Notes: Kanko’s evasion makes this one more RNG-dependent than most fights, especially if he gets Spellshield randomly from your attacks. If it goes sideways and takes too long, just try again.
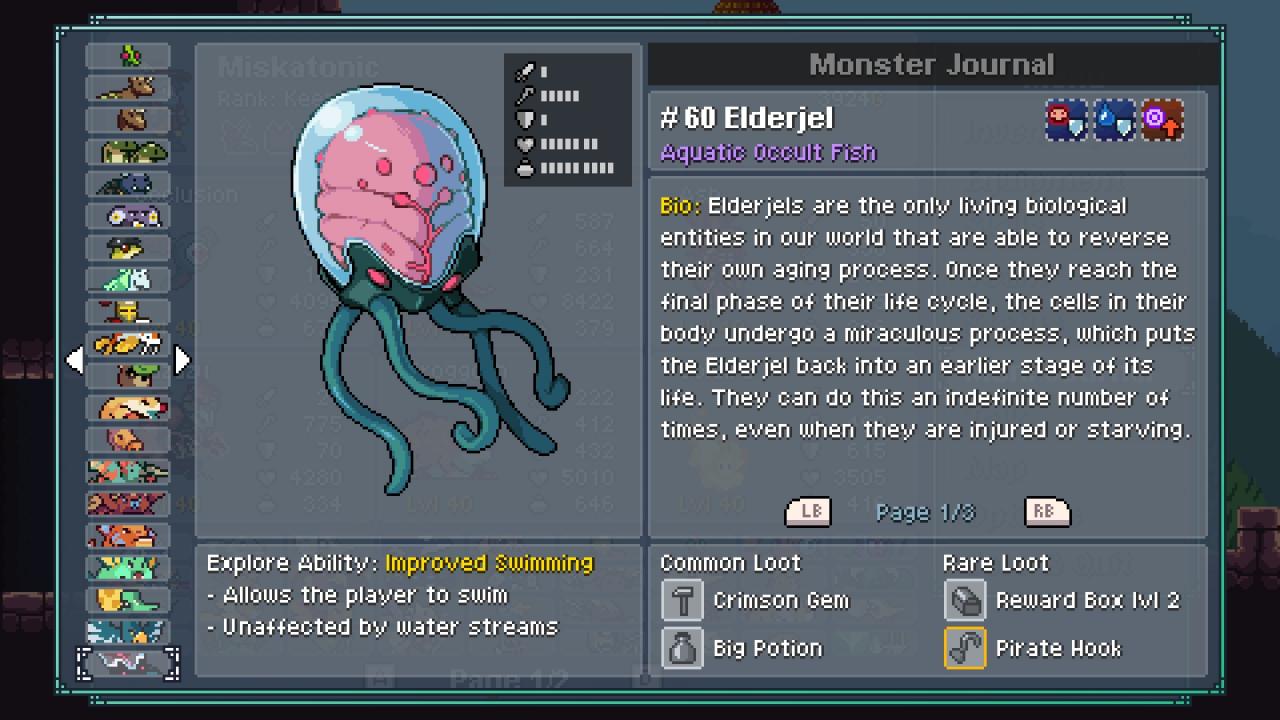
Found in: Horizon Beach
Notes: This fiend is very resilient, resistant to debuffs, and can heavily damage or outright kill our Mad Eye and Specter. It is, however, weak to neutral damage; ramp up your combo and hit it with the spectral cannon. This one may take a few tries, but you’ll get the 5-star if you keep rolling the dice.
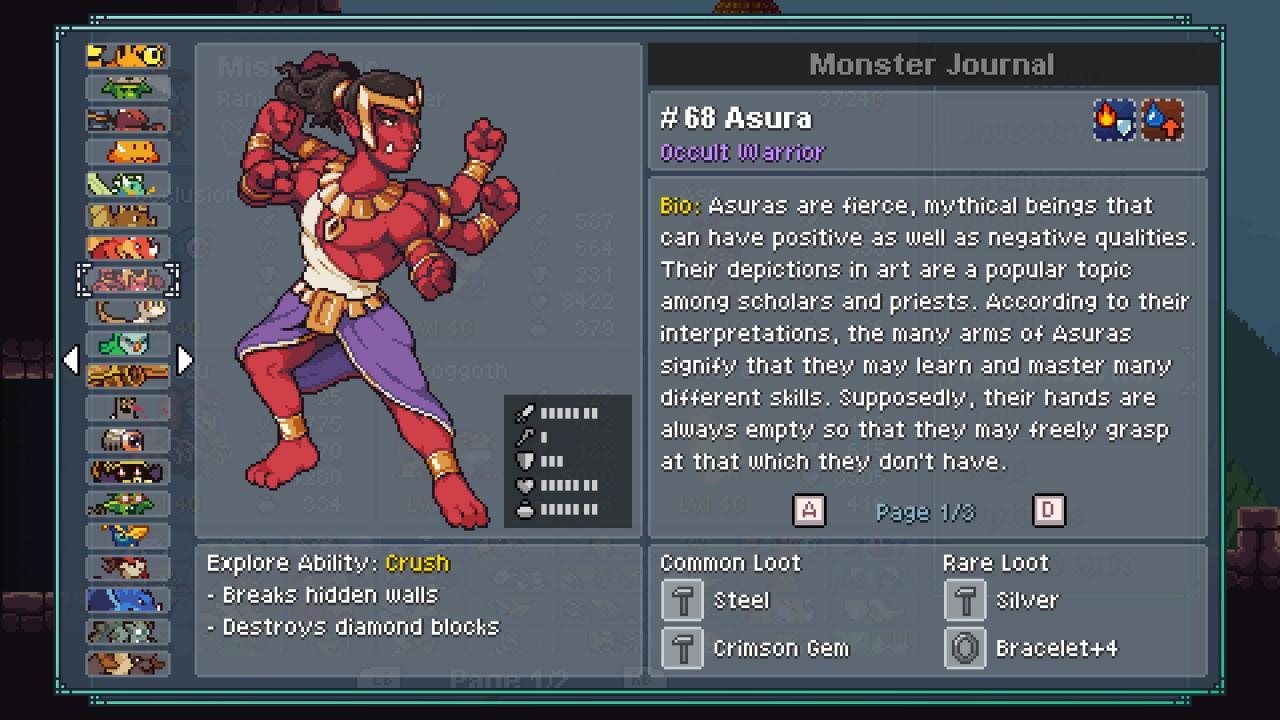
Found in: Magma Chamber
Notes: Asura’s tough, but has no way to deal with debuffs and Mad Eye will strip the buffs he gets. Business as usual–enjoy the 5-star.
Found in: Mystical Workshop
Notes: He’ll try to fight fire with fire, but yours is hotter. Stack the dots and he’ll drop without much ado.
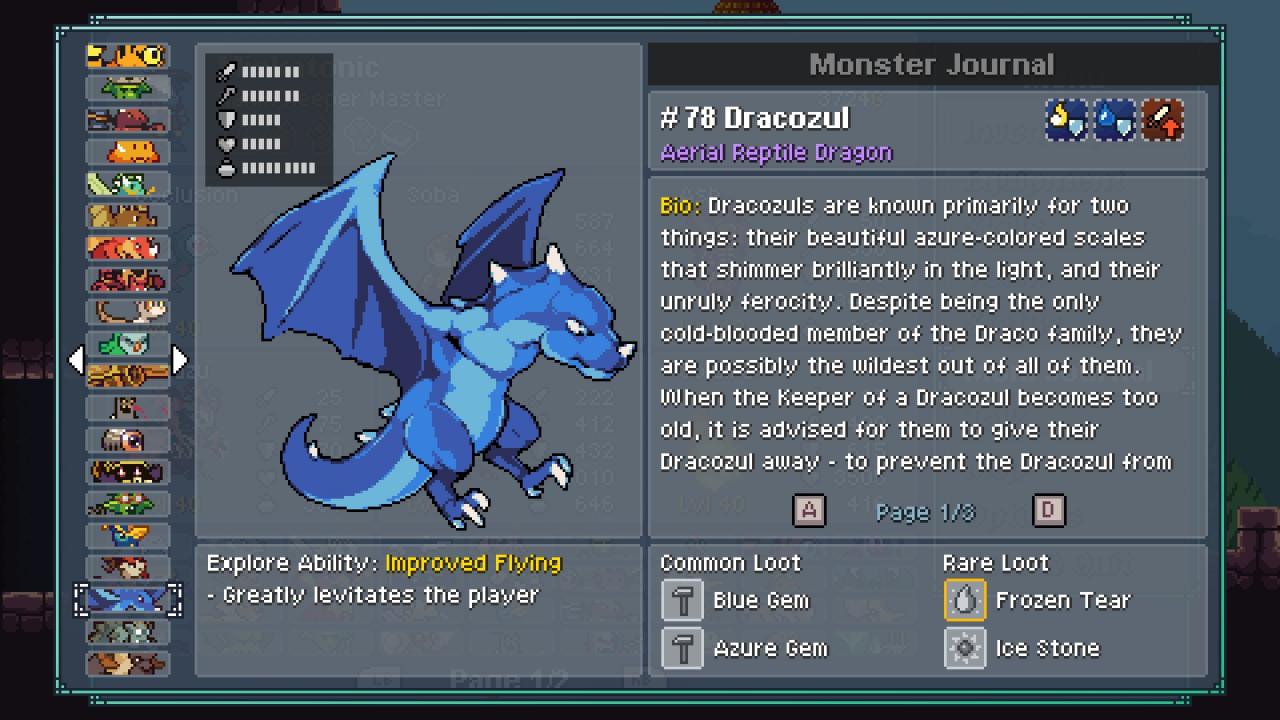
Found in: Snowy Peaks
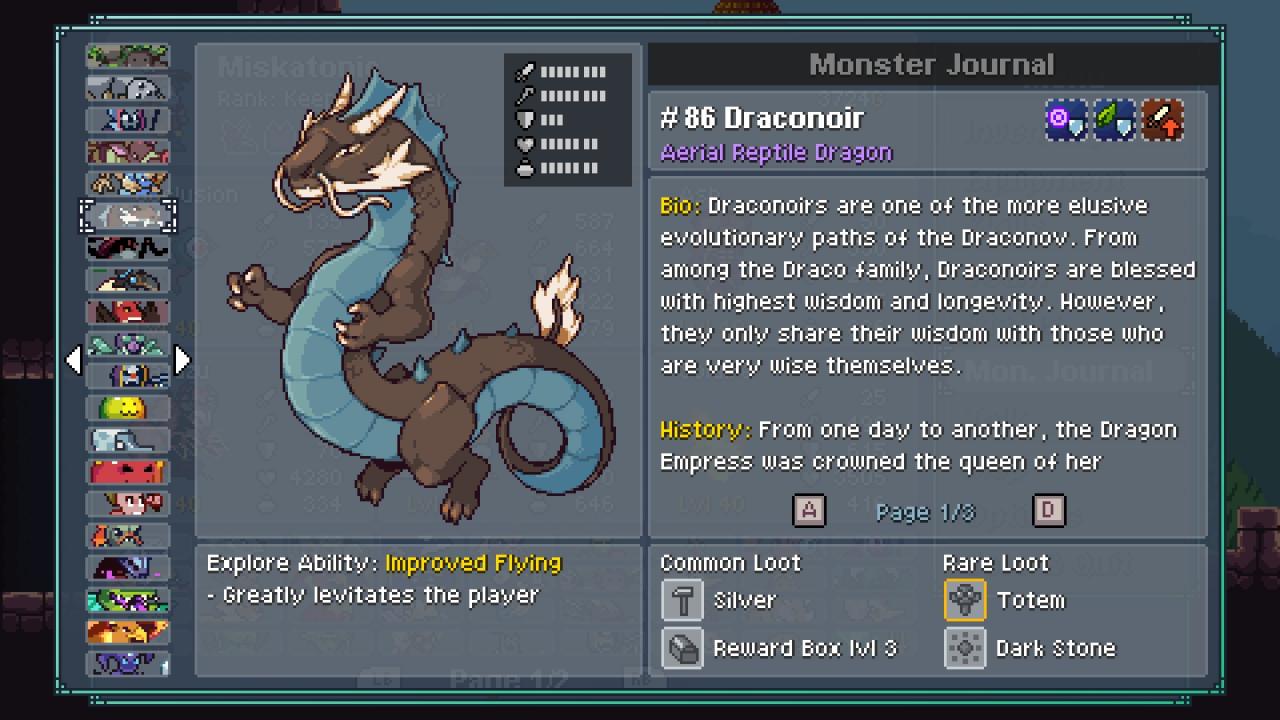
Notes: At the top of Snowy Peaks, in the far NW of the map, a trio of drakes await. Slot your aoe skills and ground those flappers.
Found in: Ancient Woods
Notes: He looks intimidating, but he’s a poor match against our team. This will be an easy win.
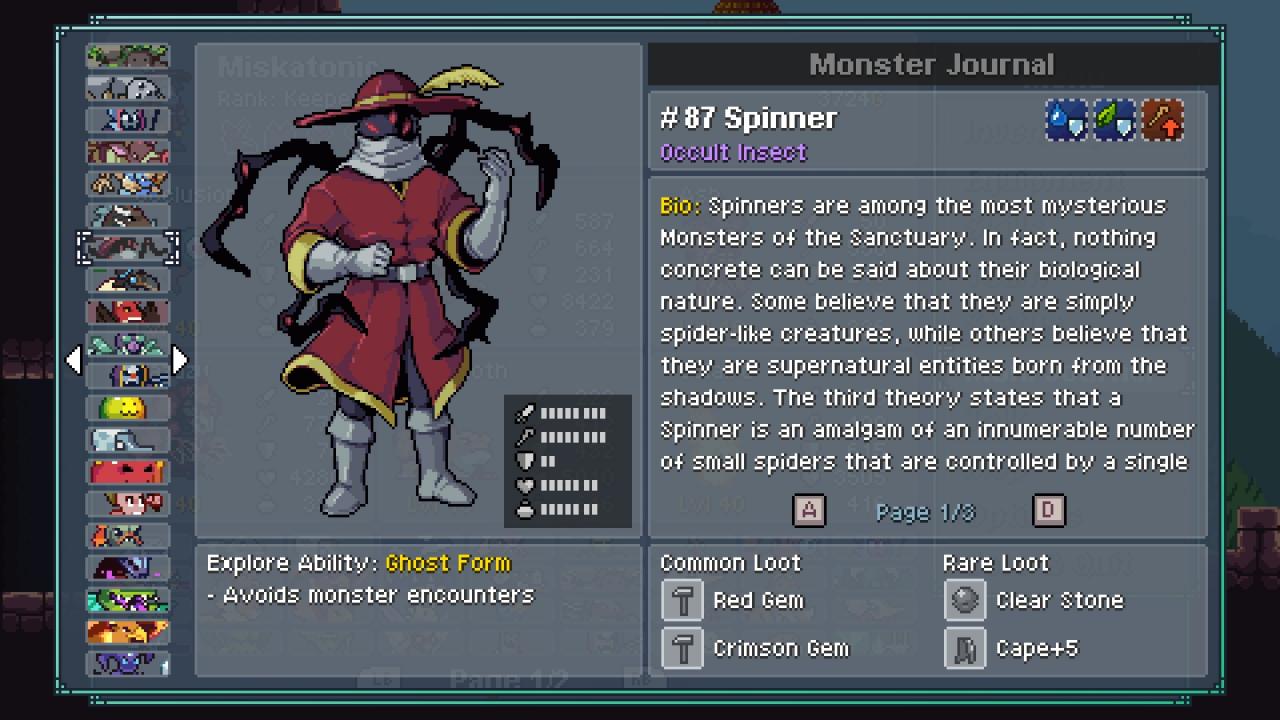
Found in: The Underworld
Notes: Evasion and blindness can be annoying, but you should be able to land the 5-star within 1-3 tries despite them.
Found in: The Underworld
Notes: In the furthest SW of the depths, this strange creepy-crawly’s nest awaits. You’ll need to trap it with some levers, and commence the beat-down. The only thing to watch out for is it will copy your last move, and a copied Spectral Cannon can be hazardous for Specter. Other than that, just lots o’ dots.
Initially, I wasn’t going to include the Elite Champions, as I wrote a guide on them already. However, I tested the team I used here in this guide and they performed very well against the elites. As such, I included videos and sections for all champions, and expanded this guide to cover the entire champion roster.

Found in: Blob Burg
Notes: Finding King Blob is the majority of the difficulty with it. Refer to the link I provided in the section above to find the hidden blob realm.

Found in: Horizon Beach
Notes: Vodinoy’s attacks are all physical, and devastating on a crit. Make sure you put up Agility on the team with Specter turn 1. Bad RNG can lead to a poor score, so just try again. A few attempts and you’ll have those shiny, shiny stars.

Found in: Stronghold Dungeon
Notes: Aazerach can be annoying in the same way Kanko was, but are team is well suited to damaging it without needing to land attacks against its evasion. Fire Shield from Vasuki helps get your dots rolling early, and barring extreme bad luck, you’ll have a 5-Star in 1 or 2 tries.

Found in: Sun Palace
Notes: It’s important to get Spellshield up on Specter turn 1, so save your ultimate for Fire Pillar. Burn is very effective against Diavola, but it likes to clear them with its heal, so you’ll need to keep an eye on the number of stacks and keep as many on as possible. Time to make Diavola salad!

Found in: Magma Chamber
Notes: Gryphonix can do a number on Vasuki, so utilize Specter’s ability to grant Agility to the party. After that, it should be smooth sailing, barring really bad RNG.

Found in: Mystical Workshop
Notes: The god of time, and the one monster that proved bane to our team. Swap out Vasuki for Aazerach and execute the turns similarly to what I did in the video, and you’ll knock this deity down a peg or two in no… time.

Found in: Abandoned Tower
Notes: Mad Lord’s a madlad, to be sure, but our normal strategy will work fine despite its resistance to debuffs. This was another 1-shot 5-Star for me, but if you make a mistake or get unlucky, just try again.
Related Posts:
- Monster Sanctuary: Shift Stone Locations (How to Farm)
- Monster Sanctuary: Material Drops Guide (Where to Farm Them Efficiently)
- Monster Sanctuary: Forgotten World Update Achievement Guide
- Monster Sanctuary: Infinity Arena Level 200
- Monster Sanctuary: All Monsters Guide (Rare or Unusual Skills)
So the Mad Lord and Elderjel doesnt work for me with this setup.