If you do not want to start the game from scratch, having lost the progress made in the Xbox, then you can transfer the save.
Required programs
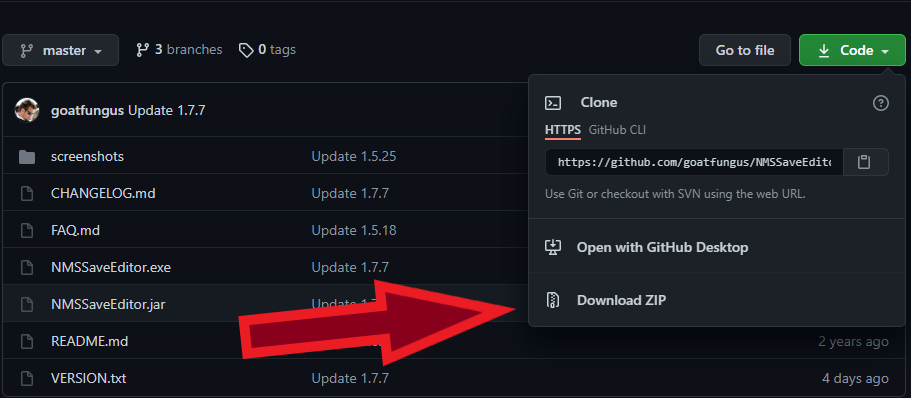
To work with Steam save you need No Man’s Sky Save Editor [github.com] . Java 8 [www.java.com]
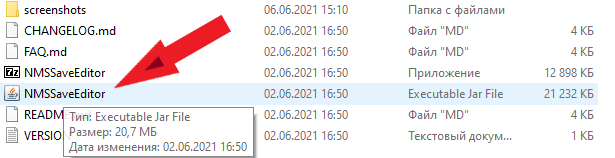
must be installed for the latest save editor to work . It is not obvious to everyone how to download files from github, so I am attaching a screenshot. Unpack the NMSSaveEditor archive. We will run using this file
(Updated 2022) The owner of the archive on NomNom can periodically change something there and generally misbehave, so you can download different versions from this link
Stage 1: Pulling out the Xbox save
Make sure your Steam and Xbox versions are up to date (maybe you turned off automatic updates).
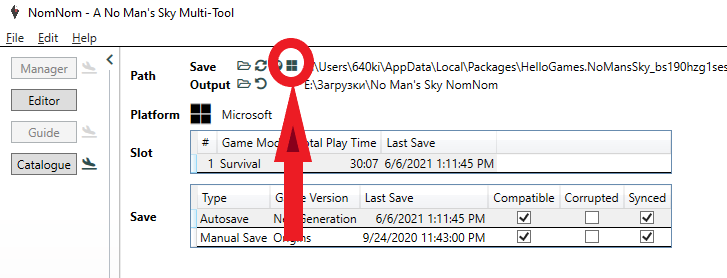
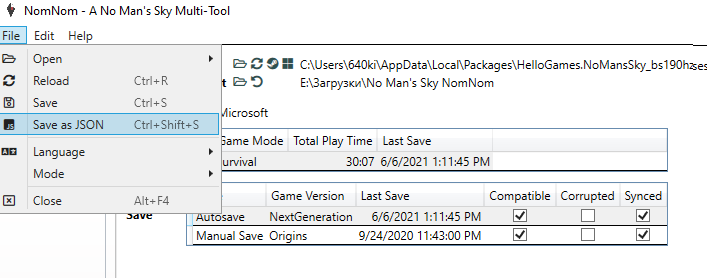
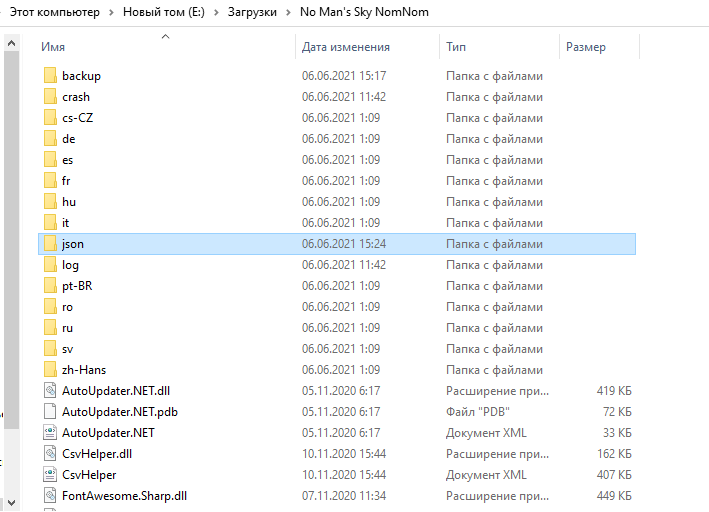
We choose to save the Windows version. We save it in JSON format. We will find this file in the json folder, in the archive with NomNom. Close NomNom. You won’t need it anymore
Stage 2: Opening Steam Save
1) Run the NMS in Steam
2) Start a new character.
3) We create any building (the first cleaner will be the fastest).
4) We climb in, we climb out of the first ship to save.
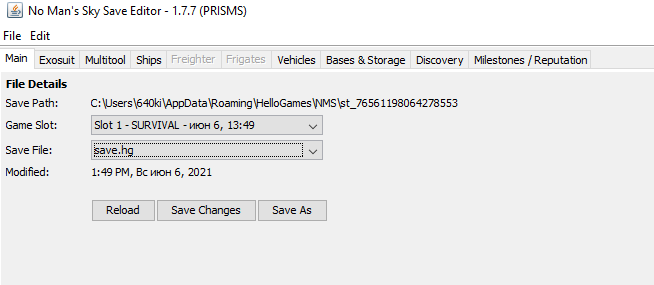
5) Close NMS.Launch the second save editor.
We select the slot for saving the blank. Choosing Raw JSON Editing
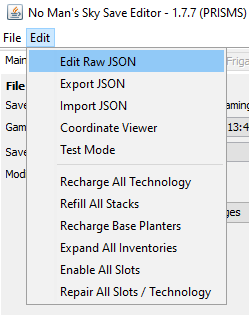
Stage 3: replace the lines with the file
Now in it we will replace the necessary values throughout the file using the “Replace” button.
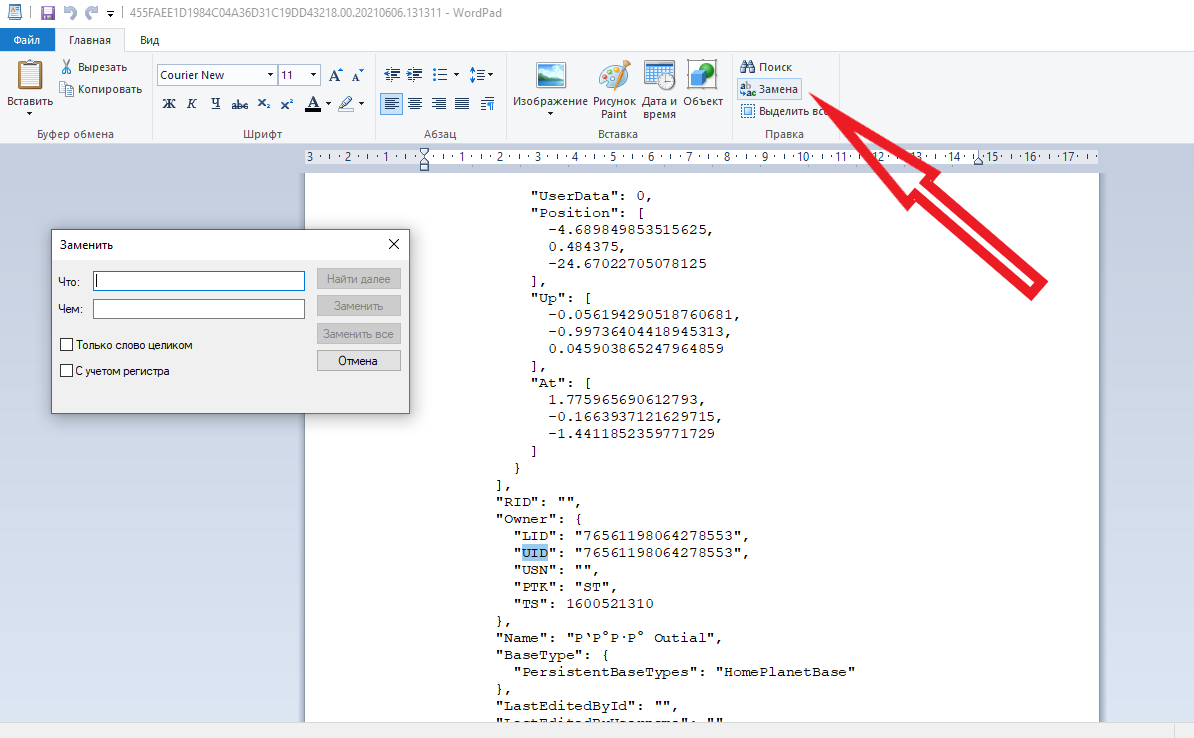
Repeat this procedure with the USN value.
In the XX save file, the LID will be “00000000000000000001”. Replace all these values with your UID.
Replace “BaseStatId” with “BaseStatID
Replace “CurrentMissionId” with “CurrentMissionID
Replace “PreviousMissionId” with “PreviousMissionID
Replace “MissionId” with “MissionID
Replace “ObjectId” with “ObjectID
Replace “TraitIds” with “TraitIDs”
Replace “MultiplayerLobbyId” with “MultiplayerLobbyID”
Replace “XB” with “ST” (be careful here, replace with quotes)
Stage 4: final
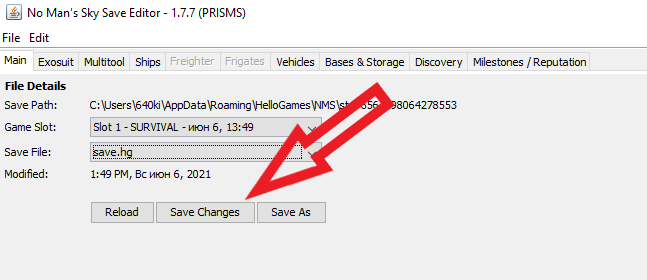
Close the editorial office and save the changes.
We save the changes If everything is done correctly, then the next time you start the game in the incentive, you will find that you have become yourself from the Xbox.
Thanks to Horad I’ns Vorau for sharing the method to transfer Xbox game save to Steam.
Related Posts:
- No Man’s Sky: How to Clear All Terrain Edits Using the Save Editor
- No Man’s Sky: How to Fix Repeat 16 Bug on New Endurance Update
- No Man’s Sky: How to Restore Save Files on Permadeath
- No Man’s Sky: Expedition 6 The Blighted Walkthrough
- No Man’s Sky: Expedition 7 “The Leviathan” Walkthrough
Is it possible to take a xbox save then when you replace everything required for steam, get a save editor change some things then try putting in back in?
Please update this… NONE OF THIS WORKS BECAUSE IT’S DIFFERENT ON GitHub… PLEEEEAAAASSSEEEE
IT WORKS! Thanks! 80 hours and a billion saved and running smoothly on the steam deck!
I made the steam dummy save, but in the JSON file was no UID nor a USN… It was just blank. In the other file it is not possible to leave it blank because it randomizes it everytime new. Why is that and how do I fix that?
Hey,
have you found a solution for this issue? Maybe more play time is required?
Thanks!
Could not manage to replace the files, can you help?
This worked perfectly for me thanks! I did have to hunt down NomNom but found it here https://www.nexusmods.com/nomanssky/mods/1566?tab=files&file_id=19253. Otherwise went perfect.
Did you just follow these steps using the newest version of NomNom?
Yessss!! Awesome, this has also worked for me!!
To anyone struggling with this, unfortunately it’s not very clear from the text: The UID for Steam is your User ID, once you have created an inital Steam save game with No Man’s Sky you should easily be able to find by doing the following: Use WIN+R keys to bring up the “run” command console in Windows. In there you paste the following and hit ENTER: %AppData%\HelloGames\NMS -> The folder that opens in your Explorer should show a sub folder something like “st_123456789″… some numbers, those numbers are what you need for the UID (without the “st_” in front of it, of course).
Use that number also to replace the USN and LID, as stated above in the blog post.
And one more thing: For everything where it says in the text: Replace “BaseStatId” with “BaseStatID –> He is missing an addition ” here at the end! And also don’t copy the ” from the blog post text because it has a weird format.
Hope this helps!
This totally works. 40 hours of game play saved.
Note: the git hud version is different. but it works. I clicked on open file. it showed it the path that it save the .json file with.
I used Visual studio code to change all the UID, USN, and LID value. the replace all function makes it easy
fond a video tutorial explain this exact article
https://www.youtube.com/watch?v=ajR7OJr50r4&lc=UgxRbVVp2GSDUEhXDzl4AaABAg
I hope this helps everyone!
Can confirm this still works 2024, best advice is to find the linked YouTube video and use that if you get stuck. Made everything so much faster for me.
Just FYI least as of 7/22/2024 there was big update to NMS game, which means NomNom is out of date – I transferred save from steam to xbox and it was labeled incompatible in the game. Waiting for update and I imagine it will work again.
So when I look into my steam usn in the files I get: “usn: ” (Blank) what do I do?
When I transport the new code into NMS save editor, When I click yes to apply the changes, It won’t exit out of the tab. I did find how to find the steam username. disregard the last question I posted.