Having troubles building efficient water cooling builds in PC Building Simulator? Wondering what to do with all those parts you just unlocked? Seek no further: Ship is here to help with this noob friendly guide.
Introduction To General Cooling
If you’ve ever played the game or know a couple things about PC building, you’re already familiar with the concept of draining heat away from the components – known as cooling – one important step to ensure you don’t end up with a serious overheating, leading to a Blue Screen Of Death – BSOD for short.
New players will begin tinkering with some simple air cooling parts, mainly case fans and CPU fans, which in most cases are enough to ensure a PC boots to the installed OS safely or runs 3DMark without returning a BSOD.
Some customers will require an AIO water cooling at times, but that is easy as well, since it just needs to be installed on the CPU and carried over to the side, top or bottom of the case.
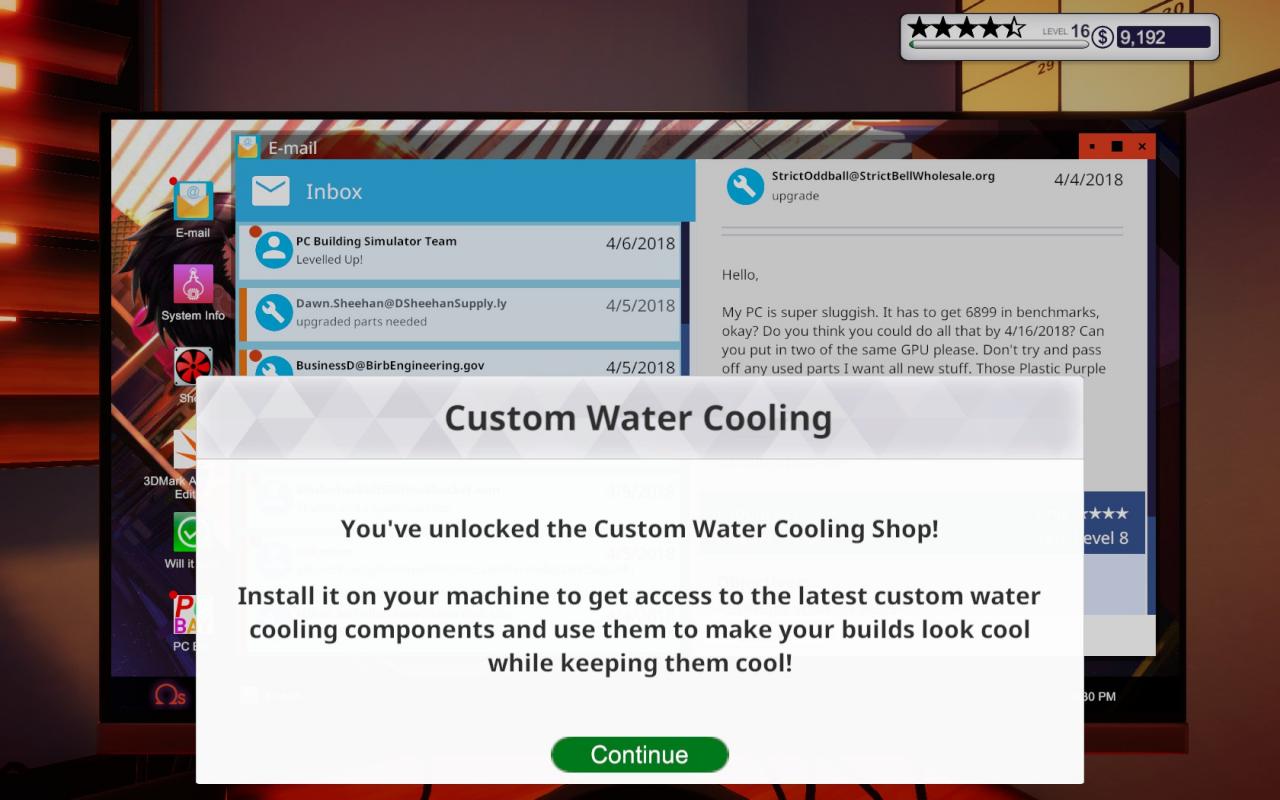
However, starting level 16, players will receive a special pop-up saying they’ve unlocked Custom Water Cooling. The game does little to nothing to guide the player, aside from telling them where to find the purchased parts in their inventory or how to buy them in the Shop.
This guide was written after a lot of firsthand practice to ensure that the reader doesn’t feel lost when coming to an actual build in-game and can keep enjoying the game with new acquired knowledge on the matter.
Step 0 – Setting Up The Workspace
I recommend using a case that’s at least a Mid Tower or larger. This is because efficient Custom Water Cooling implants end up taking a lot of space and we don’t want to end up midway with a crammed case. You are of course free to take the risk and go for a smaller workspace, but in this guide I’ll be using a CORSAIR Obsidian Series 1000D, which is a Super Tower.
Here is the full setup that I used.

One last important thing before we proceed any further: it’s more convenient to remove any case fans, dust filters and/or side panels that are pre-installed into the case itself. This will speed up things a bit, as you will be able to install all the components immediately.
Once everything is done, let’s get into it.
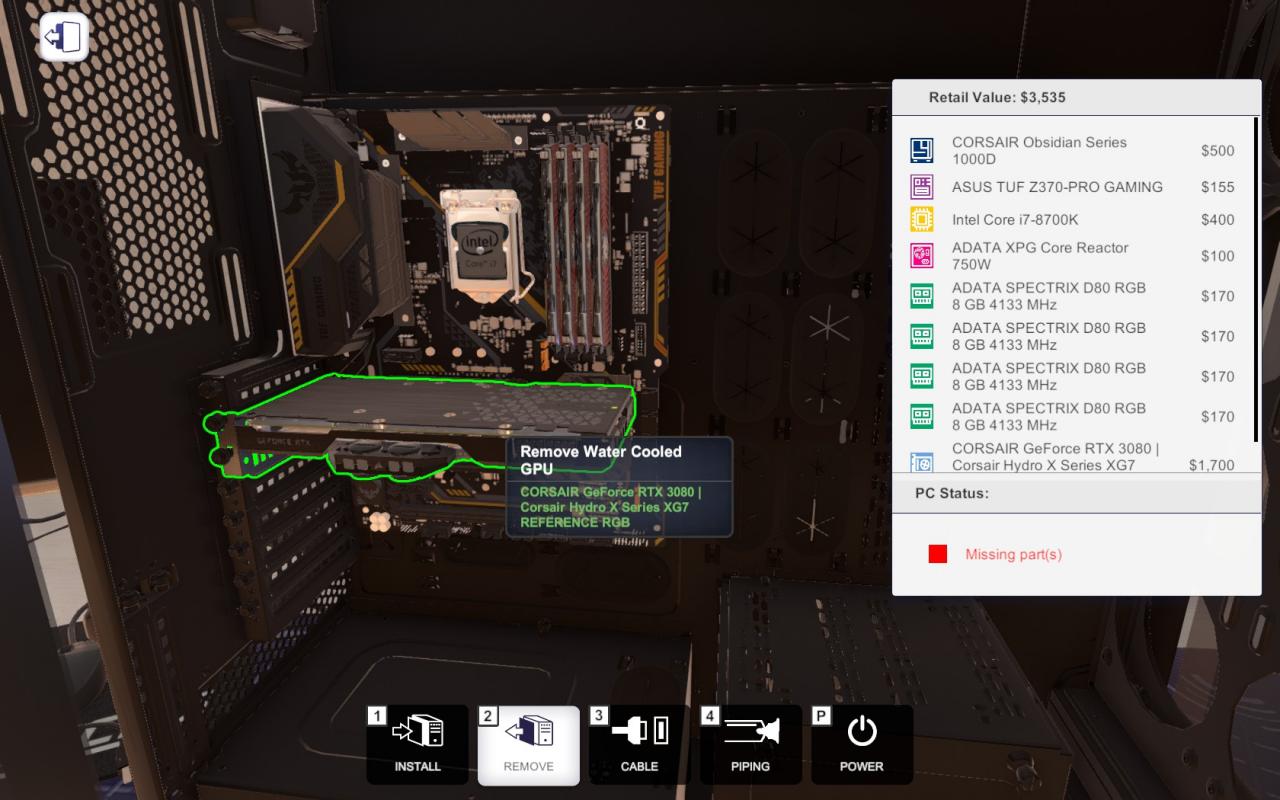
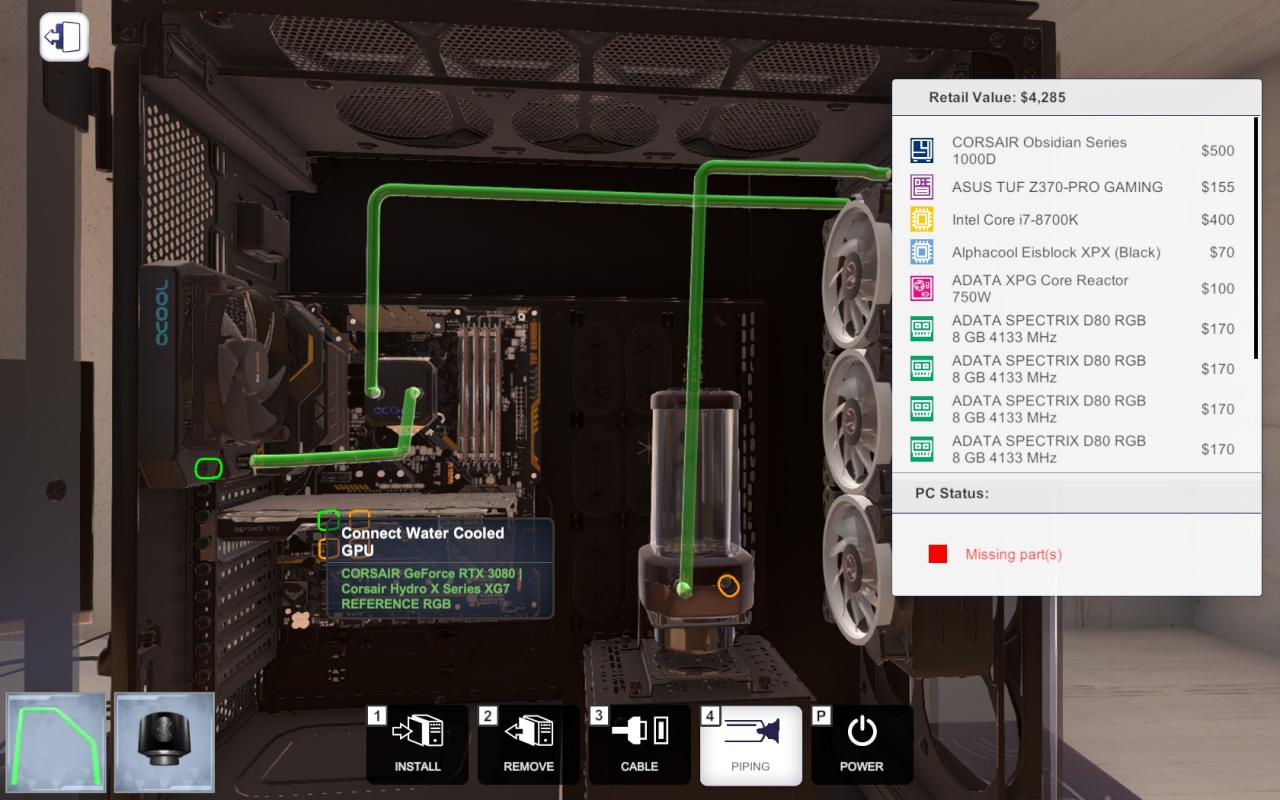
Step 1 – Watercooled GPUs
Due to having a wider choice of components, I’ll be going through all the GPUs available in Free Build mode. This, of course, doesn’t mean that this guide isn’t doable in Career Mode, only that I’ll make sure the reader fully grasps what I’m talking about by having a look at everything on the catalog.
Found anything you’d like? I’ll be getting the CORSAIR GeForce RTX 3080 Graphics Card for this build.
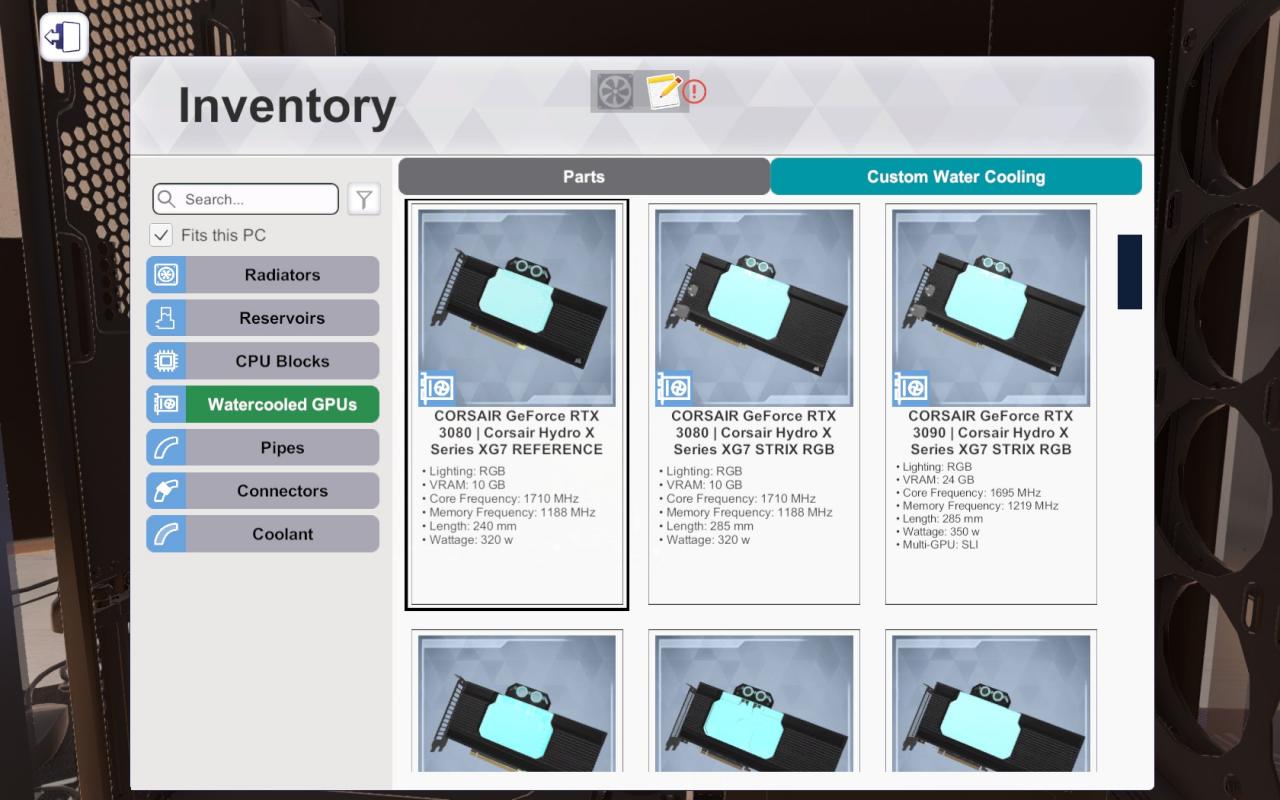
Have no fear: the Watercooled GPUs are meant to be installed just like common GPUs. This means you can technically have a Dual Watercooled Graphics Cards build, but to keep it simple I’ll stick to just one for now.
Easy, isn’t it?
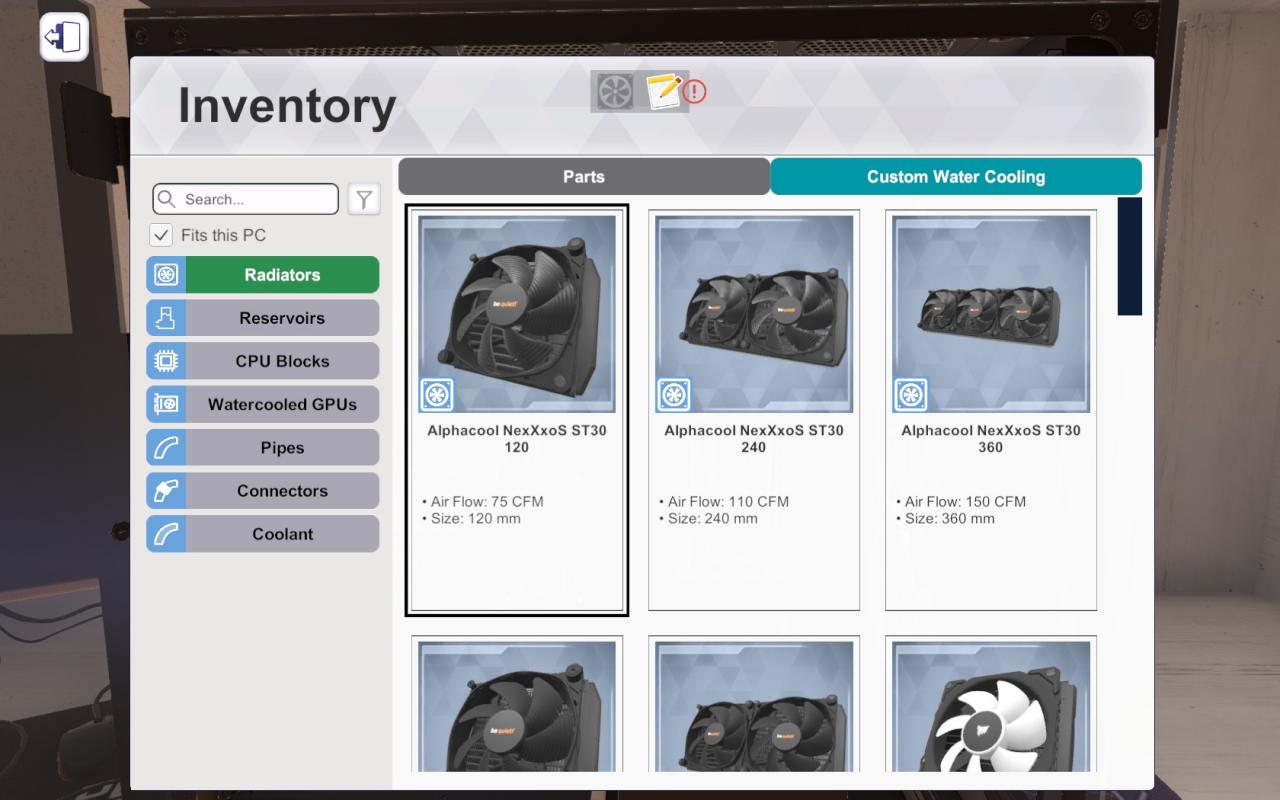
Step 2 – Radiators
Fancy some RGB? Because I do, so I’ll be using the Raijintek CALORE C360D.
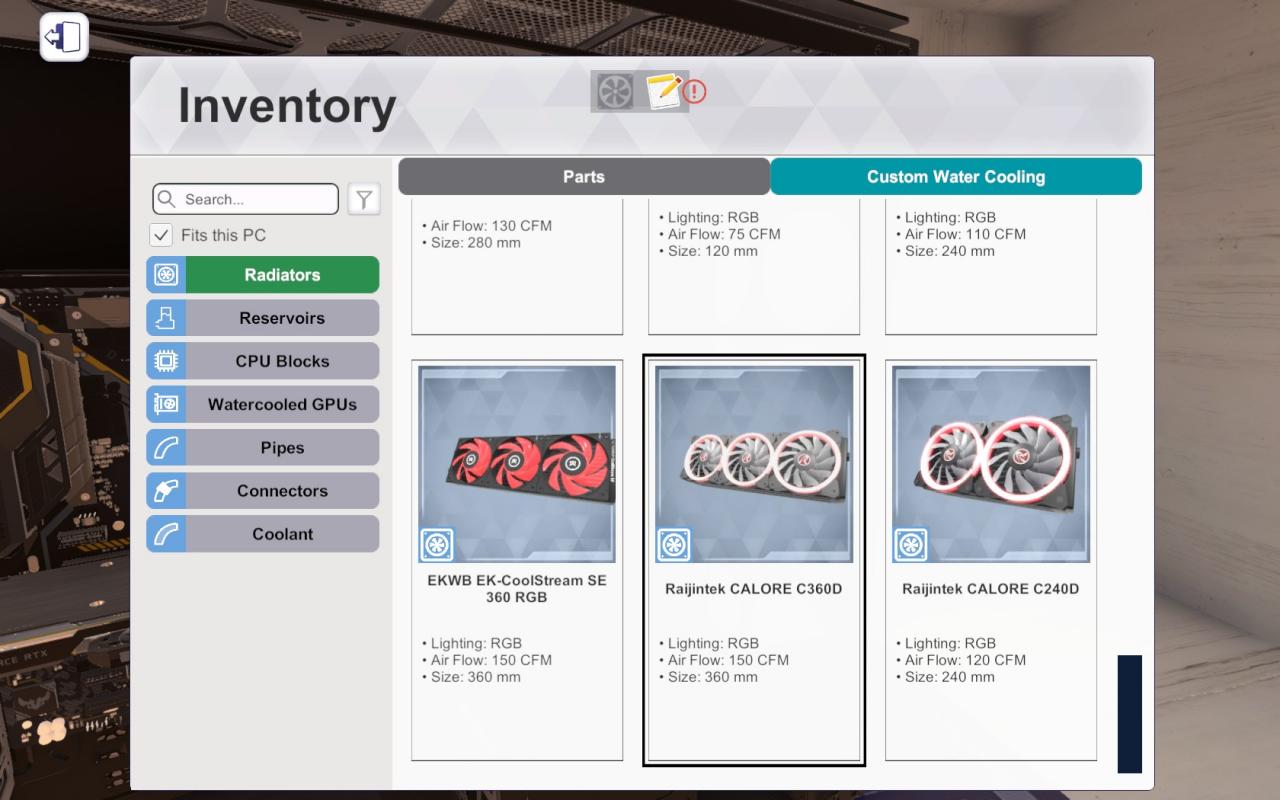
Radiators are pretty similar to case fans about the way they’re installed: you’ll usually have to place them on the top or side panels of the case. In this build, we’ll be putting them on the right side of the case.
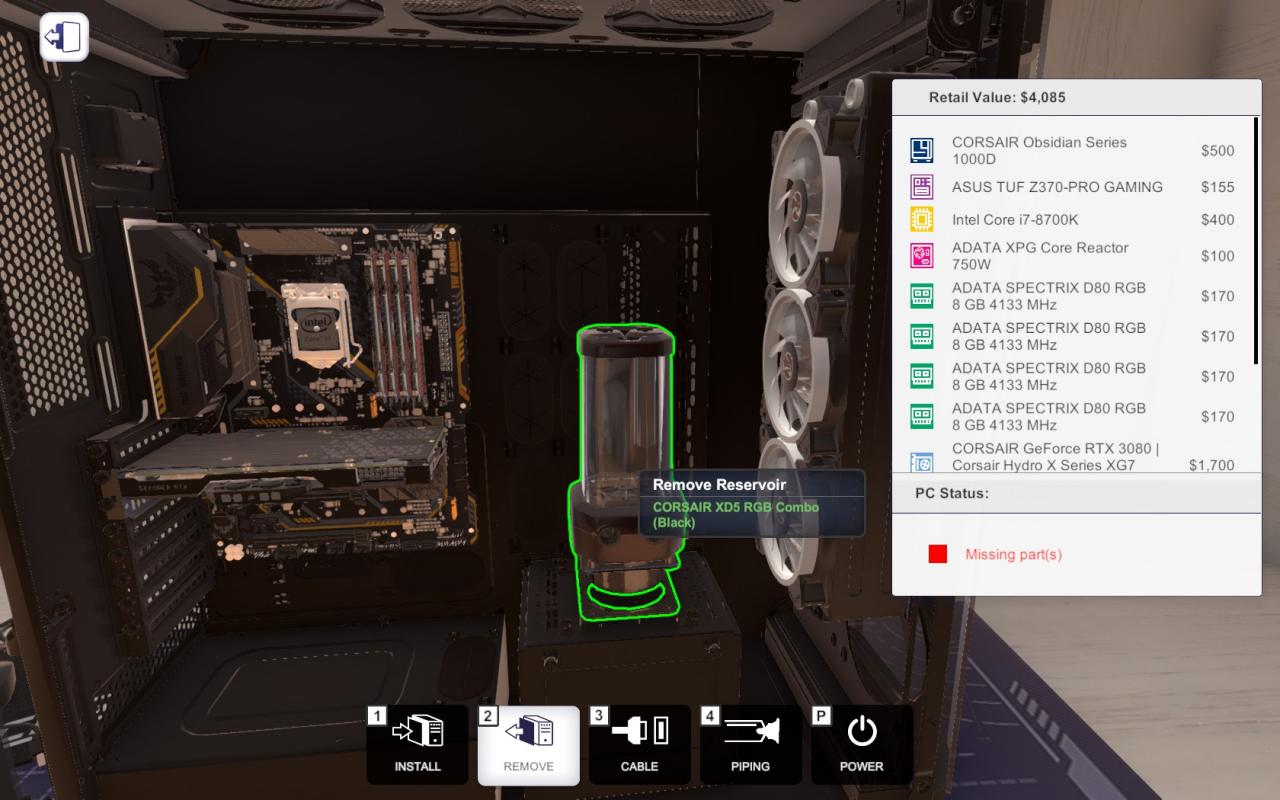
Step 3 – Reservoirs
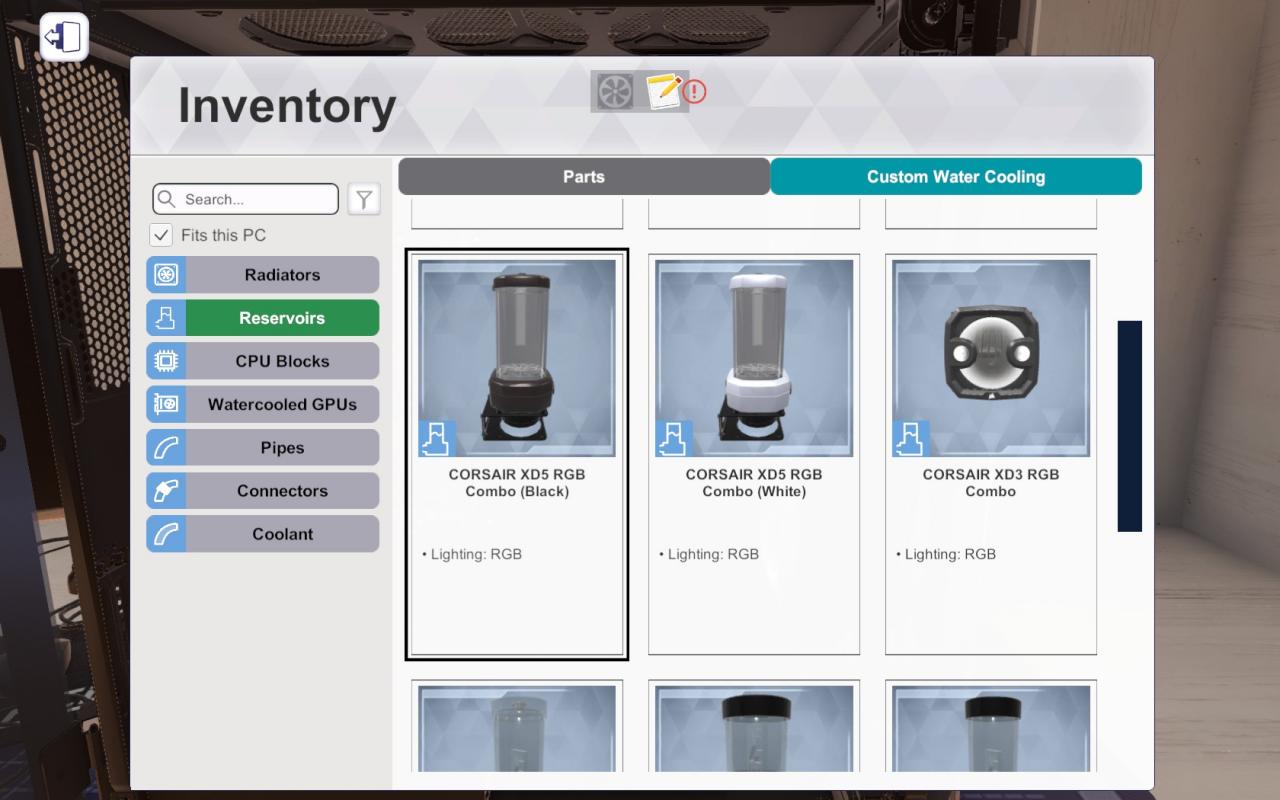
Where to install it? This, unfortunately, depends on the case you’ve chosen. Some cases let reservoirs be comfortably placed on the bottom of the case, while others force the player to hang them on the top panel, often obstructing the radiators and forcing them to rethink the build. This is one of the main reason why I recommended a bigger case from the beginning: it’s usually less a hassle, in fact I’ll be placing mine next to the back panel.
Got everything set up? Then let’s move on to one of the prime components of a Custom Water Cooling build.
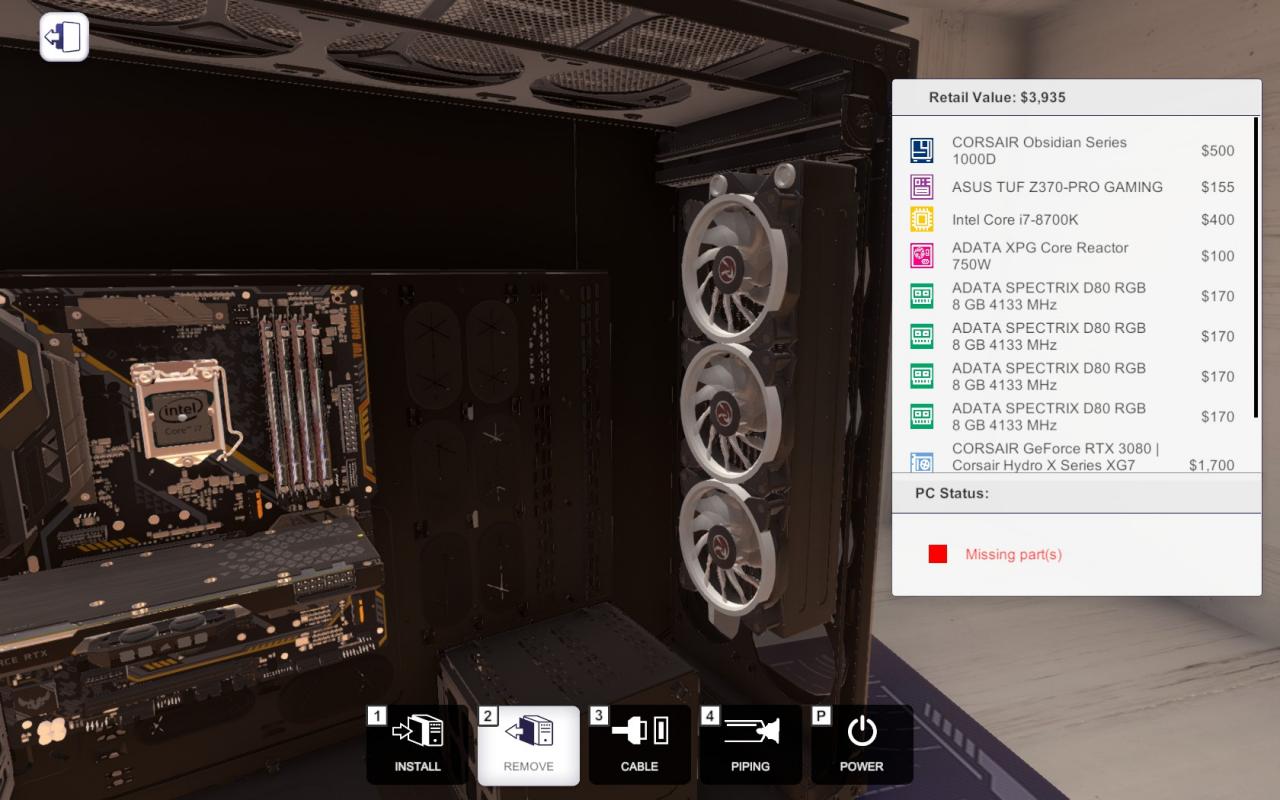
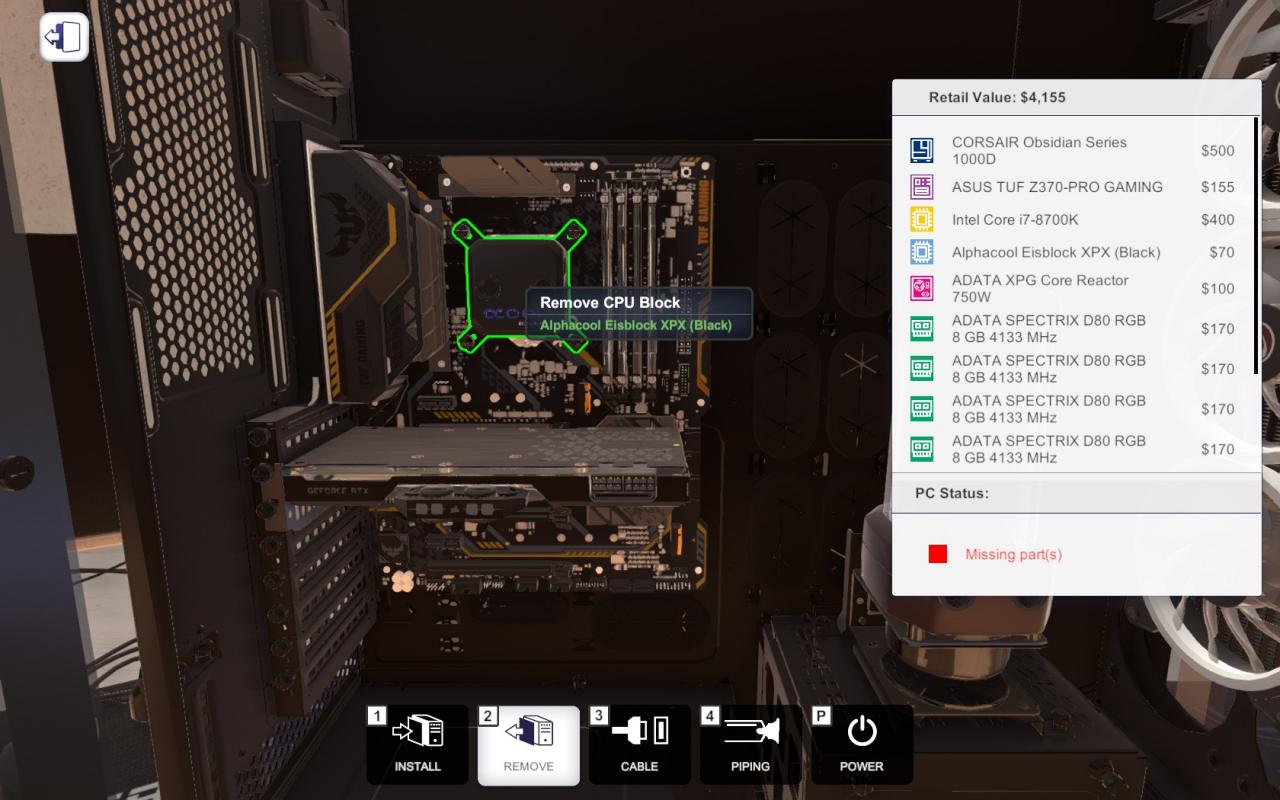
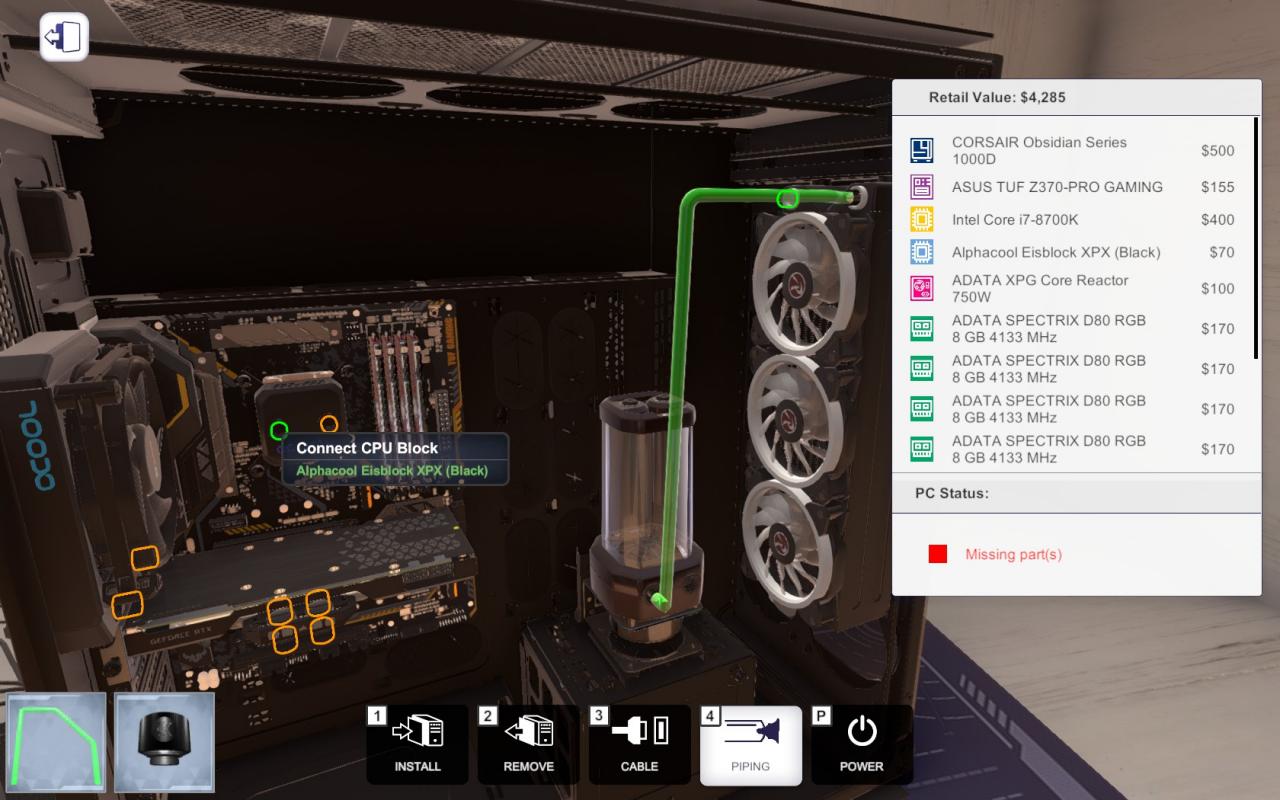
Step 4 – CPU Blocks
This is where the CPU Blocks come into play: it’s a special component which only use is to effectively use the liquid it receives to cool down the CPU. Forget to put it in and the whole implant will make much less sense.
I’ll be choosing the most basic one I can find: the Alphacool Eisblock XPX, which comes in many different colors, so just pick one of your liking. Of course, make sure that your CPU Socket is among the compatible ones for your CPU Block.

How are you supposed to install it, you may ask? Just like how you install a basic cooling component: right onto the CPU cradle. For now, you don’t need to do anything else – just let it sit. We’ll come back to it in just a moment.
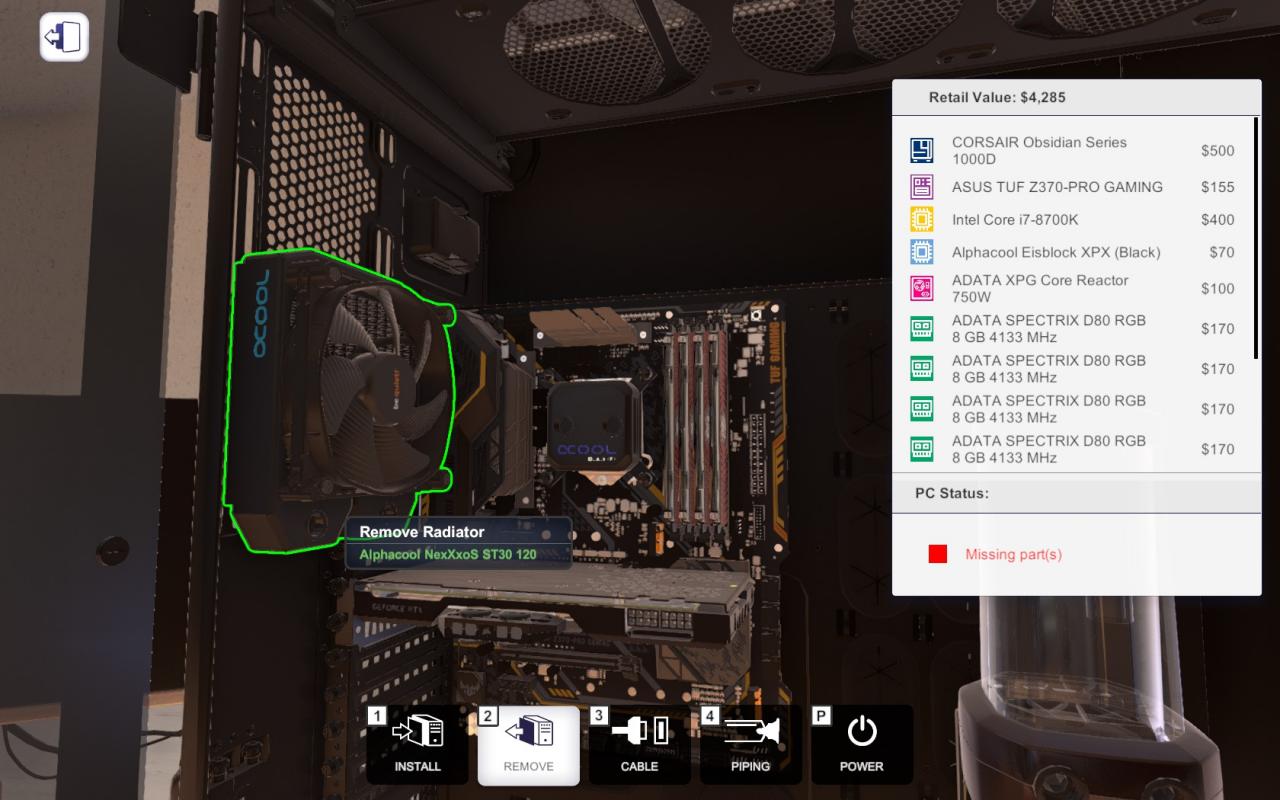
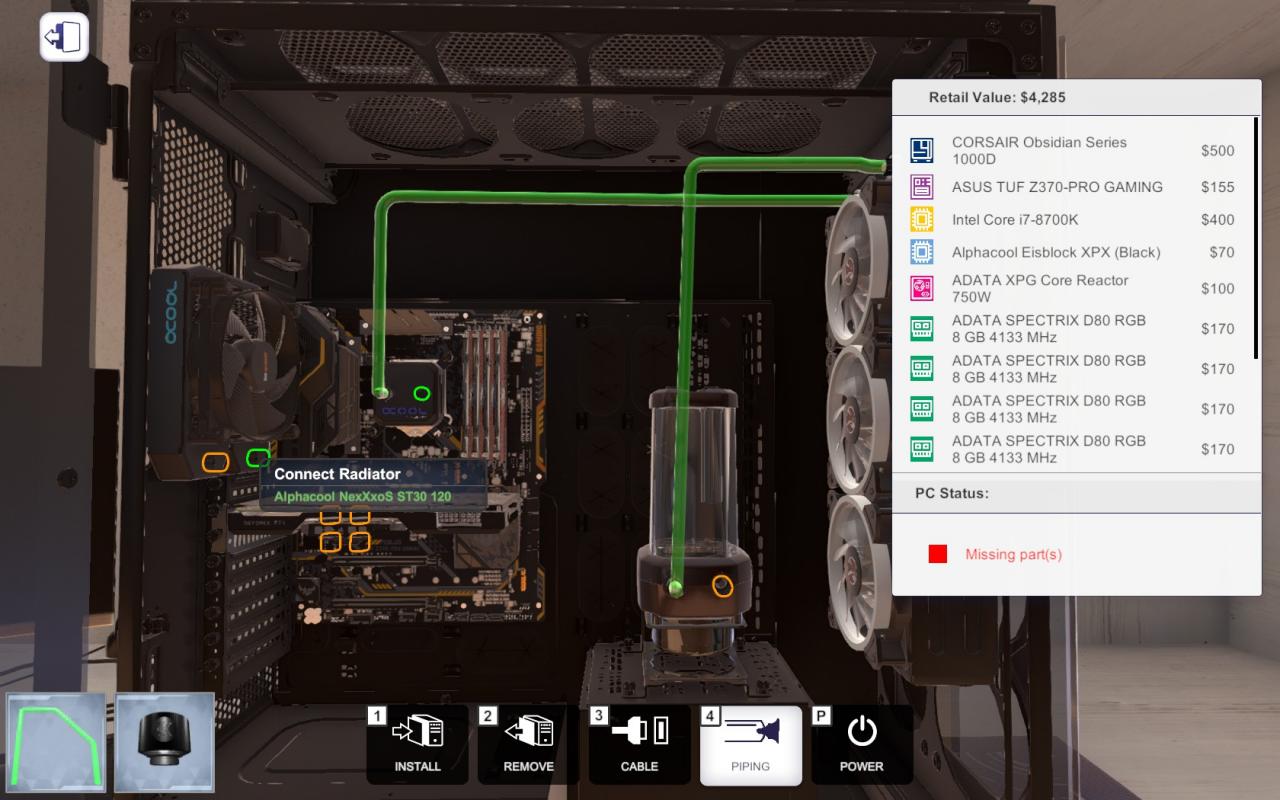
Step 5 – One Additional Radiator (Recommended)
In Step 1 of this guide, we’ve digressed about how the radiators are the ones able to cool the liquid received and output it back into the flow. Since both the CPU and the GPU are heavily in need of coolant, sending it from the CPU directly into the GPU before letting it cool down isn’t the best solution and will likely result in the GPU overheating on more complex rigs.
This is exactly why I prefer to add a single radiator between the CPU and the GPU, so that a refreshed liquid is what the GPU ultimately receives.
I’ll be choosing one Alphacool NexXxoS ST30 120 from the list.
And put it into the left side of the case, right next to the CPU itself.
Step 6 – Let’s Talk About Pipes And Connectors
As the name suggests, pipes are the ones responsible for carrying the liquid around the base components we’ve just finished installing. This means we’ll need to pay attention at how we place them, to avoid causing a mess.
PC Building Simulator offers us two kinds of pipes to choose from: Flexible Pipes and Rigid Pipes.
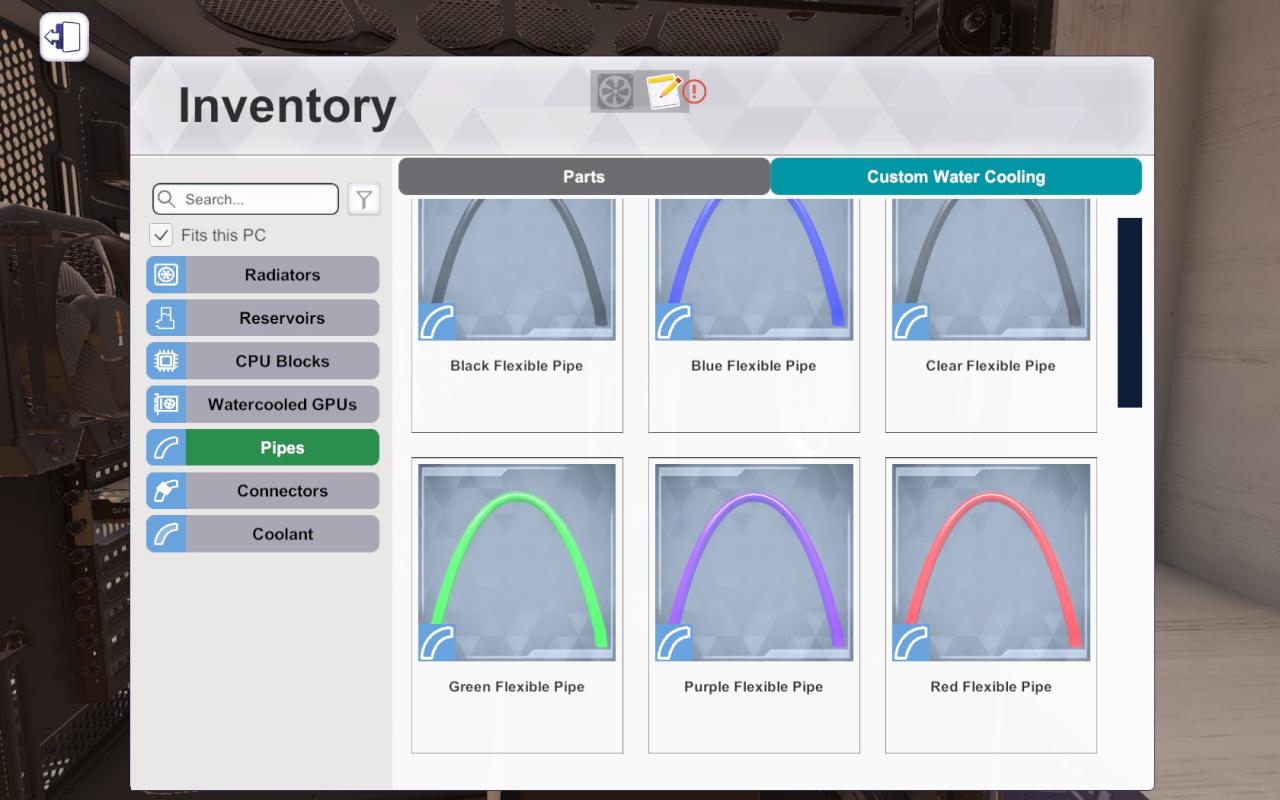
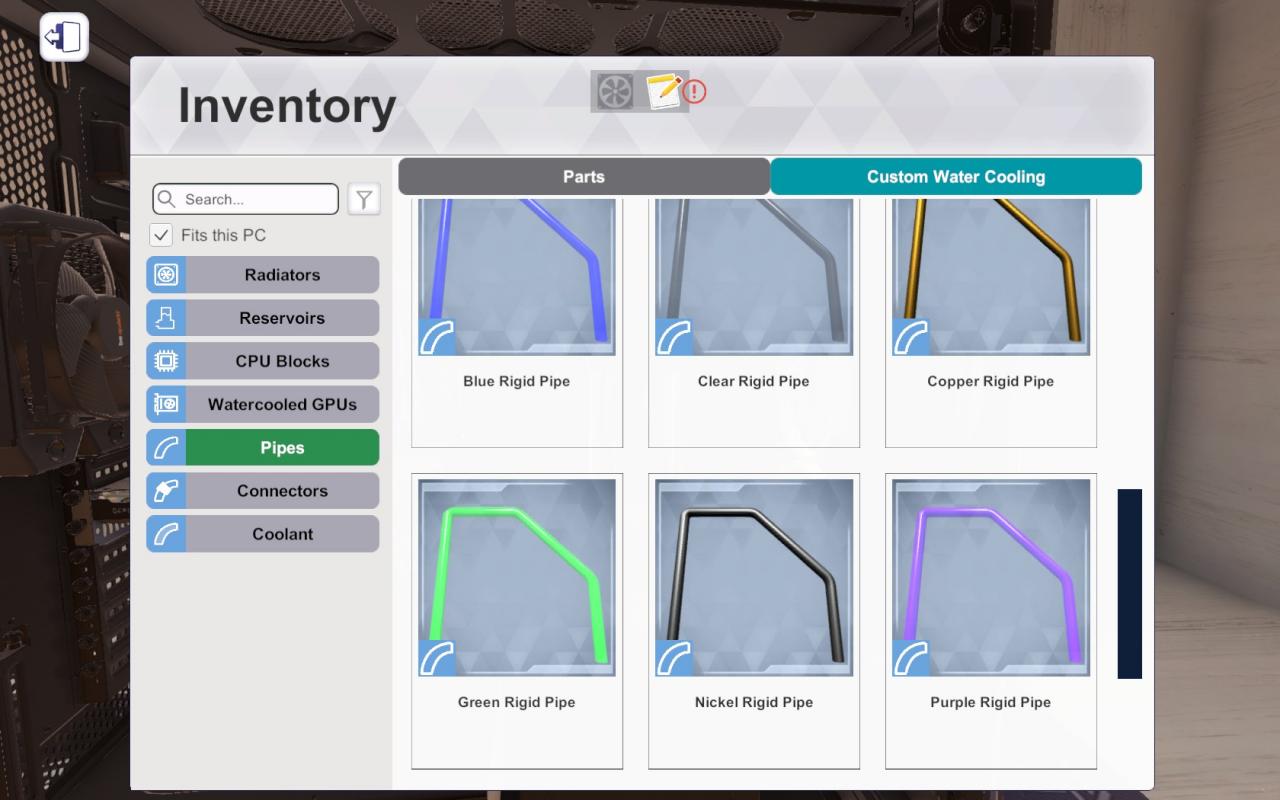
What exactly are the differences between the two? While the flexible ones automatically adapt and stretch between the components you’re linking, rigid pipes are more versatile and the player is allowed to bend them. This means that flexible pipes are easier to place, although they can conflict with each other in an intricate loop, while rigid pipes are more maneuvrable, even if that means taking extra care when placing them.
I’ll use the Green Rigid Pipes to show you how to deal with them, but for a quicker work, you’re free to use the Flexible Pipes as well.
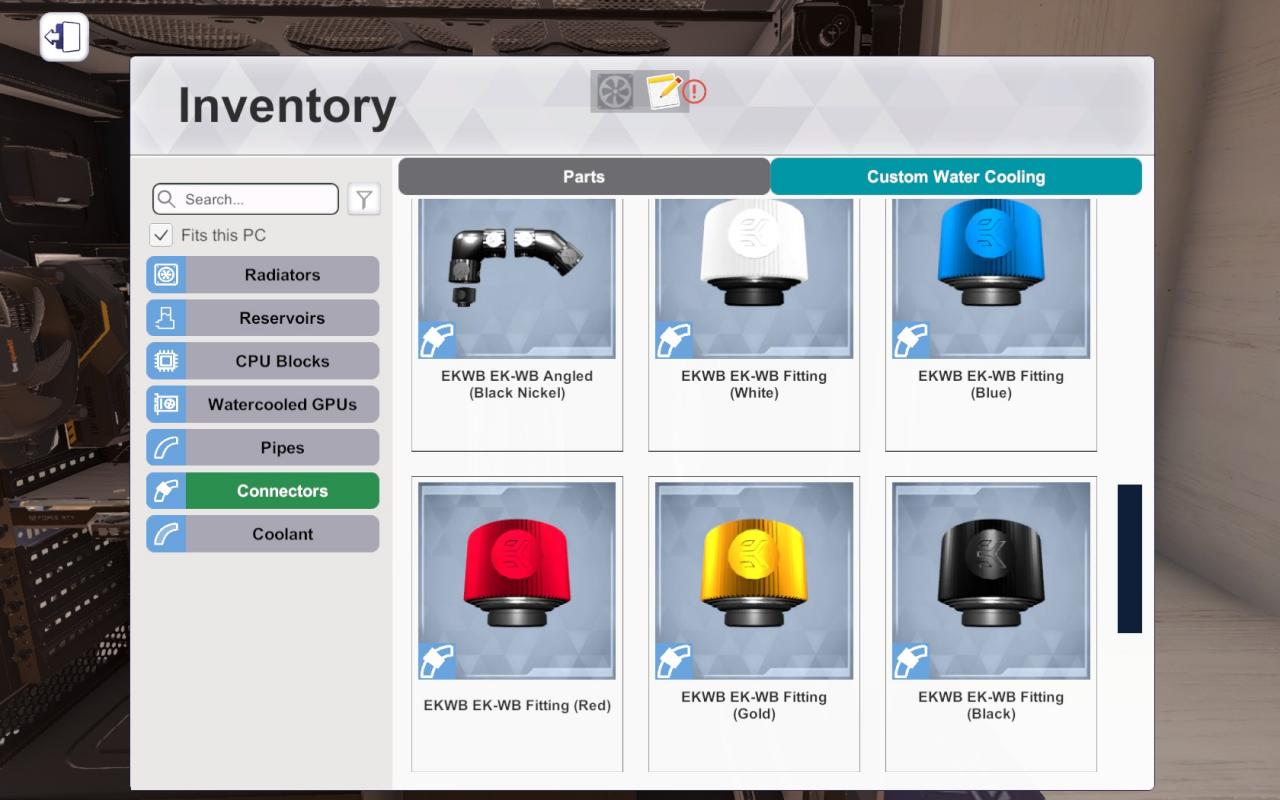
The next thing to know about the Rigid Pipes is that they require a connector in order to be bent. For this guide, I’ve used the EKWB EK-WB Fitting (White), since they’re the least noticeable ones and don’t ruin the aesthetic of the build so much.
Step 7 – Linking The Components Together
With our current setup, what we want to do is:
– The cooler is sent from the reservoir by output;
– The liquid arrives at the main radiators, where it’s cooled and then sent forward;
– The CPU receives it, warms it up and then sends it to the single radiator;
– Once again, it cools down and is sent to the Watercooled GPU(s);
– It comes back to the reservoir and the cycle continues.
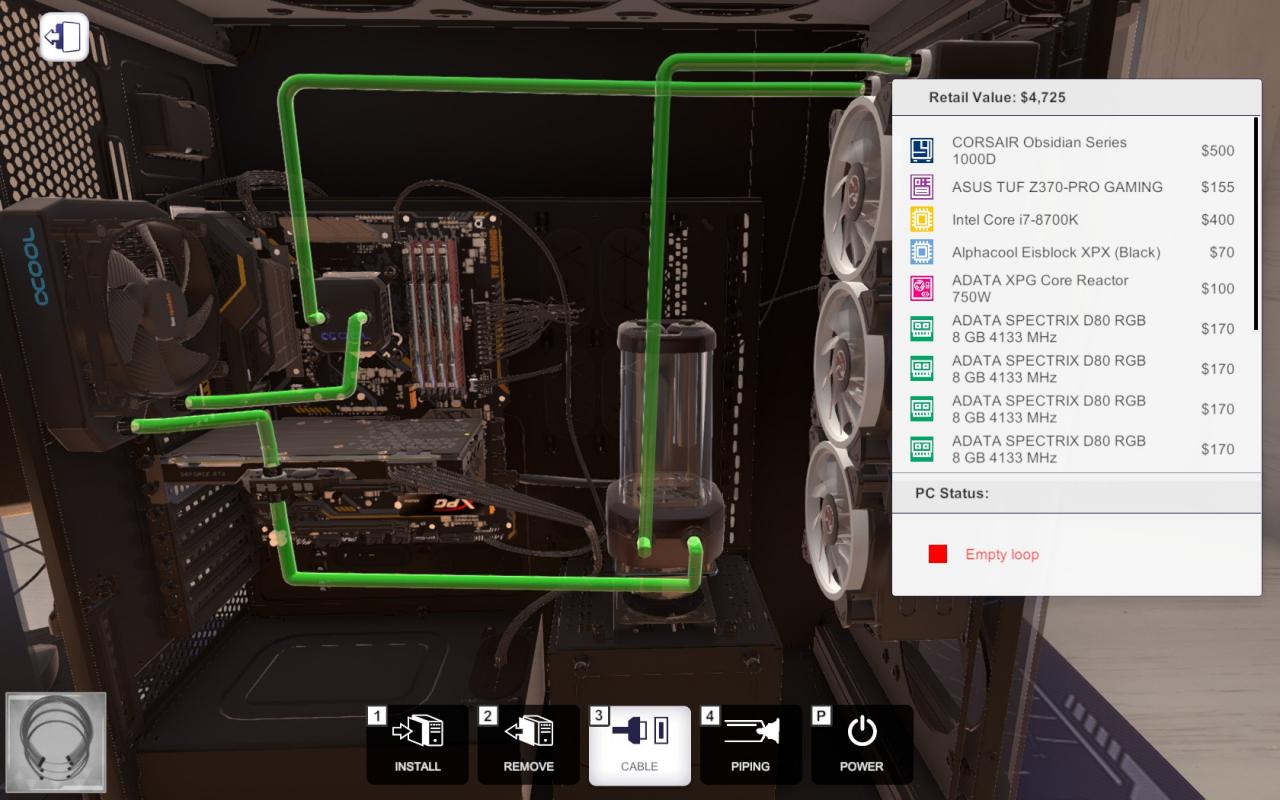
This whole process is called a loop. Pretty straightforward, right? But we need to have a firm grasp on the words input and output. “Input” means that the component is actually receiving something (in this case, the liquid coolant), while “output” means that something is coming out from that part. Every component here has two pipe connectors: one for the input and one for the output. We need to be aware of which are which, else the loop will break and some components may be left without any cooling device.
The first thing we want to link is the reservoir to the radiators, as described before. So, take a look at the picture below.
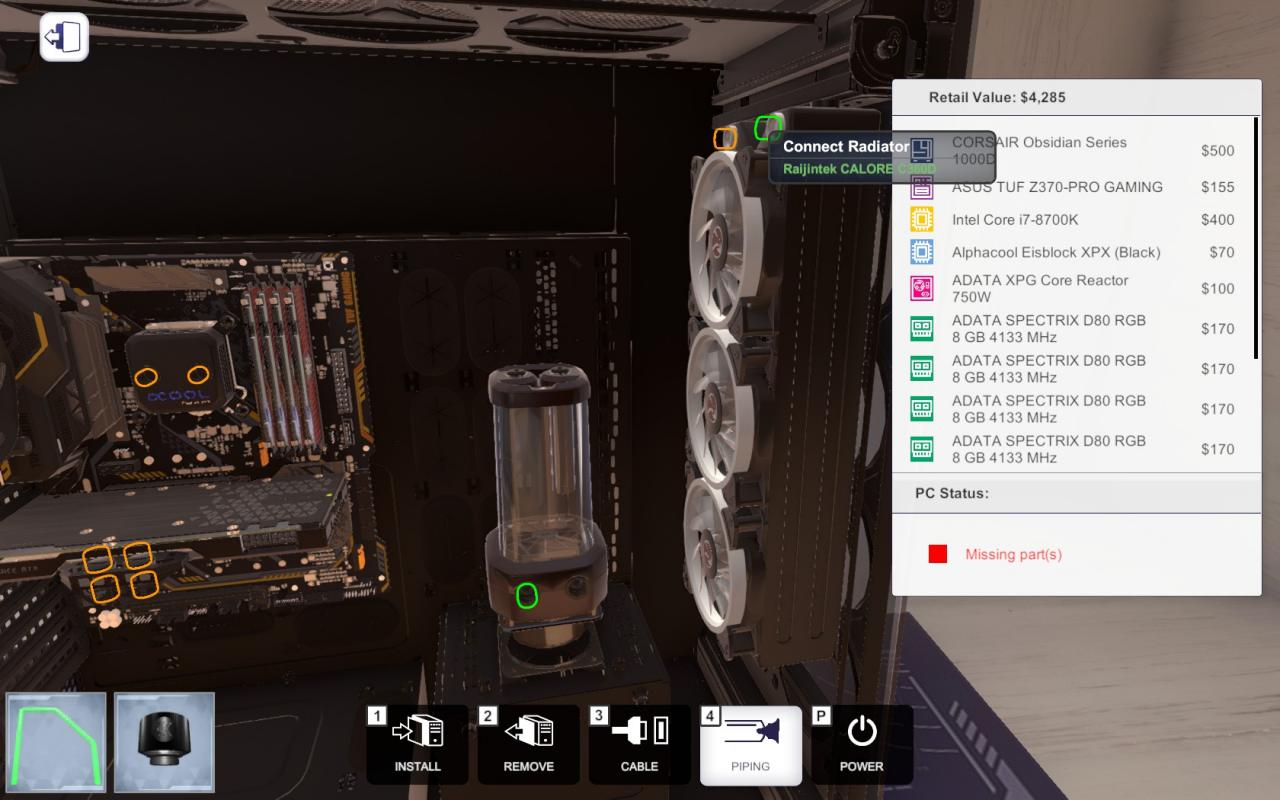
The left connector on the reservoir corresponds to its output, while the right connector on the radiators corresponds to their input. Since the reservoir is the one sending the fluid and the radiators are the ones meant to receive it, we need to link those two connectors together.
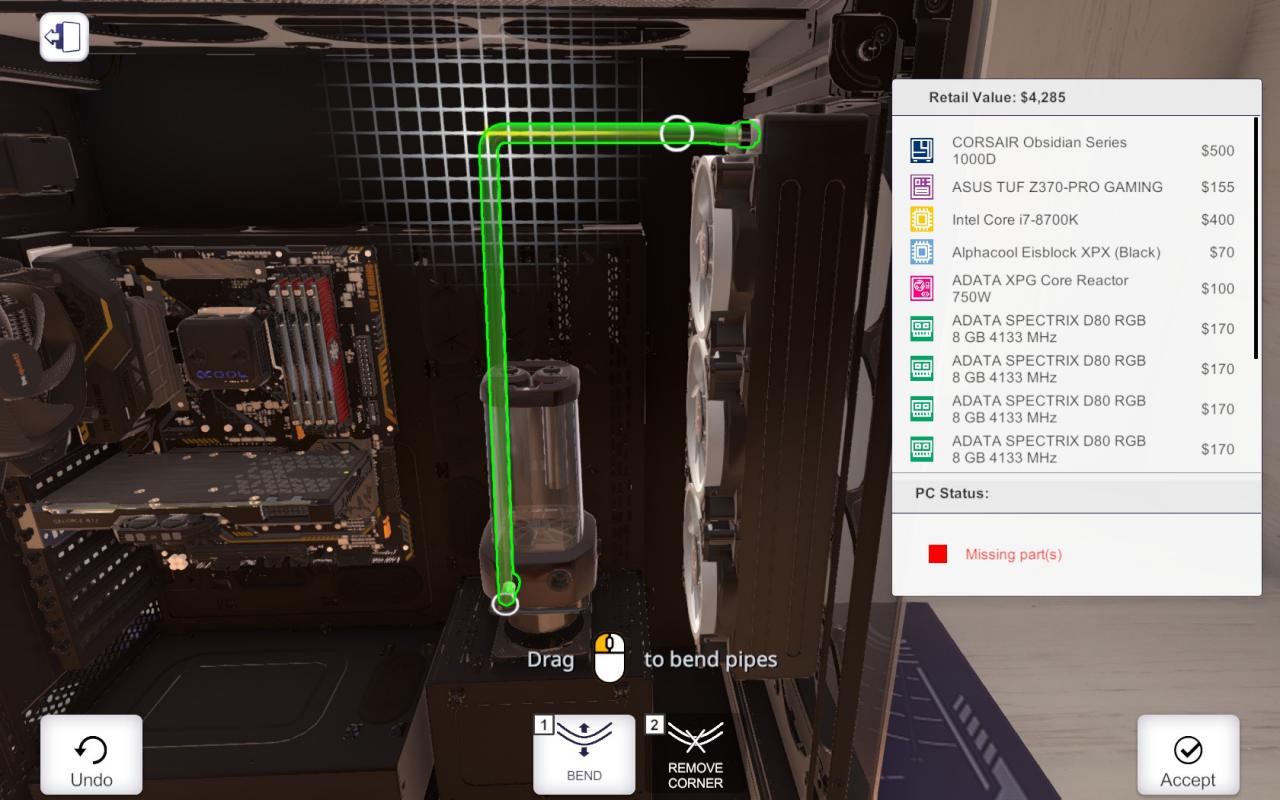
Notice how, if you’re using the Rigid Pipes, you are able to bend them at will to straighten them and improve the flowing.
Next, what we want to do is making the liquid go from the radiators to the CPU. Since we want a nice, cool liquid to aid the CPU’s burning heat, it would be weird otherwise. So now let’s have a clearer look at this.
The left connector on the radiators is their output and we need the CPU to receive the flowing fluid, so we need to link it to its left side, the input.
Is it weird compared to the simpler scenario from before? Probably, but be careful and don’t get this wrong.
Then, the CPU needs to send forward the heated liquid to the single radiator. How do we do that? By linking the right output of the CPU with the right input of the radiator, of course. If you’re confused, have a look at this picture I took.
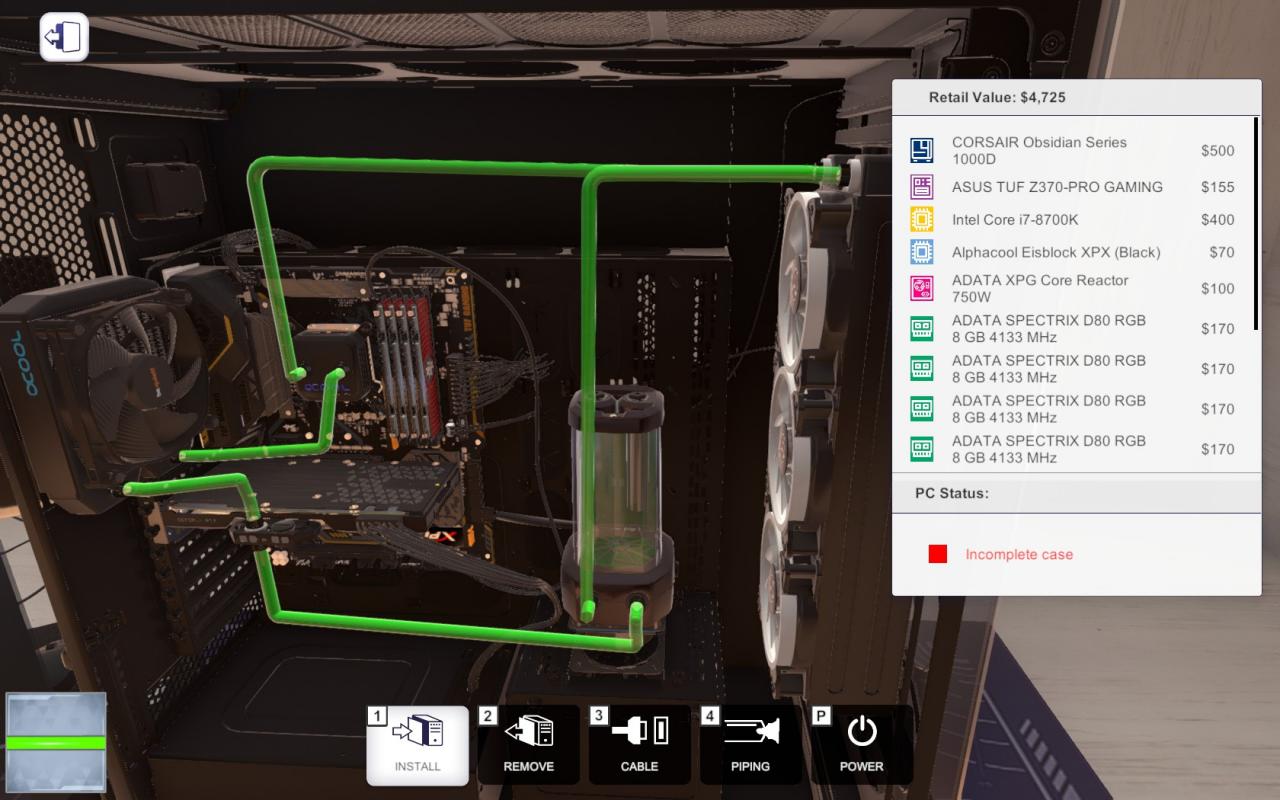
Now that the cooler is ready to serve again, it’s time to think about our neglected GPU. From the left output of the radiator, we’ll link the pipe up until one of the top input connectors of the Watercooled GPU. Which one you choose is up to you: in this picture I’ve linked the pipe to the top left connector.
We’re almost there! All that’s left now is making the liquid go back to where it came from, alias the reservoir. By directly linking the bottom output connector of the Watercooled GPU to the right input connector of the reservoir, we can achieve such.

The last step is doing a bit of cable work. Remember that the reservoir MUST be connected to the motherboard, otherwise it won’t be able to pump the liquid.
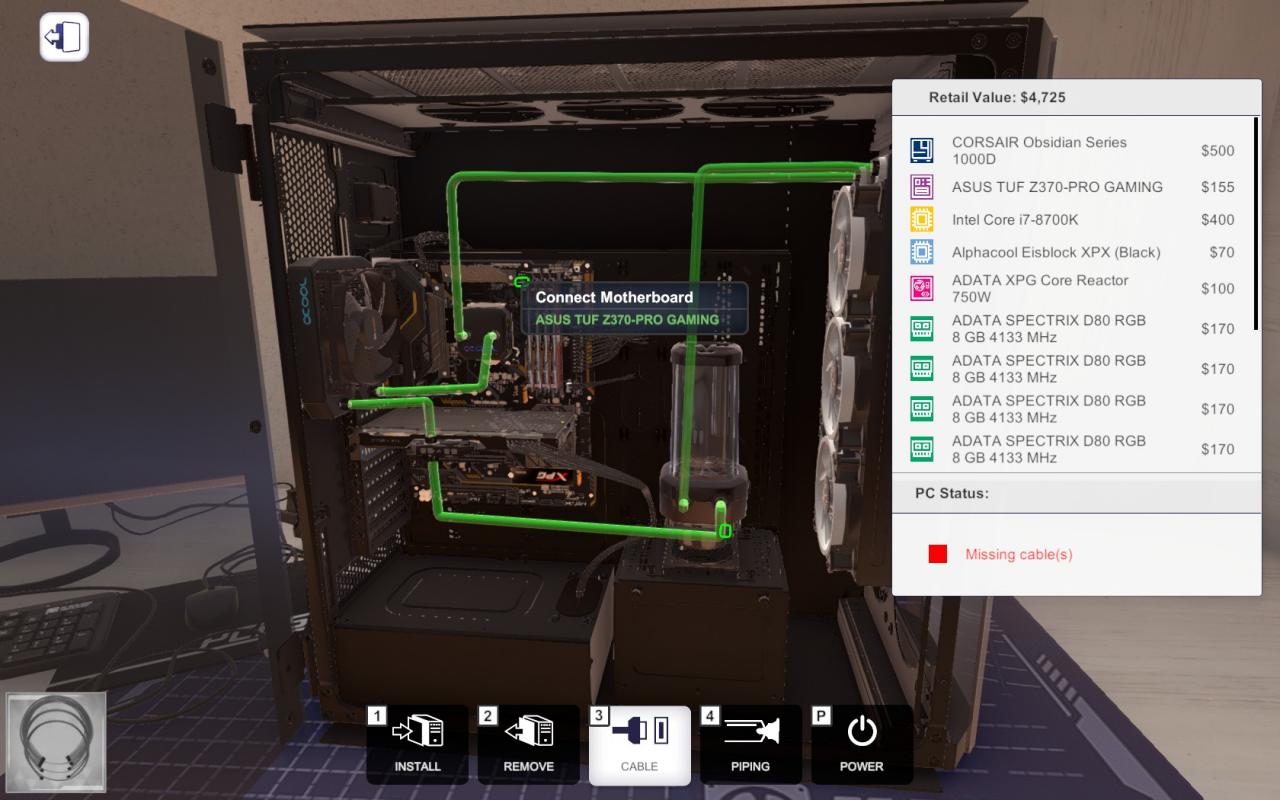
Did you notice the bottom right red writing? It says “Empty loop“, but what does it mean? Keep reading this guide to find out.
Step 8 – Coolant
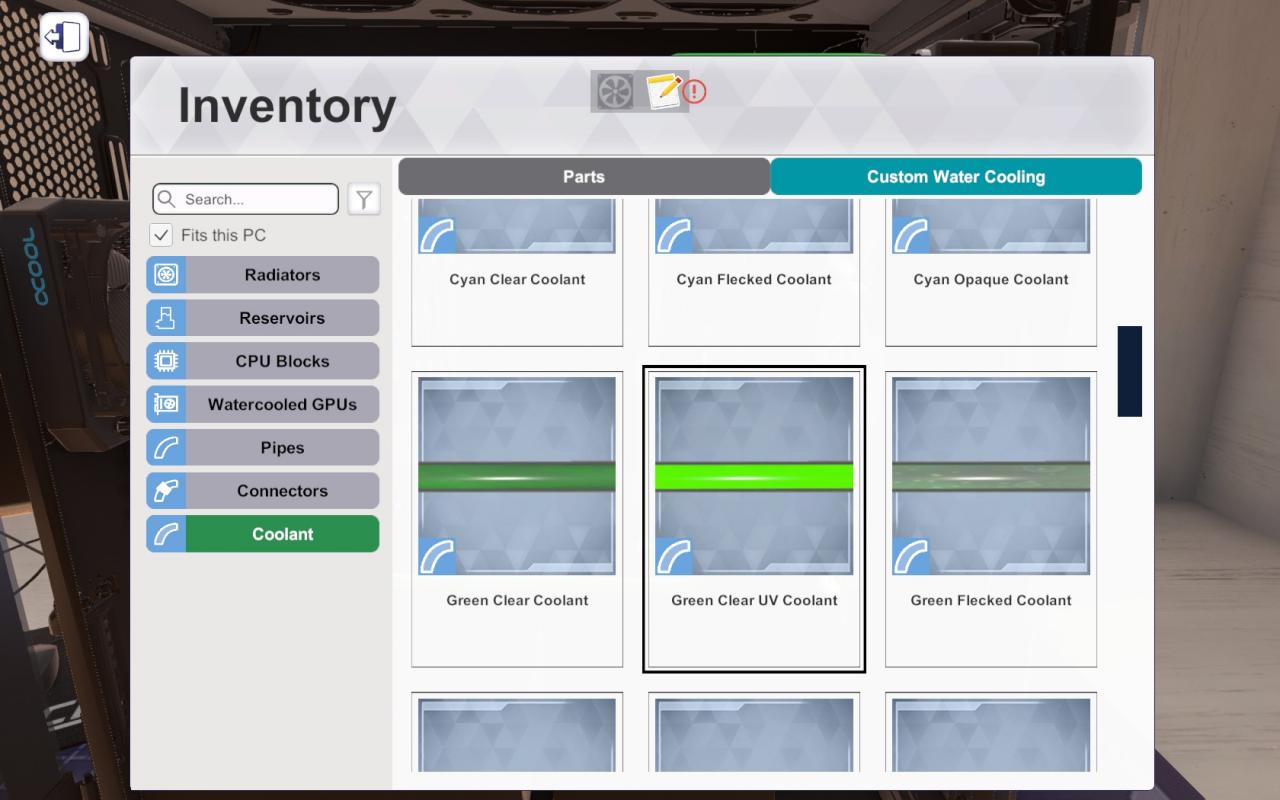
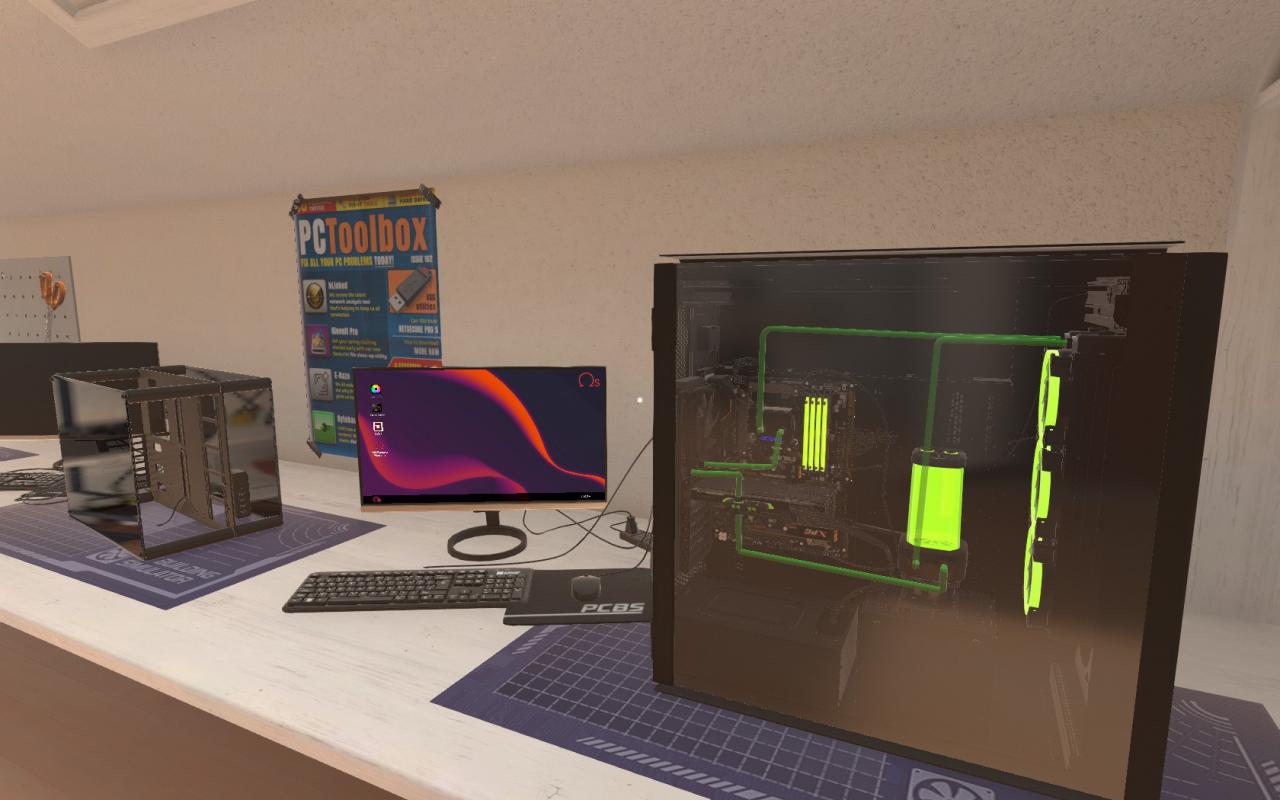
Once done, we can click the reservoir to insert the coolant inside. Notice how it will begin pumping the liquid up and forward, and you’ll actually have to wait until the loop is complete to turn on the PC. Although it might seem boring, this is your chance to check that the rig works as intended and the loop goes on smoothly.
Once it’s done, if you got everything correctly, try turning the PC on: eureka!
Step 9 – Stress Testing The Build
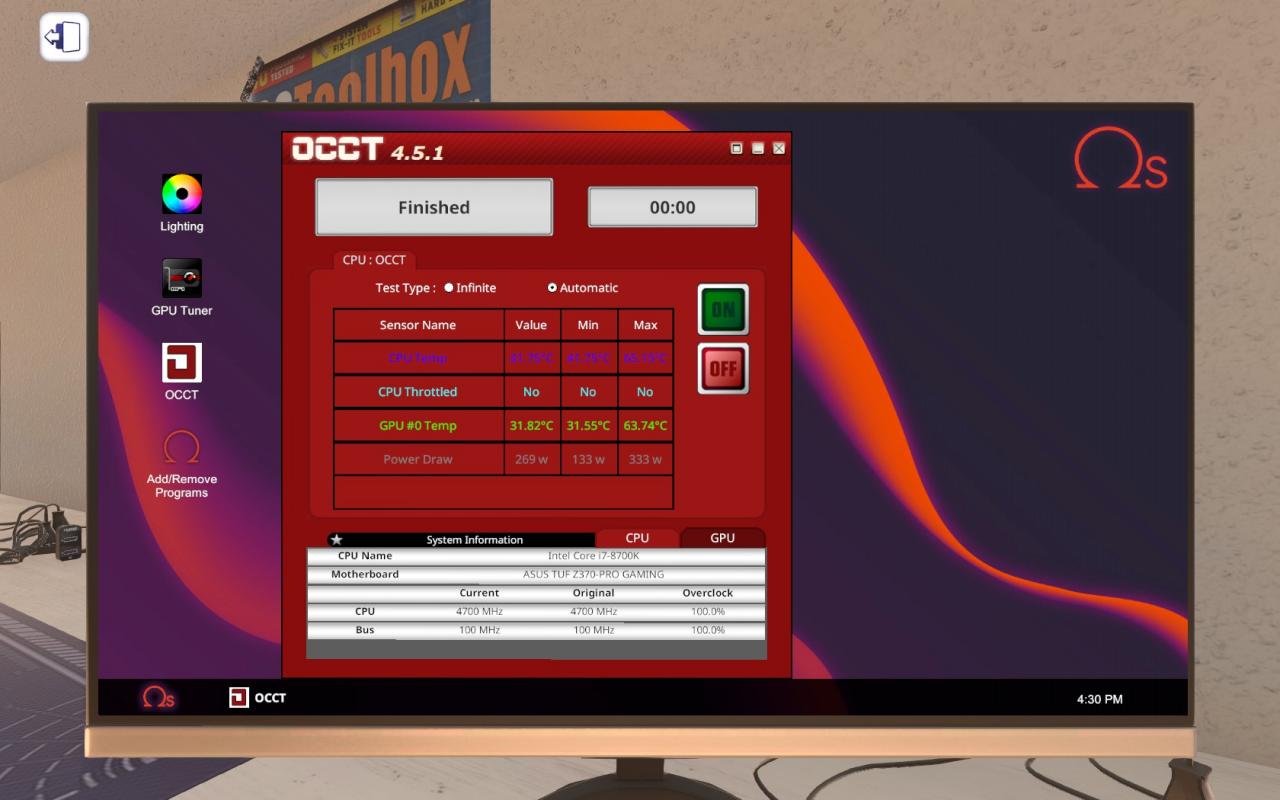
Yes, indeed. That’s why we’ll now be using OCCT to stress test our build and check what the Custom Water Cooling is capable of doing.
You can of course use 3DMark too for this, but OCCT is much quicker and you can test different kinds of overclocks with it.
First of all, forgive me for the blurry picture. The rig we’ve just built apparently works really well under pressure! The maximum temperature for both the CPU and the GPU barely exceeded 60°C, which is safe to keep on. I call this an absolute win!
But how about going further than that? If a relatively simple build such as ours can keep all the components stable, what happens when we upgrade it?
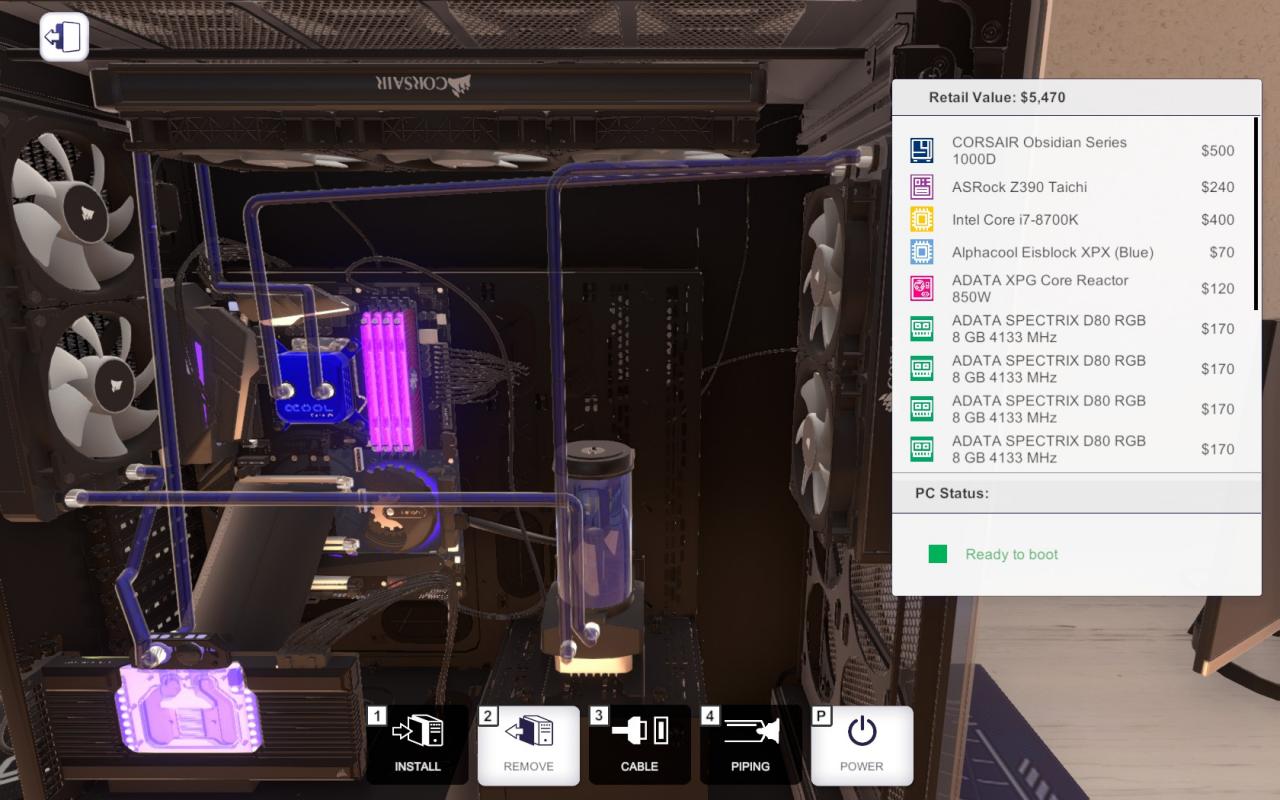
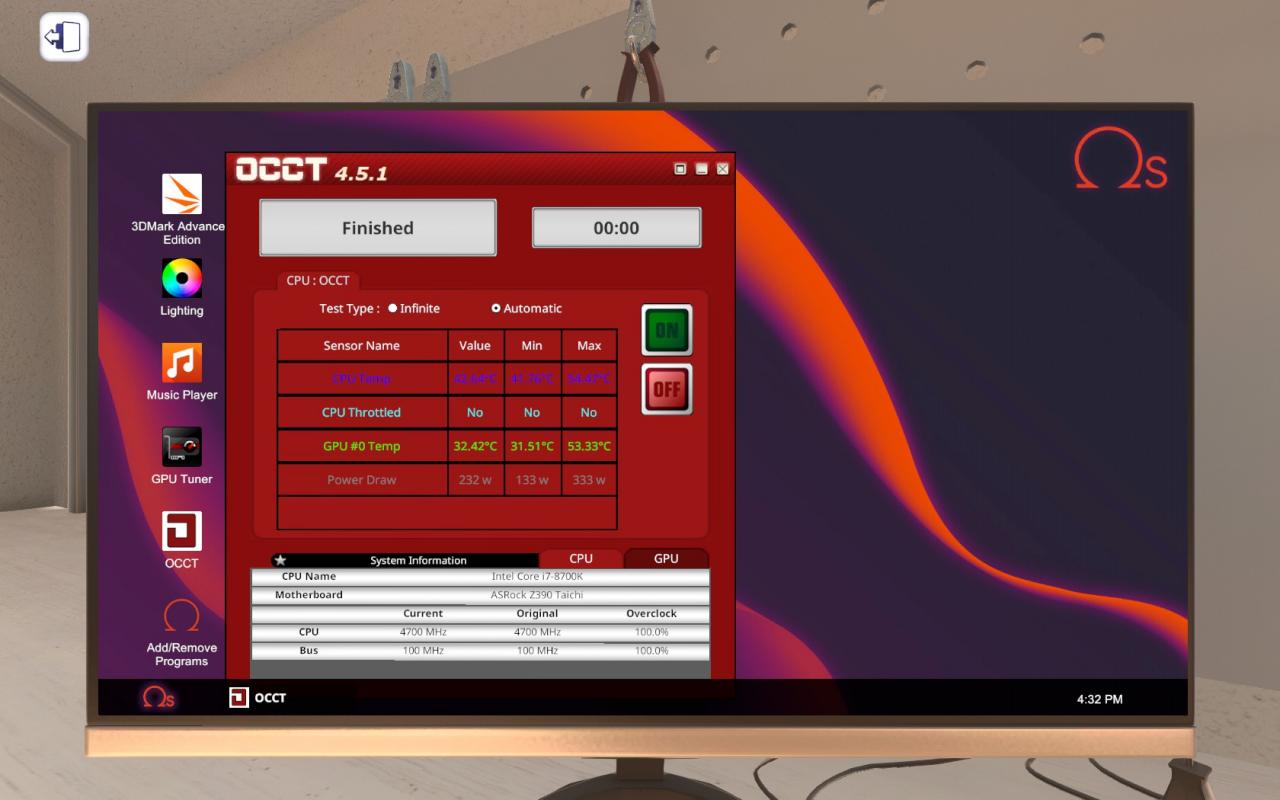
To answer your questions, I’ve built another Custom Water Cooling implant on another PC, this time using seven radiators and a better pipe management, as you can see in this picture.
Using OCCT, the results were even better: this time, it went just a bit over 50°C, which is a nice improvement. It could be made better using two reservoirs – one for the CPU and the other for the GPU – thus creating a double loop, but that’s more of advanced stuff.
For now, keep practicing different kinds of Custom Water Cooling ideas!
Thanks to ShipHeatRook for his great guide, all credit to his effort. you can also read the original guide from Steam Community. enjoy the game.
Related Posts:
- PC Building Simulator: Earn Money Faster & Maximize Profits
- PC Building Simulator: How to Take Notes