
This guide seeks to provide beginners with a good foundation to build upon regarding entry team operations in Ready or Not.
Preface
The contents of this guide is heavily inspired by an older US Army Military Police School publication that has been adapted for use in video games.
I have no practical experience in tactical operations of any kind; I am not law enforcement or military, former or current.
Fundamentals
There are three principles of clearing any structure; surprise, speed, and aggressive action.
Surprise is achieved through extensive and thorough planning and diversionary efforts.
Speed is not measured by how fast you move but how fast you can dominate and eliminate the threat in the objective. A team member should never move faster than he can accurately engage targets in the room.
Aggressive action when coupled with speed, enables the entry team to multiply the effects of surprise.
Communication
Communicate in a manner that all teammates can understand. Be concise and effective in your communication.
Entry Team Organization
As the name suggests, the team leader directs the entry team towards completing the assigned objectives. This role isn’t really needed unless you’re operating as a 5-man entry team.
The scout uses his optiwand to gather information about rooms and structures before the decision is made to breach the room or structure. He reports what he can see and feeds this information to the rest of the team. Additionally, the scout usually deploys the throwable when the decision is made to use one when breaching a room.
The breacher is responsible for breaching the target room or structure. He works closely with the scout in order to properly deploy throwables if the decision is made to use one when breaching a room.
Carries the team’s ballistic shield and is always the first person to enter the structure being breached in order to provide cover for the remainder of the team.
The least appreciated but arguably the most important part of the team, the arrest officer is responsible for securing evidence and detaining civilians and/or suspects.
Operational Preplanning
Methods of Entry
The deliberate method of entry is used to enter a structure or area quietly in order to reduce the distance to the threat. Very effective when entering larger structures or areas where the location of the threat is unknown and the size of the entry team is limited.
The dynamic method of entry is similar to deliberate, however it focuses on gaining immediate access to the objective. Distinguishing characteristics are speed and method of breaching.
Breaching Techniques
Silent breaching is breaching through just opening a door or using a lockpick to unlock a door.
Manual breaching is breaching through use of the battering ram or kicking the door.
Ballistic breaching is breaching through the use of a breaching shotgun.
Explosive breaching (C2 breach) should be the last resort when breaching a structure due to the risk of injury to anyone in the target structure and in some cases even the entry team.
Room Types
 Center-Fed rooms are rooms where the entrance is located at least 2-3 meters from a perpendicular wall.
 Positive Corner-Fed rooms are rooms where you can positively identify from outside the room that there is a wall perpendicular to the wall you are stacked up on and that it is within 2-3 meters of the entrance.
 Negative Corner-Fed rooms are rooms that initially look like center-fed rooms as you have no visual contact with the perpendicular wall. In the case of negative corner-fed rooms, it is crucial that the first man to identify the perpendicular wall calls this information out to the rest of the entry team in a concise but clear manner.
Room Entry
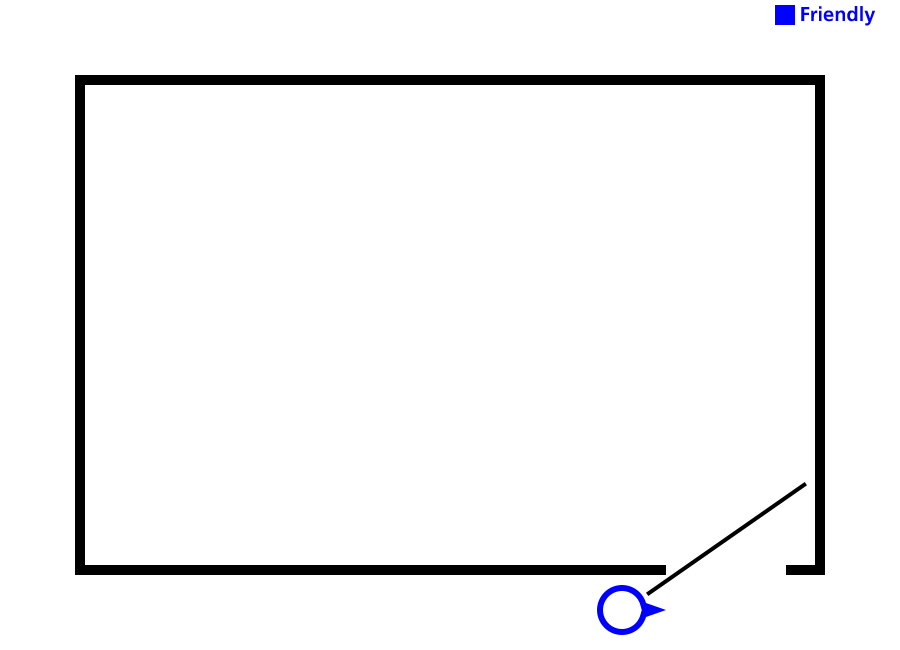
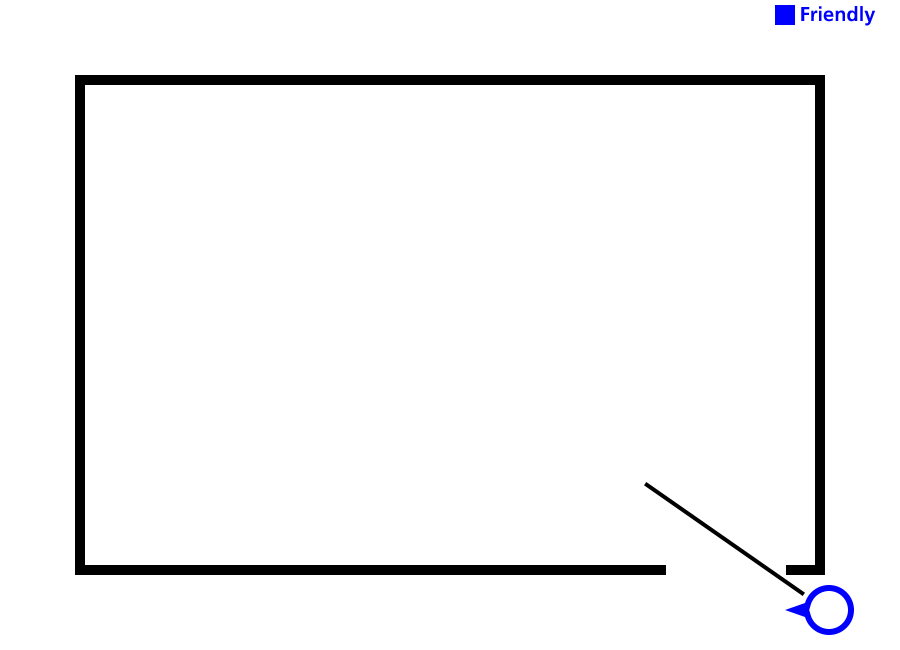
A fatal funnel is entrance (doorway) or constricted area (alley) that will be the focal point of attention or anticipated avenue of approach. The fatal funnel is most likely to draw fire from the threat.
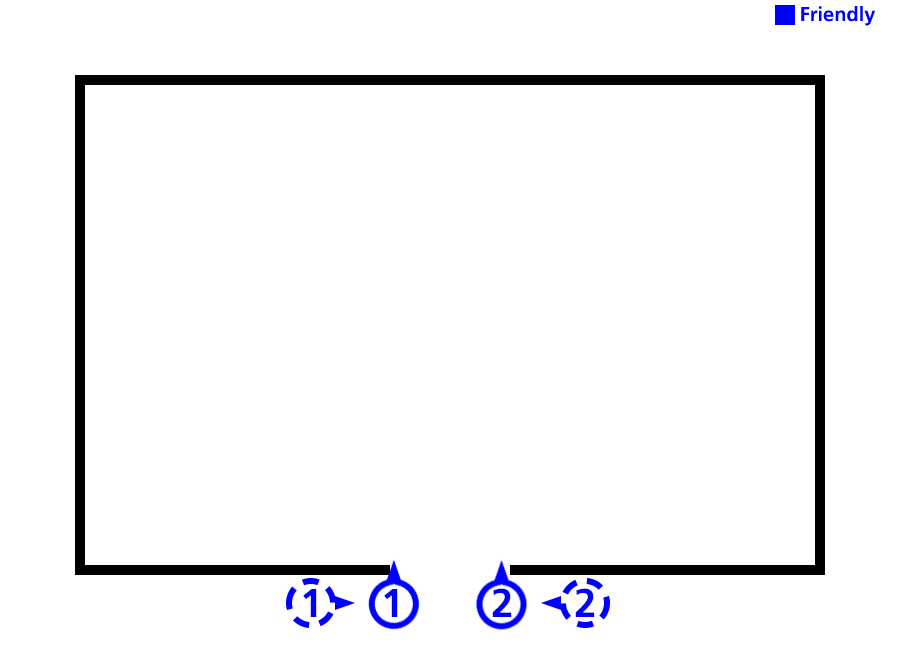
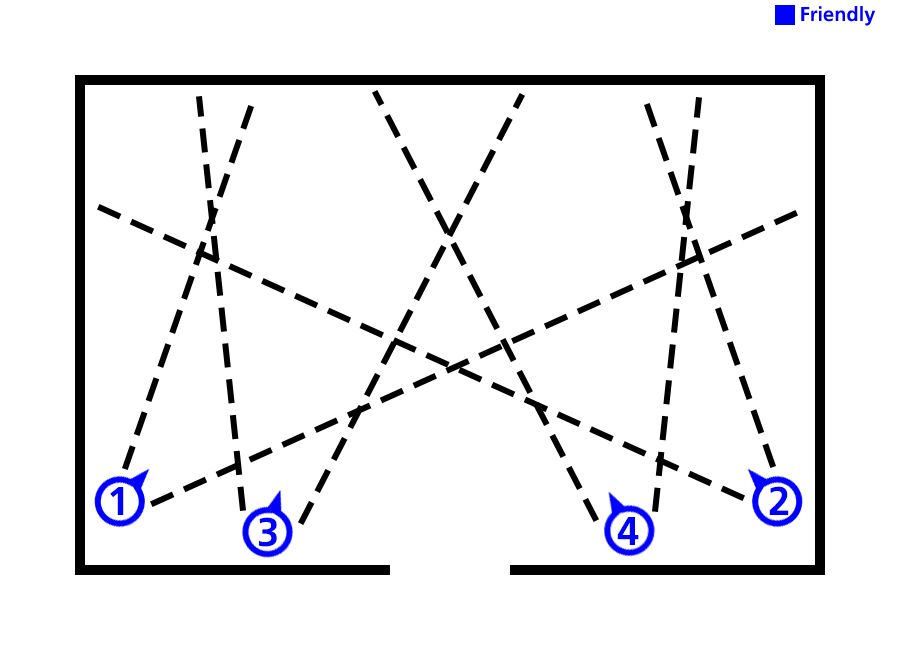
 As can be seen in this illustration, crossing simply means that you cross the fatal funnel and keep going in the original direction of travel.
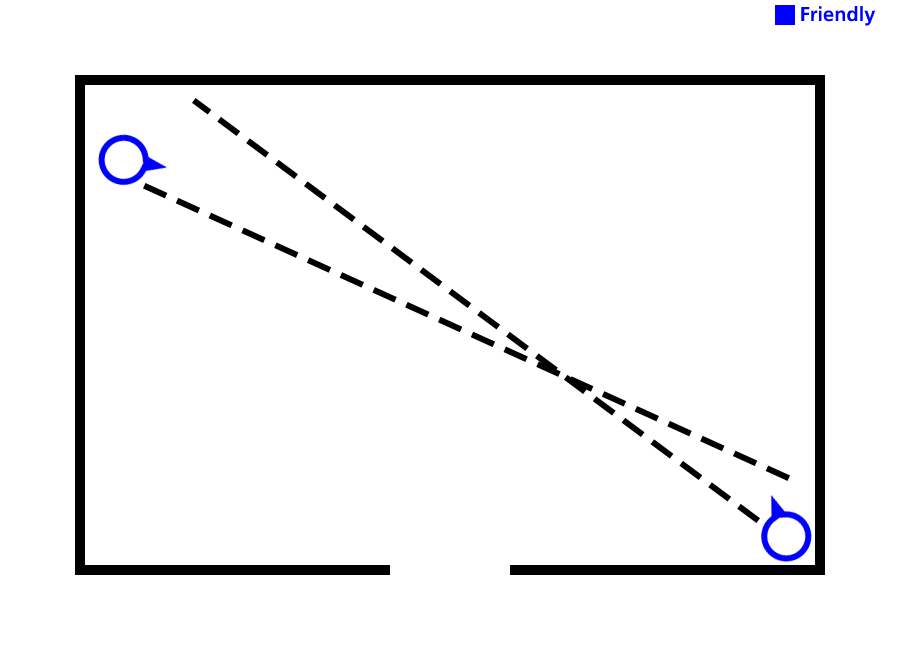
 The hook is preferable when there is no immediate threat seen through the entrance but the possibility of a threat in the room is still believable.
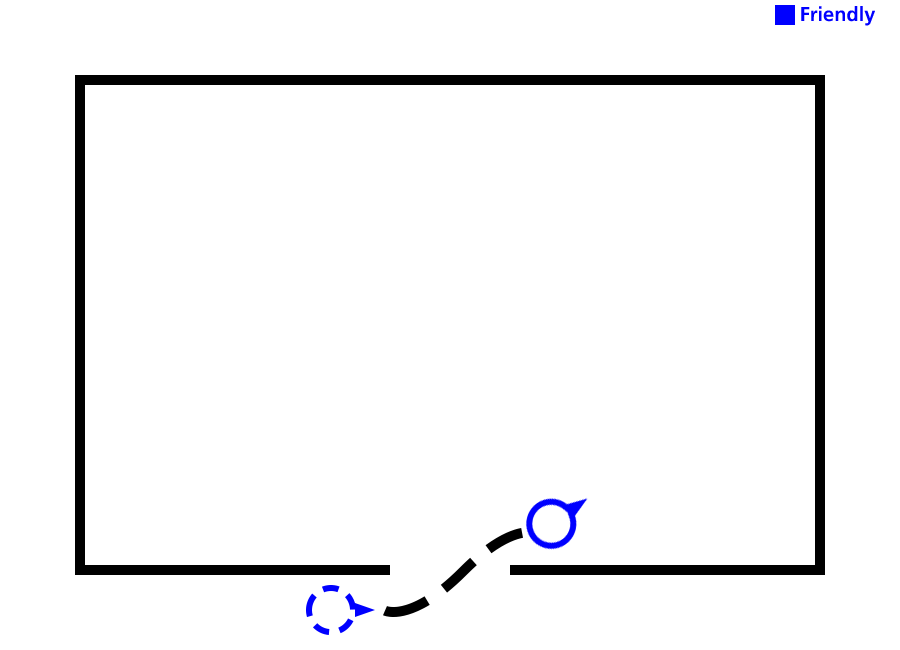
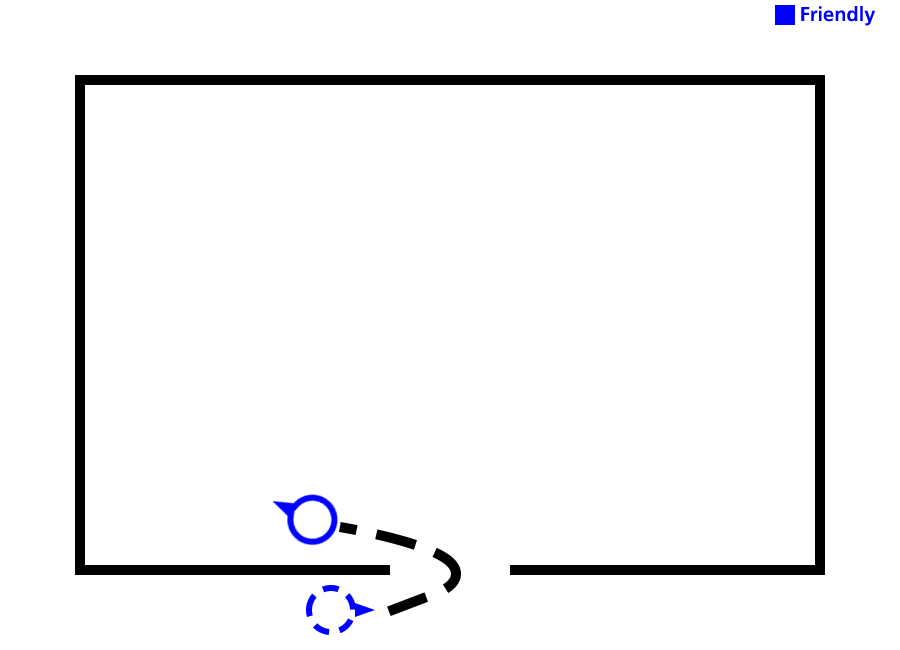
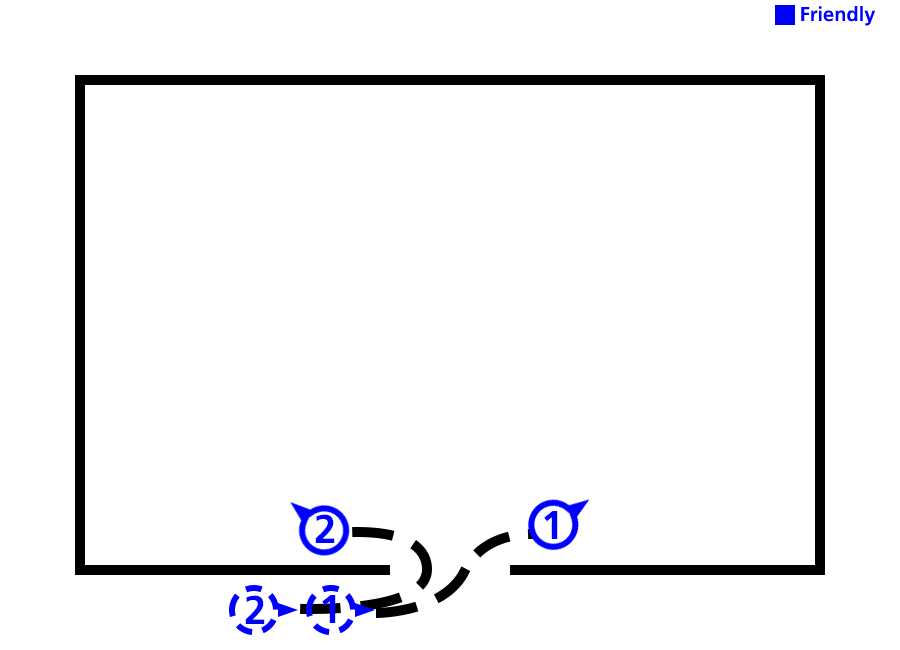 Alternating between hook and cross is used to establish a split team entry. If #1 goes right (cross), #2 goes left (hook).
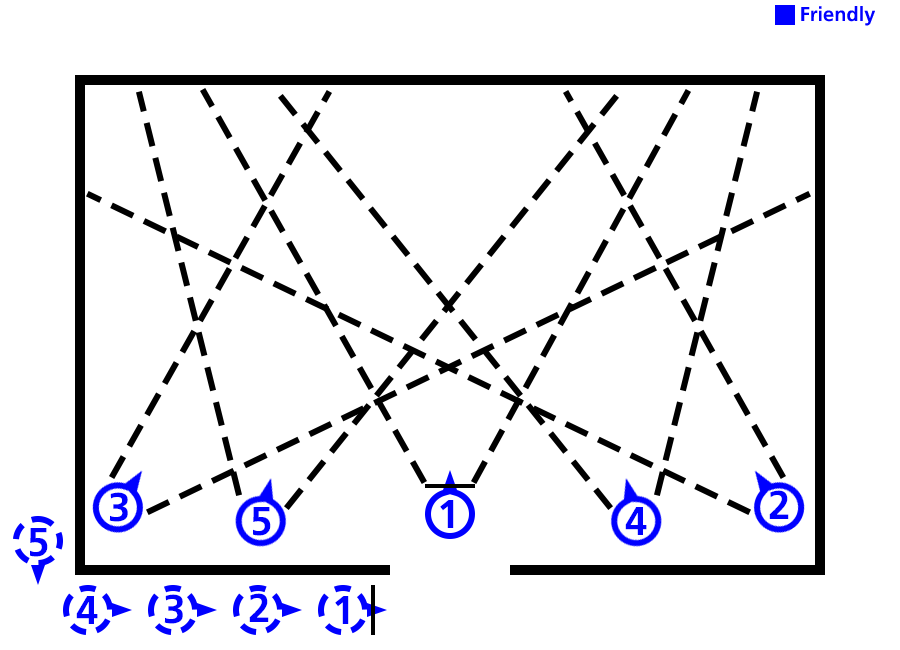
 Limited penetration is used when extreme caution is needed due to potentially overwhelming threats in the structure. After the visible area has been cleared, the team proceeds to either cross, hook, or alternate through the entrance.
Dominating Positions
 Opposing corners is the preferred type of dominating position. Communication, situational and visual awareness is critical. During opposing corners entry, team members execute entry and position themselves in opposte corners of the room.
 Split team entry seeks to dominate the room rapidly and forces the opponent to choose which target to engage.
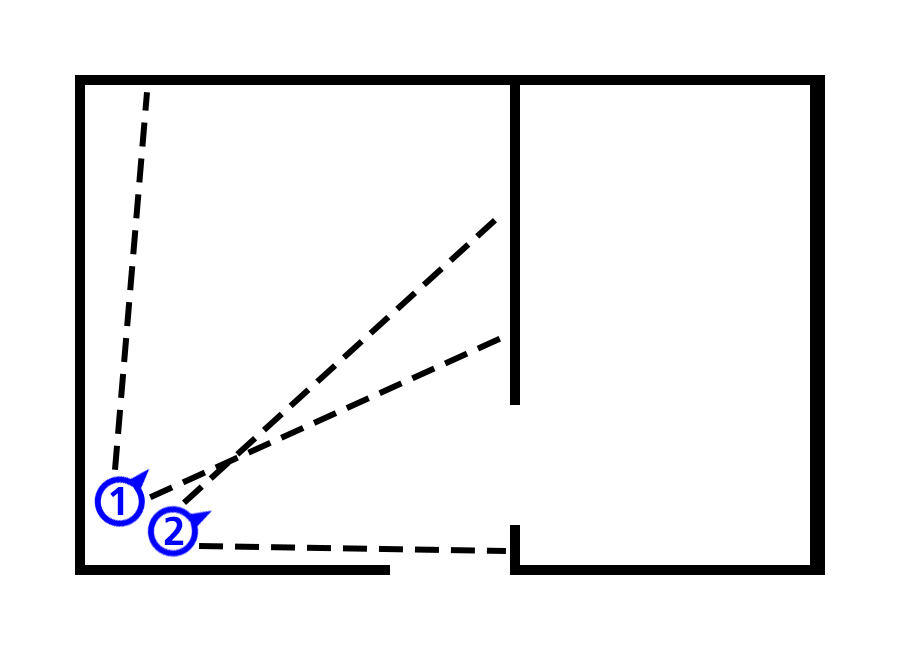 Same side entry is desirable if you encounter a room that has an adjoining room immediately next to your breach point. Same side entry is generally not preferable as it presents a much larger target to the opponent but may be the only viable option.
Staircases
Ascending stairs are by far the most problematic due to the inherent danger from above the entry team. There are two methods of tackling this problem, often the choice is made based on necessity (is the staircase wide enough, etc).
Side-by-Side Method
The side by side method is the most common method.
- The #1 man climbs positioned to the center of the stairs and slightly forward, he covers the front threat area (being the next landing).
- The #2 man climbs positioned on the outside wall backwards and covers the balconies if present or assists the #1 man in covering his area.
- At each landing, the remainder of the team moves up to the cleared level while the #1 and #2 man keep clearing up (or hold position if a door is encountered on the landing).
Back-to-Back Method
- The #1 and #2 man climb the stair back-to-back.
- The #2 man needs to be alert and react immediately should the #1 man choose to back out of an engagement.
Descending stairs is much easier as you will have a better tactical angle to see the top of the stairs, landings, etc.
When decending stairwells:
- One man provides security down the stairwell while the remainder of the team makes their way down to the next landing.
- Despite being easier, this is not risk-free, hence the entire team needs to be ready to react to contact.
- Once the team has reached the landing, the security collapses back into the team, and so on.
Marking Procedures
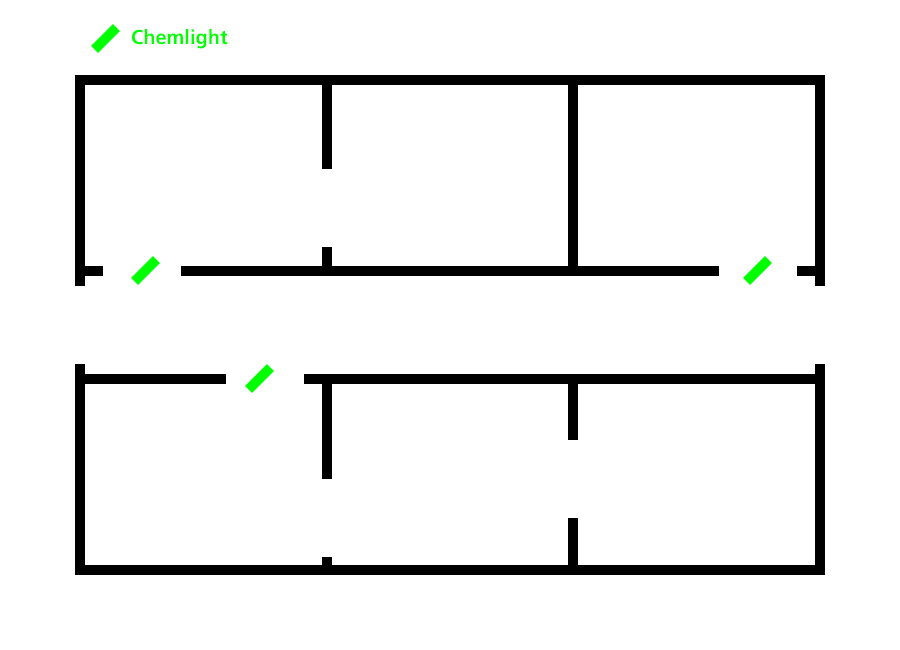
It is ideal to deploy chemlights in doorways to best be seen, however in larger rooms with multiple points of entry, you may have to deploy the chemlight in some position visible from all entrances for reference in secondary clearing sweep.
If a room is connected to other rooms that can only be accessed via one entrance, you need only deploy the chemlight in the doorway of the room leading to the deeper room.
Thanks to Lynx for his great guide, all credit to his effort. you can also read the original guide from Steam Community. enjoy the game.
Related Posts:
- Ready or Not: How to Clear Rooms (Standard Operating Procedures)
- Ready or Not: Secret Room Location Guide
- Ready or Not: AI Mod Configuration
- Ready or Not: New Armor System Guide (June 2022 Update)
- Ready or Not: How to Get a Machine Gun