
Some tips and tricks for hiking in the large level “A Breakfast in France” – and how to create a topographic map for it (quite technical)
Introduction & Disclaimer

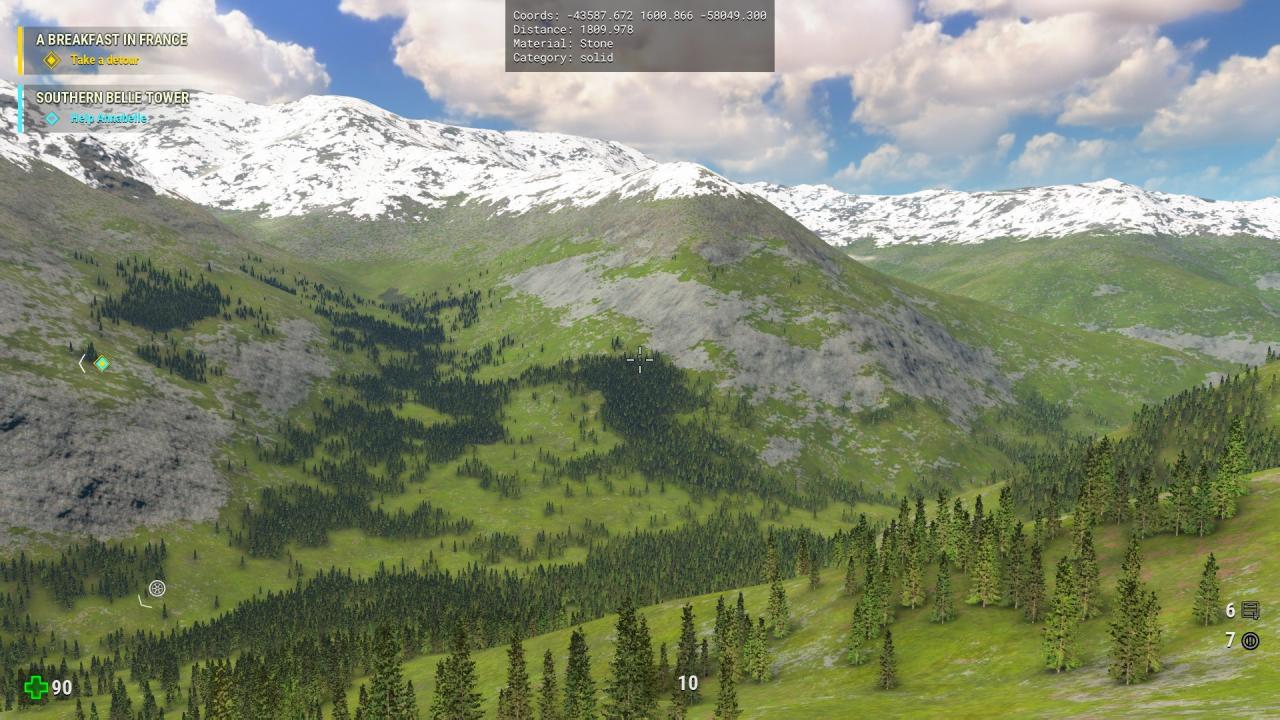
When reaching “A Breakfast in France” you are welcomed with a great vista towards some snowy mountains in the distance – and no close barriers that prevent you from exploring. So I went on exploring. And boy oh boy did I explore… and this guide is the result.
At some point I wanted to create a topo map of the level to record my hikes, draw some difficult climbing routes, see what else there is and how big this level was actually designed. However, there is pretty much nothing regarding this somewhat technical topic. So I decided to dig into it and create a 3D model of the world on my own.
Since this worked quite well I wanted at least to share the basic path of understanding the data and also the results for anybody interested in exploring. I highly recommend go hiking and biking in this relaxing environment.
Thanks to Croteam for this pleasent side aspect of the game!
Some notes:
- Since there is no compass available ingame, I decided for myself that the viewing direction at the start of the level, looking towards the snowy mountains, is NORTH. All directions in this guide and also the maps are consistent with this assumption.
- From update v1.04 on enemies are spawned randomly if you hike outside the destined path. Use older save games (also with current version) if you do not want to get disturbed by hordes of Khnums. You might want to downgrade your game to v1.03 (see Danny’s Guide), hop onto the level, do a save game and then re-upgrade again.
- The map-creation-part will be quite technical. I am not going to explain everything in detail as this would go way beyond the scope of this.
- Only free tools have been used, especially the hex editor HxD, notepad, calculator and CloudCompare. In addition, I coded some stuff in C++ to save me a great deal of manual work.
But first, some basic stuff.
Getting started – hiking and biking
Also driving down/flying down steep cliffs with the motor bike does no damage to Sam and saves quite some time when crossing over to another valley.
Another setback with using the bike is its disability to drive on snow. As soon as you reach an altitude of about 2000m there will be snow and it is nearly impossible to go on with the bike.
Sooner or later you will reach some rocky barriers which are intended to keep you inside the main playing area of the level. However, it is possible to get over that barrier on some places. Incidentally, two of them are close to both road ends / tunnels.

On the northern end of the road you can escape with the bike by driving up near the small tree with some speed (blue line) or you can climb out on the small retaining wall, changing over to the other tunnel side and going up from here (red route).

Things are a little more difficult on the southern road end. With the bike you can escape again with some speed near the tunnel (blue line).

Sam has to follow the rocky wall for about 280m (see bike distance indicator) until there is a shady part of the wall which he can jump up and escape (red line).
When the terrain gets steeper, more and more “blue-ish” rocks appear which Sam cannot climb. Sometimes there are some grass patches between the rocks which help Sam to find hold. By using forward+strafe+sprint and hammering “jump” you can navigate up those slopes.
Some useful console commands:
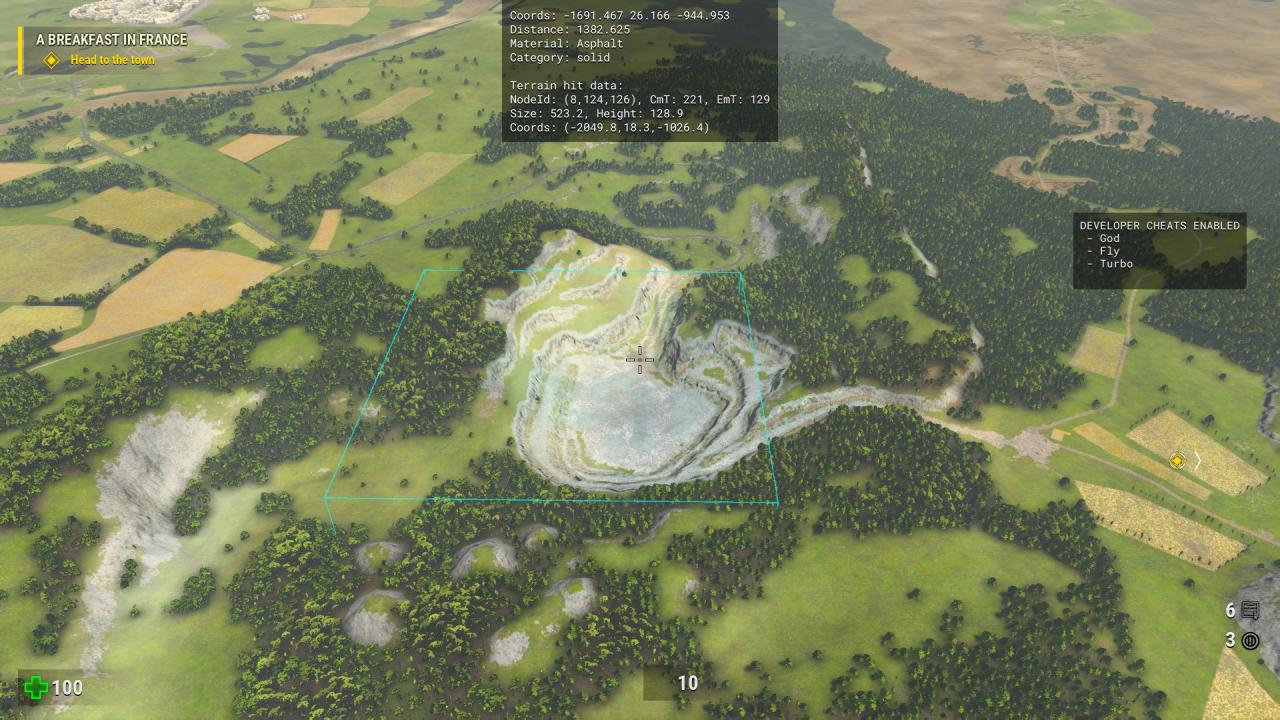
- hud_iShowCoords=1 => shows the coordinates where your crosshair is aiming at. Y is the height, X and Z are the 2D-coordinates. Also the distance is shown and what material you are looking at.
- hud_bShowWeapon=false => who needs a knive wielding through your screen when hiking?
Expect some render artifacts when reaching far out parts of the map (e.g. shadows disappearing) and get used to the chirping birds and rustling leaves, they will not vanish even on the highest mountain. You might want to turn off the music though, which can get boring after some hours.
Technical 1: understanding the data and generating a mesh
The following two chapters describe how I got down to the height values and out with the mesh. This is quite technical, although I try to keep it as simple as I can. If you are only interested in the results, skip to the end of the guide. Due to the length of the text I have to split it into two parts.
Let’s get serious.
Where to start? I opened the in-game console and tried to find anything which could help me create a map or even how the naming convention of things is with Croteam. I came across “tiles” and “atlas” and even an export function called “trn_iDumpElevMapAtlasTile” but I could not identfy anything in that file. Probably some debugging stuff (besides there are some vr_ commands and talos references, which are probably only there because of the engine).
The most useful thing I found was the command for the coordinate display which helped to identify the highest and lowest parts of the map. Those will be a key later to find the data in the binaries.
At this time, I still hiked around the level and from the highest peak ~3470m I could approximate the corners of the map and their coordinates. First drawings on paper started to exist.
With the quarry being the deepest part of the map at around 25m I found the most important entry towards understanding the data, although I was not aware of it yet.
While still not able to extract any data, I found a very nice presentation made by Alen Ladavac[gpuopen.com] who described how the engine renders the landscape – accidentally (?) on the France level.
From here on many iterations of “testing knowledge in-game” and “verifying with the PDF” started and gradually I got a basic understanding how the level is structured. So I went on to find the actual file where the data is stored. As there are not much files in the SeriousSam4 folder, I checked on the 38GB one and it fortunately is a basic zip file (“PK” as first bytes). In its subfolder “Terrains” I found what I was looking for and it turned out that the “06_Countryside_trnbin.bin” is only about 200MB of size – good to handle!
With the free tool HxD[mh-nexus.de] you can quickly view the contents. I jumped randomly to different spots in the file and by going a few bytes ahead I found reasonable 4-byte float values. And after 4 bytes more reasonable float values. At that time I was alread pretty convinced that only height values of the terrain could be saved, with some header like “next n*n values are height values in 4 bytes”. If those were real 3D coordinates with X/Y/Z the file size would be too huge.
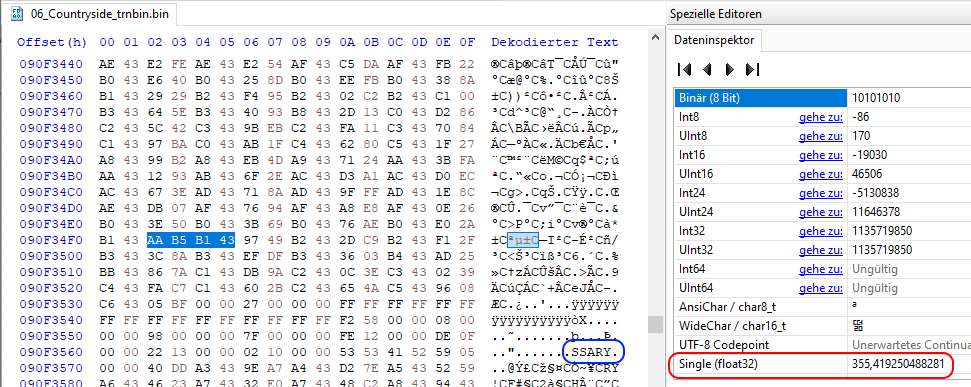
Those “interesting” height values seem to start at ~500k of the file and go till the end. So the start has to contain some header information which I am still not sure about. I created a little C++ helper tool that interpretes every 4 bytes as float values (with a general 2 byte offset from the beginning) and exports them if they are between 20 and 3500 – the highest and lowest parts of the map I identified in-game (with some margins). I got sooo many valid floats that I had to start looking for structures. I began counting “consecutive valid height values” and most of them were in groups of 1369. What?! Turns out this is 37×37. What again?!
With hindsight, I hit a first lucky spot here: all data after the header are 4-byte values which made my parse work. If there had been a one-byte or two-byte offset between the groups this would have been much more difficult.
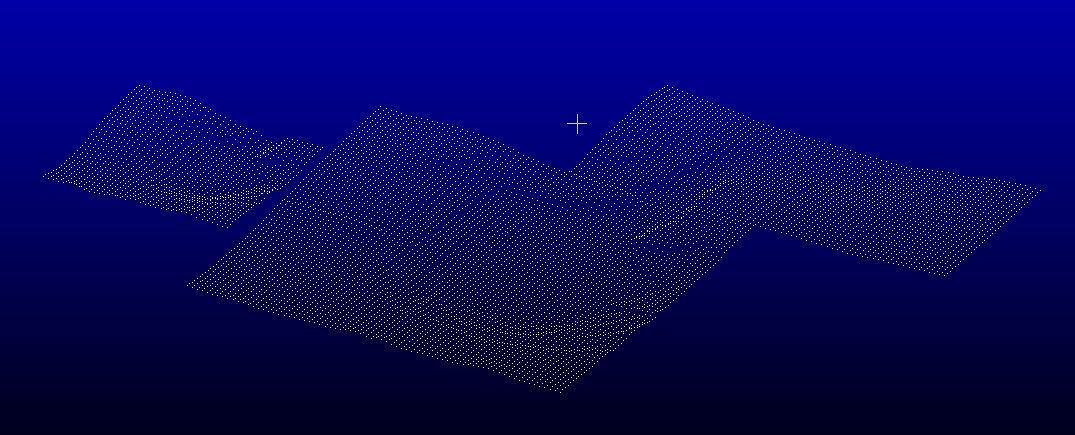
Since I got ten thousands of height-groups I had to select a few for further analysis. I randomly took 8 consecutive groups, put them into a text file as X Y Z coordinates (Y = height from file, X/Z defined by me in different step sizes) and imported them into CloudCompare[www.danielgm.net].
 This looked like proper terrain and I could move the groups – or “tiles” – next to a partner which they would (almost) match – with a strange gap. However I could not align neighboring pairs with each other – so close and yet so far.
Those randomly selected tiles might not have a relation with each other in the real game. So I decided to take the known quarry as a field of experiment and export only those tiles with a certain low height, around 20-30m. This lead only to a few tiles as hoped, some consecutive tiles and some later in the file.
 I could manually align 6 consecutive tiles (strange order, maybe something like the “Z-order curve”[en.wikipedia.org] as I learned later), but the one from later did not match – it was of different resolution. Still there were some strange gaps between the otherwise matching tiles. Nonetheless this confirmed that the way I was interpreting the floats was good and also the orientation was correct. The quarry has a road going out on its eastern side, so this helped to verify the rotation and also that X and Z were not in wrong order.
Remembering that Alen Ladavac mentioned different resolutions in his paper, I started again another loop of “check and understand” with the game. This time the console command hud_iShowCoords=2 came in handy since it helped to understand the numbering of tiles and eventually also their “resolution index”.
Next thing was to identify the nodes/tiles in the binary file. After some checks in-game it was sure that
- the map reaches in X and Z from -2^16 to +2^16 (-65536 to +65536, or 2^17 = 131.072 in sum)
- each tile is a square
- each tile can be split into 2×2 new tiles with finer resolution
I tried to find out how many levels there are by maths as a first step to understand the structure of the binary file. Since the file size must not exceed a certain amount of 4-byte-floats, the whole level can contain only tiles for all the map until resolution level 7. From then on, only parts of the map can have higher resolutions. I assumed that a central and square part is in higher resolution, but that turned out to be quite wrong.
Quick math:
2^7 * 2^7 * 37*37 * 4 -> 85MB
2^8 * 2^8 * 37*37 * 4 -> 342MB -> larger than the actual file
After understanding the tile sizes and their lateral dimensions I could re-export the tiles of the quarry with correct X/Z values in regard to Y, so that their height is displayed correctly. However there were still those strange gaps and jumps between the tiles. I fiddled around a bit with manual translations and suddenly they snapped in. What?! Looks like the 37×37 tiles have a 5 pixel overlap with the next tile. Until today I am not sure what the intention is, but after leaving them out and exporting only the “upper left” 32×32 part of each tile they line up perfectly.
This also matches Alen’s paper stating “every 32m” is a height point:
2^17 / (2^7 * 32 pointsPerTile) = 32
This makes 4096×4096 heights for the map with 32m distance between them.
This is also still a reasonable size for a mesh.
Technical 2: understanding the data and generating a mesh
This finding made it finally very easy to write out all nodes from one LOD into one single ascii file. By multiplying their X and Z IDs with the LOD-adjusted offsets it is possible to put absolute X and Z coordinates into the output file. The import in CloudCompare already looked promising:
After exporting each LOD into a file I checked their contents. LOD 7 was as expected the finest one covering the whole map.
LODs 8 9 and 10 are some (very local) refinements, but from 11 on my exported data was not good and I discarded it (there are quite few datasets with a different size than 37×37 in the binary file but I ignored them; maybe thats some missing data?).

So after importing LODs 7 to 10 to CloudCompare and merging them into one point cloud I created a mesh out of it by using the “Poisson Surface Reconstruction”. Testing different octree depths showed that 11 was the best I could handle – 12 would compute hours or infinite.
Poisson surface reconstruction creates water tight meshes, so the back of the map is one huge blob of useless triangles. By using the nice selection methods of MeshLab[www.meshlab.net] like (y < 20) I could get rid of most of them.
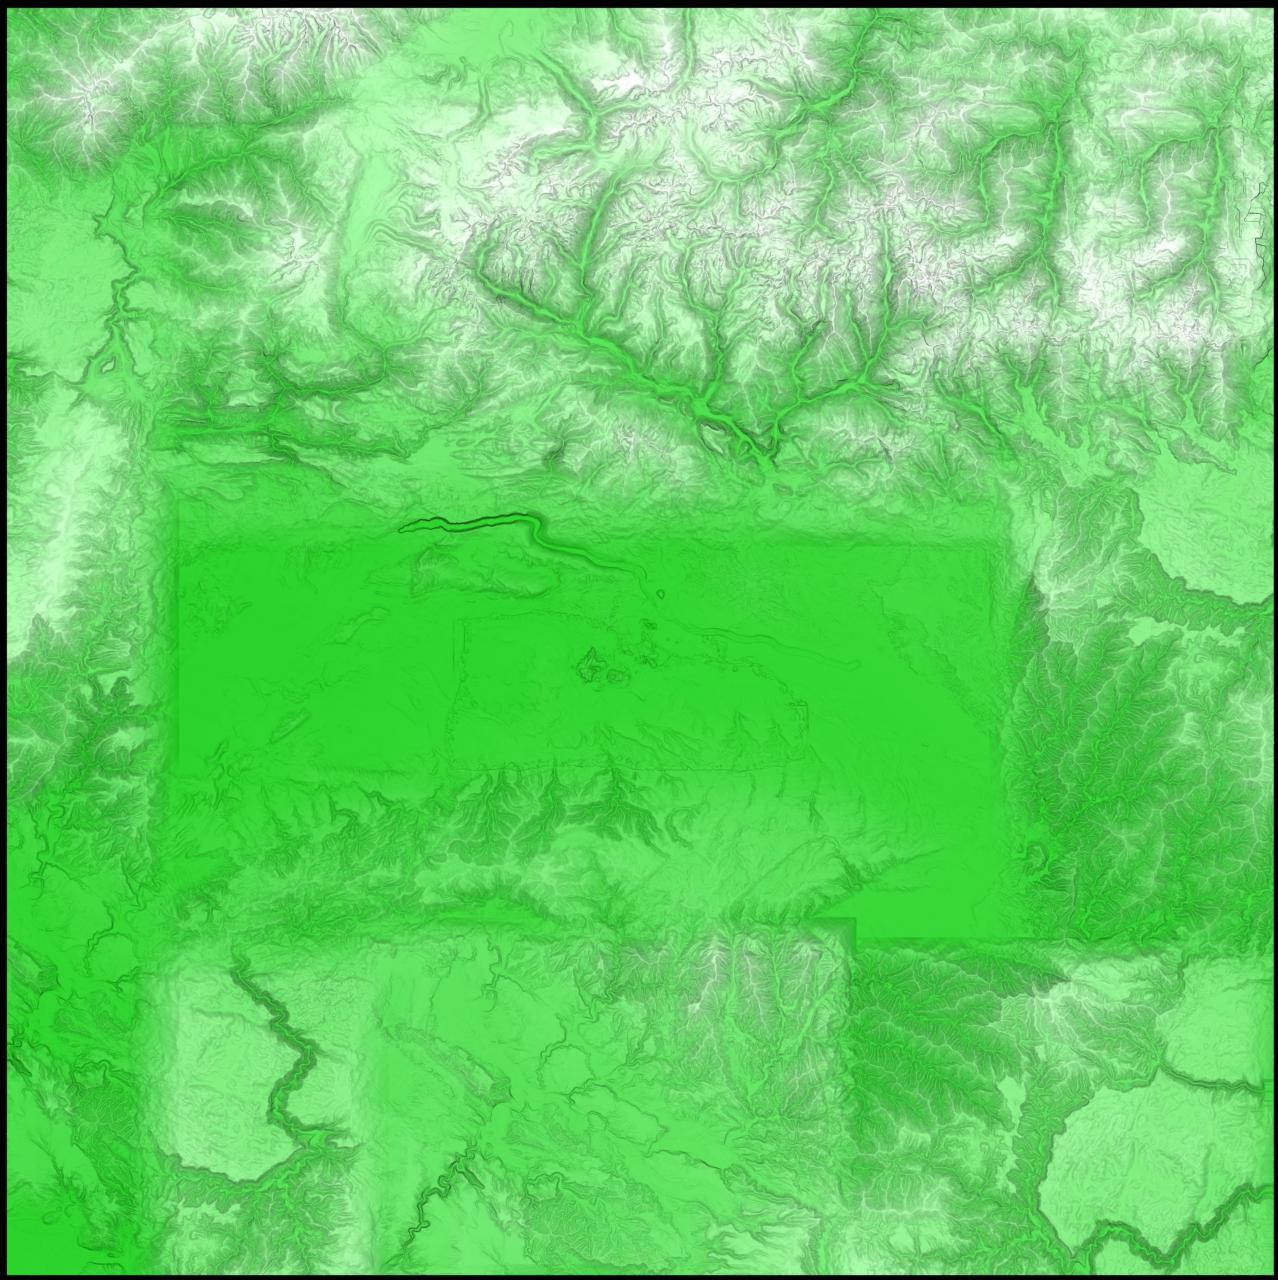
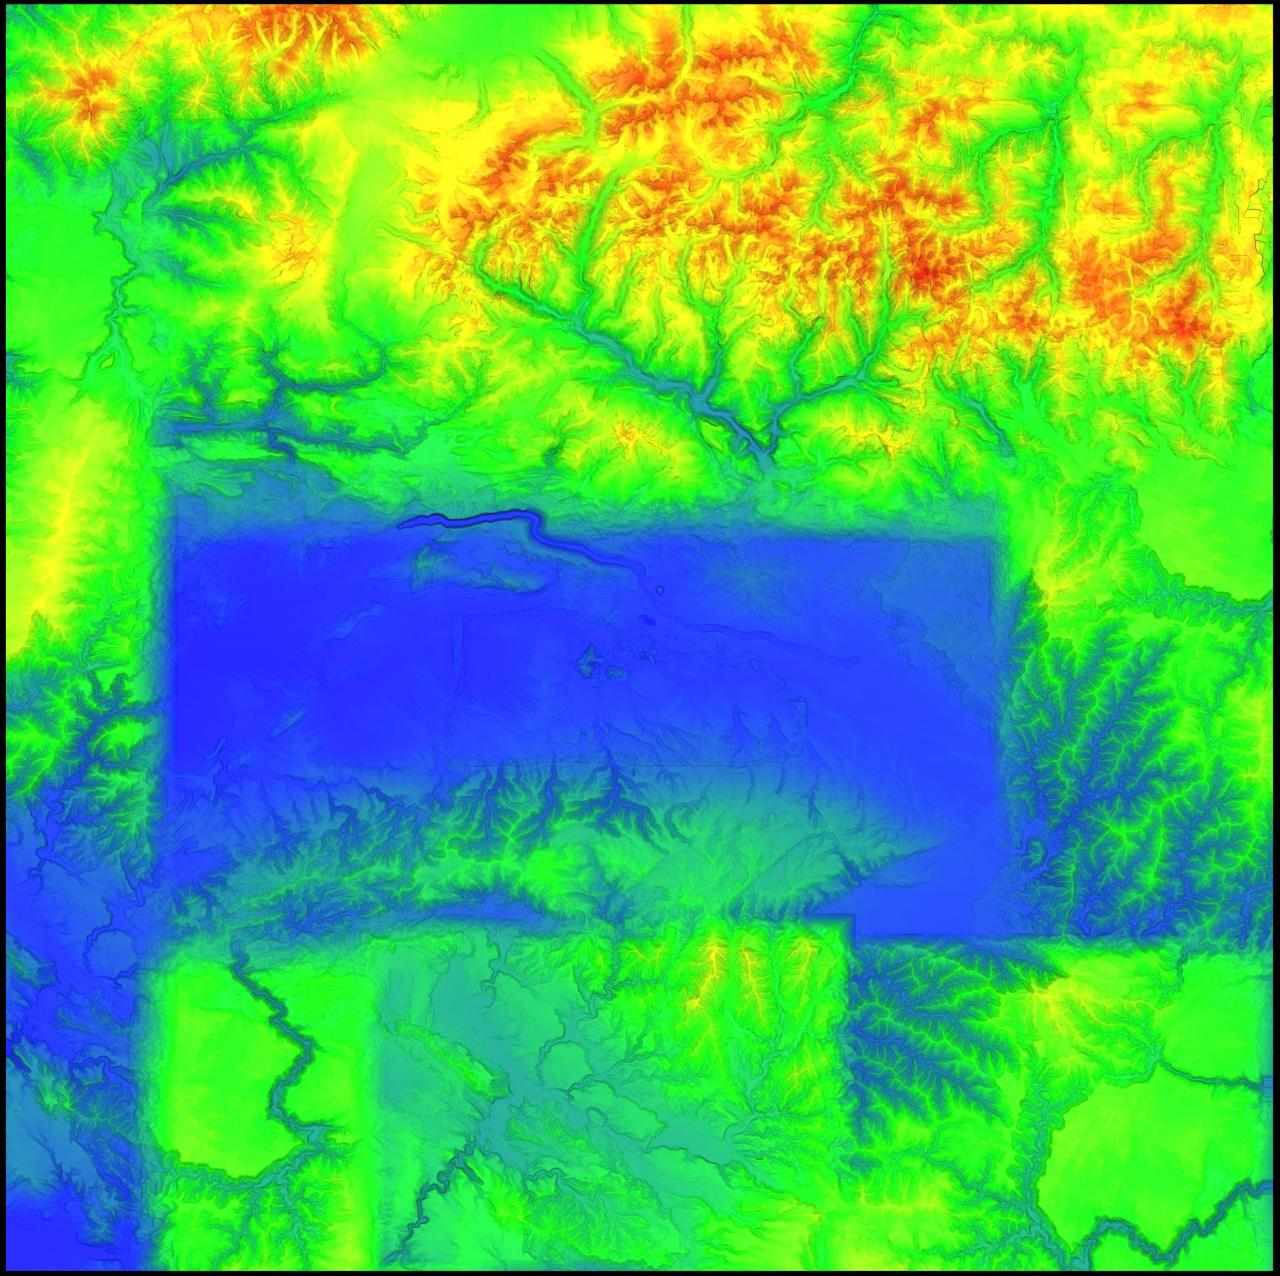
CloudCompare offers two methods to colorize a mesh: “rainbow” and “between two colors”. For the screenshot I used green for lower and white for higher grounds (both are high resolution images):
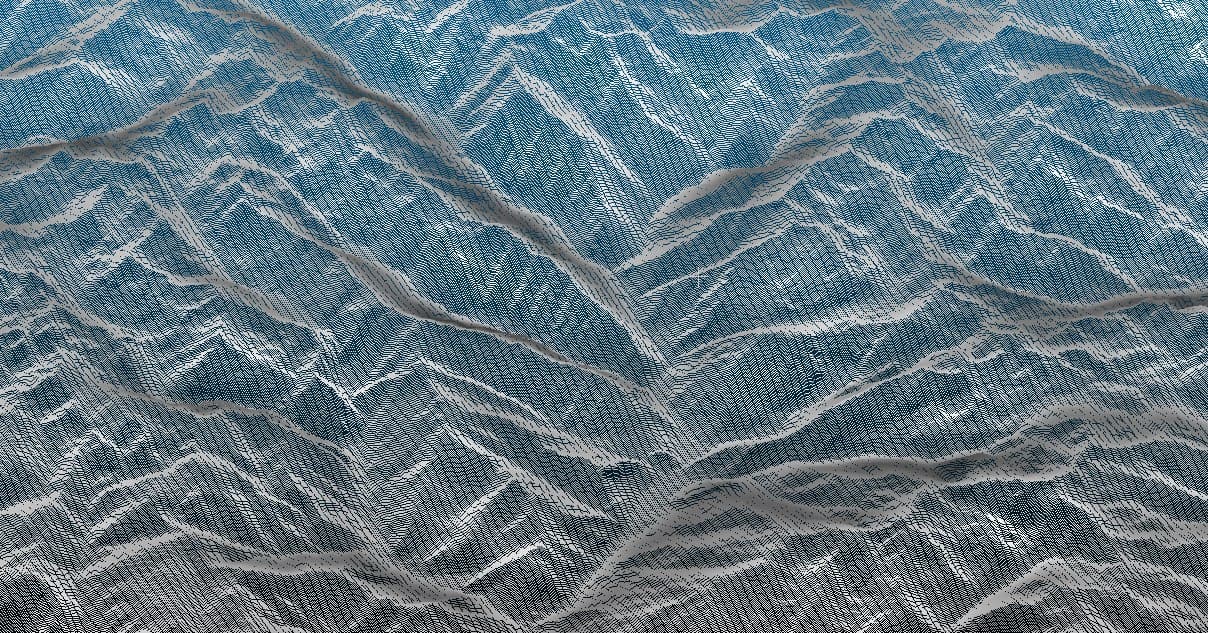
As a last step I wanted to find out where Sam can climb and where it is too steep. As test subject I selected the “Grand Canyon” in the south west of the map, here is a detailed view of mesh:
 .
.
After an enjoyable ride with the bike I checked most of the slopes whether Sam can hike or even bike up. With that knowledge I implemented a slope calculation (angle between triangle normal and Y) and colored the mesh accordingly:
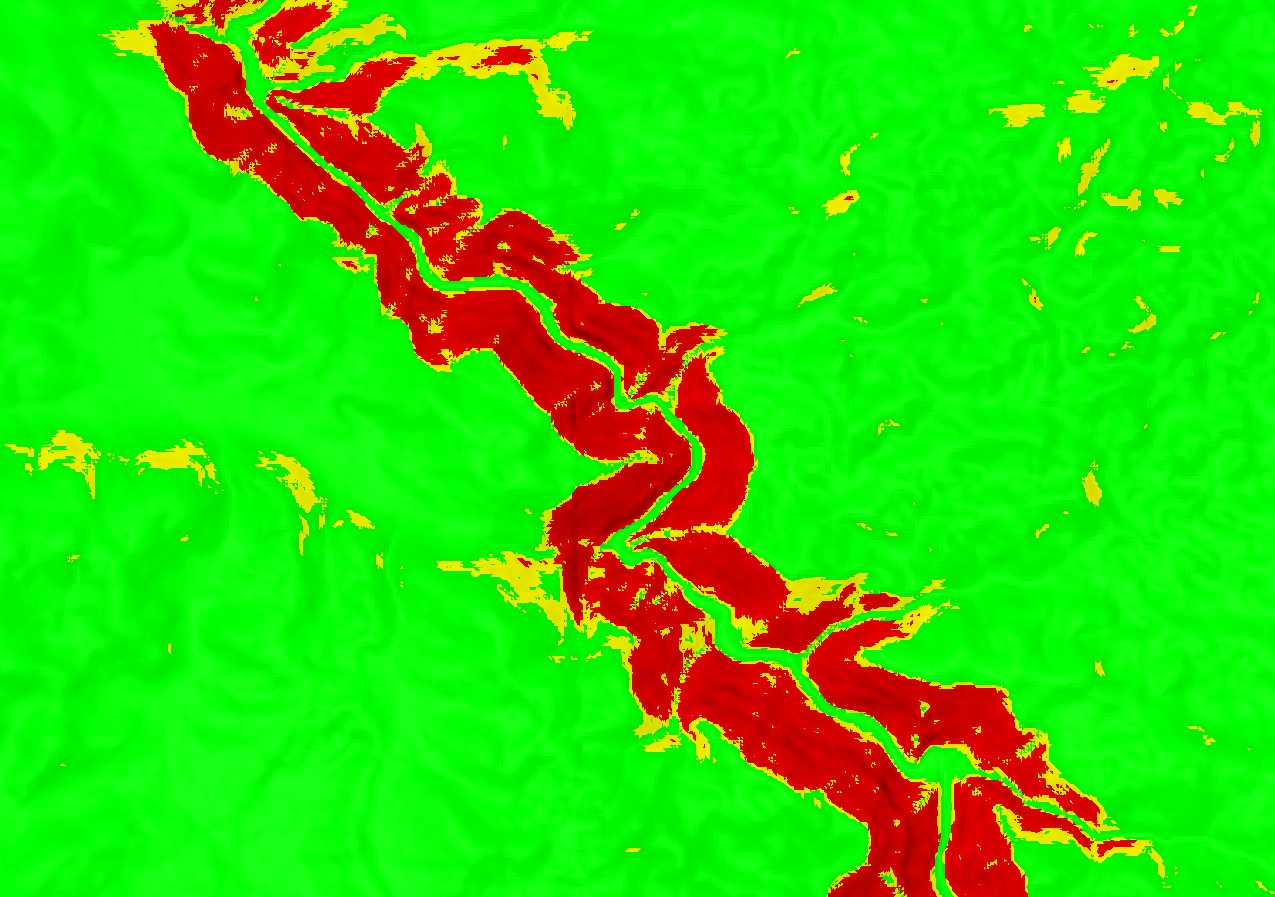
- green -> easy
- yellow -> Sam can barely climb it (>25°)
- red -> not possible (>33°)
After applying that “calibrated” values to the whole map it seemed to be not that accurate as I hoped. Some slopes were colored red although Sam could climb them and some were yellow although it was too steep. So I guess there is some local refinement on top of LOD 7 that makes it a little bit unpredictable. Furthermore, Sam can climb on the steepest of snow, so I would have to take that into consideration as well. Conclusion: colored slopes are not so reliable, merely an indication.
Results and Fun

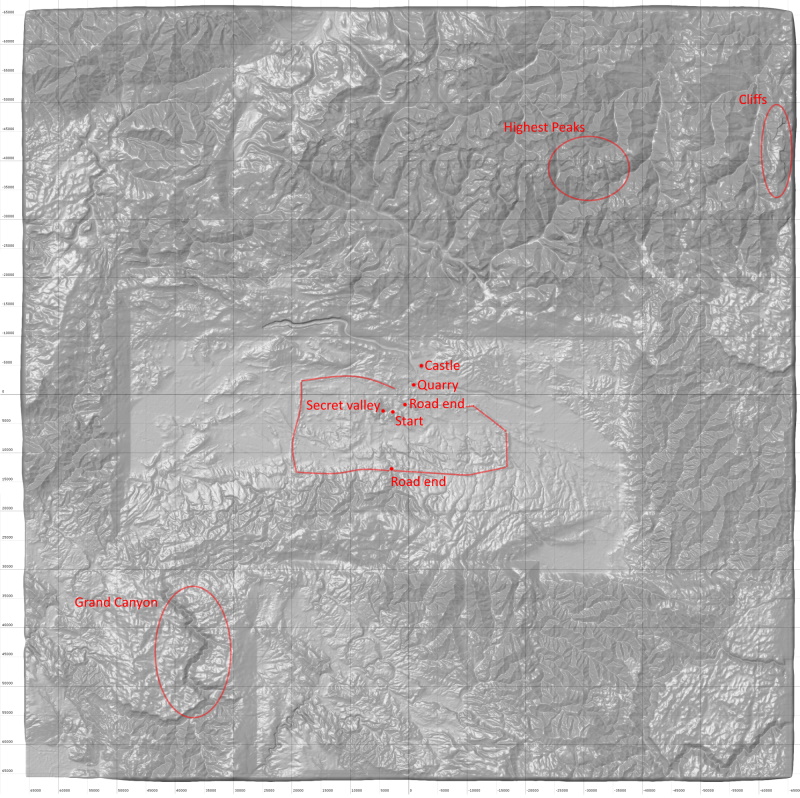
This is a simple shaded mesh without colors but some X and Z grid markings. I also did not clip the sides at +-65536 on this one yet, but that’s only a cosmetic issue.
When you consider the intended playing area (see red “rectangle”) it is a shame that you are not supposed to visit the greater rest like the Grand Canyon (south west) or the mighty Eastern Cliffs (north east) or even the deep canyon from the river by the castle:
I had quite some fun (Sam not so much) on the Eastern Cliffs as they are probably the steepest thing you will find in the map. As Alen’s paper described, landscape is mostly spline-sloped, so there are flat peaks and flat valleys and the most steep parts are the “middle parts” of the mountains. At the Cliffs they are almost vertical for several hundred meters and allow for great jumps and fall damage records (5030 in ONE drop).
The highest peak is also worth a climb, there are not many routes for the top. The Grand Canyon in the south west is worth a visit as well. I still have not been to the canyon system in the south east, this is up next.
Happy exploring!
Related Posts:
- Serious Sam 4: Sidequest Locations and Rewards
- Serious Sam 4: All Dossier Locations
- Serious Sam 4: All Secrets Guide
- Serious Sam 4: All Cheat Codes (How to Enable)